|
| BenJ |
|
||
|
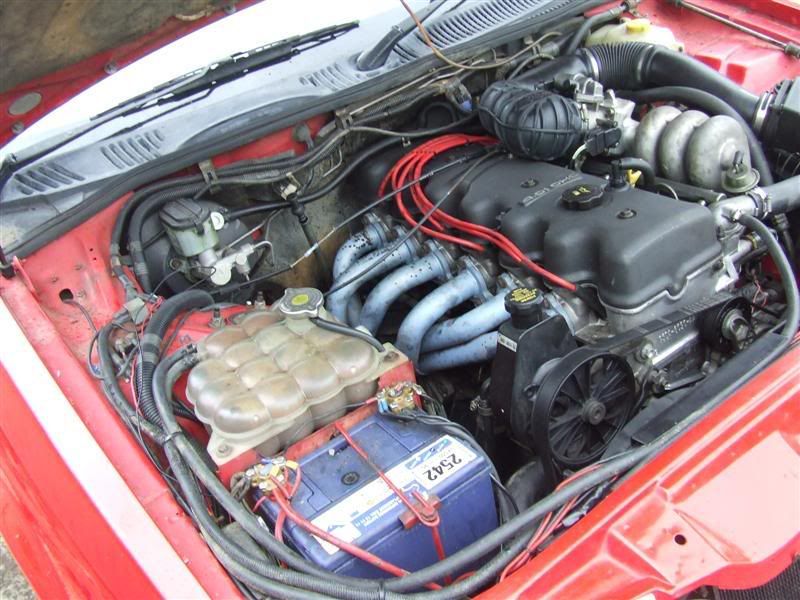
Teaser Pic
BenJ
_________________ BenJ's EB T5 DOHC Ghia Wagon - Current Ride |
||
| Top | |
||
| SgtBourne |
|
||
|
nice one benny.
hows it goin compared to the old motor?
_________________ So much RAM the motherboard twisted off the POST. |
||
| Top | |
||
| sexyr6 |
|
|||
|
nice work, well done
_________________
|
|||
| Top | |
|||
| jonathon |
|
|||
|
exelent work
_________________ Owning 1 of 84,847 ebII. |
|||
| Top | |
|||
| BenJ |
|
||
|
Well, what can I say. PaulMac, Luke (my son) and I had quite a time.
What started out as, "4 hours, no worries" turned into a very long haul. OK, so Sunday started at 7.30am with Luke and I jumping in the car and heading from Sydney up to the Central Coast to go to PaulMac's place. We rolled up to PaulMac's at about 9am and by 9.30 we were already taking the car apart. Now PaulMac has put an EL engine in his car, but used the Log manifold, so we at least had some experience here. However we progressed slowly and methodically and around 3 hours later, had the EB engine and auto mostly out of the car. 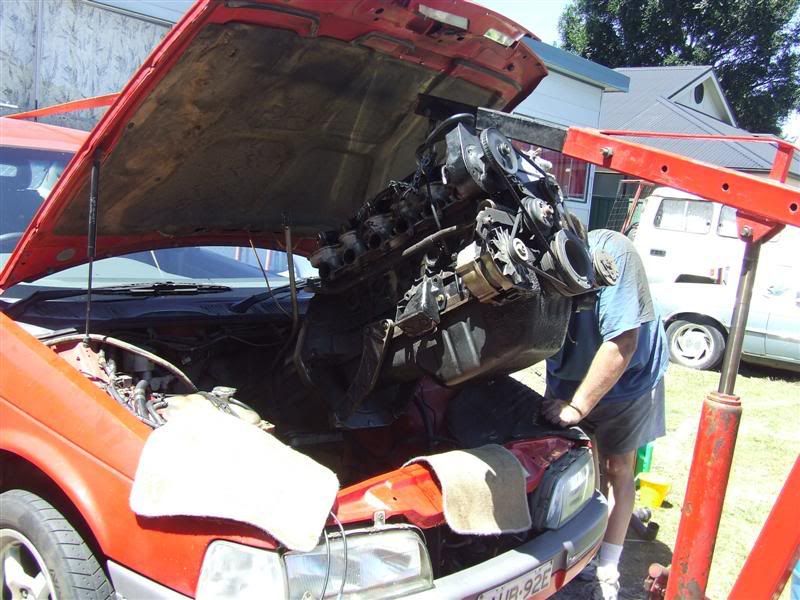
We had our problems like we all do. The auto cooler lines didn't want to come off and the engine crane wouldn't fit under the front of the car as it was too low. But we perservered and got it out. Check out all the gunk on the back of the Auto. PaulMac wondered how it stayed cool. 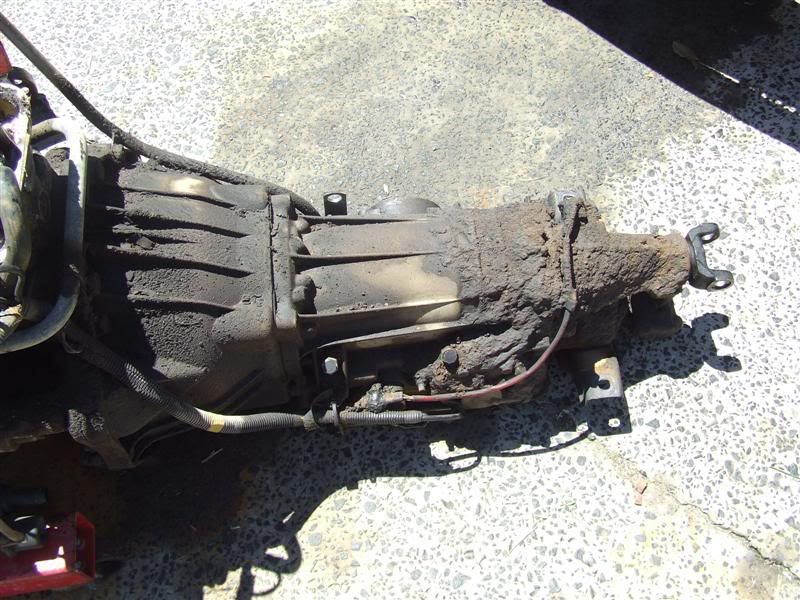
During this time I pulled the EL BBM loom off the engine and layed out the loom I had made. I found I had to extend the plug for the air temp sensor as this hadn't been mentioned in any of the threads I had read. Luckily I had taken everything with me. Here I am with the EL BBM Loom removed. 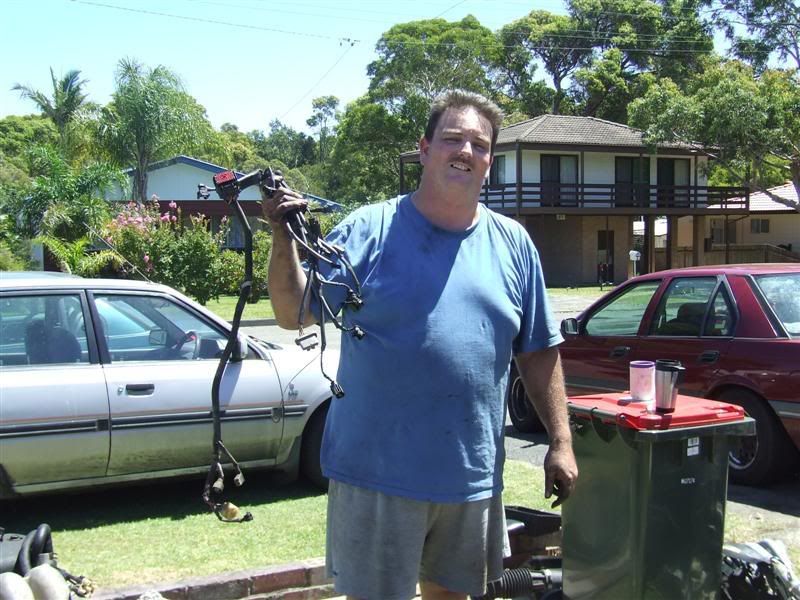
The engine bay was almost as dirty as the auto was, so PaulMac fired up the pressure washer and gave it a good blast. Nice and clean now. 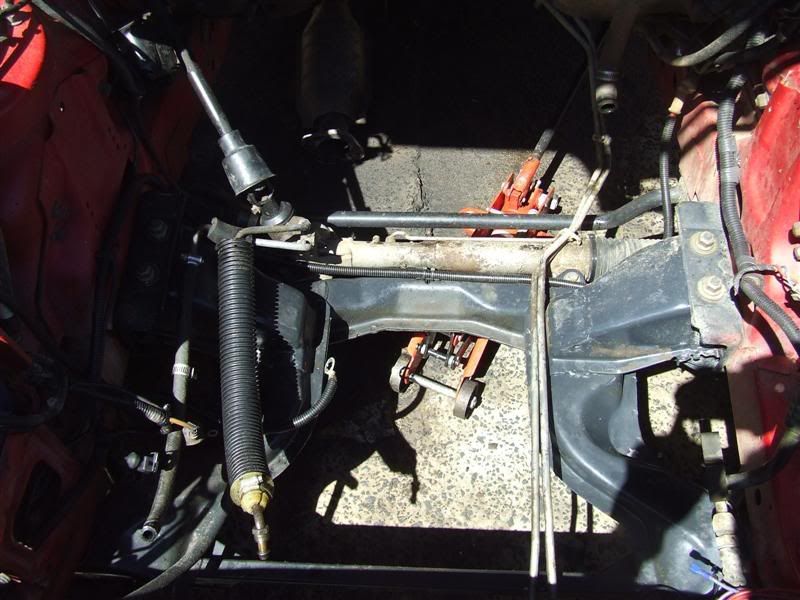
Then we moved the trailer with the EL Engine. I am balancing it. Wouldn't want it to roll over and break something now would we. 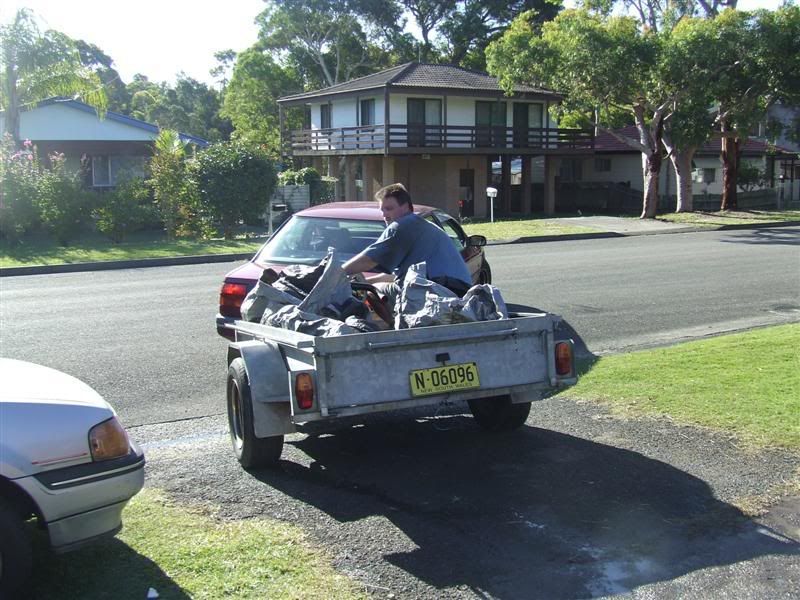
Now the fun begins. It is supposedly a simple task. Just slide the auto up to the back of the engine, give it a bit of a jiggle, and it should just drop into place. 
Next step was making sure the EL Engine was prepped to go in. Close examination showed up a few differences between the EB and EL engines. We realised the heater hoses wouldn't fit. The EL engine mounts were different so had to be swapped. And the fuel lines are different too. PaulMac went off to Bursons and picked up some heater hoses. While he was out I took care of a few things, like changing the alternator plug, bolting in the EL ECU and plugging in my custom loom for the BBM and Knock Sensor, and started playing with the cruise cable and throttle cable. Oh, and where is the EL throttle cable Paul? We realised it was still on the car the engine came out of DOH. PaulMac's lovely wife went for a drive to get it. Thankyou heaps. So PaulMac returned and we hoisted the EL Engine up and slid it half into place. By this time it was dark, and we had to work by light. PaulMac then worked out how we could marry the fuel lines up. The following is his how too. "There are two simple ways to attach the fuel lines and maintain the EL top and bottom connections. 1] My preferred option is to cut the EL metal fuel lines at the chassis rail of the donor car, leaving the flexible line intact with a 'tail' of 50-60mm of metal fuel line. Flare them very slightly with a flaring tool if you have one. Re-fit to engine or manifold while out of the car, marking the regulator feed line 'tail' clearly. Install the engine and from under the car place hose clamps over the [EA-ED] flexible lines then cut them to a length suiting the metal 'tail', insert the tail into the appropriate chassis feed or return line, clamp tight. NOTE: Feed line goes to the regulator, return line from the rail. 2]The second option is used when the EL flexible lines have been cut before the bottom join or the 'tails' are of inadequate length. Cut two lengths of metal fuel line [flare slightly if possible] and insert and clamp them into the EL flexible lines, forming the 'tails'. Proceed as above." The second option was forced upon us because one EL fuel line had not been cut away as required, [due to a misunderstanding by the engine supplier, an otherwise very helpful and professional mechanic] and we had to cannibilise the other for the metal line needed." Cheers, Thanks PaulMac - I guess one could always use the EB fuel rail. Once that was done the engine was lowered down but wouldn't get that last 10mm for the engine mounts to drop over the K frame. So, it was out with the right had mount and down it went. But do you think it was easy to bolt the mount back on? Ohhhh Nooooooo. Stupid bloody thing. This pic shows the engine almost in place, and gives you a look at our high tech lighting. This was around 1am. 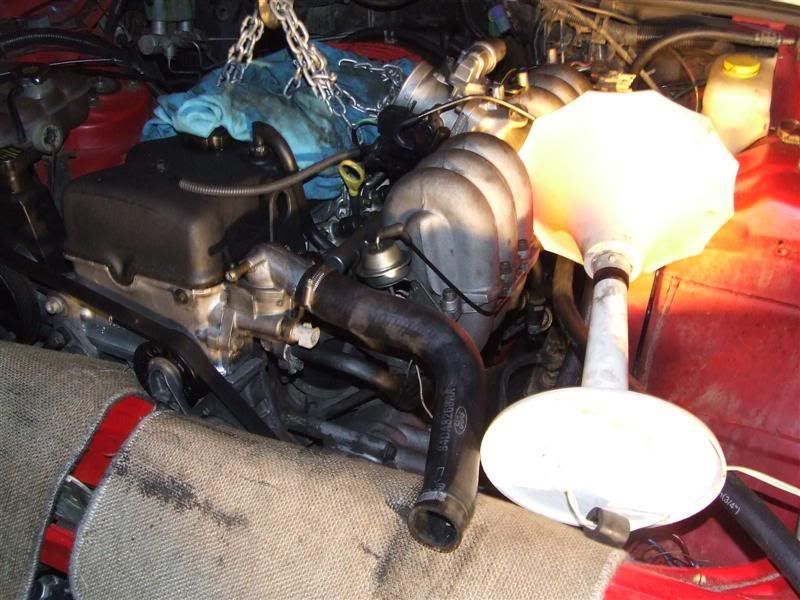
Finally we held our mouths the right way and got it sorted. We went around connecting all the bits we had disconnected. PaulMac put the EL radiator in and found that it was slightly different to the EB one. The rubber spacers on the bottom held it up too high, so he improvised that. And then the hose that goes from the bottom of the header tank into the right side of the radiator wouldn't fit as the EL radiator has a right angle bend in it. More solutions were found. The auto cooler lines didn't want to go back together again. Finally at around 4.30am it was all back together and it was time to start it for the first time. I turned the key and............... ZIP!!!! It just cranked over. The fuel pump sounded odd tho, so we threw a few ideas around, and I suggested that the fuel lines could be back to front. A bit of research on line and comparing PaulMac's car etc proved this theory to be sound. So they were swapped over and we were ready to try again. The key turned, the engine fired..........and ran..........clang clang clang clang....... I turned it off in a hurry. So considering it was now 5am and we had been working straight through from 9.30am the previous day, we packed up a little bit, called it a morning and went inside for a well earned NAP.
_________________ BenJ's EB T5 DOHC Ghia Wagon - Current Ride |
||
| Top | |
||
| Matt_jew |
|
||
|
Sounds like much fun was had.
I have never ever had an engine conversion go to plan 100%. Now when I am going out to do something at lunch on a Sunday and I tell the missus it will take a couple of hours , she says "ok Ill get dinner ready for about 9 oclock". She knows and suffers it all too well!
_________________ xr6turnip wrote: More people paid for a ride in a VT commodore then an AU Falcon so the VT is superior.
Based on that fact my Mum is the best around! |
||
| Top | |
||
| BenJ |
|
||
|
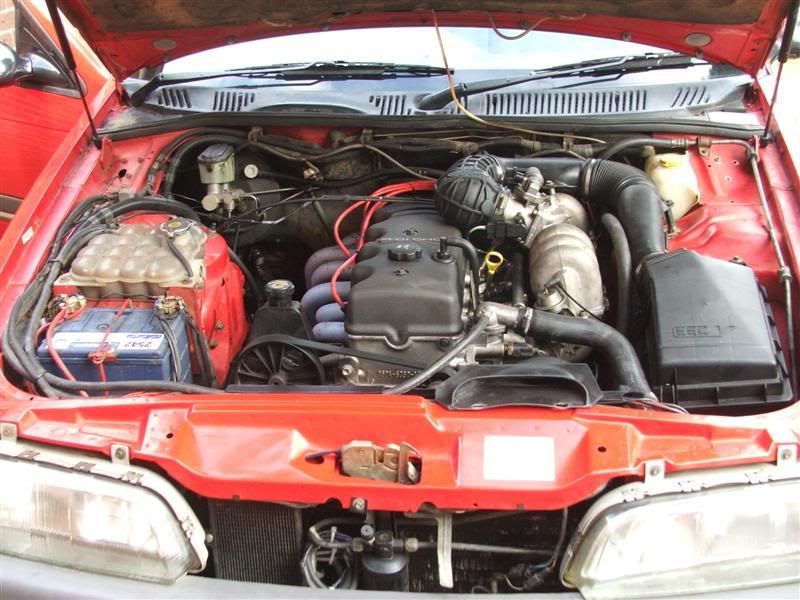
Day Two - 3 hours or so later.
We took our sorry worn out selves back out to the car (where did I put that match and petrol again?) took it down off the stands and ramps, and with slightly clearer heads tried it again. More clanging. Much conversation ensued as to the possible cause, mostly revolving around the auto being faarked. In the end we put the front back up on stands, and removed the dust sheild of the auto to check the torque convertor bolts. The all looked fine so I asked PaulMac to start the car while I was under it (Don't do this at home boys and girls). Clang Clang Clang. I immediately could see the problem. PaulMac joined me under the car and agreed with my diagnosis. It would seem that while we were frigging around trying to put the auto on the engine, we had shoved a jack under the sump at the back of the engine to lift it...........and crushed the sump so now the cranshaft was hitting it. NOT HAPPY JAN!!!!!!!!!!!!!!!!!!!!!!!!!!!!!!!!!!!!!!!!!!!!!!!!!! Much more discussion ensued and the only solution was the obvious one. Lift the engine, drop the sump and bash out the dent. Sounds simple enough doesn't it. Let me tell you nothing is simple - ever!! PaulMac ducked off to get a sump gasket, while I removing the gazzillion bolts that hold the sump on. We hooked up the front of the engine to the engine crane to lift it. But it wouldn't lift high enough to remove the sump. So I dropped the K Frame to give us more room. The Bugger still wouldn't come out. Does anyone know if the EB and EL sumps are the same? The K Frames are quite different, so they could be different. After much swearing and struggling it was suggested, not sure by who now, to insert a long object on an angle from the side into the sump and then bash the holy hell out of it in an effort to puch the dent out. To cut a long long day short, this actually worked. You will not believe how relieved I was when we started it and there was no wrong noises. So we buttoned it all back together, filled it with oil and started it again. Now I gave it a rev. Up to 2 grand and splutter. FAAAAAAARK!!!!!!! A quick think later, I remembered the EB Map sensor got pretty squashed by the BBM while putting the engine in. So I grabbed the EL map sensor, swapped them over and all was rosy. It revved strong and hard. The BBM was doing its thing and all was good with the world. Except for the auto fluid pouring out on the driveway. This proved to be a loose auto cooler line. I hate those things. Once tightened up all good. Of course by now it was after 5pm Monday. Here are a couple of shots with the engine in and finished. 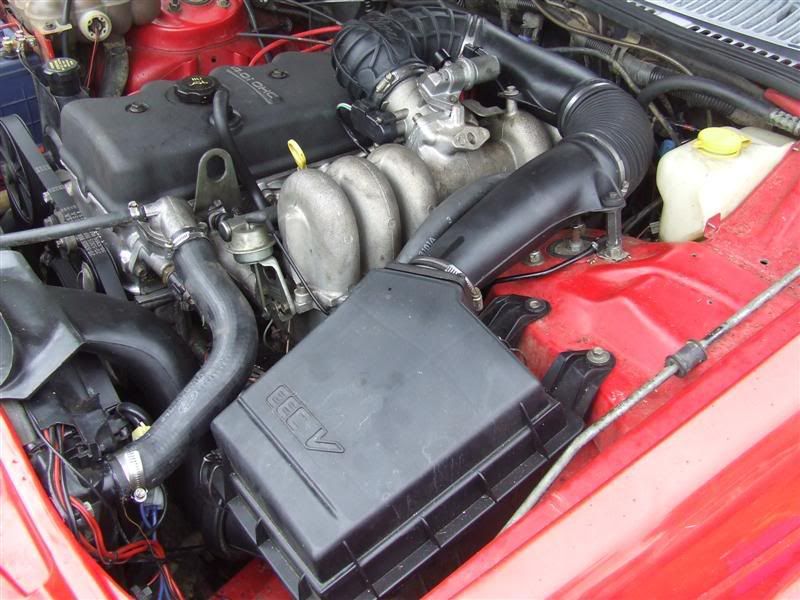
I took the EB for a test drive and it went great. The only real worry was that the temp guage in the dash didn't work, and I think we killed my Davies Craig thermo switch at some point. I had to run the fans from my manual overide switch. We packed up, jumped in the car and headed back to Sydney. The car went well and cruised easily home. I hope you all enjoyed my little story. I will be posting up a list of parts that I think others will need if they are considering a similar conversion. And I will provide some more detail of other changes/mods to make this happen. PaulMac and family, the biggest thank you for the time, effort and hospitality. You are a true friend and Ford Modder. BenJ
_________________ BenJ's EB T5 DOHC Ghia Wagon - Current Ride |
||
| Top | |
||
| TROYMAN |
|
||
|
far out mate
good to see its running sweet . i bet you were spewing about the sump. when i read that the part about the sump my first thought was oh no! |
||
| Top | |
||
| BenJ |
|
||
|
Spewing is putting it mildly. But, I was relieved that it wasn't the Auto, as I was not enjoying the prospect of pulling the engine back out!!!!.
On other things cooling related, I have spent a good number of hours yesterday and today, trying to get the ECU to control the fans. However I have not had any success. I have now procured a replacement Davies Craig switch, as remembering to turn the fans on is a dangerous game. The fix for getting the temp guage to work, was to replace the lower thermostat housing with one from the EB. This had the fittings and sensors the dash needs, as well as the climate control (for when that gets installed). More things as I think of them. BenJ
_________________ BenJ's EB T5 DOHC Ghia Wagon - Current Ride |
||
| Top | |
||
| BenJ |
|
||
|
OOPS Double Post
_________________ BenJ's EB T5 DOHC Ghia Wagon - Current Ride |
||
| Top | |
||
| TROYMAN |
|
||
|
i spent a day or two trying to get my fans working off the ecu but i could only get them to work on low speed and they would not turn on when i switched the aircon on.
so im still using the davis craig switch... ive since changed my ecu so i might try hook the fans to the ecu again.. |
||
| Top | |
||
| BenJ |
|
||
|
OK - List of parts needed to install an EL Engine into a EB Non Smarlock Car.
EL Engine - including air filter box and intake piping/brackets etc - everything El Engine Accessories - Pwr Steering box, alternator, A/C Compressor - All of it EL ECU Smartlock Bypass Module BBM Solenoid and associated Vacuum Hoses Knock Sensor plug and wiring EL Throttle Cable and pedal - The pedal ratio is different to the EB EB Manifold Loom modified for use on the BBM EL Map Sensor EF/EL Heater Hoses - both as they are different to the EB EB Engine Mounts - use yours - one of mine was broken lol EF/EL Radiator - the bottom hose is smaller than the EB EL Lower Radiator Hose EF/EL Thermo Fans - Davies Craig Thermo Switch Exhaust Manifold Gasket - Only needed because I used my extractors Exhaust Flange Gastket - get the correct size Engine Oil and Filter - 15w 40 Transmission Fluid - At least 5 litres Power Steering Fluid A good selection and quantity of hose clamps Radiator Coolant Oh and a sump gasket for when you squash the sump - not recommended I think thats about it. Anything I forgot PaulMac? BenJ
_________________ BenJ's EB T5 DOHC Ghia Wagon - Current Ride |
||
| Top | |
||
| ReGiE |
|
|||
|
jesus mate no wonder we didnt see you on sunday up the coast
at least you wont be covering me in black oily smoke next time i bring the louts on a cruise
_________________ Gooooone - Eb2 Coon - 143RWKW |
|||
| Top | |
|||
| SWC |
|
||
|
Well done Ben and Paulmac. Sounds like it turned into a much bigger job than expected.
|
||
| Top | |
||
| Paulmac |
|
||
|
Paul,
It was just a job where Murphy's Law applied. Every nut and bolt seemed to be stuck or wouldn't fit back where it came out, especially on the damn Pacies and cooler lines and we couldn't risk stripping them. The torque converter, well they either go straight in or they don't, this one was particularly obstinate and the resulting efforts led to the mistake which slipped the jack into the sump. Unnoticed in the dark it became a problem that stopped play. The engine had fired up fine and by rights Ben should have been on his way 8-10 hours earlier to rejoin his family function. There were a few small items that everyone else had failed to mention [or we had not examined closely enough] that caught both of us out, like heater hoses. This led to delays of up to an hour a time as we chased around to get them, or fabricated a fix. Then the sump gasket, another 40min trip. My forgetting to pick up the accelerator pedal and cable with the engine cost nearly two hours and in my rush to leave I stumbled over my old block and gashed/gouged out my right leg. A quick fix wasn't good enough to stop the [copious] bleeding, so I had to turn back for treatment and my wife took off to Minmi to pick it up, a very big thanks to Darrell who had it ready for her. Bless Panadeine Forte too. Even without the benefits of an enclosed workshop, this job should never have taken so long and it wasn't botched or incompetent work, just all the little hiccups happened at the wrong time for Ben to get away quickly.... Murphy's Law! I've yet to meet the mechanic who hasn't had one of those jobs. Another install could go as smooth as silk, especially now Ben's writing up the pitfalls he found for others to avoid. He put in a lot of thought and showed great skill and patience in overcoming an unfortunate series of events which [we hope] may not dog anyone else. Those unfortunate events aside, this is a very good and economical way to upgrade an EA-ED to BBM, serpentine, fans, alternator etc. Most delays were not in the actual removal or installation of the engine, none at all with the engine as supplied, mainly in just clearing the way to do it. When my wife's Fairmont is done soon, hopefully with an engine from the same place, we'll have a direct comparison and will be able to put all this down to unfortunate experience, or evil spirits! [my pick] LOL From what Ben tells me the car is going really great and that's the main thing. Cheers, Mac.
_________________ What goes around, comes around. |
||
| Top | |
||
| Who is online |
|---|
Users browsing this forum: Google Adsense [Bot] and 45 guests |


