|
| XR-Lane |
|
|||
|
Ben text this to me earlier on today, hope you dont mind Ben

|
|||
| Top | |
|||
| SWC |
|
||
|
{USERNAME} wrote: I bet he's still out in the driveway by torch or candlelight tinkering away with it I'll take that bet |
||
| Top | |
||
| BenJ |
|
||
|
You are a bunch of funny buggers LOL.
Pics and story soon. BenJ
_________________ {DESCRIPTION} - Current Ride |
||
| Top | |
||
| BenJ |
|
||
|
As you hopefully will have figured out, today was sunroof day.
Before I continue, once again I must give a big THANK YOU to SWC for his assistance in cutting a big bloody hole in my roof, and for fabricating the brackets etc, and also thanks to Snap, MRE-50L and LP for their assistance, input and advice. So, just how do you install an electric sunroof into an E series? Step 1 - Remove all unwanted interior parts. Basically this means to pull out the hood lining, interior lights, sun visors, interior plastics and wiring that may get in the way. I also removed the middle roof brace. Step 2 - Work out the position for the sunroof to be in. This is a two step process, which involves looking at the aesthetics externally, and analysing the practical limitations of physically fitting the sunroof cassette. To achieve this I borrowed MRE-50Ls cut out from his sunroof install to visualise where I thought the best position would be from the outside. Then we used some strapping to hold the cassette up close to the roof and work out how much leeway we had. We found that the next brace back limited how far to the back of the wagon we could go, and after settling on a satisfactory position for the cassette inside, we then lined up the cutout on the outside to match the front of the opening. 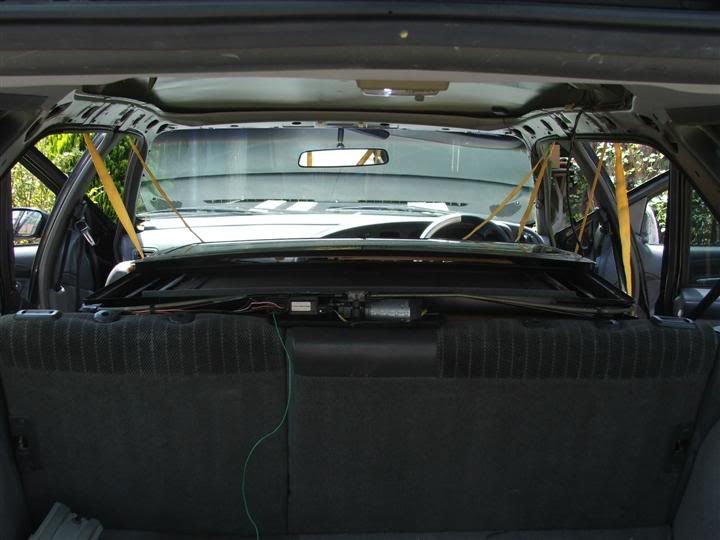 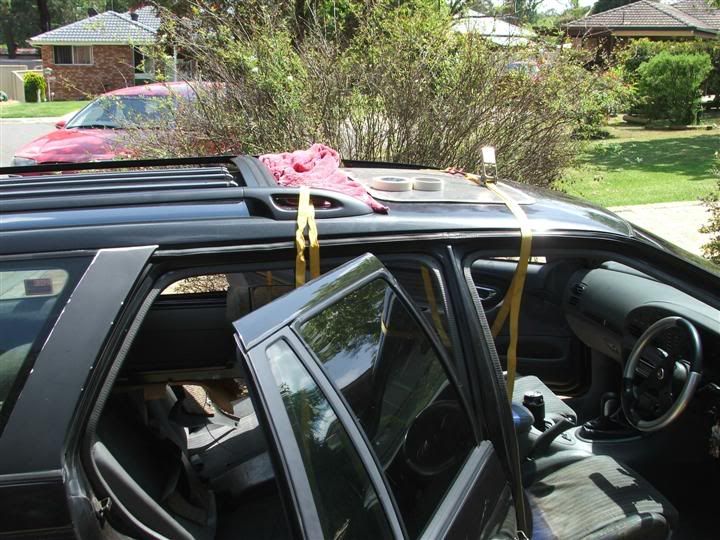 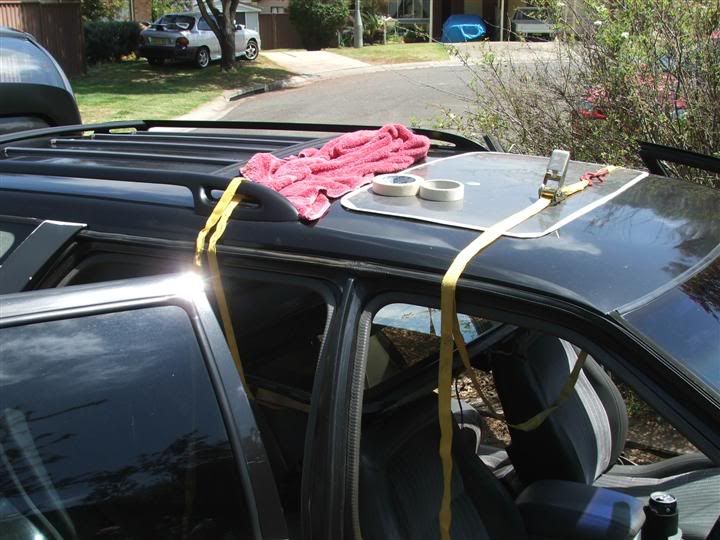 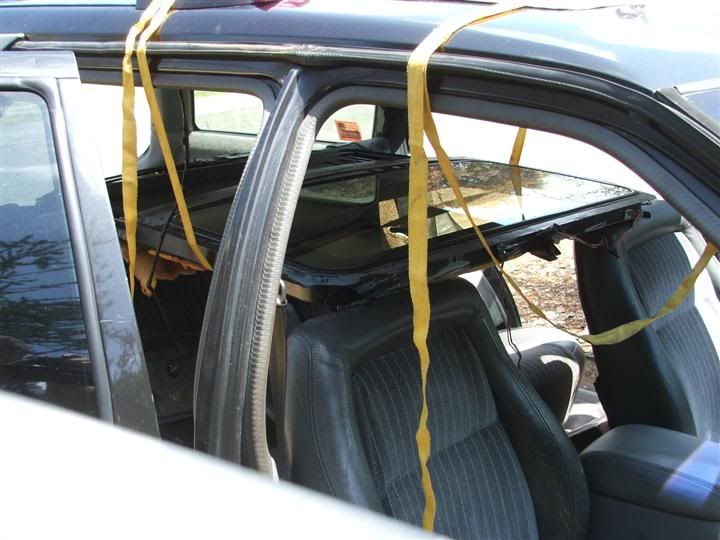 Step 3 - Mark the roof area to be cut. Once I was satisfied with the position of the cutout, we needed to make a template. This could be done using some cardboard and trace out the size of the opening or remove the glass and trace around it. In our situation, I grabbed the cutout from MRE-50L and sat it on the glass area, and found out it was almost perfect. TADA, a template. We then used the template to mark the roof. After measuring left and right, front and back to centre the template we then laid masking tape down before clearly marking the CUT line. 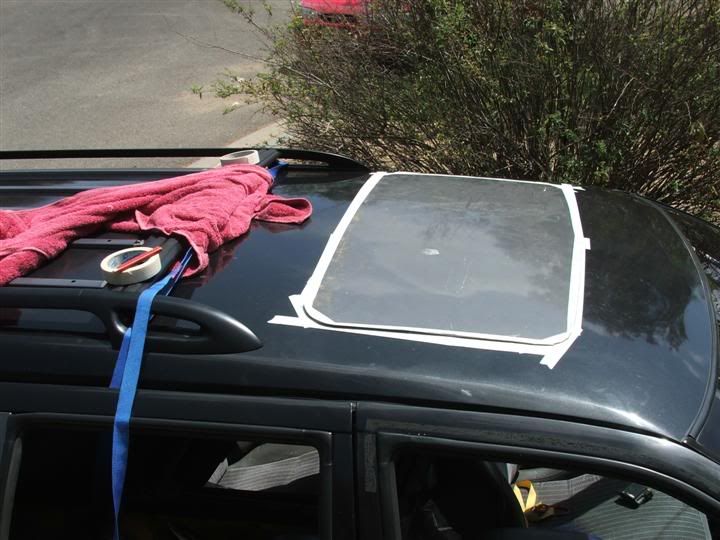 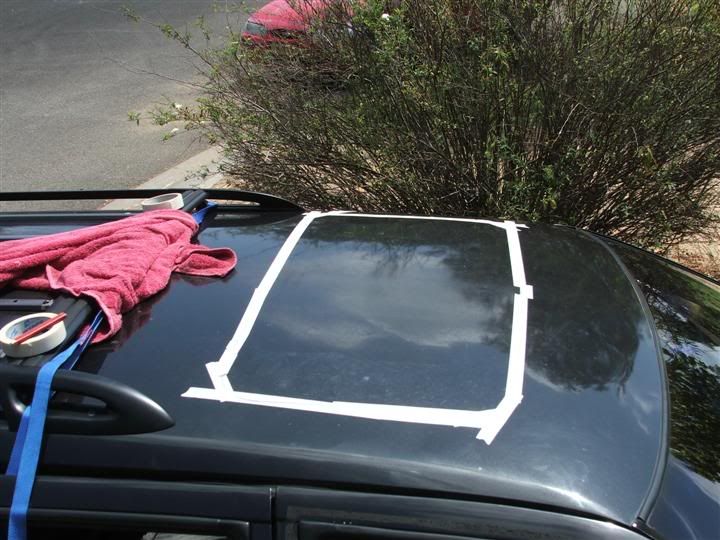 Step 4 - Cut a bloody big hole in the roof There are a variety of tools that can be used for this task. We had several discussions regarding this and settled on using a 4" Grinder with a 1mm cutting blade, and a jigsaw for the corners. SWC wanted to start with a corner, so a pilot hole was drilled, and the hacking commenced. SWC found the jigsaw was making easy work of it, and decided to do the complete cut with it. No turning back now!!! 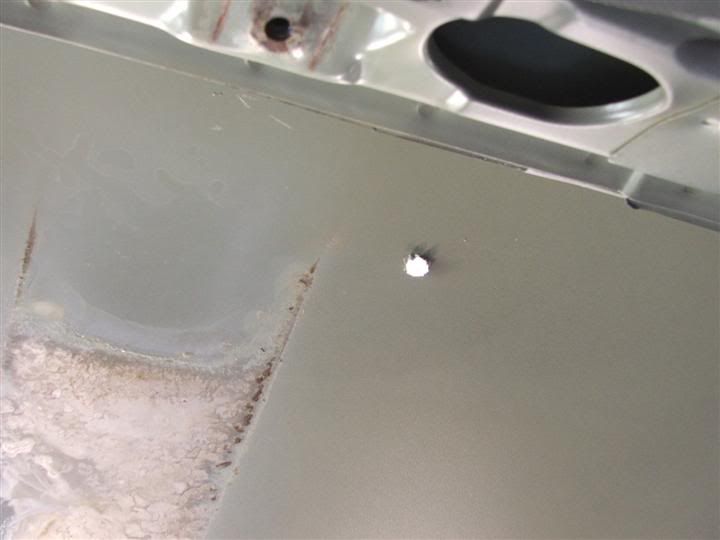 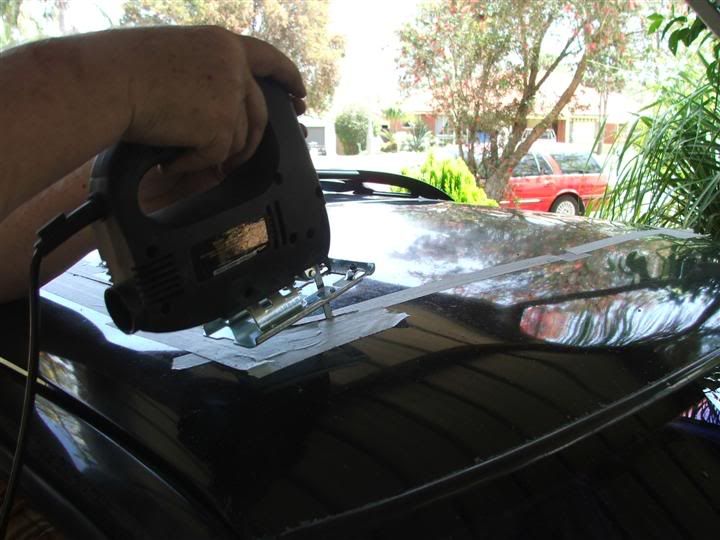 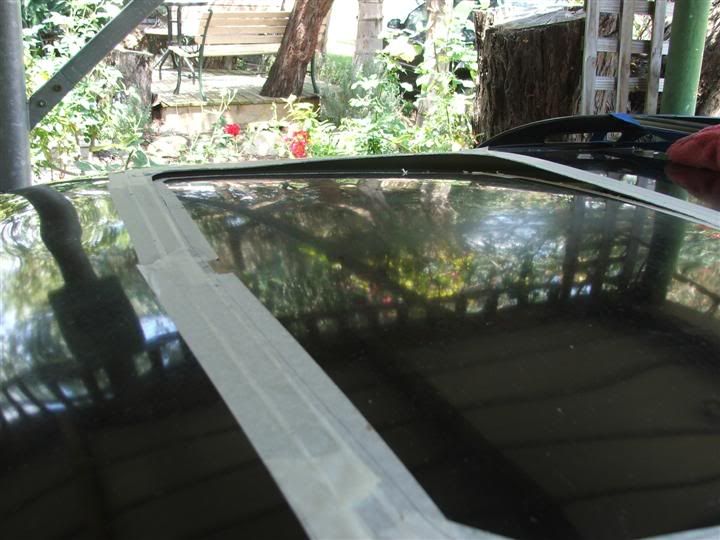 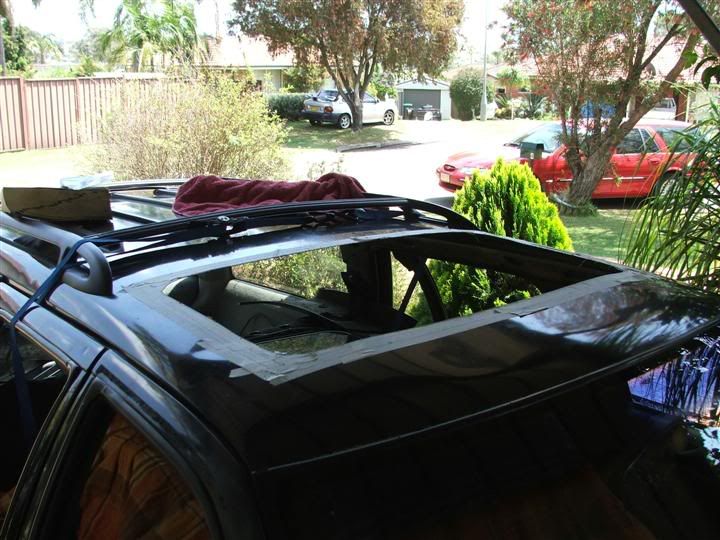 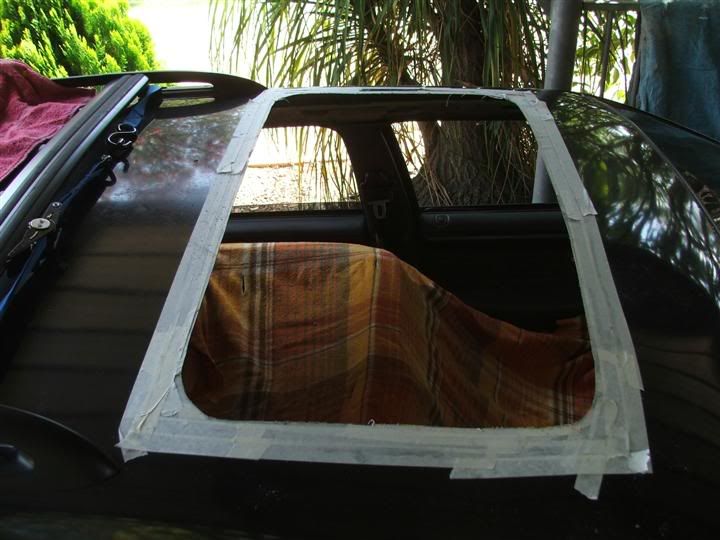 Step 5 - Make brackets to secure the cassette in place. As you may have noticed, Wagons have a higher roof line than the sedans or Fairlanes etc. This meant that any sunroof brackets I could have obtained from sedans would be the incorrect size and shape. The plan always had been to make brackets. To do this, we hoisted the cassette back up into place and then used a number of G-clamps to secure it in place. This allowed us to exactly position the cassette in position using the new hole. The rear of the cassette was supported with a length of PVC pipe Now that we have it locked in place, SWC made up the brackets for the rear of the cassette. This required the rear roof bracing to be notched in the corners to allow the cassette to sit flush with the roof. Then the new brackets were made and tek screws were used to fasten it together. Then the front brackets were fabricated, followed by a pair of middle brackets. We then powered up the sunroof and conducted a couple of tests to ensure that the hole was big enough. This identified a clearance issue, and a further 5-7mm was then cut out of the right hand edge of the hole as it was fouling on the glass as it tilted up. 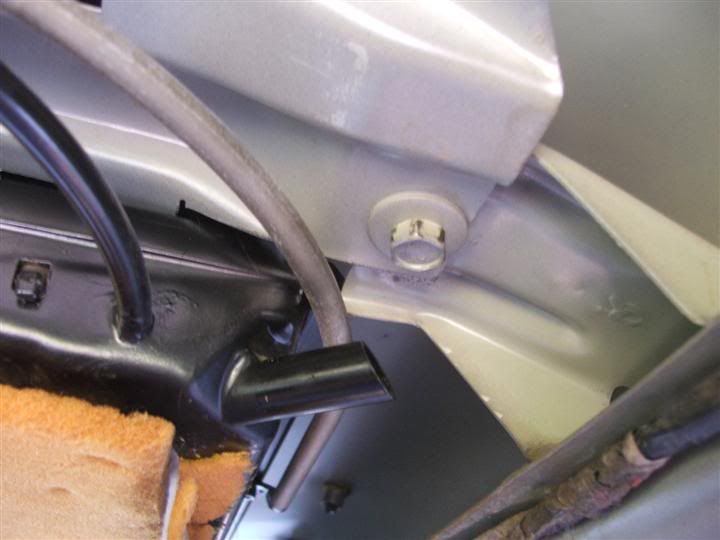 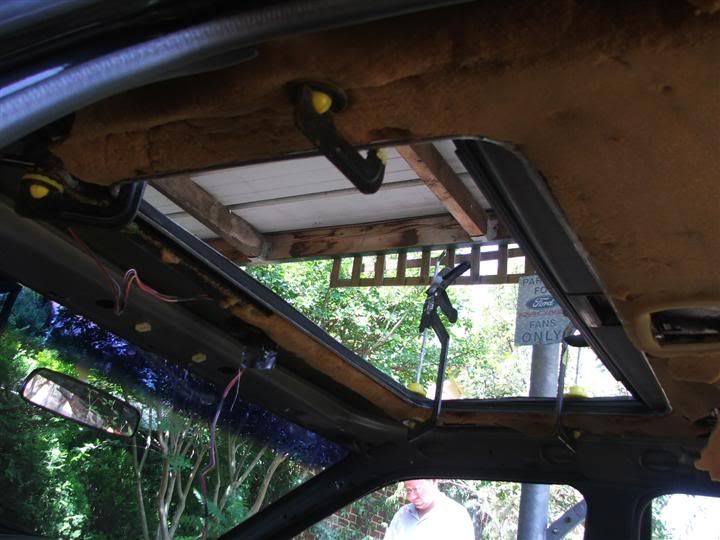 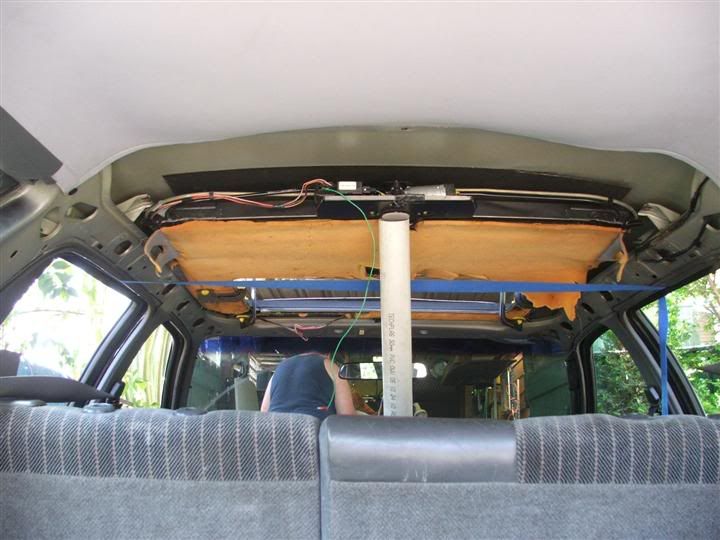 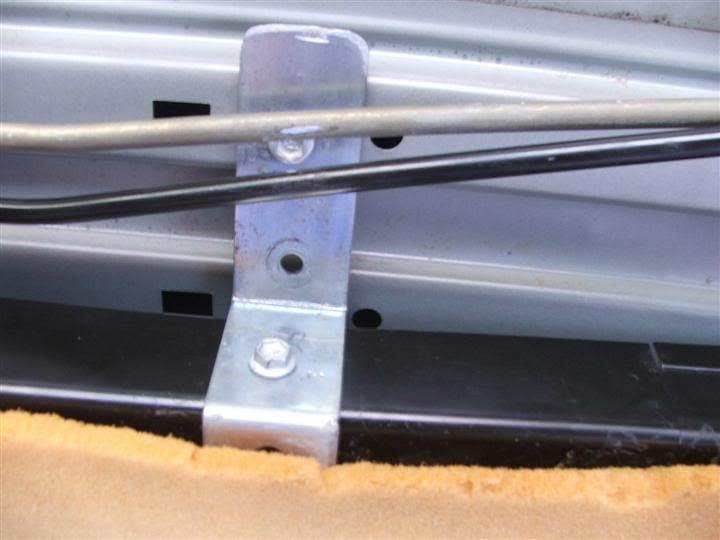  Step 6 - Glue the cassette in place Now that the cassette is can be firmly attached to the roof frame, the roof skin needs to be glued to the cassette skin. SWC recommended a Selleys product, Adhesive + Sealant, Polyurethane. This was liberally applied before the cassette was lifted up for the final time into place, and all the brackets tightened down. Clamps were again used around the hole opening to clamp the skin against the cassette while the adhesive cured. As this would take a while, SWC improvised and used some door flashing as a temporary clamp around the edge. This was left in place for the drive home. ************************************************************ There are a couple more steps which I will cover tomorrow, after I get pics of the the relevant areas. At this stage, I have partially wired up the sunroof so the Wagon can be secured, and Snap and LP ran the four drain tubes so if it rains the water will not fill up the car. Here is a couple of quick photos of the partially finished job. 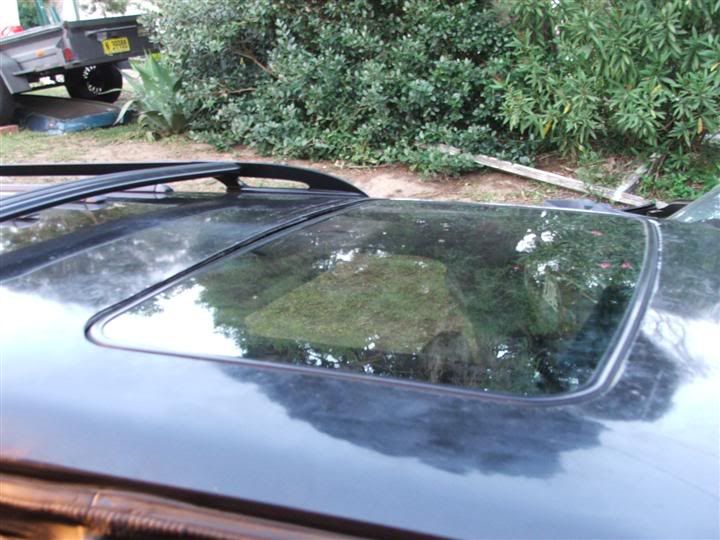 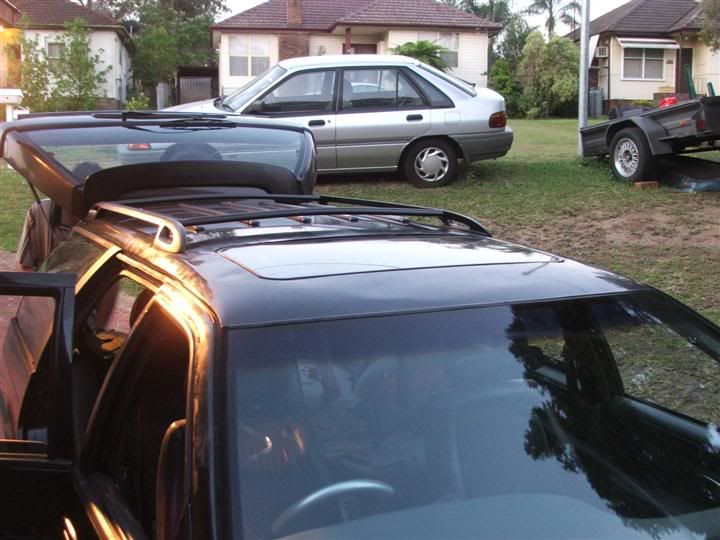 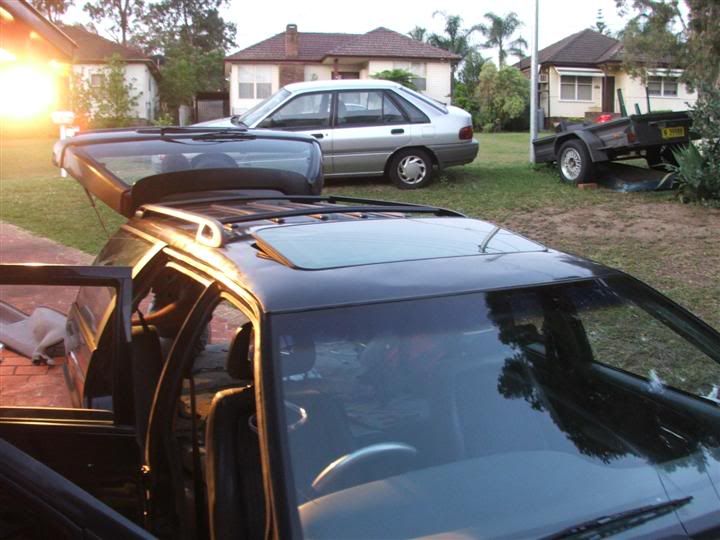 Cheers BenJ
_________________ {DESCRIPTION} - Current Ride |
||
| Top | |
||
| StrawbZ |
|
|||
|
Very Nice BenJ!
|
|||
| Top | |
|||
| XR-Lane |
|
|||
|
Well done guys! I have never had a close look at a sunroof out of a car before, did not know they require drain lines. Where you you run the lines, through rubber grommets in the floor?
Cheers |
|||
| Top | |
|||
| SWC |
|
||
|
Plastic tubing runs down the A & C Pillars and through to the out side of the car.
|
||
| Top | |
||
| XR-Lane |
|
|||
|
So is there Blanked out holes in the floor or at the bottom of the pillars or did you need to drill holes for this?
cheers |
|||
| Top | |
|||
| BenJ |
|
||
|
{USERNAME} wrote: So is there Blanked out holes in the floor or at the bottom of the pillars or did you need to drill holes for this? cheers Patience young Master. All will be revealed. Cheers BenJ
_________________ {DESCRIPTION} - Current Ride |
||
| Top | |
||
| XR-Lane |
|
|||
|
What was I thinking, this is a BenJ thread after all, Ill check back later |
|||
| Top | |
|||
| fiend |
|
|||
|
Do I detect some dents in the roof just back from the window? Hmmm... They could have been there already mind you --- I know mine has dents there from using the roof racks... Silly bloody roof rack design....
Good stuff though BenJ. I'd follow suit, but that would run clearance issues with my 15" LCD monitor from the roof install. Have spent the last five minutes trying to figure it out, it is impossible. Got sideskirts yet? |
|||
| Top | |
|||
| KWIKXR |
|
|||
|
Looks the goods there BenJ, sunroofs are wonderful things aren't they
Wish i had a sunroof in my EF. Even if i had one laying around, i still dont think id be game enough to go and cut a massive hole out of the roof |
|||
| Top | |
|||
| BenJ |
|
||
|
Thanks all for the kind comments.
Fiend, Yep, plenty of dents in the roof, which were there when I purchased it. ************************************************************ After getting home, a good 45min drive, two things needed to be completed before calling it a day. Step 7 - Drainage This style of sunroof is designed to allow water past the sides of the glass and into the cassette. From each corner a drainage pipe is situated to allow the water to drain away. I went to my local Bunnings and grabbed some 10mm tubing. This tubing was then fed down the A Pillars at the front, and exits through an unused grommet near the front door hinges, and the C Pillars at the back, out over the wheel and through a spare grommet. Lucky we did that yesterday, as it has rained most of today. I am happy to report the drainage system works well. One word of advice however, is if your car is wet, don't tilt up the back of the sunroof and then reverse up a steep driveway. My shirt is still wet. LOL. I only have pics of the front tubing, and where it exits. There rear exit is hidden up under the car.  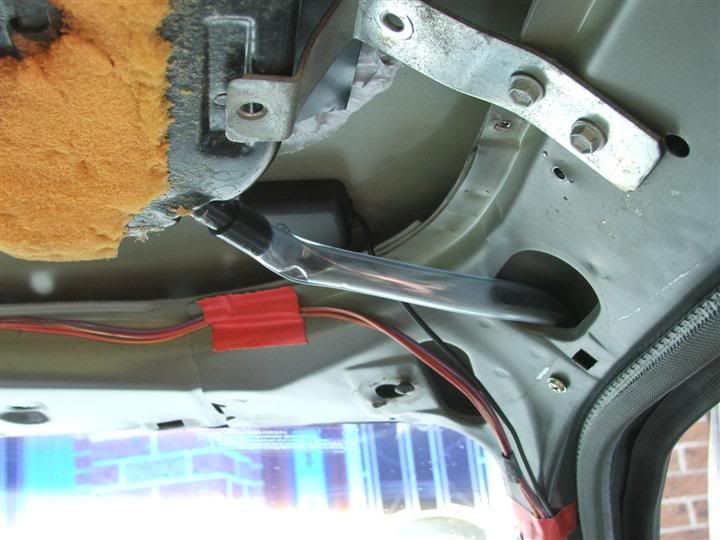 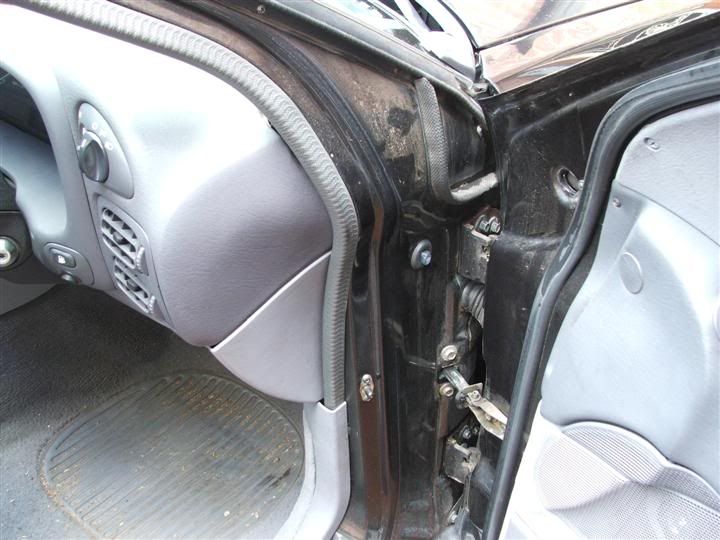 Step 8 -Wiring The factory wiring has three wires. The first is constant 12V, the second is ACC and the third is the smartlock sense wire, which signals the auto close feature of the sunroof when you lock your car. I decided to not to hook up the ACC and instead supplied it constant 12v too. This allows the sunroof to be operated from within the car, without the need for the keys to be in the ignition. I used an inline fuse, just to be safe, and I also plan to relocate the switch from the roof mount position to a dash or console location, as it interferes with where my AU map lights will mount. No pics of the wiring at this stage. ******************************************************** Once the above steps are completed, the sunroof is installed, secured, won't let water in and will open and close etc. The last major step is the hood lining. I was hoping to mod the existing hood lining, but initial trial fittings have proved that while it will be possible for a temporary solution, it is not a long term option. Yes, SWC, you were right. I might actually have to spend some dollars on this installation. I also have adjusted the normally closed position of the rear of the sunroof so it sits a bit higher. I still have to finish trimming the roof hole edges with a Dremel, and then fit the roof trim piece. Cheers BenJ
_________________ {DESCRIPTION} - Current Ride |
||
| Top | |
||
| fourL6 |
|
|||
|
{USERNAME} wrote: One word of advice however, is if your car is wet, don't tilt up the back of the sunroof and then reverse up a steep driveway. My shirt is still wet. LOL. I also plan to relocate the switch from the roof mount position to a dash or console location, as it interferes with where my AU map lights will mount. could only imagine the water coming in lol, and with the mapping lights, is there enough room to mount the switch in the middle of them? even if there is it probably still more convenient to have it on your dash somewhere... I wondered why this thread had only had 3 posts but 181 views today... great effort benJ Cheers Cam
_________________ Was - {DESCRIPTION} |
|||
| Top | |
|||
| racedirector |
|
|||
Age: 65 Posts: 1584 Joined: 20th Mar 2005 Ride: EDL Fairmont Wagon/AU XR8 Ghia Location: Riverstone |
So Ben - "I can see the sky now" - J, you finally did it! Great job matey and well done to the rest of the crew. Musta been scary drilling that first hole!
Oh, and had to chuckle at the water down the back trick, now that would have been funny to witness Cheers RD
_________________ =1994 ED Wagon GLi body/EL Fairmont spec with *ALL* EL running gear.= |
|||
| Top | |
|||
| Who is online |
|---|
Users browsing this forum: No registered users and 0 guests |


