|
| easpak91 |
|
|||
|
Nice work BenJ thought i would bring this to your attention, with the tubing make sure it has a high heat resistance or make sure the tubing has no kinks...as a friend of mine had installed a sunroof just as you did and found out the hard way....to cut a long story short when tempreture rises the tubing gets soft and any slight kinks become major kinks and close the opening of the tubing and when tubing cools it stays in that formation thus creating blockages or restricts the drainage flow.
Keep on modding......
_________________ WHO EVER SAID "TWOS COMPANY THREES A CROWD" OBVIOUSLY NEVER HAD A THREESOME |
|||
| Top | |
|||
| BenJ |
|
||
|
{USERNAME} wrote: Excellent work!! Looks mad!! and by the looks of the Background... "Another bar bites the dust" Thanks Mate. That 'Bar' is the BA Bar waiting for me to paint it. {USERNAME} wrote: Nice work BenJ thought i would bring this to your attention, with the tubing make sure it has a high heat resistance or make sure the tubing has no kinks...as a friend of mine had installed a sunroof just as you did and found out the hard way....to cut a long story short when tempreture rises the tubing gets soft and any slight kinks become major kinks and close the opening of the tubing and when tubing cools it stays in that formation thus creating blockages or restricts the drainage flow. Keep on modding...... Ahhh, now that I believe is a very valid point. There is one kink I am concerned about, but have an idea on how to remedy it. And yes, the modding will keep happening. Cheers BenJ
_________________ {DESCRIPTION} - Current Ride |
||
| Top | |
||
| Mar55s |
|
|||
|
{USERNAME} wrote: Thanks Mate. That 'Bar' is the BA Bar waiting for me to paint it. BenJ Ah!! Good times |
|||
| Top | |
|||
| XR-Lane |
|
|||
|
Look great from the outside now buddy.
So the EB bumper is back on at present? |
|||
| Top | |
|||
| Papa Smurf |
|
||
|
Ben, I love all the work you have done to your wagon.
Last edited by Papa Smurf on Mon Nov 09, 2009 9:16 pm, edited 1 time in total. |
||
| Top | |
||
| BenJ |
|
||
|
With work, family, Fordmods outings and bad weather, it has been hard to find time to get outside and do any work. But I managed to to a bit here and there.
Most importantly is this. Step 9 - Hood Lining The most sensible option is to take your car with the newly installed sunroof to an Auto Trimmer, hand over around 3 - 400 bucks and get a new one made. And in time I may well do that, and get the rear one done to match at the same time. But for now, I thought that I may as well have a go at modding the factory hood lining to fit the sunroof. Right. . . . . . . I used the mount points for the sunvisors and the sunvisor clips as the location to fix the hood lining in to position. Then I held up the hood lining to the bottom of the cassette, and using a pointy phillips screwdriver made some new holes in each side for the black clips to go through. Each hole was about 15mm higher than the original. This of course is due to the fact that the sunroof cassette forces the hood lining to be lower than standard. Once the held in place, I reached in through the open sunroof and using a marker pen, drew on the cardboard, marking out the opening in the cassette. The hood lining was removed and I then marked a slightly larger area than the hole. With judicious use of a stanley knife I cut out the cardboard and felt backing, leaving the grey hood lining material in place. The hood lining was reinstalled, and then I used the stanley knife to cut the grey material approx 30mm on the inside of the hole area, to allow for the material to be wrapped up around the hole and before the rubber seal was pushed in. Then I cut new holes for the grab handles to be mounted through, and trimmed up to 30mm from both side edges as required. The plastics were reinstalled and it was done. There was a fair bit of trial and error in all of this of course. Somewhere in this process, I also rewired the interior lights, refitted the AU Map lights, and relocated the sunroof switch. All good fun really. No REALLY!!!! I have only one area to finish off, but have a plan of attack in mind for that. Need more motivation. Enough of the text stuff. Some pics!!!! No progress shots I am afraid. 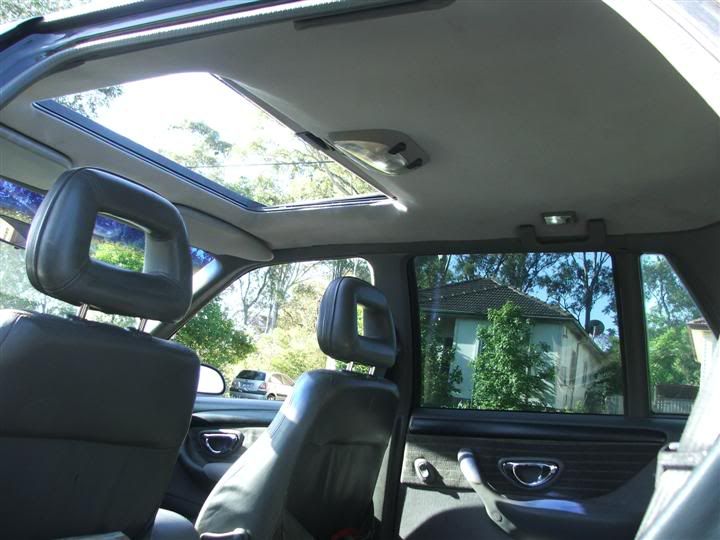 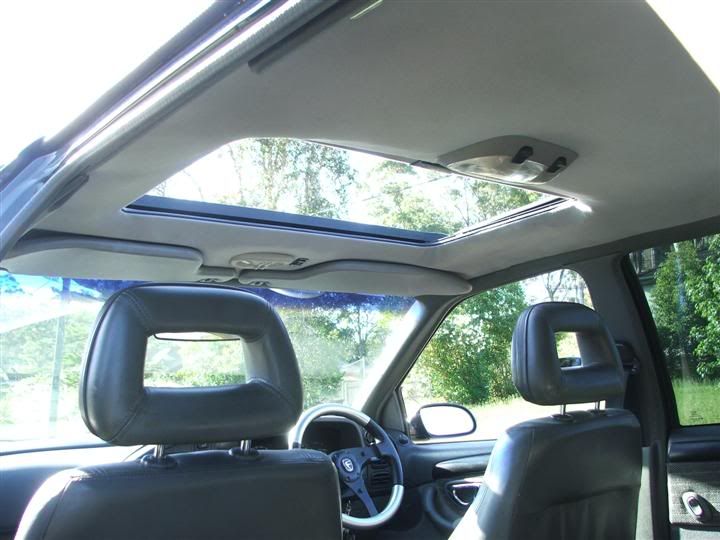 This is where I mounted the switch. No wires were harmed during this move. 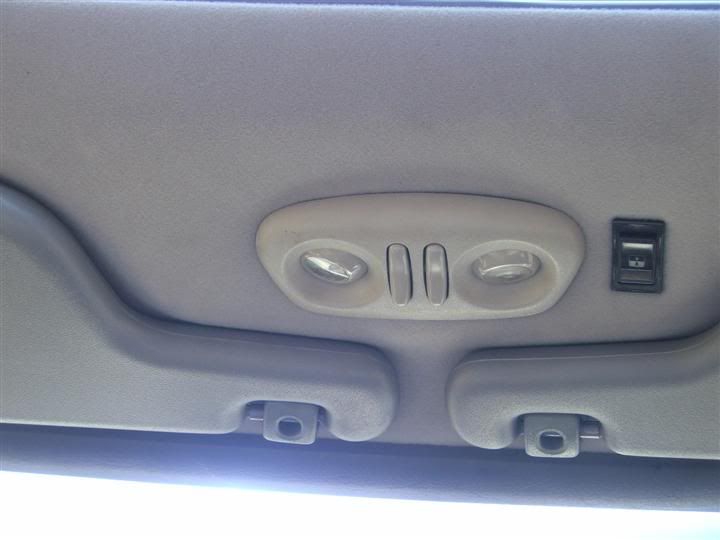 And the last bit that I need to finish. The original hole in the fabric for the interior light. 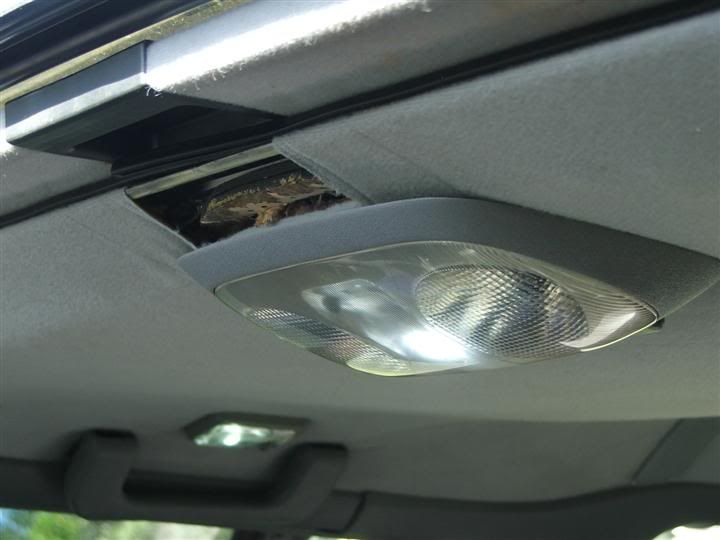 And a couple of external shots. 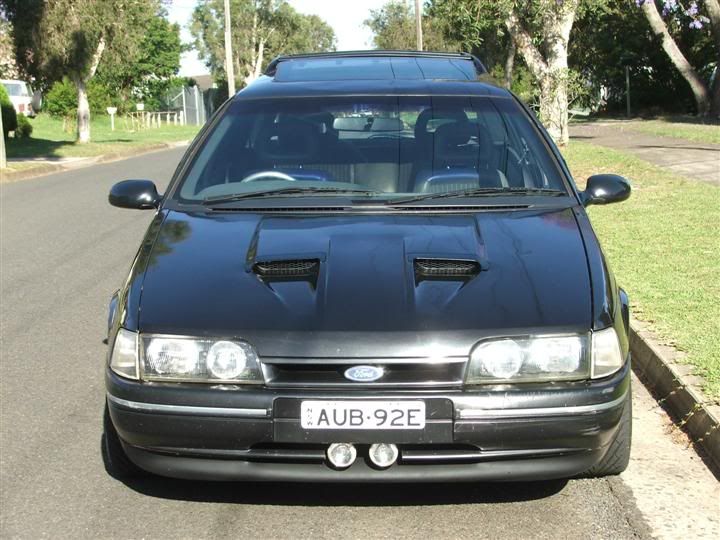 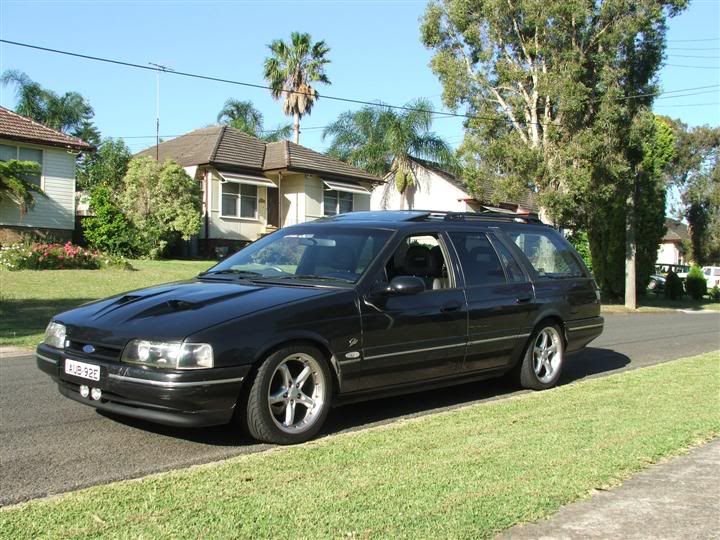 I have now been on a couple of long drives on nice days and have decided the glass needs to be tinted. I am really enjoying having a sunroof. It is nice and airy inside now and much lighter too. Cheers BenJ
_________________ {DESCRIPTION} - Current Ride |
||
| Top | |
||
| BenJ |
|
||
|
Now, the other thing I got done, was to clean up the the birds nest of wires, rust, and general untidiness around the battery.
This area has been bugging me for a while, and I have been accumulating the necessary parts to fix it up. This photo shows what I mean. 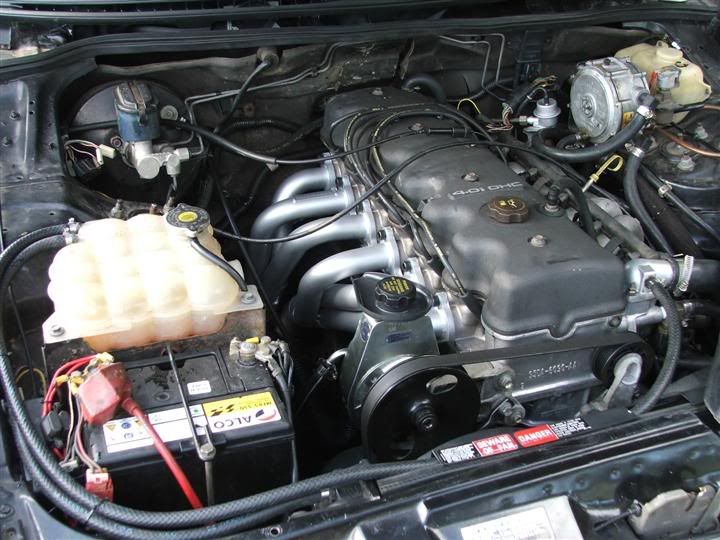 It was taken shortly after the EL engine was installed, and it hasn't changed much. You can see the wires running every where, the back of the battery tray is a nice shade of rusty brown. I wanted it to be functional, and neat and tidy. So I picked up the following from Jaycar. One Positive LED Terminal. It shows the current voltage, and has a perspex cover. 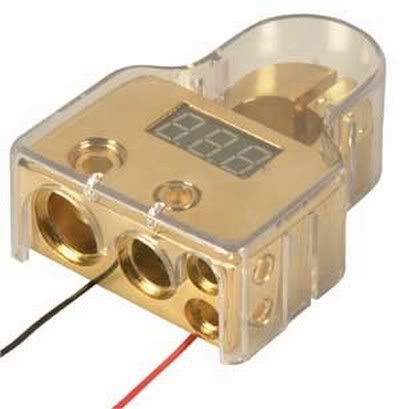 One Negative Terminal. It also has a perspex cover. It looks a bit like this, but could not find the right pic. 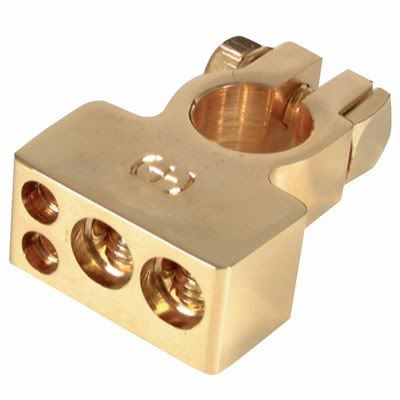 Two Power Distribution Blocks. Typically used in stereo installs. 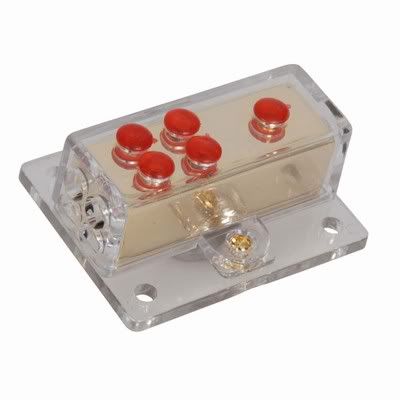 What I ended up with was this. 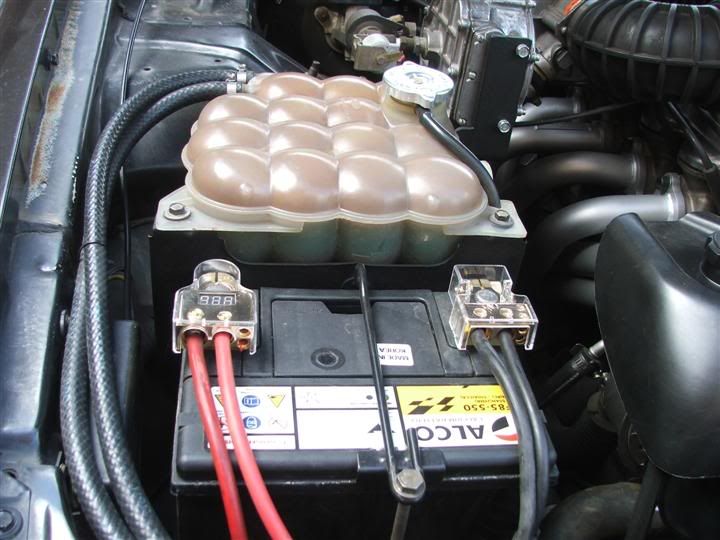 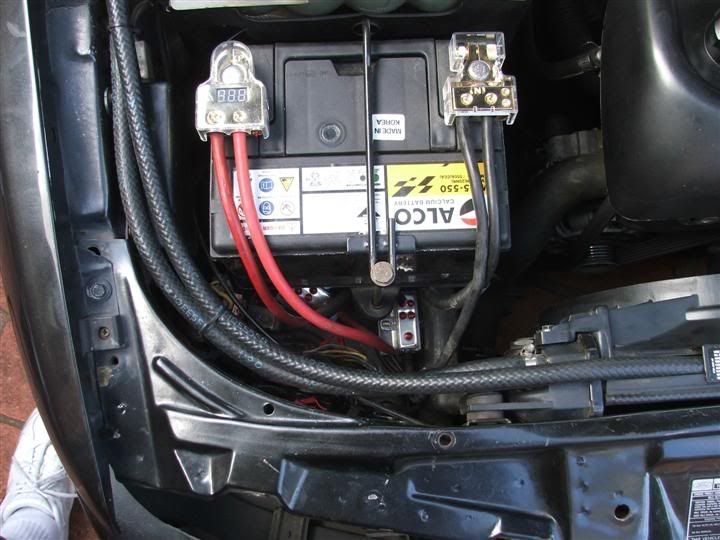 In the second photo you can see the distribution blocks between the back of the headlight and the battery. The following pic is taken through where the headlight is normally mounted. 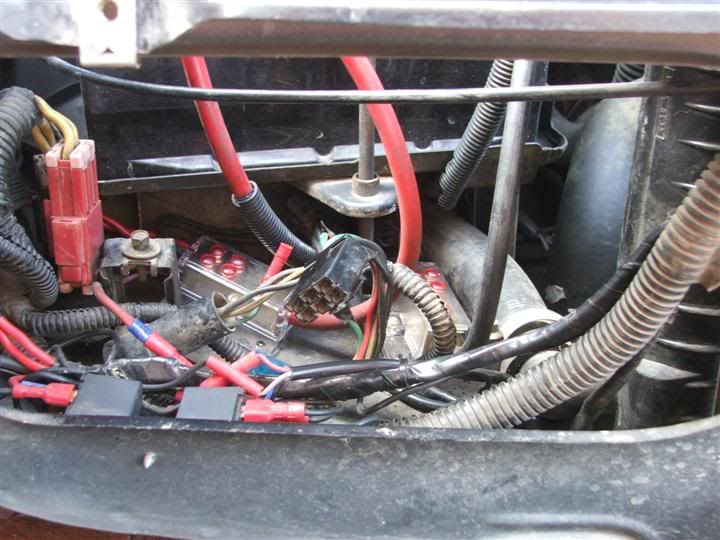 A bit of a mess down there, as the wiring and relays for the driving lights, thermo fans and now the fusible links and earth lines are all down there. Doesn't matter now. Out of sight, out of mind LOL What I have done is reroute all of the car wiring under the batter tray and cut off all the ends that where attached to the old battery terminals, and put them in the 8G holes of the distribution blocks. Then using some of the 4G wire from my old Red EB Sedan (Don't throw anything away!) I made up some short lengths to go from the new terminals to the 4G input of the distribution blocks. I also painted the battery tray black with some engine enamel I had left over. This is how the engine bay looks now. 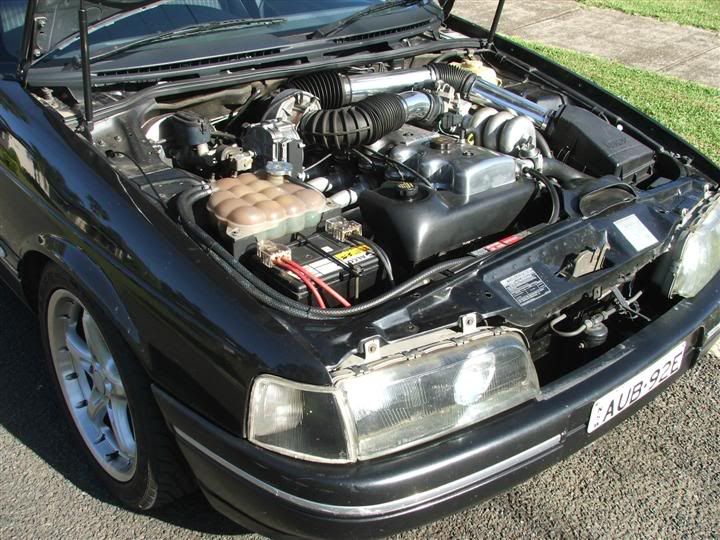 Much better. Only 49 other things under the hood to tidy up. Cheers BenJ
_________________ {DESCRIPTION} - Current Ride |
||
| Top | |
||
| XR-Lane |
|
|||
|
Hey Ben,
Bloody nice work with the battery terminals, where they dear? I also like the what you have done with the hood lining, What do you have in mind to close the original hole for the interior light? Cheers |
|||
| Top | |
|||
| ToranaGuy |
|
|||
|
Nice work on the Sunroof & the battery clamps BenJ! I've been wanting a sunroof in the EB for a long time now, and having seen it be done by another fordmods member such as yourself, i think i'll have a go at it this summer if i can get my hands on one.
Those battery clamps look like just the thing i need for my mighty boy. It's time to replace & hide most of the wiring in the engine bay in the boy, and those clamps look like they will help the cause greatly. I should probably also get a set for my EB, as I'm only half way thru my wiring mods around the battery, and it now needs to be tidied up! I've installed the EF fuse box & wired it all up. Much nicer than the EB fuse links! Cheers ToranaGuy
_________________ I am the ToranaGuy!|74 Lh Torana Turbo|78 Hz PanelVan|86 Mighty Boy Ute|93 EB2 Ghia,GT Mockup,5spd,LPGI,Full Leather|2 x EB Xr8 5spd's|{DESCRIPTION}|{DESCRIPTION}|{DESCRIPTION}| |
|||
| Top | |
|||
| braad |
|
|||
|
Awesome work BenJ. Looks heaps neater now! and dare i say it, looks easy haha :s
I might have to save this thread so i can do a sunroof down the track The battery terminals are a great idea. I've been annoyed at mine recently, i need to re-do the battery tray as its rusting at the bottom a bit so when i might take a leaf out fo your book and do something similar with all the wiring in that area Bring on the other 49 things...
_________________ Previous - |
|||
| Top | |
|||
| BenJ |
|
||
|
Thanks Fellas!!
XR-Lane The battery terminals are between $25 and $40 each, and the Distribution Blocks are approx $17 each. I took a few weeks to get them to make it easier on the wallet. Re the hood lining fix, I will report on that when I get it done. LOL Cheers BenJ
_________________ {DESCRIPTION} - Current Ride |
||
| Top | |
||
| XR-Lane |
|
|||
|
look forward to it buddy
|
|||
| Top | |
|||
| B0XCAR |
|
|||
|
Looking good Benj! i was gonna attempt the battery clamp idea couple weeks ago.. but didn't get up getting another clamp Lol!
|
|||
| Top | |
|||
| alfy |
|
|||
|
BenJ, are they XR indicators with the inside parts painted black?
_________________ 2021 V6 Manual Amarok - 245kw/750nm - many goodies |
|||
| Top | |
|||
| BenJ |
|
||
|
{USERNAME} wrote: BenJ, are they XR indicators with the inside parts painted black? Almost. They are after-market clear indicators, (much like the XR ones, but don't have the park light in them) that I painted the inside edges black. Cheers BenJ
_________________ {DESCRIPTION} - Current Ride |
||
| Top | |
||
| Who is online |
|---|
Users browsing this forum: No registered users and 0 guests |


