|
| frankieh |
|
|||
|
Pilch wrote: comming along very nice. i like the el xr front design. Thanks mate, I'm pretty fond of it myself.. The new bits: One very tidy T5 manual with everything needed: 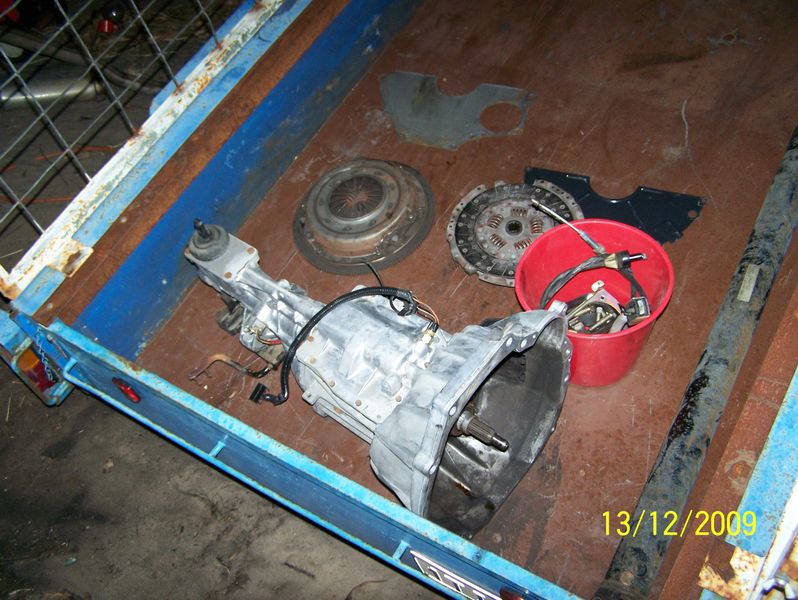 Today I stripped and cleaned my Ticky head ready to send off and get sorted had to buy a spring compressor and then modify it to get it to work. Angle grinders are great.. 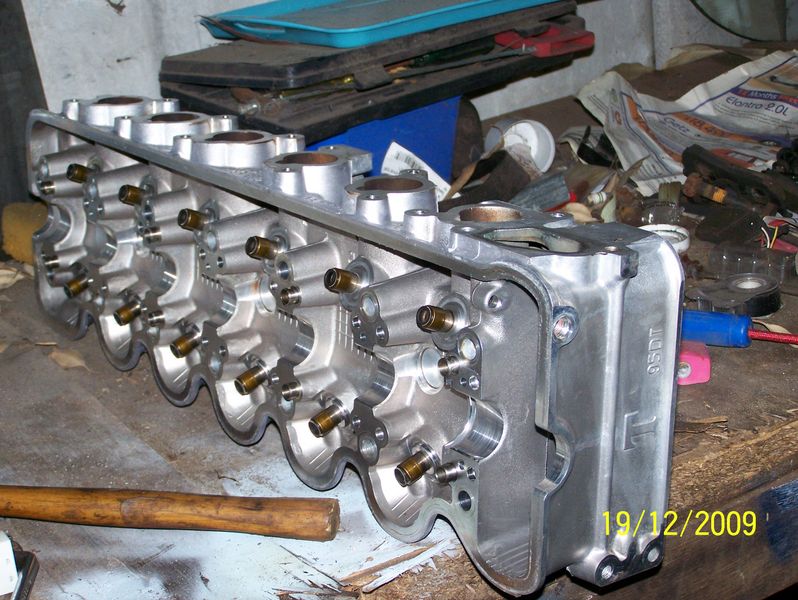 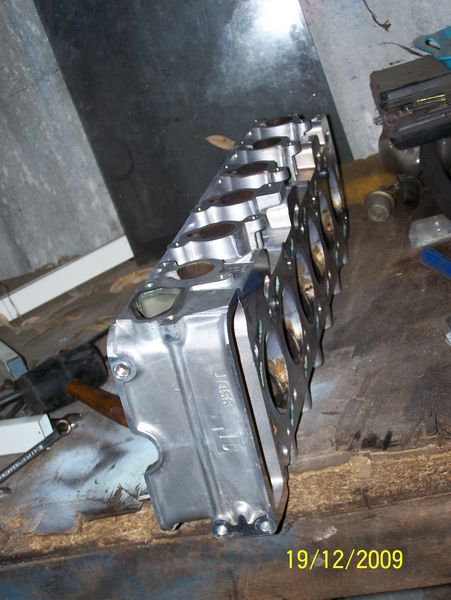 cleaned up ok I think.. hoping it doesn't need anything major... though I am thinking of pulling out the dremel and giving it a clean up... not sure I can be bothered though lot of effort for not a huge amount of difference in my application I think. anyway... will find out about the head on Tuesday assuming all goes well... Then the games begin |
|||
| Top | |
|||
| frankieh |
|
|||
|
more progress...
Today I prepped my new tidy dash harness (the one in the car has been butchered sometime in the past...) and my nice new fairlane dash and combined the two in preparation to putting it in the car.. I've also re-inforced my manual pedal box so it doesn't die from clutch use.. I didn't go as overboard as some on here have, but I'm fairly certain that mine wont break either as I've spread the load over a much wider area than the standard setup which is what causes the stress fractures in the first place. Also I've welded both ends of the brake pin (which goes all the way though the pedal box) so it locks the two sides together rigid....... will know soon enough if I've done enough.. I have to be back at work on Wednesday, so I plan to do the dash swap tomorrow and Tuesday... will be driving around with an auto gearbox and a clutch pedal for a while (while I get the rest of my collected kit ready)... but no biggie... |
|||
| Top | |
|||
| bradley4567 |
|
||
|
looks like you have some work cut out for you
_________________ ef falcon daily driver |
||
| Top | |
||
| frankieh |
|
|||
|
yup.. .
gonna take a week off work in a month or two.. and in that week put my shiny new supercharged i6 and manual box in my car.... so between then and now, I want to have all the other stuff required (like the pedal box) in and ready to go. can't wait.. |
|||
| Top | |
|||
| frankieh |
|
|||
|
progress...
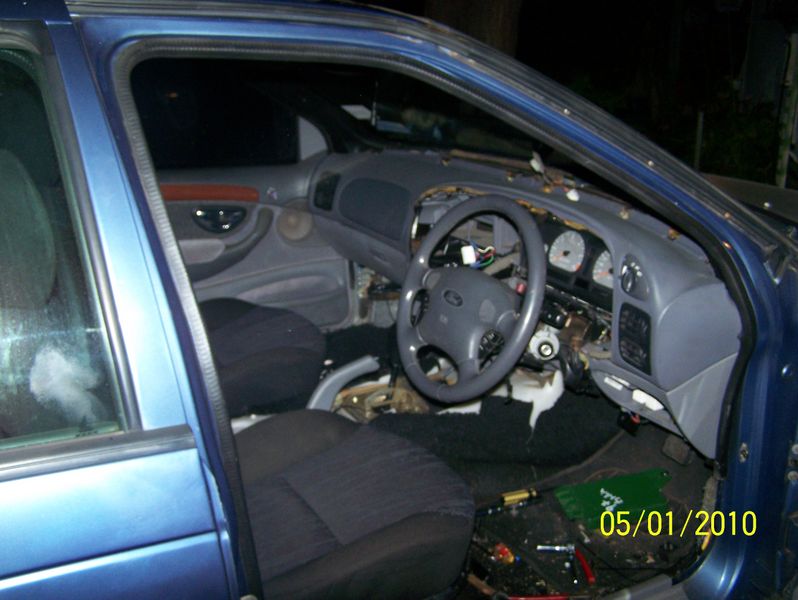
Dash is out... 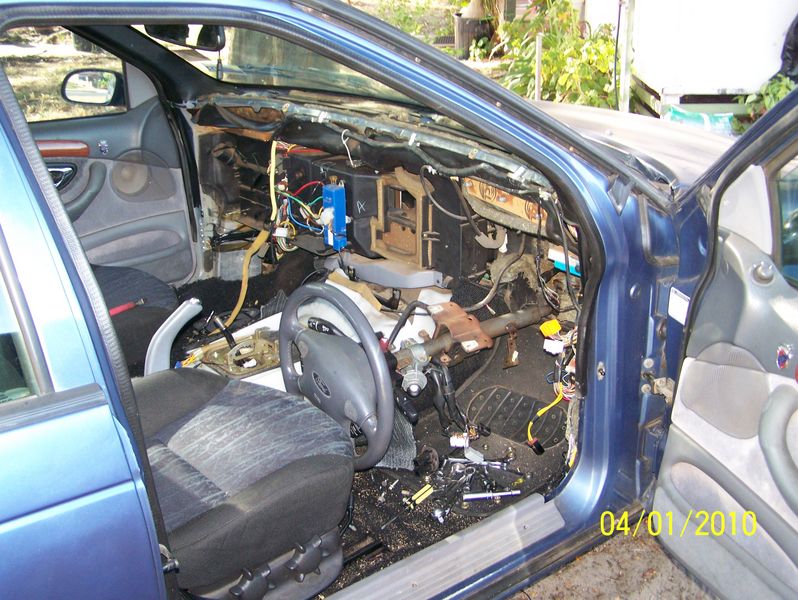 blend door not working properly so that is to be fixed tomorrow as well.. have a spare fairlaine heater box.. to pull bits off.. Out with the old and in with the new.. you can see some of my reinforcements in this shot.. 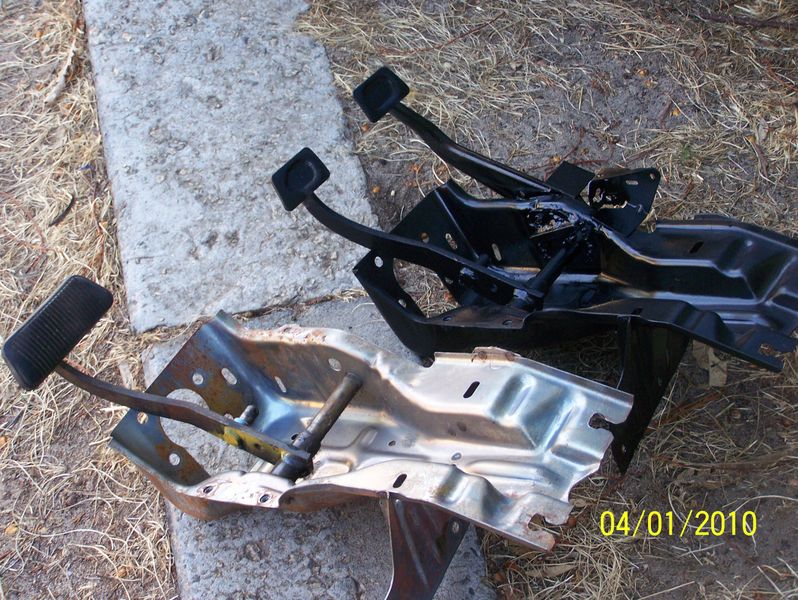 This is why I pulled the dash out.. this is the condition of the dash loom that was in the car.. 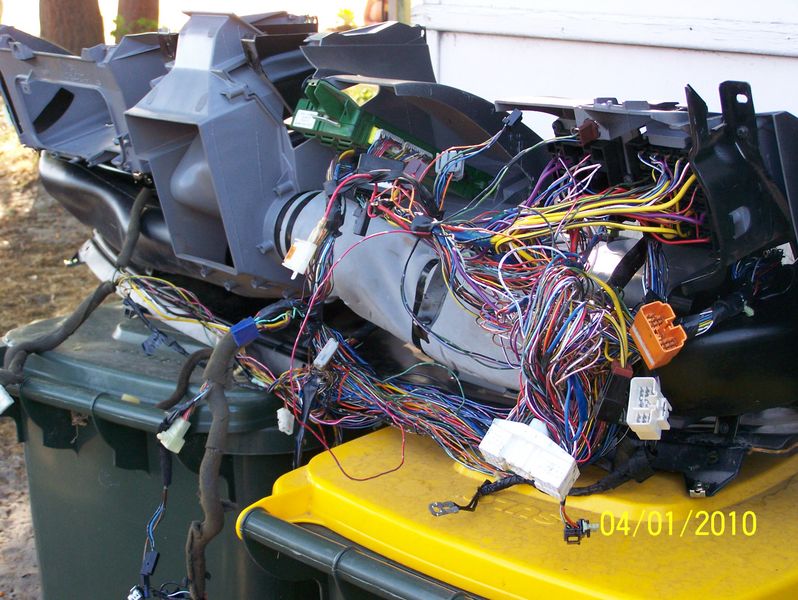 I have a nice bit of 3mm steel plate I will be reinforcing the clutch cable mount on the firewall with from the inside.. will take photos of that finished.... also need to drill a hole for my zero gauge cable and the gas wiring which was running though the clutch hole. One question I have though... the plug to the brake switch has a loom with 4 wires in it... two of them go to the brake switch and the other two have been cut off and twisted together.. (they were not soldered or even taped up amazingly) just stripped off and twisted together... nasty tw@t was the person who made this mess.... Anyway, what are those two wires and are they the ones provided factory for the clutch cruise control switch? cheers Frank I do have one |
|||
| Top | |
|||
| snap0964 |
|
|||
|
frankieh wrote: One question I have though... the plug to the brake switch has a loom with 4 wires in it... two of them go to the brake switch and the other two have been cut off and twisted together.. (they were not soldered or even taped up amazingly) just stripped off and twisted together... nasty tw@t was the person who made this mess.... More than likely - in the auto's there's a shorting connector fitted. From memory, one or both of the wires are green/white, or the other is green/red. There are pics in the cruise doco or the common probs doco IIRC.
Anyway, what are those two wires and are they the ones provided factory for the clutch cruise control switch?
_________________ 96 XH Longreach 'S': LPG, Alarm, 3.23:1 LSD, Cruise, Trip Comp, ABS, Power Windows, Mid Series Dome Lt, Climate Ctrl |
|||
| Top | |
|||
| frankieh |
|
|||
|
Sweet.. makes my job easier then...
have to get the dash in tomorrow anyway, have to drive it to work on Wednesday... |
|||
| Top | |
|||
| fordman351 |
|
|||
|
Holy jeeeeeesus! I don't envy that job one bit! I dread the day i have to pull out a dash! Well done though, eager to see this thing going and to have our drag race! Nooo...i havn't forgotten HAHAHA!
|
|||
| Top | |
|||
| frankieh |
|
|||
|
The dash out was dead easy... took about an hour and a half at most...
Wiring doesn't normally look like that... the person that owned it before me butchered it badly... That dash and wiring loom will not be going back into the car anyway.. Here is a pristine one I prepared earlier that goes back in tomorrow. 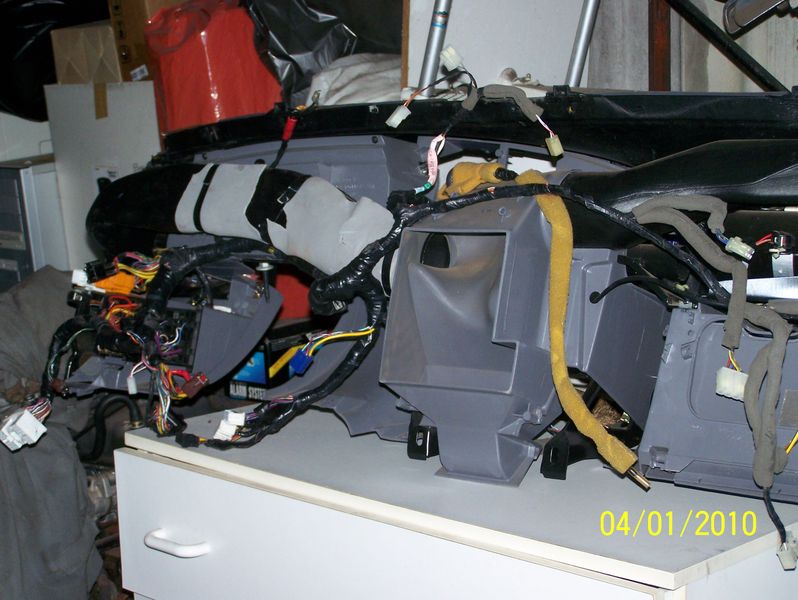 The loom is perfect, and as you can see, it's much less like spaghetti than the other one. Also, this dash has not been badly sprayed black... which is always a bonus.. 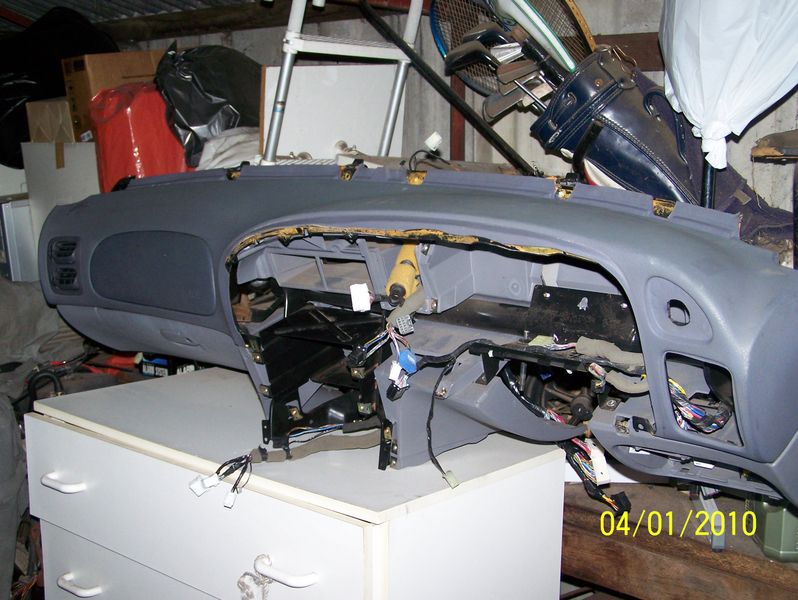 I remember the drag... one of the reasons I changed to a manual. your car was an E series with an NA BA motor... I think putting a turbo on it changes things somewhat. Also, while I am here, people might be wondering why I'm not driving around with my hybrid front bar on yet.. This is why... 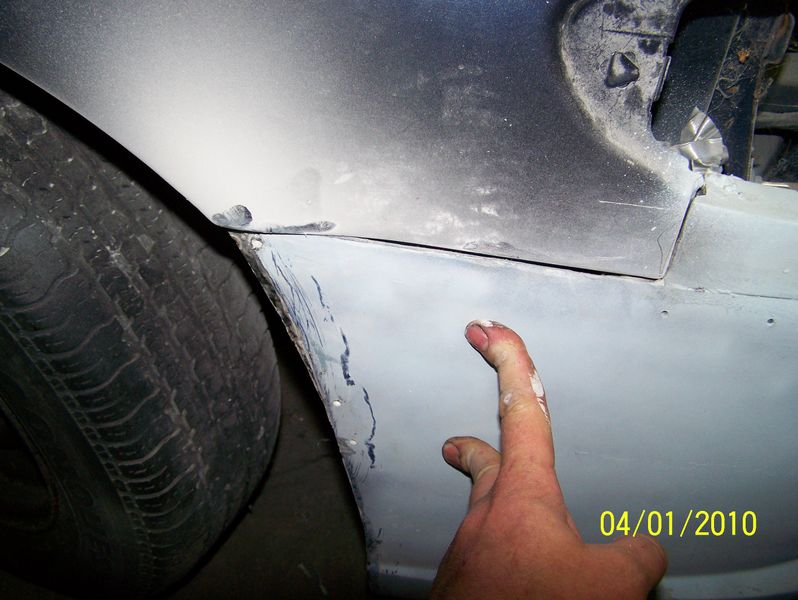 When trimming it to match the guard, I accidentally cut an extra half an inch off... only just fixed it. Also note the line of the guard flare. It doesn't match the BA bottom and looks dumb..... only just figured out an easy way to match the curve of the flare down till it tapers out.... I want this thing to look factory when I'm done... Lastly, I got my Ticky head back... I had it faced, and also had the two rear water jackets welded in and re-opened as they were seriously corroded. He also had to reset the valve seat at that point as the head displaced it.. the others were still perfect so only needed the one done.. total cost $150... I'm happy with that. 
|
|||
| Top | |
|||
| frankieh |
|
|||
|
OK.... I got the dash in... just
 I don't start work till 10ish tomorrow so I can do some cosmetic stuff like the facia in the morning.. it's all working though... had to pull the spare GLI's cluster out and use it as I forgot the fairlaine cluster will not work in the ghia loom.... (the car had a butchered NL loom in there but I've removed that now.) Most importantly... I have a clutch pedal now.. 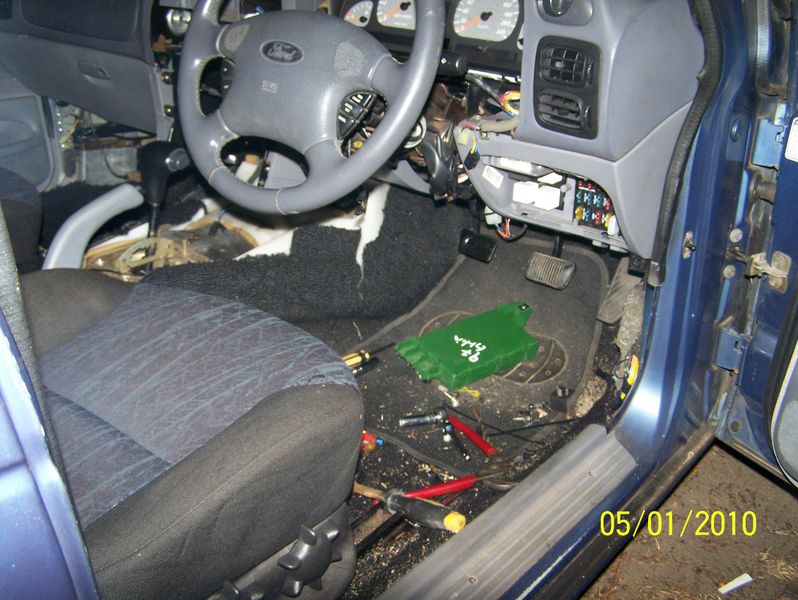 The cable and everything is in... just not hooked to anything on the other end yet. Here is how I reinforced my firewall... Here is the blank untouched version.. (except you can see the 30mm hole I drilled for my zero guage cable and the gas wiring.) 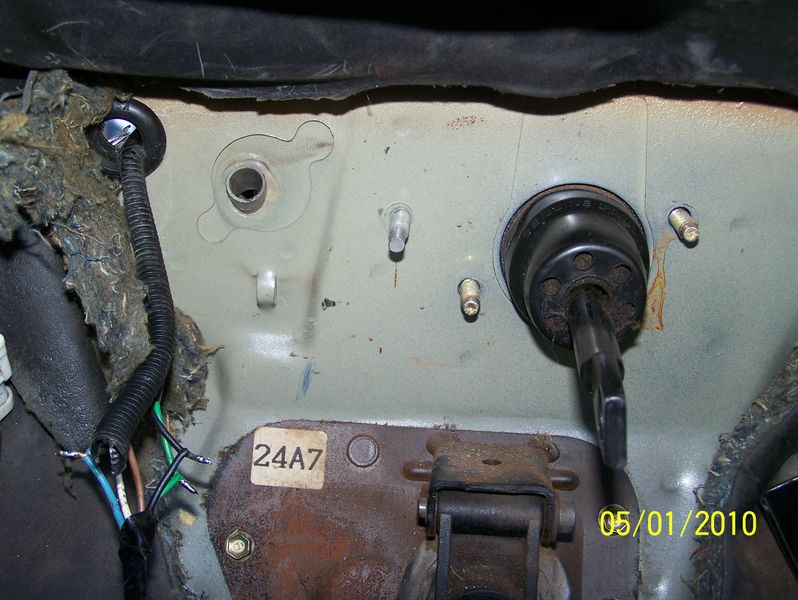 And here is what mine looked like before I put the pedal box back in. The black stuff is 3mm steel plate..... I've spaced the pedal box out so that the plate holds the 3mm plate tight up against the firewall to stop it flexing... I tried to move it with a screwdriver and it's pressed really hard against the firewall so there will be absolutely no movement with the clutch use. 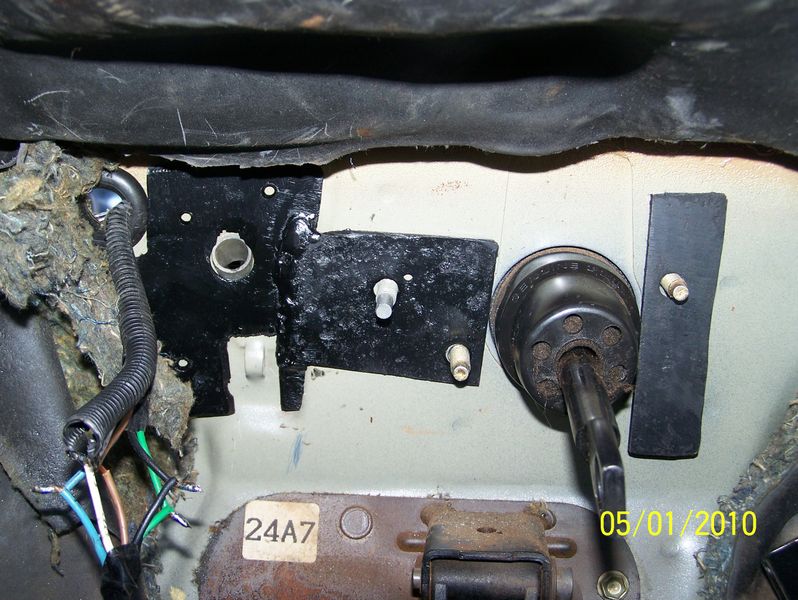 Here is a close up of the bracket... you can see that it is two bits welded together.. that was because the firewall is on two levels and to get hard pressure it was the only way... here is a better pic of what I mean...(side view)  Anyway, the end result is that all pressure on the firewall from the clutch is now fully supported by the mounting points of the pedal box (3 big bolts)..... there is no chance for movement. Also it's invisable to the outside and it didn't affect the pedal box fitting at all... I'm stoked with the results, but it turns out I'm gonna have to pull the dash out again at some stage in the future anyway.. just noticed at the last minute that the vacuum activator on the far left of the heater box (under and behind the outside passenger air vent) has a snapped arm where it enters the heater box... Has anyone found a way to fix that that doesn't require an aircon regass afterwards? regards Frank |
|||
| Top | |
|||
| frankieh |
|
|||
|
Odd..... steering is notchy and power windows not working.....
have to steal the wifes car to get to work today.... don't understand why the steering should have issues as I never disconnected anything just dropped it down a bit to swap the dash... very odd.... I'm wondering if the lock mech rolled 360 when I had it unbolted from the frame or something.... it seems to get worst the more angled up it is... so with the shaft fully up under the dash in its highest position.. it is very notchy in two positions about a half wheel turn each side of center. (sounds like the steering shaft uni joint is hitting something as it turns around, but I can't see anything so I'm at a bit of a loss. bummer |
|||
| Top | |
|||
| frankieh |
|
|||
|
Sorted it all out! Had to take the dash out again to get there, but it's all done now..
Heater box had a broken linkage behind the glovebox in the box bolted to the fan... (3 bolts, one either side and one inside the bottom, easy to get off) anyway the plastic linkage had snapped, so I drilled a 1/8th hole though the the linkage arm into the shaft of the air flap and put a long self tapper through it after applying some araldite to the ends... better than new now as I doubt the screw will ever snap.... worked out great and cost nothing. Power windows were not working because this new loom was from a Ghia with power sunroof and the removal of the sunroof wires took the power window wire from the back of the relay and fuse box... used a test light pointy thing to get the plugs out of the old fuse box/relay box and transfered it all over to the new one in one piece.... all back to OEM and working perfectly... Sorted the steering out too... had the top uni joint upside down... was slightly bigger at the wrong end.. not that easy to notice but a pain to sort out... all good now too... While the dash was apart, I've converted most of the LCD displays and general lights to blue LED's... the trip computer came out perfectly, but the climate control LED's were just not bright enough... I've ordered a small LED panel with like 36 LED's on it that will go in there and take over lighting duties..... will see how that comes out. I'll take some photos of the dash LED's when I get a moment.. it looks cool... nice to know all my wiring is in as new condition now... This coming weekend I hope to install that really cool 5km range car alarm with the LCD display on the remote and also my bluetooth rear vision mirror. Last edited by frankieh on Tue Jan 12, 2010 2:07 am, edited 1 time in total. |
|||
| Top | |
|||
| eboost |
|
|||
|
lookin good! this thread is what useful forums are all about.
|
|||
| Top | |
|||
| BenJ |
|
||
|
Well done Frankieh!!!
Don't you love that sense of achievement when it all works like it should? Cheers BenJ
_________________ BenJ's EB T5 DOHC Ghia Wagon - Current Ride |
||
| Top | |
||
| ausedwagon |
|
|||
|
let me know how the alarm goes.. i need one im just sus of the ebay jobs..
_________________ 94 White ED Wagon |
|||
| Top | |
|||
| Who is online |
|---|
Users browsing this forum: No registered users and 8 guests |


