|
| Aurora 98 |
|
|||
|
well it must have videos on it and maybe some flash but needs to have hi def photos, the right text, list of my services, portfolio and the other usual stuff
Basically background like my logo (blue sky, clouds up top, open road in the middle) The site needs to get me some of my work rather than me chasing after it 100%
_________________ June 9 - Sept 3 - in boise idaho USA |
|||
| Top | |
|||
| XRFan101 |
|
|||
|
I might get some of the trim dream when i come up in a couple weeks man. ill let ya know in advance ne ways.
_________________
|
|||
| Top | |
|||
| baboon |
|
||
|
Cool, next couple of pays I'll contact you to purchase some trim dream diy.
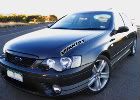
Finally got some time to take pics 1 week after the wax. There was dirt build up so I just quickly wiped with warm wet microfibre (MF) wipe then dried with a seperate MF wipe. Just caught some sunlight! All pics are of bonnet. You can see at these two angles the bonnet looks ok...  Funny how a camera angle and certain lighting angles make it look good.  Upon closer inspection, looks pretty bad. You can see the paint chips in this first pic. Most of them are at the front. I've heard they have problems with the paint on BA's with shockwave paint and had a recall. I think that might extend to narooma blue too!   Front on shot you can see speckles and chips.  Can you see the problems I've got? |
||
| Top | |
||
| Aurora 98 |
|
|||
|
Chips on the front bar and bottom of the hood can be dealt with some touch up paint or a specialist touch up guy (try superfinish express)
The swirls and scratches are far easier to sort out, it will just take plenty of TLC by hand or far less time and effort by using a random orbital machine or rotary (go for the RO as they are cheaper and cant damage the paint)
_________________ June 9 - Sept 3 - in boise idaho USA |
|||
| Top | |
|||
| MAD |
|
|||
|
Can you recommend some products and/or the process to wet sand paint with no clear coat?
I have a 97 EL Fairmont Ghia in White that has pretty bad orange peel on the doors that I'd like to knock back and smooth out. I am getting myself an RO soon with an 8mm orbit. Would this be enough to finish it off after the sanding? Or is rotary the only option? Also while I'm at it, what can be done for the rubbers around the rear window and rear quater windows on EF/EL's? |
|||
| Top | |
|||
| Aurora 98 |
|
|||
|
{USERNAME} wrote: Can you recommend some products and/or the process to wet sand paint with no clear coat? I have a 97 EL Fairmont Ghia in White that has pretty bad orange peel on the doors that I'd like to knock back and smooth out. I am getting myself an RO soon with an 8mm orbit. Would this be enough to finish it off after the sanding? Or is rotary the only option? Also while I'm at it, what can be done for the rubbers around the rear window and rear quater windows on EF/EL's? Sounds like your buying a Flex XC 3401 VRG RO, the only one I know with 8mm orbit orange peel can be reduced with unconventional methods and new technology and without removing paint but wet sanding is still the safest and quickest method The machine will definately take care of the sanding scratches Just keep an eye on paint film thickness - try 2500 and 3000 for a fairly long time instead of 1200 to 1500 papers. I'd say 2000 or 2500 and finish with 3000 will sort it out
_________________ June 9 - Sept 3 - in boise idaho USA |
|||
| Top | |
|||
| MAD |
|
|||
|
{USERNAME} wrote: Sounds like your buying a Flex XC 3401 VRG RO, the only one I know with 8mm orbit orange peel can be reduced with unconventional methods and new technology and without removing paint but wet sanding is still the safest and quickest method The machine will definately take care of the sanding scratches Just keep an eye on paint film thickness - try 2500 and 3000 for a fairly long time instead of 1200 to 1500 papers. I'd say 2000 or 2500 and finish with 3000 will sort it out Its actually a Kestrel DAS6. It's new to Aussie shores. What are these unconventional methods? I'm interested. Where do I get those grades of paper? Specialty painting store? I've never seen those grades. Will I be safe if I keep checking for when the peaks are level with the troughswith a light? I'd much prefer to spend more time with a finer paper than stuff it in a couple of minutes. Plus I figured I'd have to use a finer grade paper since I'd be using a DA to polish it afterwards. What sort of sanding block should I use? Hard, soft, medium? which on this topic, what polish would you recommend to finish it off? I'm going to get some doors from the wreckers or similar and practise on those before I take to my car. |
|||
| Top | |
|||
| Aurora 98 |
|
|||
|
I'm going to get some doors from the wreckers or similar and practise on those before I take to my car.[/quote]
oh yeah the Kestrel, very popular in the UK Well what I do to fix orange peel is to reflow the paint and also use a special molecular fusion product that melts dead paint molecules back to fresh paint, softens paint for easier paint correction and also reduces orange peel by fusing the hills and valleys together This however takes a little time and alot of skill with the proper pads from one manufacturer Your better off going the sanding paper route Either Meguiars Unigrit blocks and paper, SIA Air Velvet 3000 discs which you can use on your DA or 3M Imperial wet or dry or Trizact 2000, 2500 and 3000 papers with a 3M block (any body shop paint supplier should have what you need - go to spies hecker, standox, de beer australia etc and click on distributors - they should have that brand paint plus body shop supplies including papers, buff pads, ancillaries etc) make sure to use some car shampoo (soak your papers in shampoo and water for 30 mins) for lubrication. another tip is to have a hose with no nozzle slowly running over the panel as you sand to flush out the clearcoat and abrasive grit from the papers 25 to 30 double passes is pretty much the most you should do in one small area and always sand in one direction with one paper and the opposite direction with the next. so left to right with one and up and down with the next. heres a few links http://www.dupontpc.com.au/spieshecker/ ... on-network http://www.sia-abrasives.com/en/index.php
_________________ June 9 - Sept 3 - in boise idaho USA |
|||
| Top | |
|||
| Aurora 98 |
|
|||
|
To remove the sanding scratches, use your DA at high speed using a wool or heavy or medium foam cutting pad with any of these
Prima Cut or Swirl - swirl works with almost any pad from wool to finishing foam make sure you do use a 3000 paper or disc - it makes your scratch removal easier Other recommendations - Meguiars 105 Ultra cut, Meguiars Diamond Cut, Gtechniq P1 (hard to source and tricky to use for non pro's), Menzerna Powergloss and Powerfinish (either), 3M Extra cut compound, 3M perfect it II or III rubbing compound ( I dont like 3M personally but if thats all you can find then use it) these use kaolin clay abrasives I believe and are quite cakey/claggy so they can be a mess to use and hard to buff off if you splatter any around and forget to wipe up immediately) Any compound that is water based says it can remove 1000 to 1500 grit scratches (do not use farecla G3, T Cut or Max Cut compound as these contain a little filler and are like putting gravel on your paint) TIPS: make sure to fully break down the polish and move the DA machine slower over the paint than you would with a rotary - 1/2 an inch per second vs 1 inch to 2 inches per second Work a smaller area - 2 by 2 or 3 x 3 foot area - if you spread the abrasives out too far you weaken the correction ability Add water or Meguiars Final Inspection to the surface or pad if the compound dries up on you - it will reactivate the product in the pad. Slow down your speed from 5 to 4, 3, 2 and 1 once you achieve the scratch removal 4 pea sized drops for first application, after that 1 to 3 per area.
_________________ June 9 - Sept 3 - in boise idaho USA |
|||
| Top | |
|||
| Papa Smurf |
|
||
|
Matt, I may have fixed ONE problem so far. The spoiler, which looks crappy might just be getting replaced in the near future.
Attachment: 07102009020.jpg The only thing that bothers me know is that the paint on the right front bumper is cracking.. |
||
| Top | |
||
| Aurora 98 |
|
|||
|
Oh, that aint so good. by that do you mean a flex crackor clearcoat peeling off
_________________ June 9 - Sept 3 - in boise idaho USA |
|||
| Top | |
|||
| baboon |
|
||
|
Hello Aurora98,
The Australian dollar seems to be very close to 1 to 1 against the US dollar and with christmas coming up I've got the Makita 9227 on the wishlist. I've looked at prices on the internet and the best price looks to be about $US199 but delivery looks to be about $US90 to Australia. I was wondering if you knew of any suppliers in Australia for the 9227? Very interested! Thanks! Sorry ignore the above, I do it all the time, when I ask the question I find the answer straight after, http://www.justtools.com.au http://www.vektools.com.au http://www.gasweld.com.au http://www.powertoolspecialists.com.au http://www.makitafactoryoutlet.com (US based) |
||
| Top | |
||
| DaveXR8 |
|
||
|
Just make sure you buy one locally mate.
I almost made the mistake before as I was about to buy one from the US not knowing that the power outages are different I think i got mine for about $395
_________________ AU3 XR8 Manual, Full options,Pursuit Lip, Boss bonnet, Hurricane extractors, zorst, SS Induction, K&N filter, Flash tuned...191rwkw |
||
| Top | |
||
| baboon |
|
||
|
{USERNAME} wrote: Just make sure you buy one locally mate. I almost made the mistake before as I was about to buy one from the US not knowing that the power outages are different I think i got mine for about $395 Thank you DaveXR8! That is a very good point, didnt think of that! USA uses 110V AC and AUS uses 240V AC. http://www.powertoolspecialists.com.au/ ... ctsPage.do They have one on special for $369 at the moment and are in melbourne! 9227CB. Thanks again man. |
||
| Top | |
||
| Aurora 98 |
|
|||
|
Hello back
Sorry I have not replied sooner, been a crazy three days so far working on a Monaro GTS for a custom restoration shop who's had to repaint it three times and sanding it one day after painting Anyhow I agree with Dave, the US machines are 110V and have a 5/8ths thread not 14mm though I do use 5/8ths backing plates and use a 3M superbuff adaptor to use pads with them I have two of those machines and my first one cost me $360 but now they are anywhere from 360 to 420 depending on who you shop with
_________________ June 9 - Sept 3 - in boise idaho USA |
|||
| Top | |
|||
| Who is online |
|---|
Users browsing this forum: No registered users and 29 guests |

 -BF MKII XR6 Turbo in EGO-