|
| SWC |
|
||
|
{USERNAME} wrote: i ment using it as hair gel as Ben suggested.. i havnt touched fiberglass in years, but im ITCHING to try again Ha Ha Funny bugger |
||
| Top | |
||
| ausedwagon |
|
|||
|
well it cant be my old bush it didnt look that bad.
anyways i had a good trip good to see the photos up and ill be lowering my car more now. after i fix a few other things. good to meet you benj and everyone else i met at the meet
_________________ {DESCRIPTION} |
|||
| Top | |
|||
| BenJ |
|
||
|
I have been doing a bit of work here and there on the BA front bar.
This included envisaging the final look of the BA Front, BA SR side skirts, and the MMM rear. Blending together different products can either work well, or FAIL big time. After looking hard at the BA Front while sanding back the fibreglass on the top I decided the join gap between the bottom lip and the main part of the bar needed to be filled in. To begin with I did a couple of photoshops to see how this would look. Before  After  Before  After  I liked how this created a more cohesive, less fussy look, and that would work well with the smoother MMM rear bar. I spoke to SWC about it and he said to bring with me on my next visit and he would fill it with fibreglass bog filler, which he did. I then sanded it down when I got home. 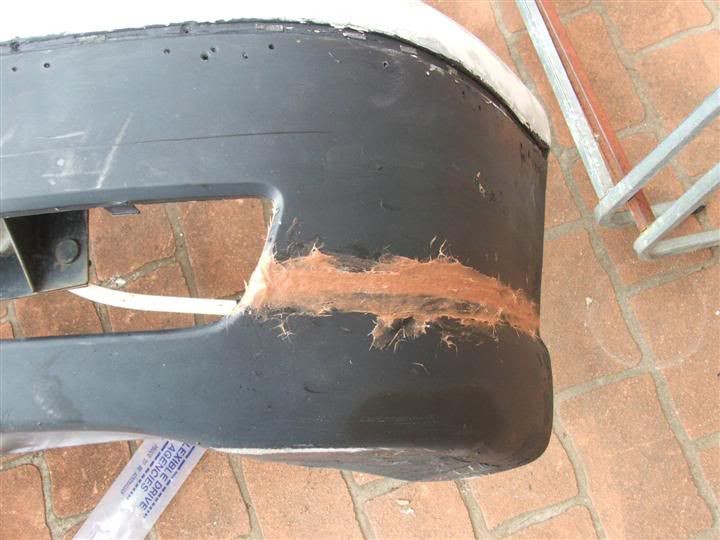 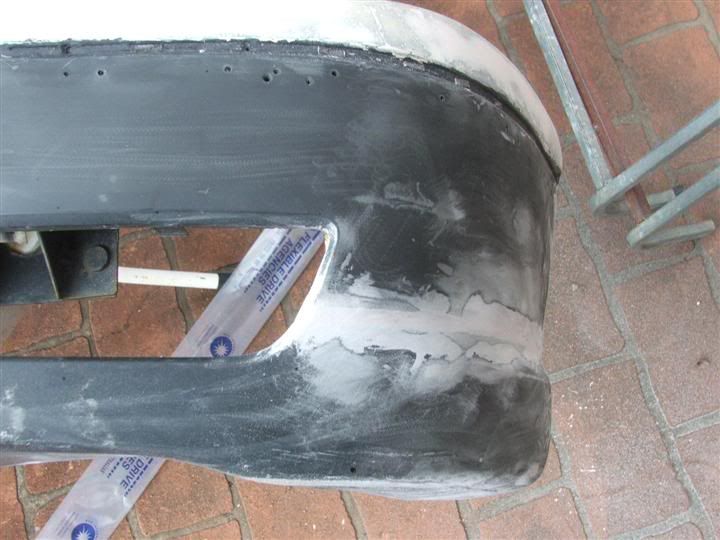 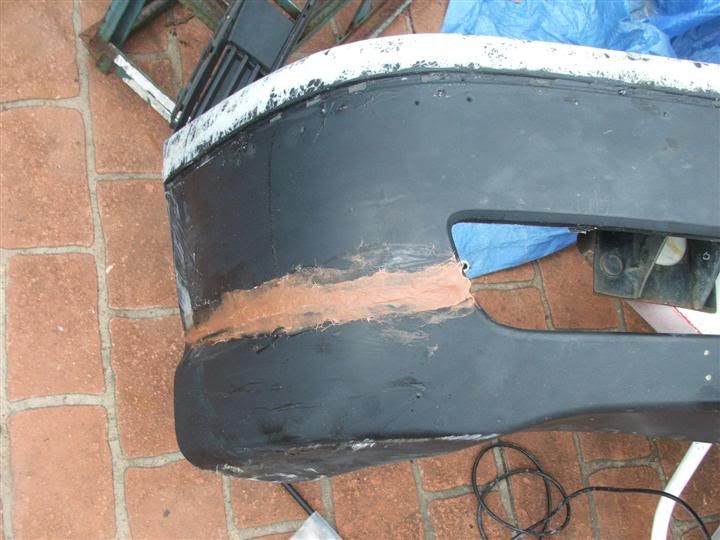 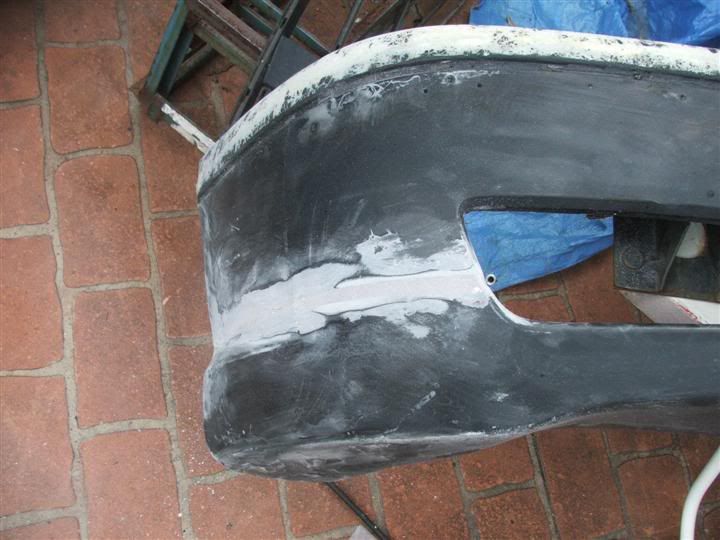 Looks a bit like a cross between a BA and a BF bar now. My main reason to visit SWC, was to work on the MMM rear bar. The MMM bar is a 3/4 add on and hangs from the groove in the EB bar below the strip. It was too wide, and needed to be tucked in all the way around as it sat approx 10mm out from the rear bar. SWC had already cut it in half through the middle so we could get one side right before duplicating the work on the other. After much cutting, grinding, test fitting and removal, we got the left side to the point we were both happy with it. There was A LOT of fibreglass dust floating around. I thought I was in a snow globe for a while there LOL. As a result of the tucking in work, SWC will now need to section the left and right sides, as the bar now sits 8mm to far in the wheel well. It would appear the original work done to lengthen the MMM sedan bar to fit the wagon bar, was a bit rough and ready, but with SWC on the job, and his high level of expectation and workmanship it is coming together really well. I will get some pics of it all on the weekend. Cheers BenJ
_________________ {DESCRIPTION} - Current Ride |
||
| Top | |
||
| ToranaGuy |
|
|||
|
Looking good BenJ.
Cheers ToranaGuy
_________________ I am the ToranaGuy!|74 Lh Torana Turbo|78 Hz PanelVan|86 Mighty Boy Ute|93 EB2 Ghia,GT Mockup,5spd,LPGI,Full Leather|2 x EB Xr8 5spd's|{DESCRIPTION}|{DESCRIPTION}|{DESCRIPTION}| |
|||
| Top | |
|||
| DA22LE |
|
|||
|
{USERNAME} wrote: Looking good BenJ. Cheers ToranaGuy +1 Flush door handles are over-rated....hahahaha Why dont you get rid of them alltogether??? Now that would be cool. What are you going to do with your old handles? I was contemplating going with a falcon handle. Might stick with my chrome ones i have (yet to fit)..... Catch you on friday hopefully Cheers Daz
_________________ BA XR8 Boss 260 |
|||
| Top | |
|||
| BenJ |
|
||
|
Got a bit of motivation last week.
I did this mod on my Red EB Sedan, and it was one of the first mods I attempted to do on the Wagon, well over a year ago now, but gave up on it quickly due to the position of the LPG gas filler. I am of course yapping on about the flush fuel flap mod. For those that don't know, EA-ED Sedans and Wagons and EF and EL1 Wagons have a fuel flap made of plastic with a raised section designed for your finger to pull open the flap. This is necessary on the early EA-ED base model cars as they did not have a remote fuel flap release fitted. The Fairmonts and Fairlanes however did, the finger pull was not needed. With the introduction of the EF sedan the fuel flap was made of metal and the finger pull was deleted leaving a nice clean flat fuel flap. The wagons however, being the same as the early cars in the back end, still had the old plastic fuel flap with the finger pull. The EF/EL sedan fuel flap is NOT a direct bolt in to an EA-ED sedan or wagon. It is however possible to swap the hinge from the EA-ED plastic flap, and install it on the EF/EL sedan metal flap, mod the catch and give you that nice smooth clean look. An even easier method is to locate the fuel flap from an EL11 Wagon, as these cars have the smooth metal flap with the early type hinge already installed from factory. These DO bolt straight in, making things much easier. These EL11 flaps however, don't have the mounting bracket for the Fuel Flap Ajar sensor. Now the history lesson is over, and you are realising the amount of trivial E Series crap floating through the large expanse between my ears, it is time go get on with some pics etc. Seeing as I needed the Fuel Flap Door Ajar sensor, I chose to mod a EL sedan flap and install an EB hinge with the required mounting bracket. On the left is the modded EL metal flap, and on the right the EB plastic flap. 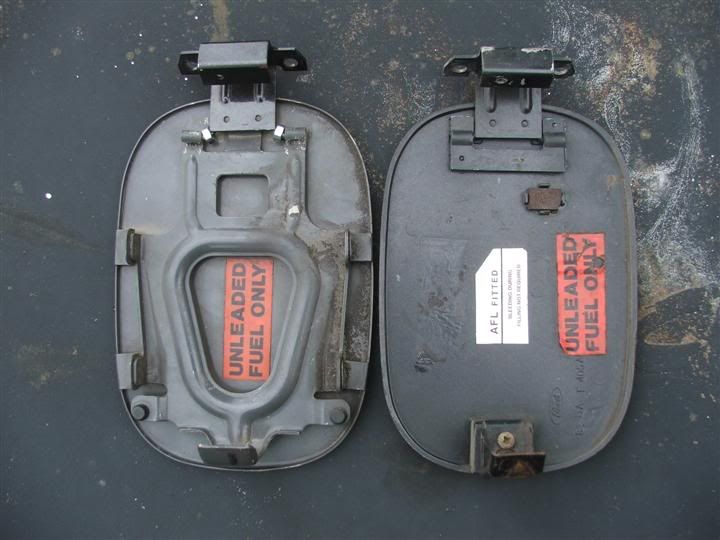 You can see how I have used some small nuts as spacers to centre the EB hinge on the EL flap. To fit the EB Hinge you need to open up the rolled ends, remove the EL hinge, insert EB hinge, and the close the rolled ends back up. As they are metal, this takes a bit of effort and care. This picture highlights how far the EL support bracket intrudes into the fuel cavity compared to the the EB flap. 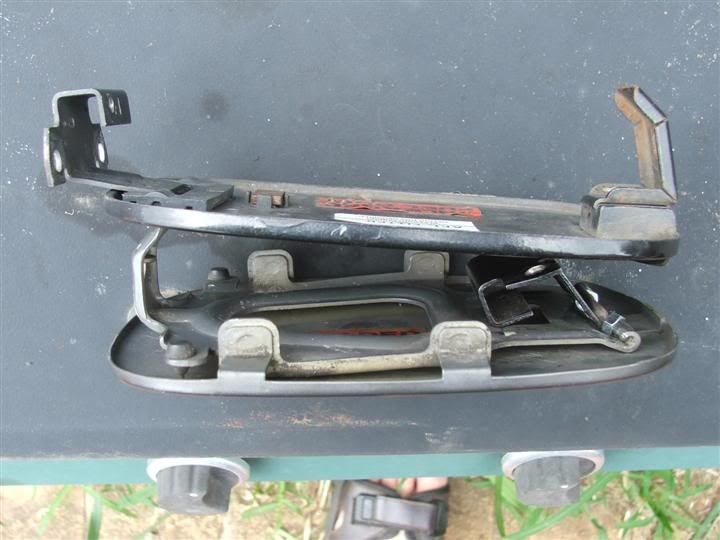 On most cars, this is not a problem, and the EL flap will fit without any issues. On my Wagon however, the LPG Fuel Filler is located very close to the edge of the filler cavity. 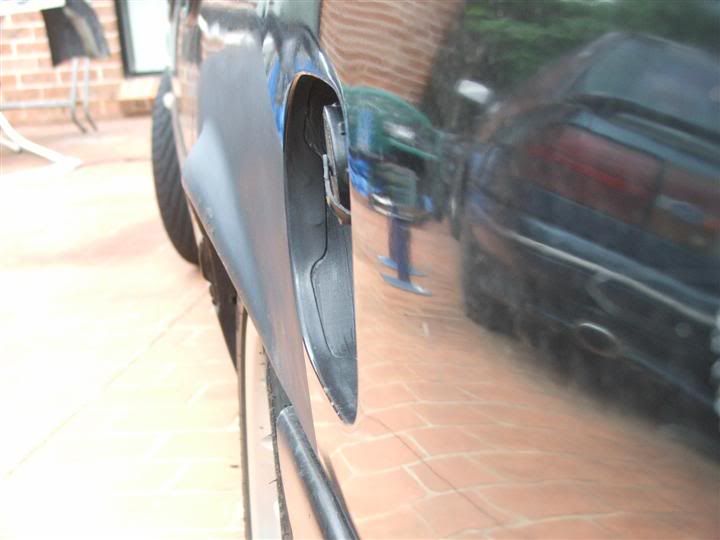 There was no way the EL Flap was going to close. This just gave me a good excuse to break out the Dremel and some cutting discs. I marked up the inside of the flap and got to work. 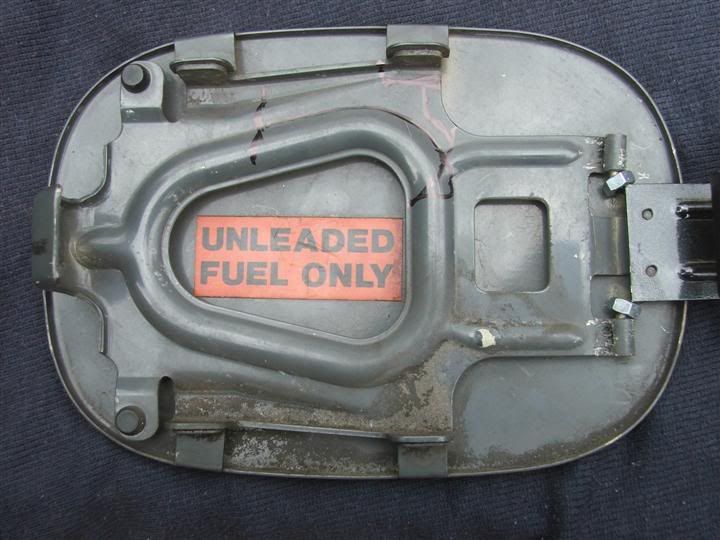 After many trial fits, and several cutting sessions, I ended up with this.  I modded the catch assembly to work with the EB Fuel Flap release solenoid.  And was finally able to close the EL Flap. 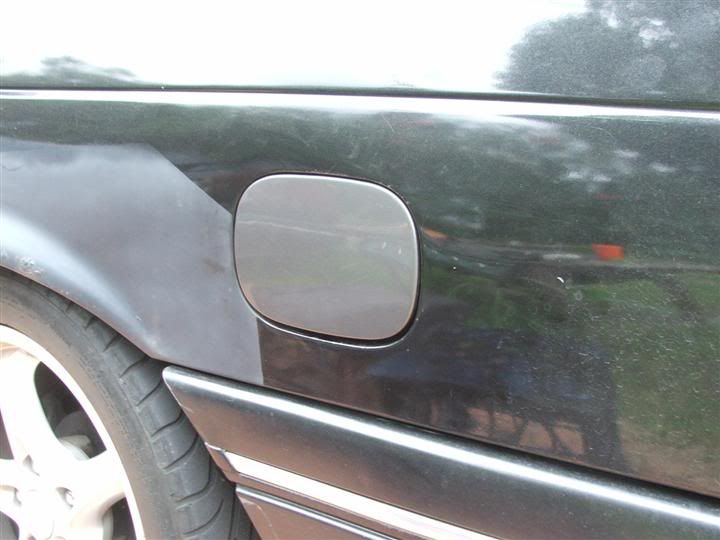 At this stage I continued on with some more adjustment to keep the gap lines equal. When I was satisfied, I sanded, primed and painted the fuel flap in Black Pearl. Here are some before and after comparison pics.  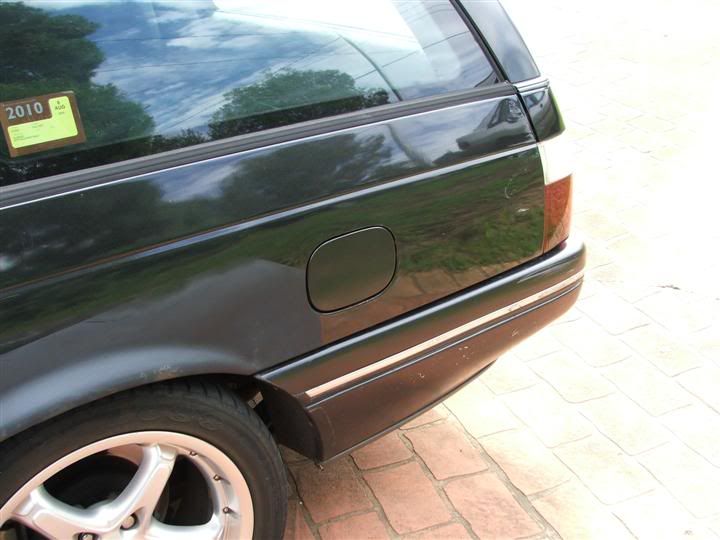 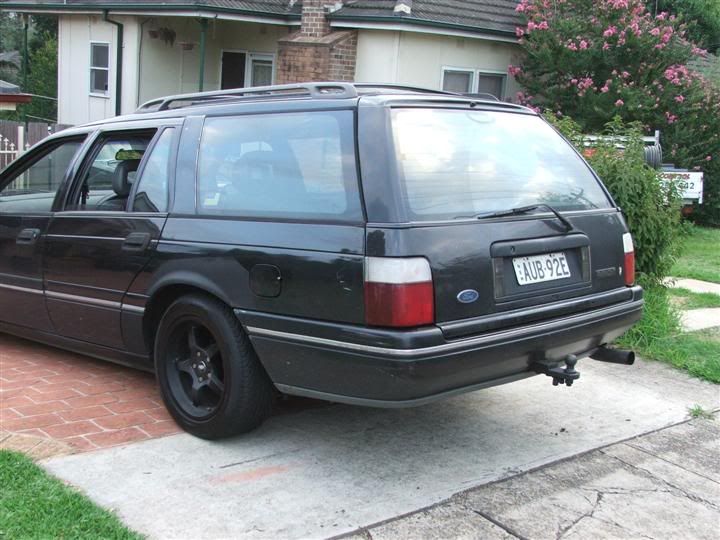 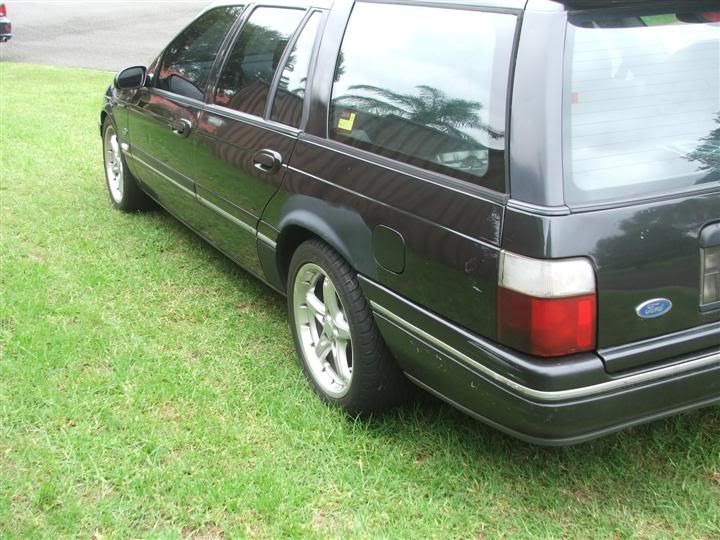 I am yet to clear coat the EL flap as I still want to play with the adjustment. While the final result of this mod is not dramatic, it does clean up the left rear quarter. When the rust in the wheel arch is repaired and I can paint the quarter, the finished result will be worth it. Cheers BenJ
_________________ {DESCRIPTION} - Current Ride |
||
| Top | |
||
| XR-Lane |
|
|||
|
Looks good Ben
|
|||
| Top | |
|||
| ToranaGuy |
|
|||
|
That does indeed clean up the rear quarter. It's all the subtle little mods like this that add up to an awsome custom wagon! I think i may have to look into this mod for my car's now.....
Cheers ToranaGuy
_________________ I am the ToranaGuy!|74 Lh Torana Turbo|78 Hz PanelVan|86 Mighty Boy Ute|93 EB2 Ghia,GT Mockup,5spd,LPGI,Full Leather|2 x EB Xr8 5spd's|{DESCRIPTION}|{DESCRIPTION}|{DESCRIPTION}| |
|||
| Top | |
|||
| KWIKXR |
|
|||
|
It's amazing how subtle mods can clean up the whole look of the car. Nice work BenJ
I must say, that second to last picture of the wagon with the black rim on the back looks pretty cool. I reckon black rims would look tough on the wagon |
|||
| Top | |
|||
| Esteven8 |
|
|||
|
_________________ {USERNAME} wrote: Cheap pads squeal like cheap hookers, and you can take that to the bank. {DESCRIPTION} {DESCRIPTION} |
|||
| Top | |
|||
| BenJ |
|
||
|
As indicated previously, I have been at SWCs helping (mostly watching LOL) him work on the rear MMM bar.
I thought I would post up some of the process involved in customising a bar to fit where it wasn't intended to be. As a reminder, this rear bar is a MMM Sedan rear bar. This creates a few issues when trying to fit it to a Wagon bar. The main ones are that the left and right sides are longer on the Wagon, and the curves from the side to the back are sharper on the Wagon compared to the sedan. And, the work done on this bar by the previous owners who did the original stretch made things harder. Part of the tucking in process involved grinding out excess thickness of the fibre glass. This results in quite a dust cloud and it covers everything. Here is a pic that shows this. 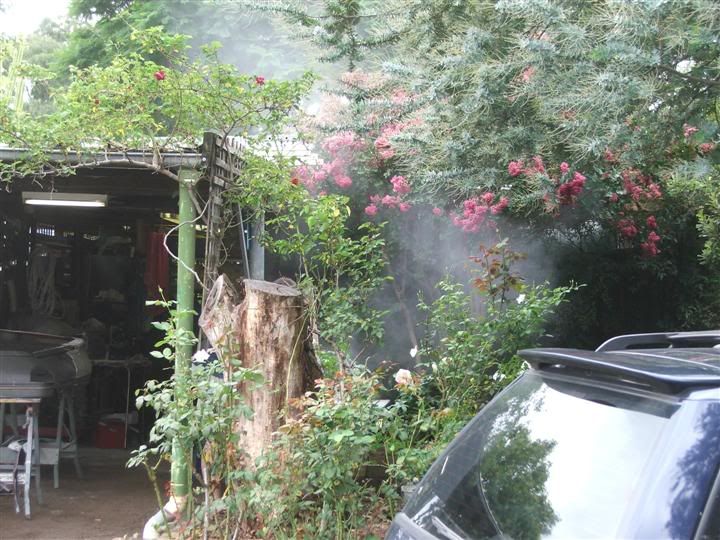 SWC is in there somewhere LOL. The following shots show the bar tech screwed into place with tolerances of approx 4mm protrudence from around the top. The bar was cut into two pieces so it could be narrowed. 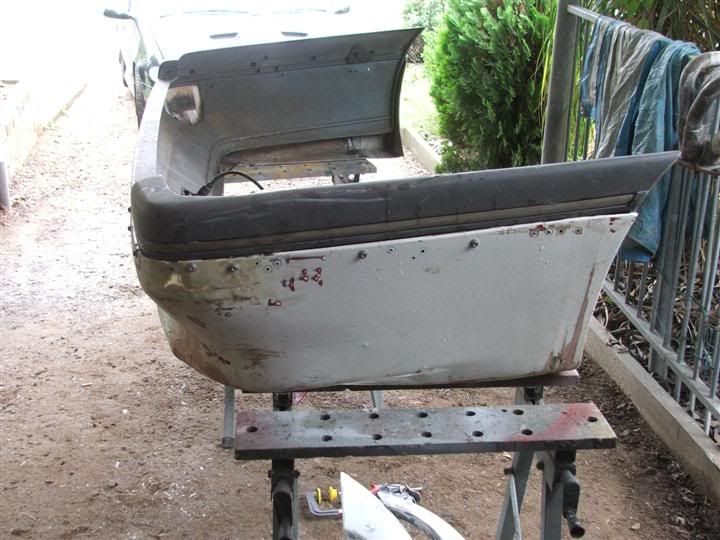 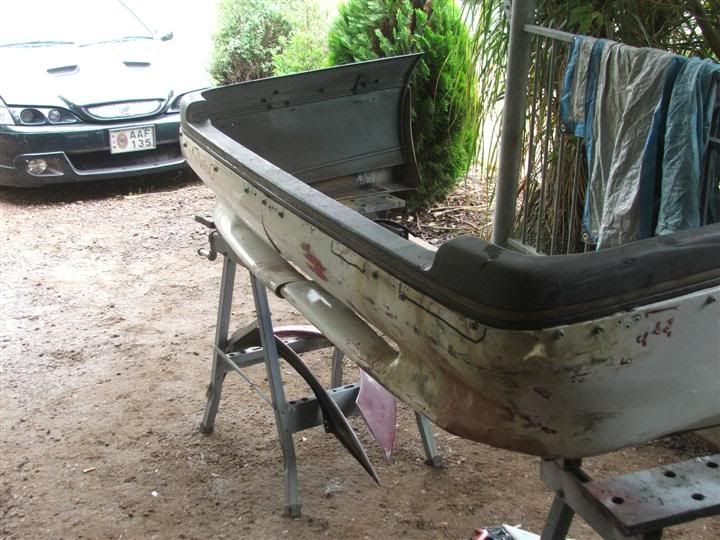 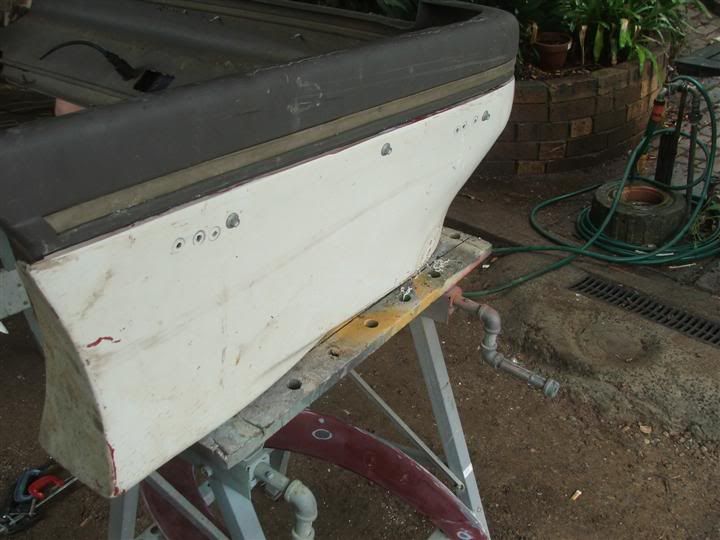 As the corners of the EB Wagon bar are sharper than the Sedan bar the corners were cut out to allow better fitment. 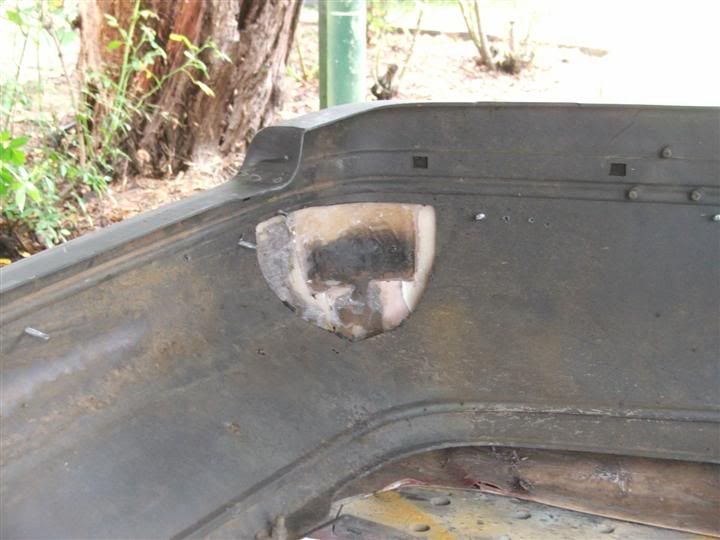 In this photo the bar is upside down, but gives a good indication of how far the bottom of the MMM bar will hang below the factory EB bar. 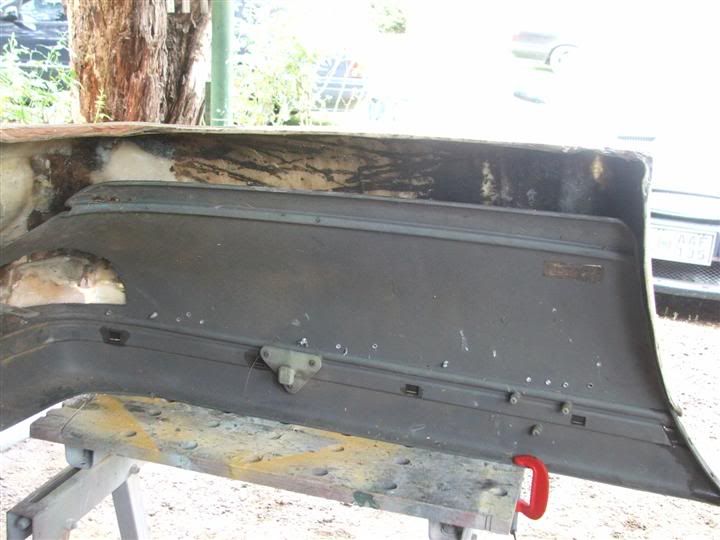 This photo indicates how far we tucked in the bar along the back, pushing the wheel arch around 8mm to far in to the wheel area. 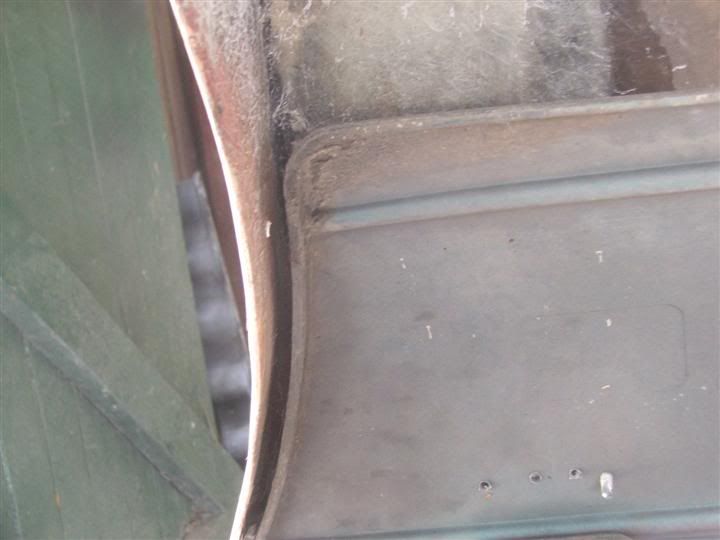 As the sides of the bar now needed shortening, I suggested flush mounting the MMM bar into the wheel arch, instead of having a step that a normal 3/4 bar would have. As the MMM bar will become one piece with the EB bar this is possible. Cutting off the end of the MMM bar. 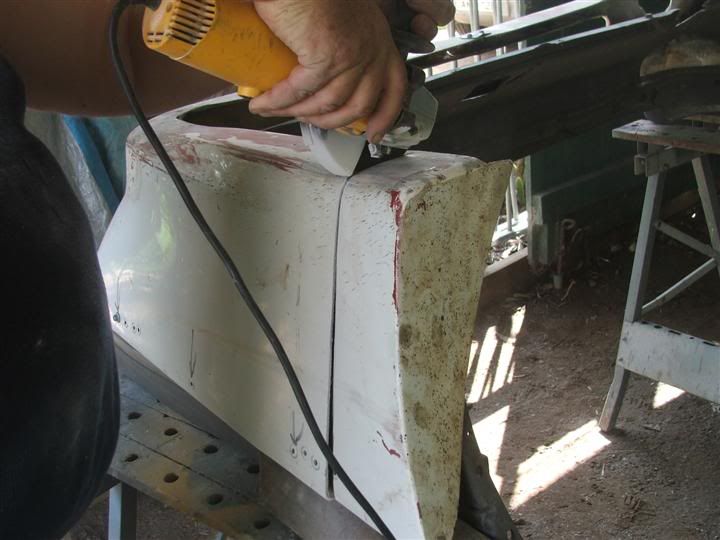 The EB bar recessed. 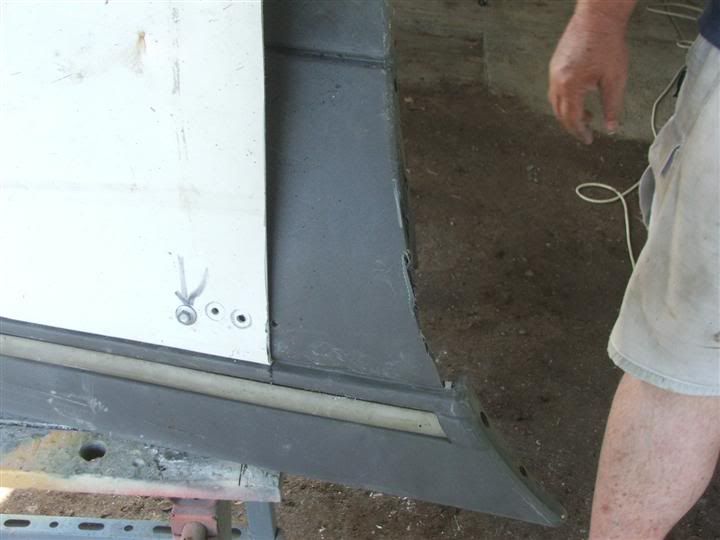 Trimming the off cut. 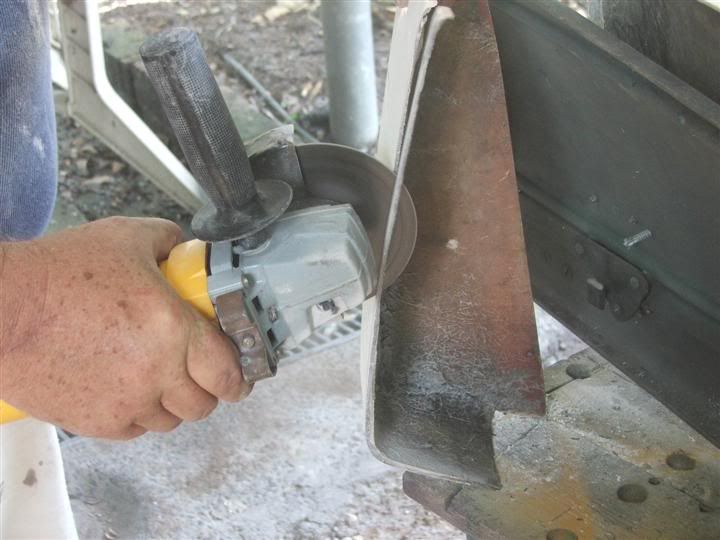 The end placed back into position. PERFECT!!!!  The other side received the same treatment. 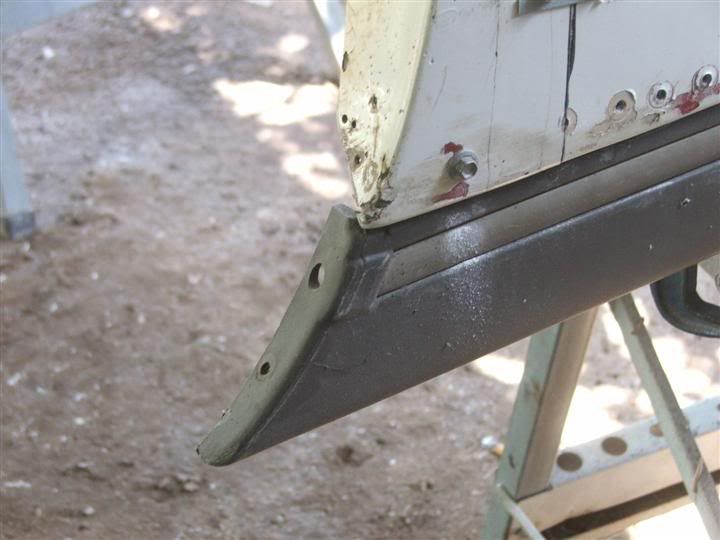 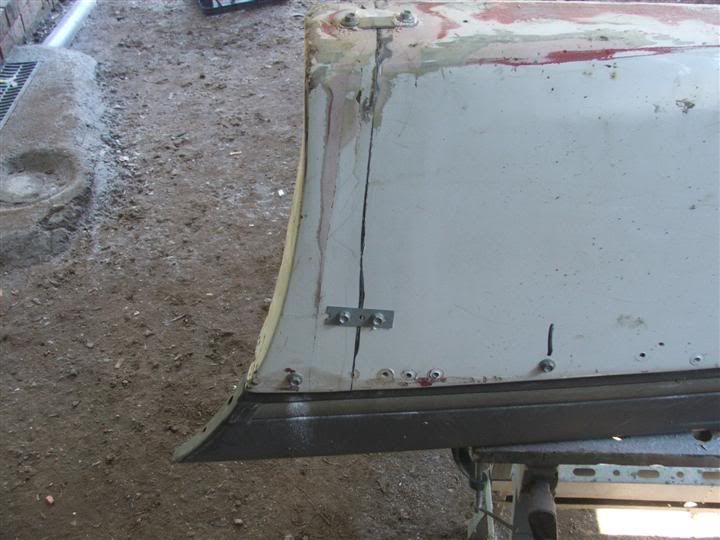 SWC also cut out the Exhaust Hole. 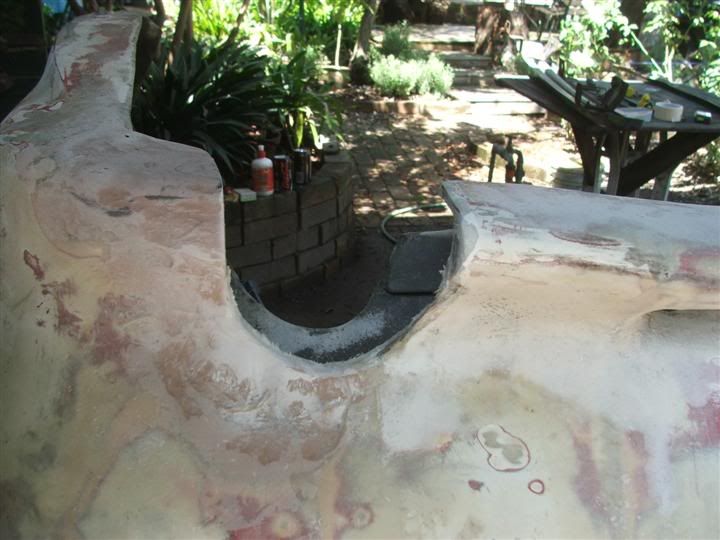 He may need to repeat that last trick after what I found at Pick N Payless. We also glued a rebar into the EB bumper. The mounts had long ago broken off, so using a good adhesive is the only good option. During the week, SWC has fibre glassed most of the bar back together. The next step will be a trial fit. Hopefully, you now have a bit of an insight into what is involved in this sort of process. It is a lot of work, and I am a lucky guy to have a such a skilled and good friend like SWC. Cheers Mate!!! BenJ
_________________ {DESCRIPTION} - Current Ride |
||
| Top | |
||
| ToranaGuy |
|
|||
|
WOW! That's some serious modding going on there, i'm sure the results will look stunning!
Great work SWC & BenJ. Cheers ToranaGuy
_________________ I am the ToranaGuy!|74 Lh Torana Turbo|78 Hz PanelVan|86 Mighty Boy Ute|93 EB2 Ghia,GT Mockup,5spd,LPGI,Full Leather|2 x EB Xr8 5spd's|{DESCRIPTION}|{DESCRIPTION}|{DESCRIPTION}| |
|||
| Top | |
|||
| StrawbZ |
|
|||
|
Always doing great stuff BenJ, keep it up
|
|||
| Top | |
|||
| XR-Lane |
|
|||
|
Looks great Ben. A credit to SWC for his work, by the way that first pic of the fiber glass dust. I like the view in your yard SWC, looks secluded
Whens your all ford day Ben? You going to have the bars ready and painted for AFD? Cheers |
|||
| Top | |
|||
| BenJ |
|
||
|
Hey XR-Lane.
Our All Ford Day is in July, so you never know, I might have them done by then. ******************************************************************* OK, so where to begin. Hmmmmmm. Well, after the clutch cable was replaced, Snap was up for the weekend, and decided to make a saftey line for the Rubber Dampener so that if the cable failed again in the future at least the dampener would not get lost like the last one. He drilled a small hole through the rubber from the back through to the hole in the metal and then using some fine tie wire made the saftey line which was attached to an earth cable from the gearbox to the chassis. 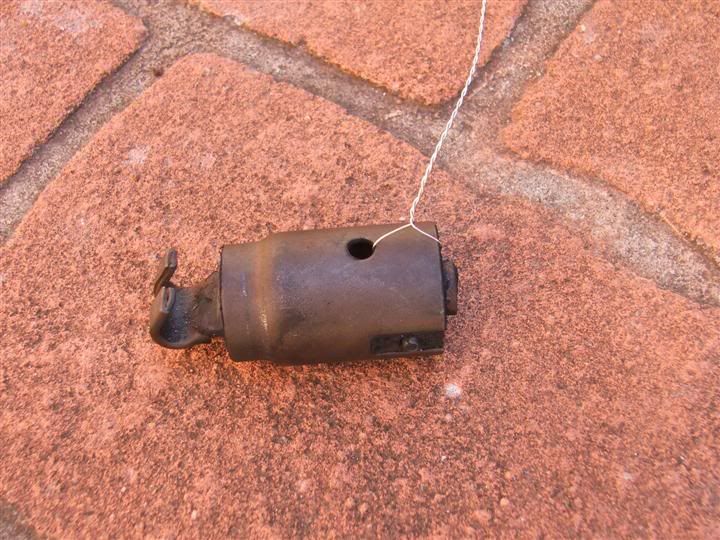 When installing the dampener back in we discovered a little problem. The clutch fork seemed to have a lot of movement. Hmmmm. Closer inspection also revealed that the thrust bearing was no longer attached to the clutch fork, and we decided that the other end of the clutch fork must have come adrift from the pivot bolt. GROAN!!!!!!!! After much discussion, it was decided that the T5 would have to come out to fully examine the extent of the problem. But, before I went ahead and did that, I would need to acquire the following spare parts in case of damage. Thrust Bearing - must have Clutch Fork Pivot Bolt Snap attempted to restrict the lateral movement of the clutch fork with the use of some more tie wire, but this only lasted a couple of days. There was a lot of variance in the movement and travel of the clutch, which resulted in very inconsistent pedal feel, and on occassion was bad enough to not release the clutch plate enough to easily select gears. Snap suggested that as I would be pulling it all out anyway, I may as well install a new clutch kit. I agreed, as this would also include a new thrust bearing, which I needed anyway. A bit of hunting around found a clutch fork with pivot bolt, which XPFalcon170 agreed to part with. Thanks Cous!! Due to work and family commitments, I had to wait until last Saturday to pull the T5 out. I borrowed a trolley jack off RaceDirector (cheers bud) as there was no way I was going to attempt this with just a scissor jack! I got the car up on ramps and stands and got to work. Had fun getting to the top bellhousing bolts, and in the end had to lift the front of the engine up to tilt the back down to make the necessary room to get the uni joint and socket on the bolts. Oh, and the idiot that designed the starter motor mount bolts needs speaking too. GRRRRRRR. A few hours later, I had the box out and bell housing off and was able to look for issues. Here is what I found. The thrust bearing retainer clip was sitting on the input shaft and the bearing was only loosley being held together. 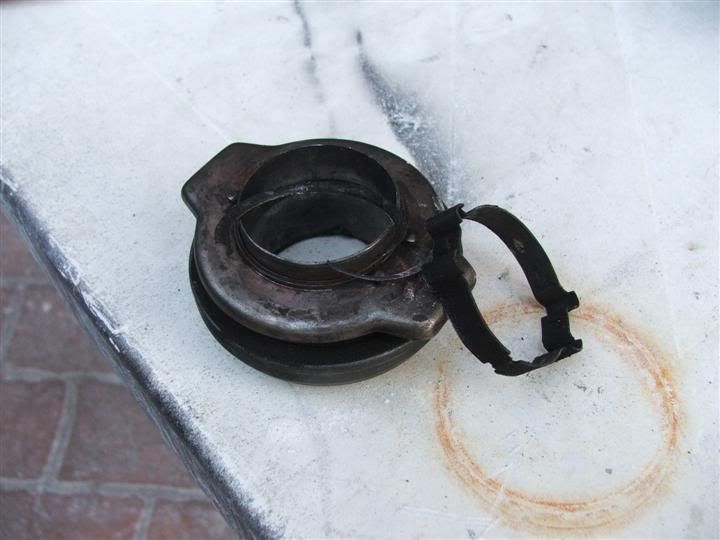 As the thrust bearing plate was rotating around the clutch fork bearing retaining tangs were pressing on the incorrect surfaces, the top tang was a little worse for wear. 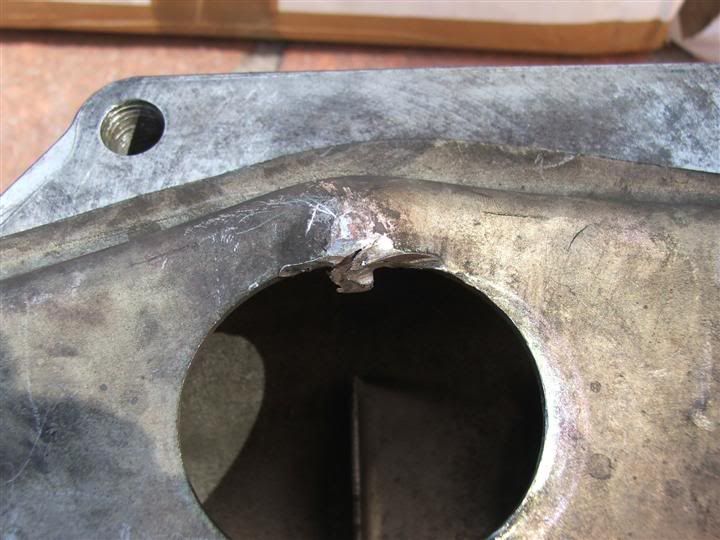 The Pivot bolt was still in place but the fork is able to be pulled away with no effort at all, and there appears to be some wear in the aluminium where the fork pivots on. 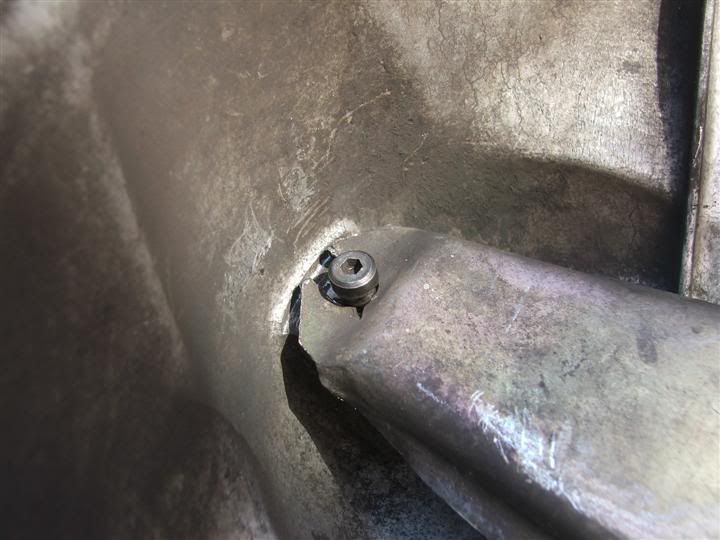 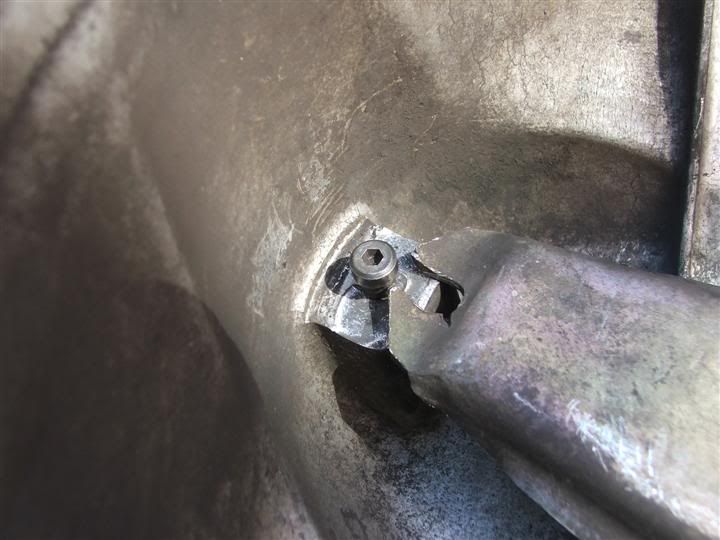 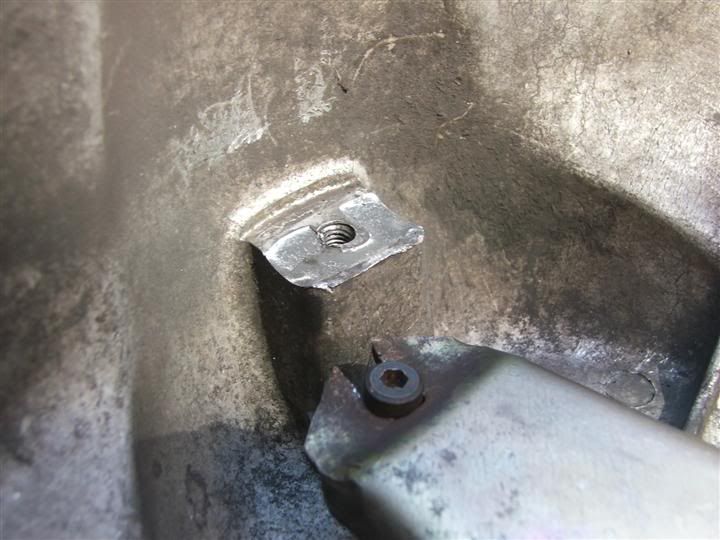 Closer inspection of the spare clutch fork and pivot bolt revealed a metal plate on the pivot bolt that I did not have in my original assembly. This pivot bolt also does not pull away from the clutch fork with out a lot of effort. I decided not to try too hard and left it there. 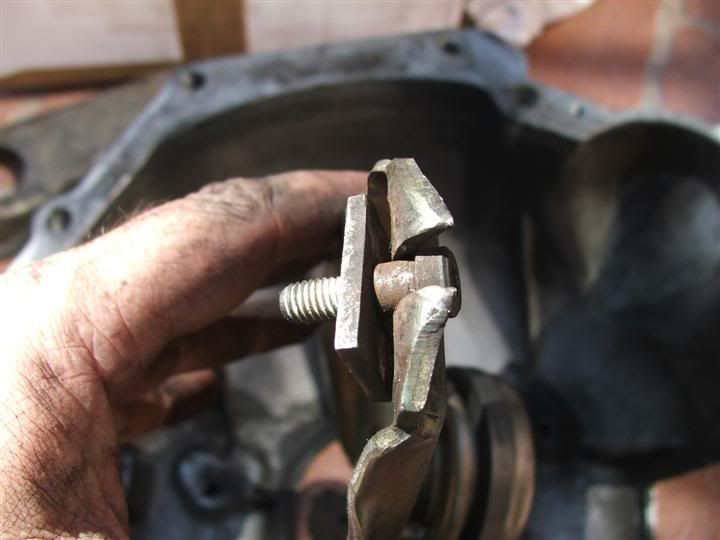 In addition, the rubber dampener on the spare clutch fork already was designed not to be removed or fall out, so I left this in place as well. 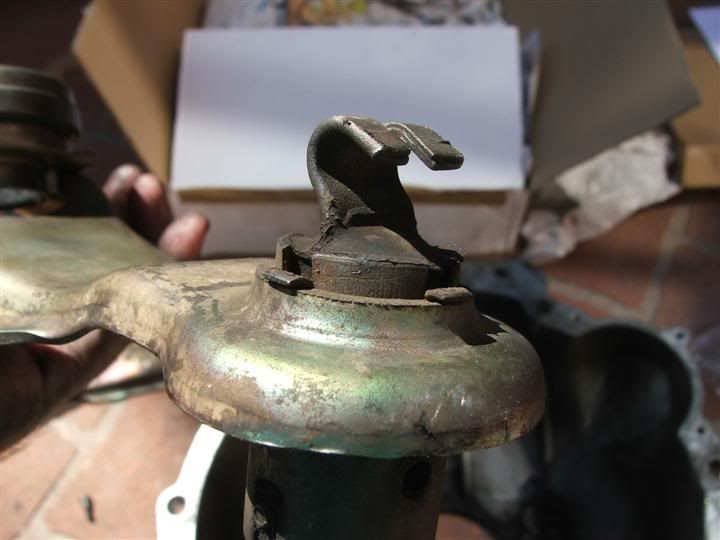 I installed the new thrust bearing to the spare clutch fork and assembled it all in the bellhousing. 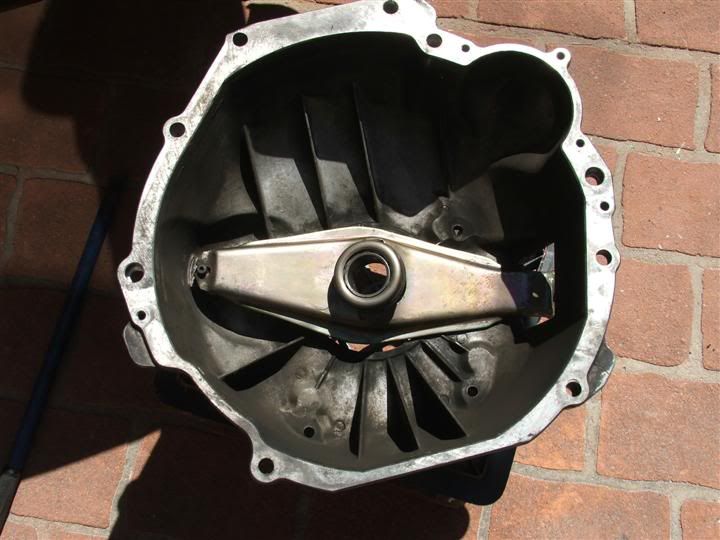 It had been suggested to me that I should have the flywheel machined, but a lack of funds and transport meant I was not able to. However, as the flywheel had been machined approx 14 months ago when I did the initial conversion, I doubted it would need it again. I took this pic of the flywheel. You can still see the machining marks and it appears to be in great condition. 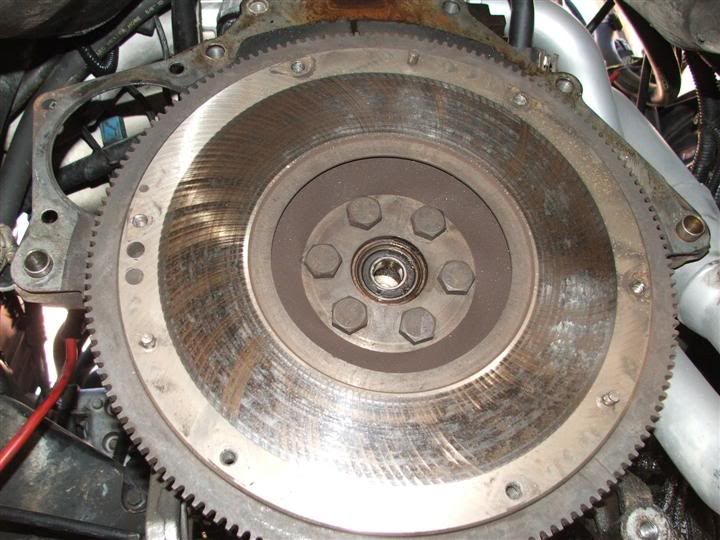 I reassembled the whole lot, and as I was lucky enough to borrow a T5 Clutch Alignment tool (TA EVL098), didn't have a lot of difficulty getting the box back in. I got it in most of the way, and then got LP_ to disengage the clutch for it to slide home. When it was back on the ground, I tested the clutch pedal feel, and it is a whole lot lighter than before. The new clutch kit is a Valeo Std HD item. It has 20% more clamping pressure than a std replacement clutch, but without the heavy pedal feel usually associated with HD clutches. I started the car, only to be greeted with an odd scraping noise. NOOOOOOOOOOOOO!!!!!!! Turned the car off straight away. Started it back up again, and the noise returned. Pressed the clutch in and out a few times, with no change in the noise. Gave the engine a rev and the noise changed with the speed of the engine, but not with the use of the clutch. Seeing as I was buggered, and well beyond clear thinking for the day. I turned it off and decided to sleep on it. Over the next day and a bit, I applied a bit of lateral thinking and delved into the mechanical construction of the clutch assembly and developed a viable theory as to the cause of the noise. I tested this theory out on a couple of friends and they concurred with my assessment. So, on Monday after work, I jacked the front of the car back up and tested my theory. This is what I found.  See the shiney bits at the top edges of the dust shield where it would go around the bottom of the crank? Well it was rubbing on the back of the crank. When I was installing the dust shield, the top bolt near the extractors was a b**ch to get at so I slid the the bell housing back approx 10mm to get better access. Then when the dust shield was done up, I pushed the bell housing back into place and tightened it down. What this did was bow the dust shield slightly towards the back of the crank causing it to rub slightly. By removing the dust shield and reinstalling it with the bell housing in place, the top edge of the dust shield was able to sit on the correct side of the lower edge of the top plate. Problem fixed. Very relieved it was not clutch or box related. PHEW!!!! The Wagon drives great now, and I am looking forward to a few years of clutch free issues. I must give LP_ a big thanks for all his help on the day. Cheers Mate!!!!! Cheers BenJ
_________________ {DESCRIPTION} - Current Ride |
||
| Top | |
||
| Who is online |
|---|
Users browsing this forum: No registered users and 14 guests |


