Fordmods Logo

How to change the colour of your instrument lights. EF/L/AU 


Page 1 of 1 [ 6 posts ] 

 
 Post subject: How to change the colour of your instrument lights. EF/L/AU
Posted: Fri Mar 16, 2012 10:06 am 
Getting Side Ways
Offline
User avatar

Age: 45

Posts: 841

Joined: 20th Feb 2010

Gallery: 2 images

Ride: AU Fairmont Ghia

Location: Elizibif Norf (Local Spelling!!)
SA, Australia

Hi All,
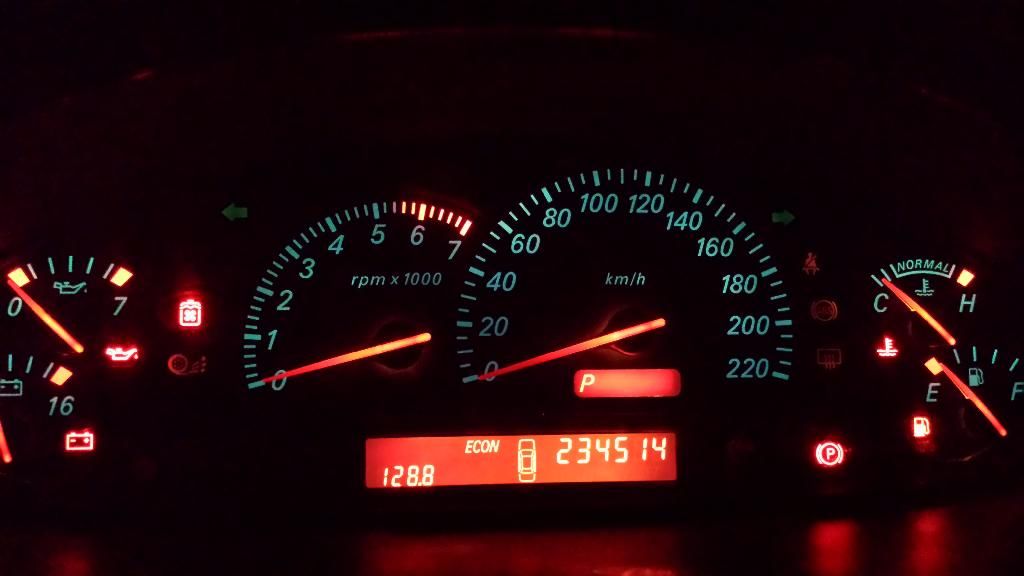
After receiving some interest in how I changed the lighting in my instrument cluster I have put together a 'How to'. I have included a lot of pics and have started it from removing the cluster from the dash for those who are unsure of how to do this.
Tools and equipment needed: 2x Phillips (Star) screwdrivers - Long and stubby, 1x flat blade screwdriver, Long nose pliers (to help with changing any blown globes), 1x can of spray adhesive, cellophane in the colour of choice, 1x scalpel/stanley knife, scissors, 1x fork.
Method, Part 1:
First of all we need to get the cluster out. To do this you will have to lower the steering column, then put the gear selector in 1st (Auto) and then remove the ashtray. You'll see a hole on the left of where the ashtray goes.
Attachment:
SANY0235.jpg
SANY0235.jpg [ 86.74 KiB | Viewed 397 times ]
Remove the screw in there and, reaching behind the ashtray, gently pull the whole unit out towards you lifting it up until you can get it out over the stereo.Unplug the connectors for the cig lighter and ashtray light and put the unit aside. You will then see 3 phillips head screws that secure the dash fascia, remove these. There are also 2 more beside the steering column and another 3 above the cluster and, depending on if the fascia has been out before, 2 clips near the demist button/clock. Remove all the screws and gently pull the fascia away, removing and noting where all the switch etc connectors go. (Note: the A/C unit stays where it is, there is no need to remove anything on it for this mod)
You should then see this:
Attachment:
SANY0236.jpg
SANY0236.jpg [ 96.95 KiB | Viewed 410 times ]
Remove the 4 screws at each corner of the cluster. (Note: Take care with the 2 on the right hand side. If you drop these in the dash you will have a hell of a time finding them again. I have 3 or 4 floating around mine. :oops: ) To remove the cluster I find it’s easier to remove the 2 connectors on the bottom (Low and Mid series, 3 on high series) first. Then ease the right hand side out, then the left and finally tilt the cluster forward and out behind the steering wheel towards the center of the car. You'll then have this..
Attachment:
SANY0219.jpg
SANY0219.jpg [ 103.36 KiB | Viewed 352 times ]
Attachment:
SANY0220.jpg
SANY0220.jpg [ 99.22 KiB | Viewed 427 times ]

Next we need to get the instrument cards out. Undo the flathead 2 screws on the top of the cluster and using the flathead screwdriver carefully ease the clips (Be careful!! These will break very easily) up and remove the cover. The instrument surround will just lift off. (Good time to paint it!! :) ) You will then see this.
Attachment:
SANY0222.jpg
SANY0222.jpg [ 106.99 KiB | Viewed 392 times ]

(And yes, I am aware these are 3 different clusters! :))


_________________

dc_todd wrote:
Cheap pads squeal like cheap hookers, and you can take that to the bank.


Au Fairmont Ghia
My (Old) 95 EF Wagon

Last edited by Esteven8 on Fri Mar 07, 2014 11:32 pm, edited 1 time in total.

Top
 Profile  
 
 
 Post subject: Re: How to change the colour of your instrument lights. EF/L
Posted: Fri Mar 16, 2012 10:17 am 
Getting Side Ways
Offline
User avatar

Age: 45

Posts: 841

Joined: 20th Feb 2010

Gallery: 2 images

Ride: AU Fairmont Ghia

Location: Elizibif Norf (Local Spelling!!)
SA, Australia

Method, part2:
Now we can remove the needles. First take note of where they are pointing. Using a fork gently ease each needle off.
Attachment:
SANY0223.jpg
SANY0223.jpg [ 67.31 KiB | Viewed 408 times ]
You can now remove the cards.
The next step is applying the cellophane to the back of the cards..
Pretty much exactly as it sounds, cut it roughly to size, spray the back of the card with adhesive ( I found this one from Bunnings worked well)
Attachment:
SANY0226.jpg
SANY0226.jpg [ 70.47 KiB | Viewed 385 times ]
and lay the cellophane on it then smooth out any bubbles.
Attachment:
SANY0227.jpg
SANY0227.jpg [ 79.24 KiB | Viewed 382 times ]
You’ll need several layers (I have 4, but I could have gone a little darker). Now it’s time to cut out the warning light and redline segments, easiest way is to put the card up against a sunlit window as this shows up exactly where you need to cut.
Attachment:
SANY0229.jpg
SANY0229.jpg [ 67.06 KiB | Viewed 399 times ]
Best to do this before the adhesive cures, so only do 1 card at a time otherwise it’s a real pain to get the pieces out.
Now it’s just a case of reassembly and getting it back in the car. However there are a couple of thing I do before it all gets finished. First off I leave the cluster cover off and make sure there aren’t any blown globes.
Attachment:
SANY0237.jpg
SANY0237.jpg [ 92.23 KiB | Viewed 381 times ]
Much easier to find out now than at night. Also before I put the dash fascia back on I check to make sure the trip computer works, mine is a GLi and every now and again the data line comes loose. Also when I put the cluster back in I find it easier to put the 2 right hand screws into the tabs on the side of the cluster while it’s sitting behind the steering wheel so they (hopefully) won’t drop into the dash. And lastly, I don’t use LEDs in this conversion for the main lighting, I’ve not yet found any that give an even enough light spread. However I have found them useful for the indicator and econ jewels. But I wouldn’t use one for the high beam jewel as it can be a little too bright on a dark night.
Also – Don’t forget the trans is in 1st!!! The first time I had the cluster out I forgot and freaked when the car wouldn’t start after I’d put it all back in!! :oops:
Hopefully this has been fairly clear and easy to follow, if anyone has any questions or feedback, please feel free to contact me.


_________________

dc_todd wrote:
Cheap pads squeal like cheap hookers, and you can take that to the bank.


Au Fairmont Ghia
My (Old) 95 EF Wagon

Top
 Profile  
 
 
 Post subject: Re: How to change the colour of your instrument lights. EF/L
Posted: Fri Mar 16, 2012 6:02 pm 
Getting Side Ways
Offline

Posts: 5503

Joined: 20th May 2005

Gallery: 11 images

Ride: EB1 Fairmont Ghia T5 Wagon

Location: Seven Hills, Sydney
NSW, Australia

I like it!

Well done.

I assume the contact adhesive dries clear?

Did you spray each layer of cellophane with the contact adhesive?

I think it is time to dress up my Fairlane cluster.

Cheers
BenJ


_________________

BenJ's EB T5 DOHC Ghia Wagon - Current Ride
BenJ's EB GL Sedan - Previous Ride
My respect and thanks go to - snap0964, Paulmac, SWC and MRE-50L

Top
 Profile  
 
 
 Post subject: Re: How to change the colour of your instrument lights. EF/L
Posted: Fri Mar 16, 2012 6:08 pm 
Getting Side Ways
Offline
User avatar

Age: 30

Posts: 1006

Joined: 1st Oct 2010

Gallery: 14 images

Ride: EF XR8

Location: Richmond,
NSW, Australia

This is probably the cheapest way of modding your instrument cluster, without farrking around with LEDs and the such.
Good effort!

Could even go with white LEDs and a cellophone cover to make it a bit brighter. :D


_________________

Blue blooded.

Top
 Profile  
 
 
 Post subject: Re: How to change the colour of your instrument lights. EF/L
Posted: Fri Mar 16, 2012 11:45 pm 
Getting Side Ways
Offline
User avatar

Age: 45

Posts: 841

Joined: 20th Feb 2010

Gallery: 2 images

Ride: AU Fairmont Ghia

Location: Elizibif Norf (Local Spelling!!)
SA, Australia

BenJ wrote:
I like it!

Well done.

I assume the contact adhesive dries clear?

Did you spray each layer of cellophane with the contact adhesive?

I think it is time to dress up my Fairlane cluster.

Cheers
BenJ

Thanks Ben. In answer to your questions, yes it does and yes I did. :)
REW93N wrote:
This is probably the cheapest way of modding your instrument cluster, without farrking around with LEDs and the such.
Good effort!

Could even go with white LEDs and a cellophone cover to make it a bit brighter. :D

Thanks also.
Yes it was cheap, $11 for the adhesive (I think) and the grand total of $1.50 for the cellophane. I'm sticking with the original globes as I found LEDs too blotchy and nowhere near as even with the light spread, plus I can still dim the instrument lights. It is actually surprising how bright it is still.


_________________

dc_todd wrote:
Cheap pads squeal like cheap hookers, and you can take that to the bank.


Au Fairmont Ghia
My (Old) 95 EF Wagon

Top
 Profile  
 
 
 Post subject: Re: How to change the colour of your instrument lights. EF/L/AU
Posted: Fri Mar 07, 2014 11:40 pm 
Getting Side Ways
Offline
User avatar

Age: 45

Posts: 841

Joined: 20th Feb 2010

Gallery: 2 images

Ride: AU Fairmont Ghia

Location: Elizibif Norf (Local Spelling!!)
SA, Australia

This also works for the AU's.
Image


_________________

dc_todd wrote:
Cheap pads squeal like cheap hookers, and you can take that to the bank.


Au Fairmont Ghia
My (Old) 95 EF Wagon

Top
 Profile  
 
Display posts from previous:
Sort by  
 Page 1 of 1  [ 6 posts ] 

Who is online

Users browsing this forum: No registered users and 27 guests


You cannot post new topics in this forum
You cannot reply to topics in this forum
You cannot edit your posts in this forum
You cannot delete your posts in this forum
You cannot post attachments in this forum


It is currently Thu Apr 25, 2024 9:38 pm All times are UTC + 11 hours


(c)2014 Total Web Solutions Australia - Australian Web Hosting and Domain Names