|
| BenJ |
|
||
|
The EB is going into the Auto Trans shop tomorrow to get the rear bush and seal (where the tail shaft goes in) replaced. I have a nice tranny fluid leak when at cruising speeds and a friendly vibration to go with it. When I had the auto serviced recently they showed me how much play (far to much) there was.
Hopefully this will fix it, and for $120 I bloody hope so. I have two new uni joints, I might ask if they can put them in while I am there. Regards BenJ
_________________ {DESCRIPTION} - Current Ride |
||
| Top | |
||
| BenJ |
|
||
|
I am off to QLD for two weeks on Tuesday. I am driving the EB up to visit my parents on the sunshine coast.
This unfortunately means that for the immediate future there won't be any progress, unless something breaks on the trip and I add a post about it. I have some EL external door handles here to be painted and I want to add some black to the door trims so there will be some changes before christmas I hope. And of course, when the diff goes in for repair and then gets installed. I have put the driving lights back on for the trip. There are photos on the first page of how they look. I will be checking the forums while on holiday (taking my PC with me) so I won't miss out on anything. Regards BenJ
_________________ {DESCRIPTION} - Current Ride |
||
| Top | |
||
| BenJ |
|
||
|
Ok, I lied.
Something broke. I was reading another thread re throttle cables and thought I should check mine out as I remembered it was a bit crappy. The plastic just after the clip on the rocker cover was not only broken but gone altogether as well as the wire mesh. I must have been losing around 5-10mm travel from the loud pedal to the throttlebody. I swapped it out with a good one from my spare parts car and the throttle response is sooooo much better and WOT is a lot more fun. So fellas, check your cables. Oh, and I have now taken the driving lights back off the car, as one of the bulbs was blown and I don't have the $$$$$ to replace it. Looks better anyhow. Regards BenJ
_________________ {DESCRIPTION} - Current Ride |
||
| Top | |
||
| BenJ |
|
||
|
Well Hello Again.
Just a short note to say I am back from QLD. The EB did 3237kms on the trip and an avg of 10.0 L/100ks which included some hoon....... um, driving around the Sunshine coast. I went through approx 1 litre of engine oil, which I think is pretty good considering the now 396000+ ks on the EB, and no transmission fluid so that must be fixed now. On the way up I had a vibration due to a bad rear wheel balance which my brother arranged to have redone for free at his work place. Now 125k/hr is smoooooth. Did the trip home from Maroochydoore to Western Sydney in 11hrs 45min and the EB purred like a kitten all the way. Updates will occur as things progress. Regards BenJ
_________________ {DESCRIPTION} - Current Ride |
||
| Top | |
||
| BenJ |
|
||
|
So today I went to Pick and Payless wreckers at Blacktown to have a poke around and see if there was anything new, or useful. I am always on the lookout for things I can use or put away for future use.
In my wandering I noticed an XF Panel Van and went over to have a look. I noted the interior was stripped and then thought, hmmmm thats odd, there is an EB engine in this. I had a closer look, and thought to myself, hey thats a serpentine setup using the log manifold. YES!!!! Turns out it is an XH, and what do you think I found still bolted to the front? Can anyone say 'belt tensioner'? Yep, as we know these things are as rare as hens teeth. New from ford, if they are available has been reported to be up to $300. So I carefully removed it, wandered up to the front and asked how much a belt tensioner was for an EF falcon. Handed over my $20, said thanks mate and headed home. I have thought about doing the Serpentine conversion purely to enable me to use a bigger alternator from the EF/EL, but PaulMac has detailed nicely in his thread on how to use one using the standard three belt setup. I will hang on to the XH tensioner, for when I put a newer engine in as I want to use my EB log manifold and this will enable that. Of course I may come accross the other components needed for the right price and then may do the conversion later. Oh, and I started on a mod today for the interior. Hope all is well with you all. BenJ
_________________ {DESCRIPTION} - Current Ride |
||
| Top | |
||
| BenJ |
|
||
|
Well all, it has been an interesting year.
Just thought I would catch you all up on a few bits and pieces I have been messing with. I have been wanting to do something different with the interior to set it apart from all the other conversions. Everyone seems to be crazy about woodgrain pieces, but I wasn't looking for that feel for my car. The first phase was to paint the door handles. 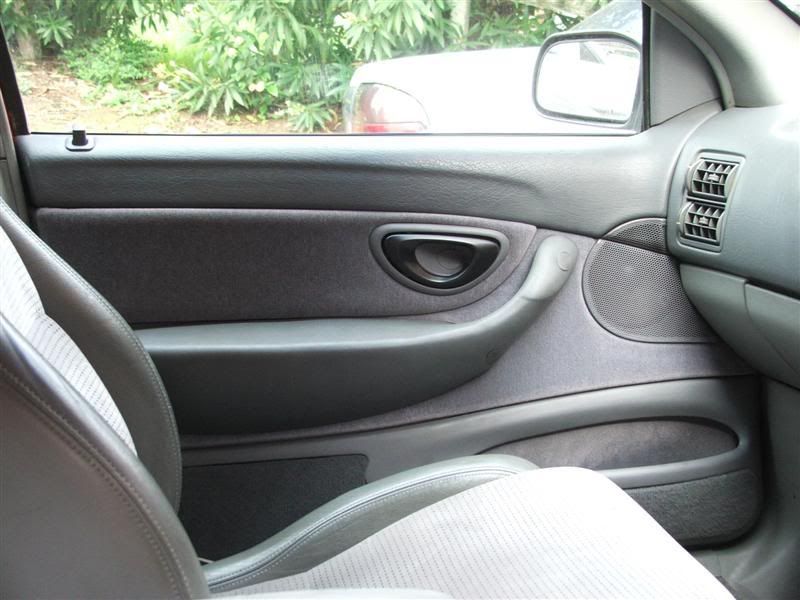
I acquired a spare set of handles and sanded them smooth. I primed them with plastic primer and then over a period of a week painted five coats of Satin Black. I am really happy with the outcome as they look like they were meant to be that way. They almost look like they are made from metal. The second phase involves more Satin Black and some sad looking fake woodgrain. The other major body mod was to give the car a random dented effect. This was done while dodging orange size hailstones racing down to the carpark during the wild storms here in Sydney the other week. Well, I guess it just adds more character to a less than perfect car. Repairs recently include, a dead relay on one of the thermo fans, replaced the air con idler pulley as the bearing was shagged, and while using the shift kit it chirped into second and ripped the left engine mount in two. All good fun really. Well, hope you all have a great Chrissy and New Years. Will update as more things occurr. Regards BenJ
_________________ {DESCRIPTION} - Current Ride |
||
| Top | |
||
| BenJ |
|
||
|
Hey all
Hope you had a good new year and quick recovery Just a quick update. The EB reached a major milestone last weekend. 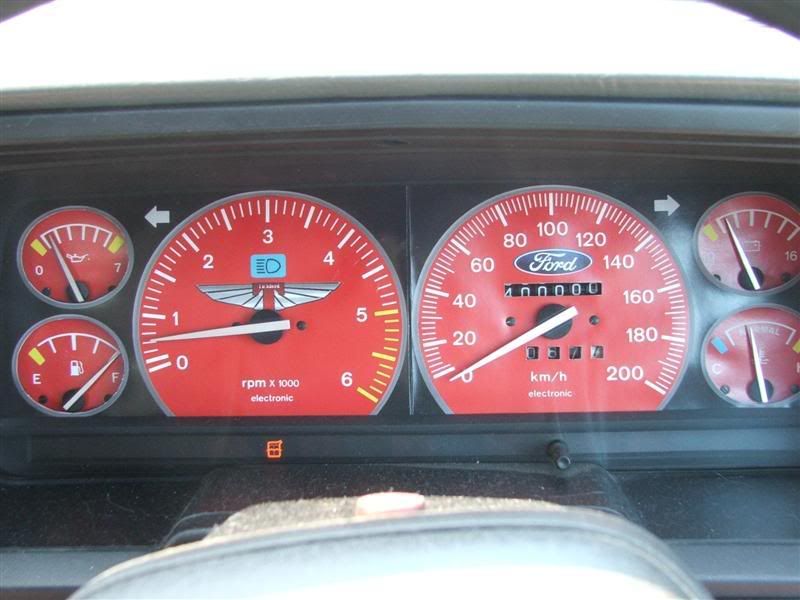
Still going strong. I plan to run her up on the dyno early in the year, just to see what an old engine can do. Catch you all later. BenJ
_________________ {DESCRIPTION} - Current Ride |
||
| Top | |
||
| edfairmont4.0 |
|
|||
|
your motor will keep going and going..... the motor in my white ed is near half a mil....still pulls well and sounds healthy.....just valve stem seals are nackered... lol
_________________ ED Fairmont, Ghia mock DOHC-T 11.6 @ 118 Trying to get back to the 1/4! |
|||
| Top | |
|||
| BenJ |
|
||
|
Ok Then.
If there is one thing boxcar owners love to hate, it's the steering wheel. Specifically if you have Cruise Control. The primary reason for not fitting a sports steering wheel is that owners want to keep the Cruise buttons. 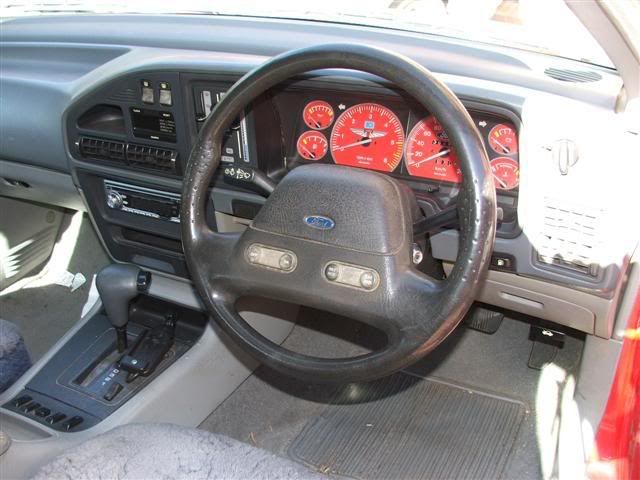
Lets face it. The factory wheel is just ugly. So I hunted around for a solution and came accross a guide on Ford Mods {DESCRIPTION} to use custom mounted momentary switches. I acquired the parts and looked around for a suitable steering wheel within my limited budget and found this. 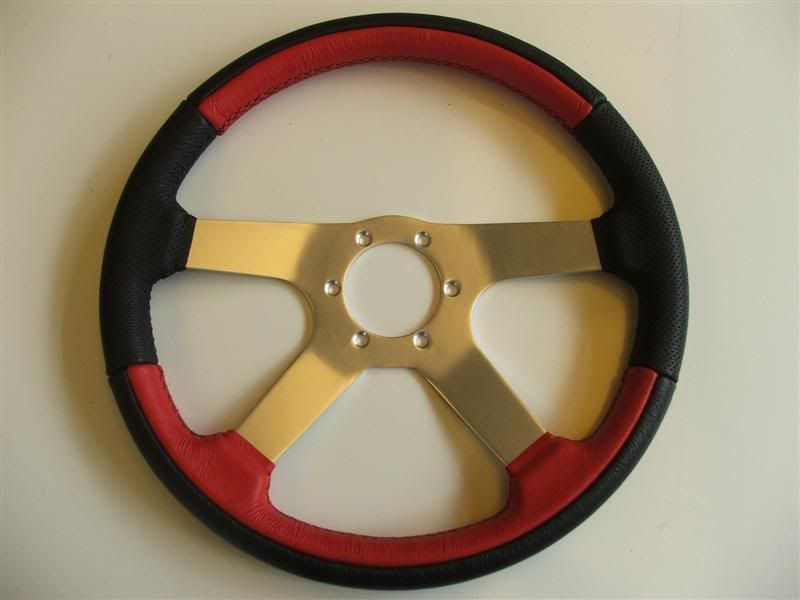
It was marked down to $70 at parklea markets. It is leather wrapped and the four spoke design appealed to me. The red leather parts also would match my car nicely. I also picked up a boss kit for $70. I got home and promptly created a 3D model of the wheel in Sketchup so I could design a bracket to mount the cruise switches on. The Front. 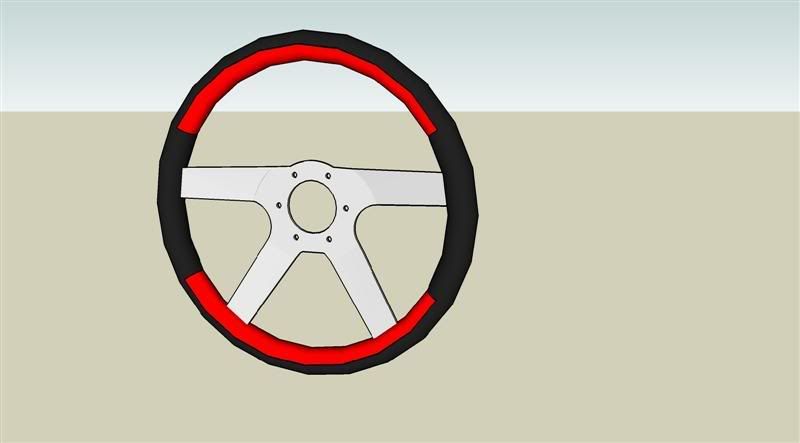
The Back with Cruise Bracket. 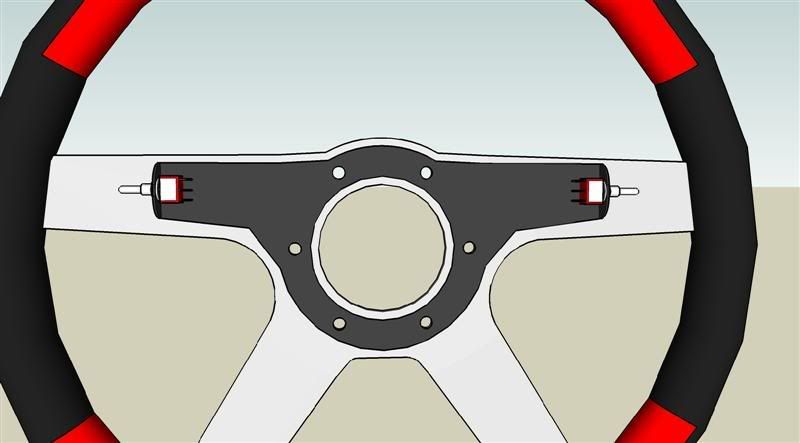
I looked around the garage and found an old computer side panel which I used to draw the pattern for the bracket. 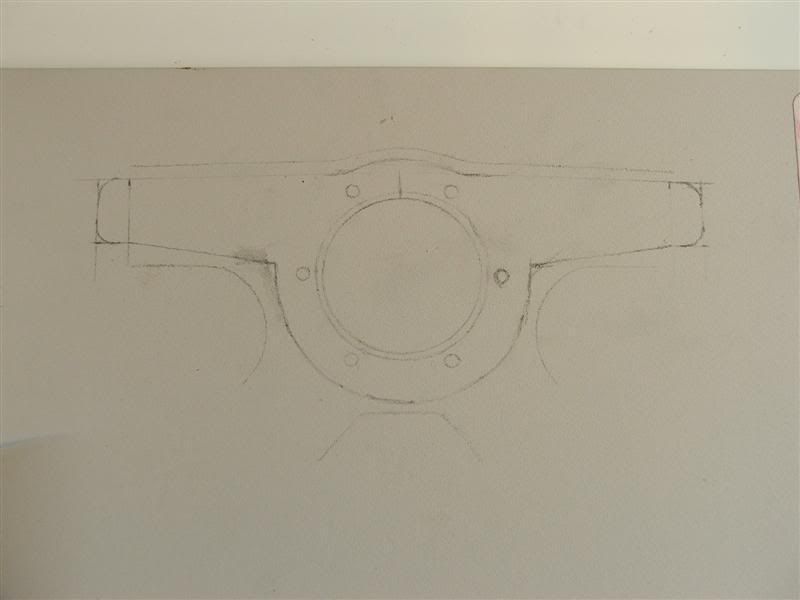
I then cut it out using a Dremel rotary tool and sanded the edges. 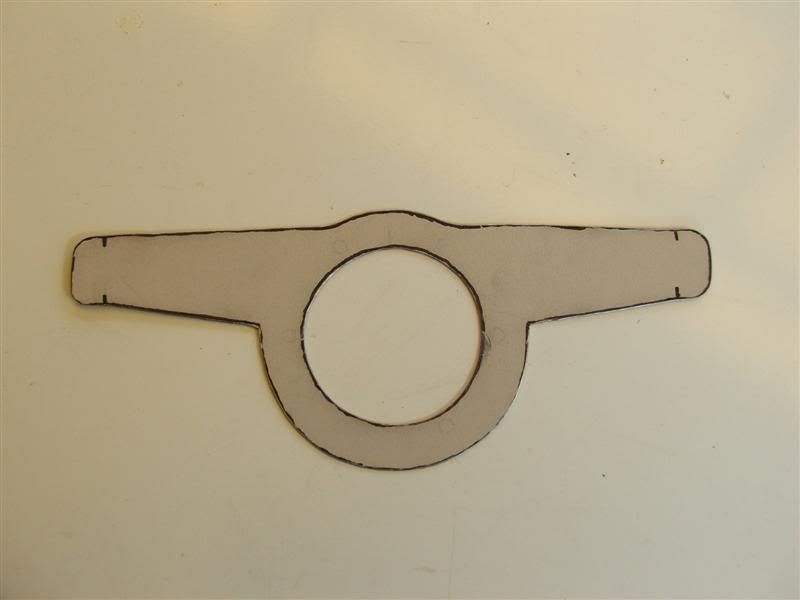
Here is the raw bracket on the back of the wheel. 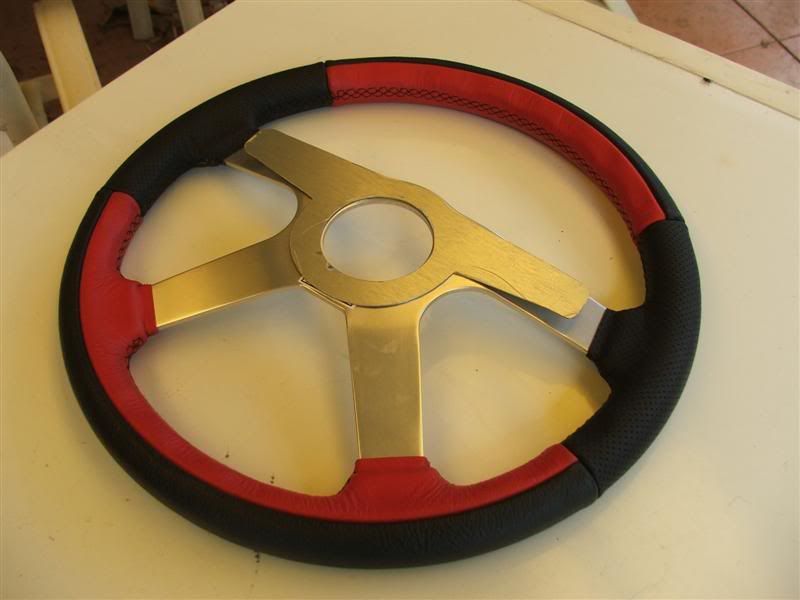
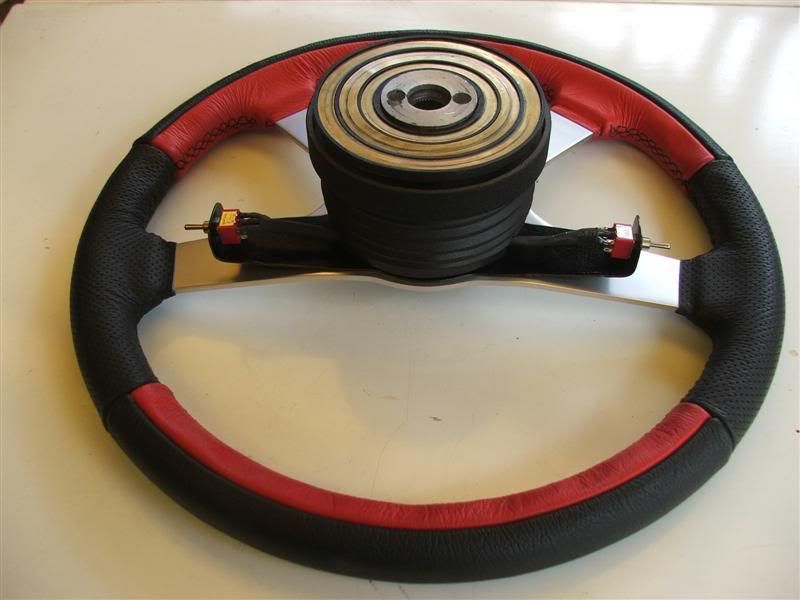
The next couple of shots show the finished bracket with the switches mounted on the boss and then the boss and wheel and finally a close up of the switch setup. 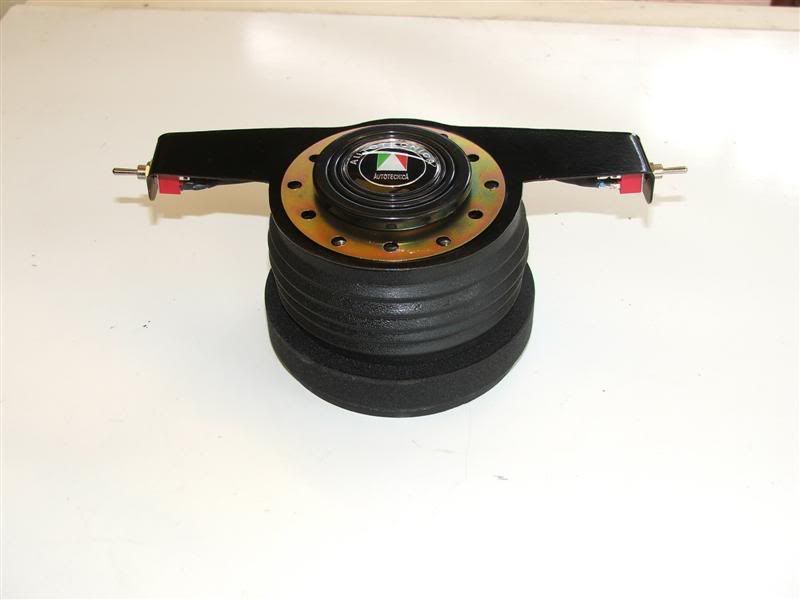
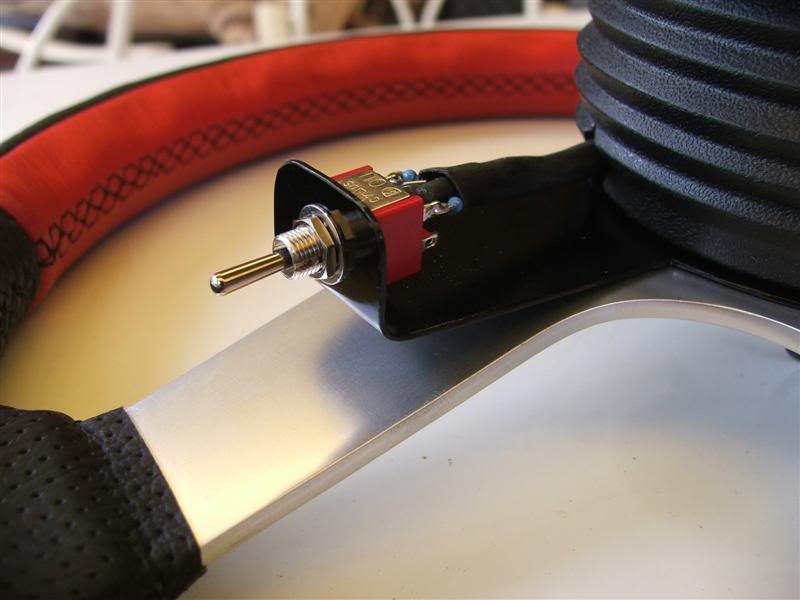
I then mounted it all in the car and I am really happy with the way it looks. 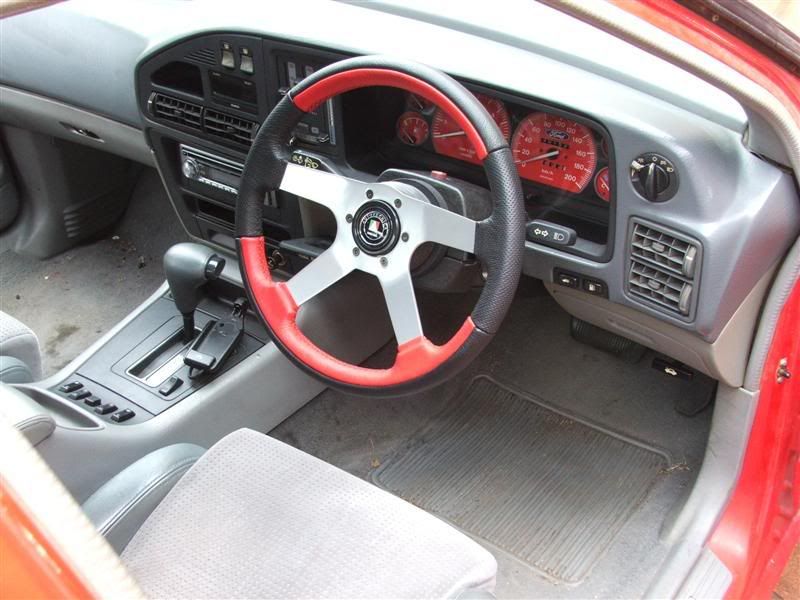
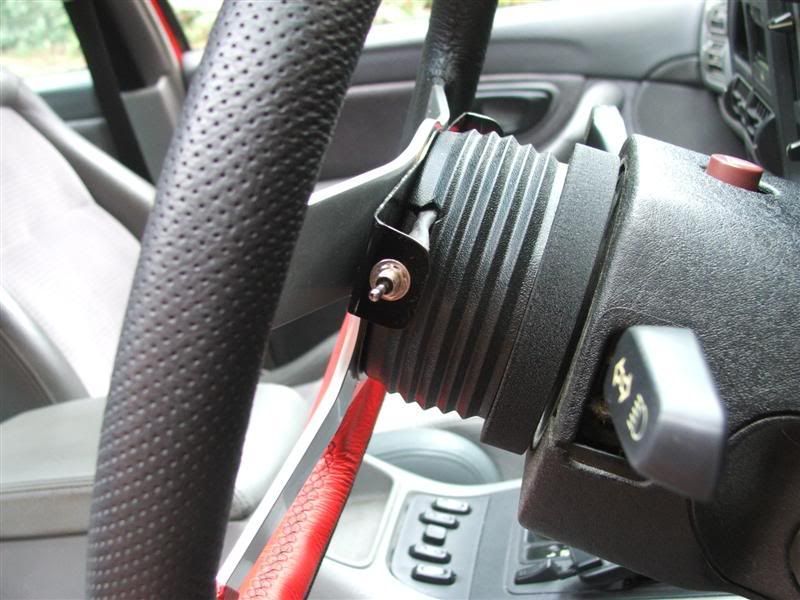
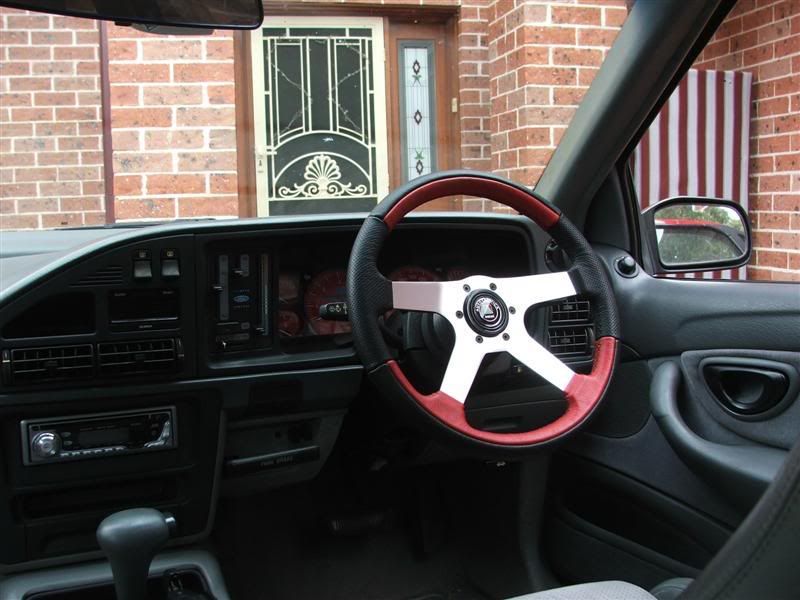
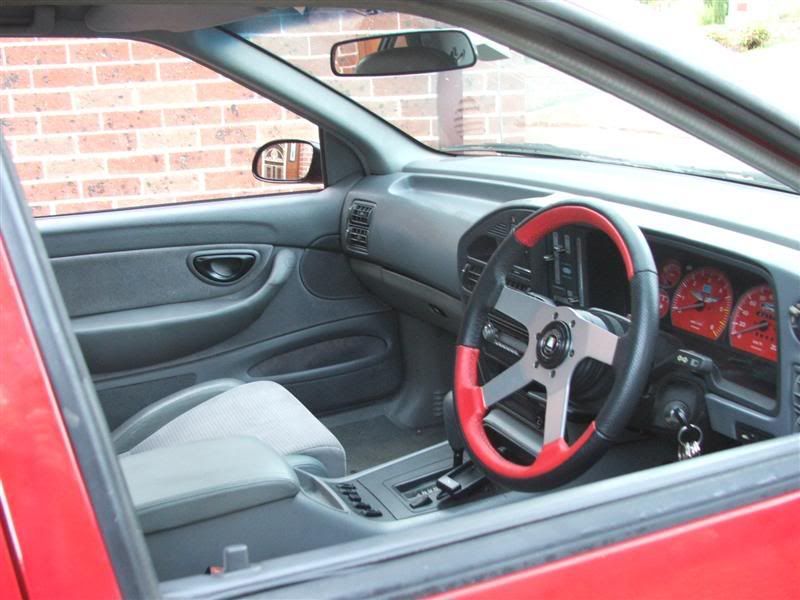
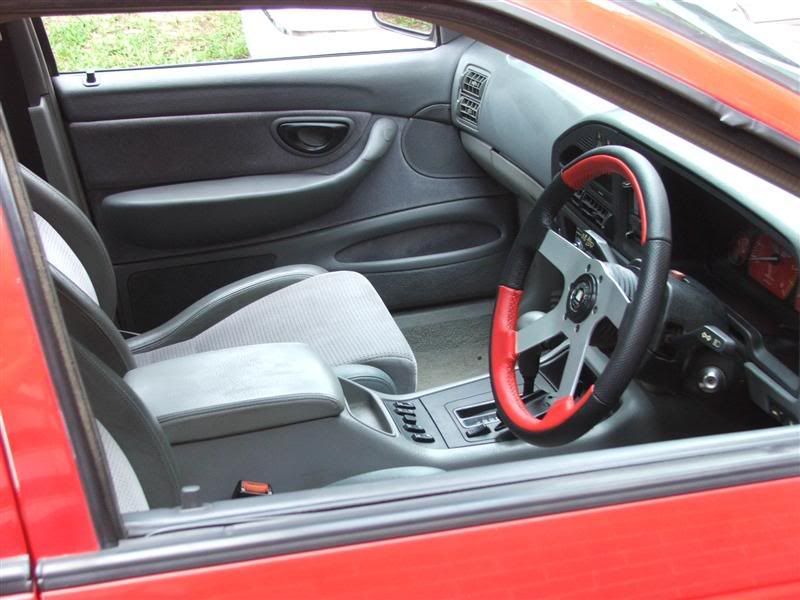
The cruise switches work great and are positioned so my index fingers fall on them with a small reach. There is now no excuse for you boxcars ownwers to put up with the factory cruise steering wheel. I have also acquired some EF mirrors so look out for another update soon. Happy Australia Day BenJ
_________________ {DESCRIPTION} - Current Ride |
||
| Top | |
||
| BenJ |
|
||
|
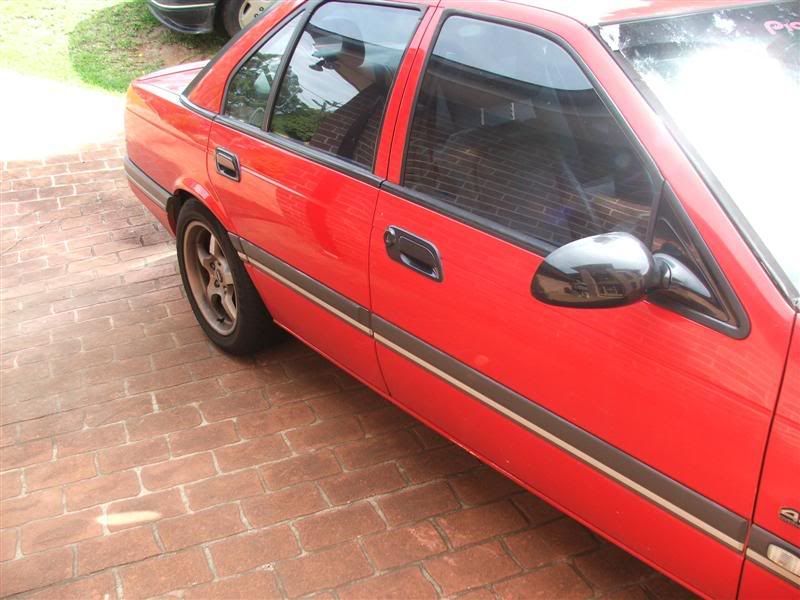
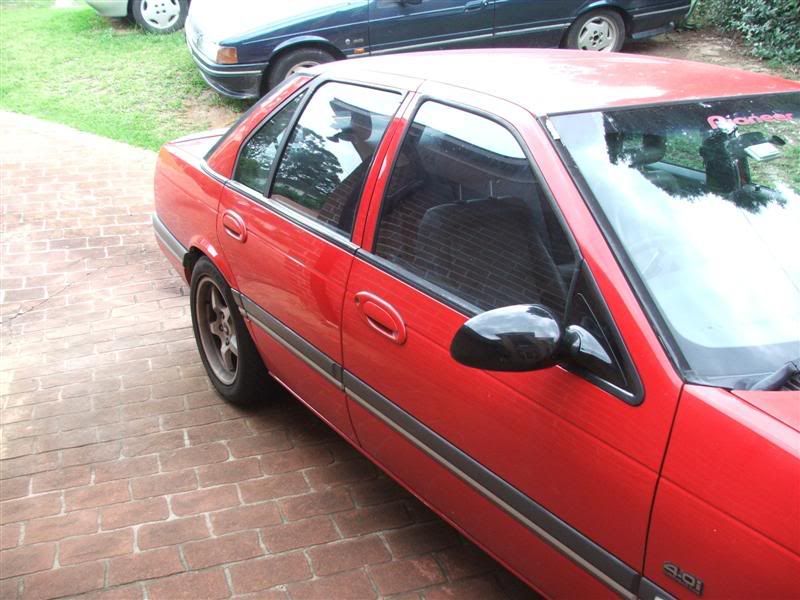
Well, got busy today.
Seeing as I had all the bits I needed for the EF Mirror mod, I got stuck into it. The finished product. 
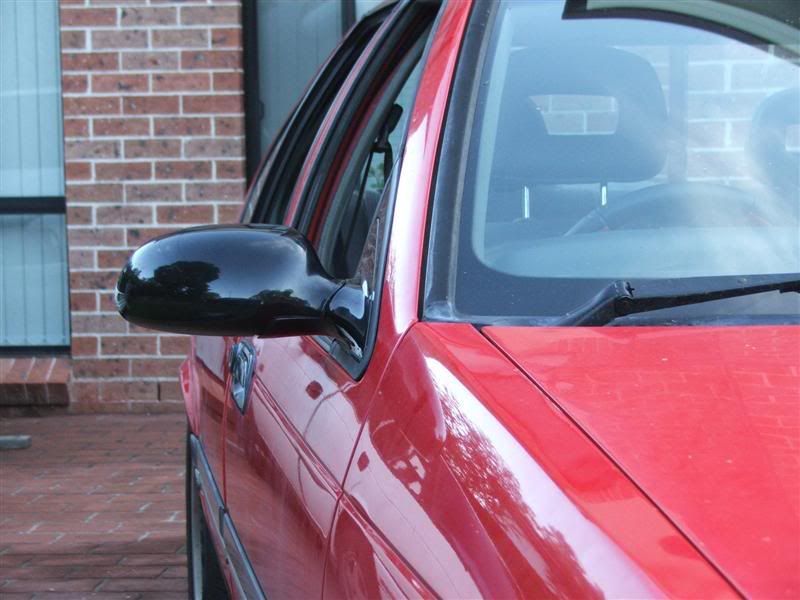
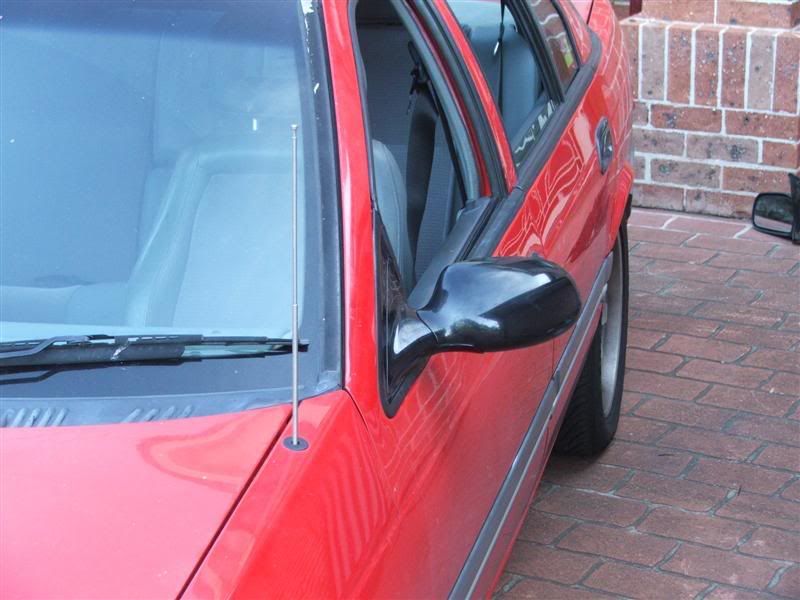
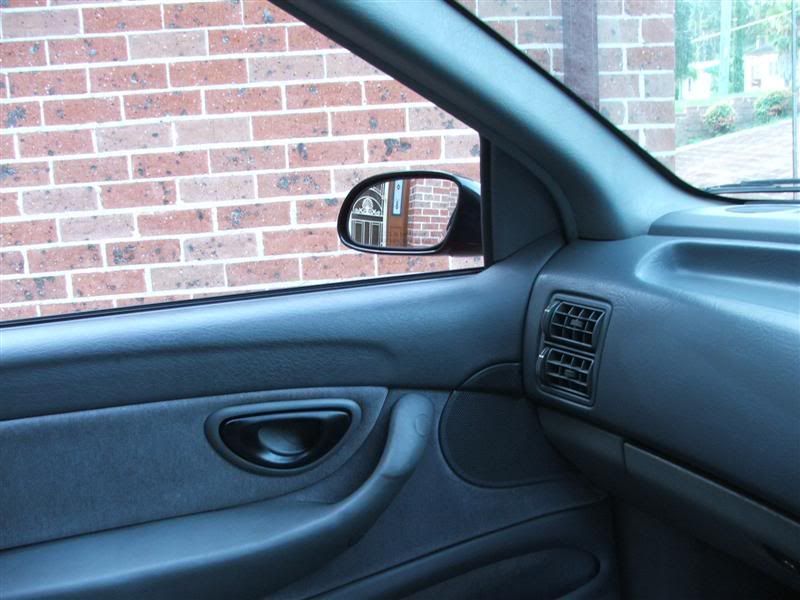
I am really happy with the way this turned out. I am keeping the mirrors black as I think this works well with the look I am trying to achieve with the EB. While this isn't too difficult I thought I would do a short tutorial. This is to use EF Door Trims with EF Mirrors in an EB. EA and ED should be the same. Parts Needed. EF/EL Mirrors and screws EF/EL External Weather Strips for Front Doors. EF Door Wiring Looms, left and right - at least the plugs for the mirrors and the mirror switch. EB Mirror Switch assembly plugs and loom. EB Left hand mirror plug and short length of wires. Optional Parts Needed. EF Front Door Window Rubbers - the ones the window goes up and down etc. EF Rear Wagon External Weather Strips. Tools Needed. Philips Screwdriver. 10mm Socket and Ratchet - if using EF Window Rubber. Drill and assorted Drill Bits. Round File. Soldering Iron. Heat Shrink. Electrical Tape. Common Sense. 1. Remove Door Trim, Speaker and Backing. 2. Remove EB Mirror. 3. Remove EB External Weather Strip. 4. Optional - Remove Front Window. 5. Optional - Remove EB Window Rubber 6. Optional - Install EF Window Rubber 7. Optional - Install Front Window 8. Use EF Mirror and mark and drill and file holes for mounting lugs. 9. When happy with fit of Mirror Install EF External Weather Strip. 10. Install EF Mirror for final time, first plugging in loom and tucking it in the door cavity. 11. Check Mirror Operation. 12. Install Door Trim, Speaker and Backing. 13. Enjoy and brag to your mates. Now for the wiring part, check out the following pictures. Drivers Door Loom 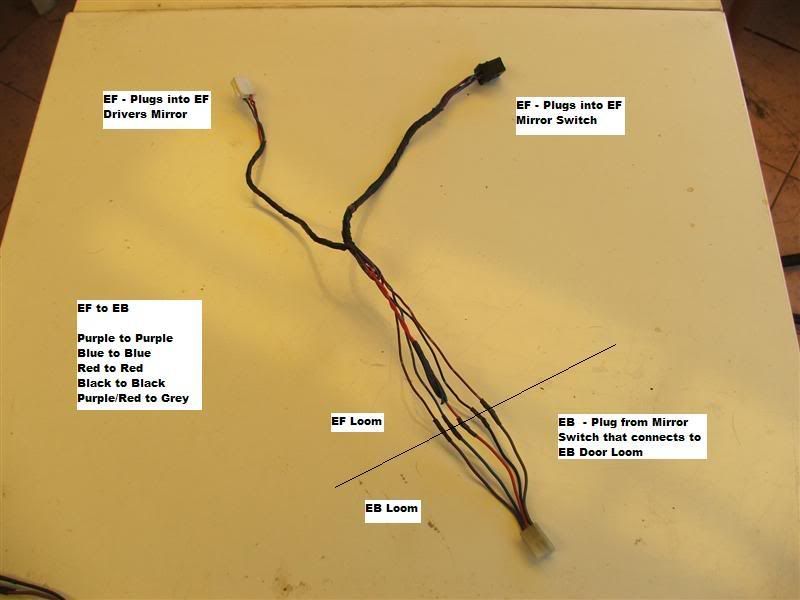
Passenger Door Loom 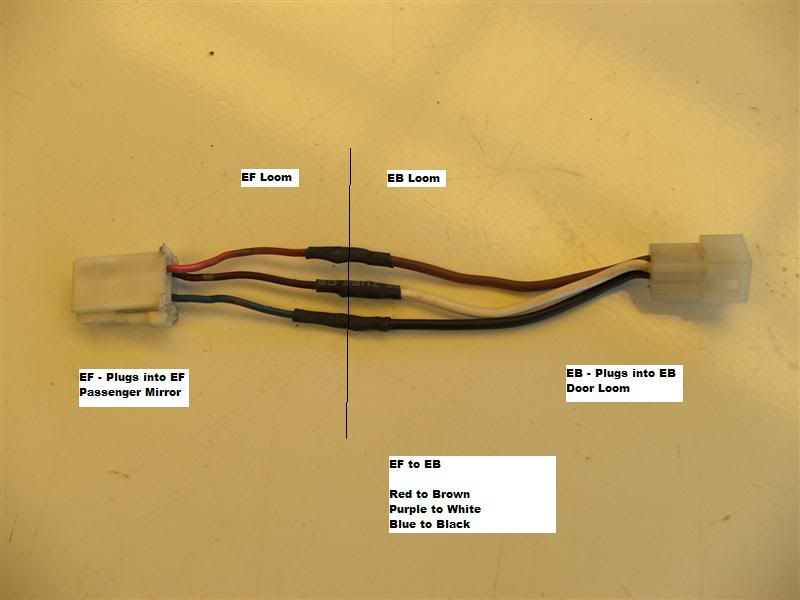
By acquiring extra plugs and wires, I was able to create new looms to plug into the various parts, meaning I didn't have to butcher my looms. Good Luck and PM me if you need help. BenJ
_________________ {DESCRIPTION} - Current Ride |
||
| Top | |
||
| BenJ |
|
||
|
Ok, well it never rains, it pours.
Seeing as I was home today, waiting for NRMA insurance assessors to look at our dead white goods (some fool ran into a power pole a few weeks back), I was looking for things to do. I was poking around in my garage and found my EL external door handles. So I grabbed some sand paper and paint and got to work. Dissasembled and 1st coat of paint. 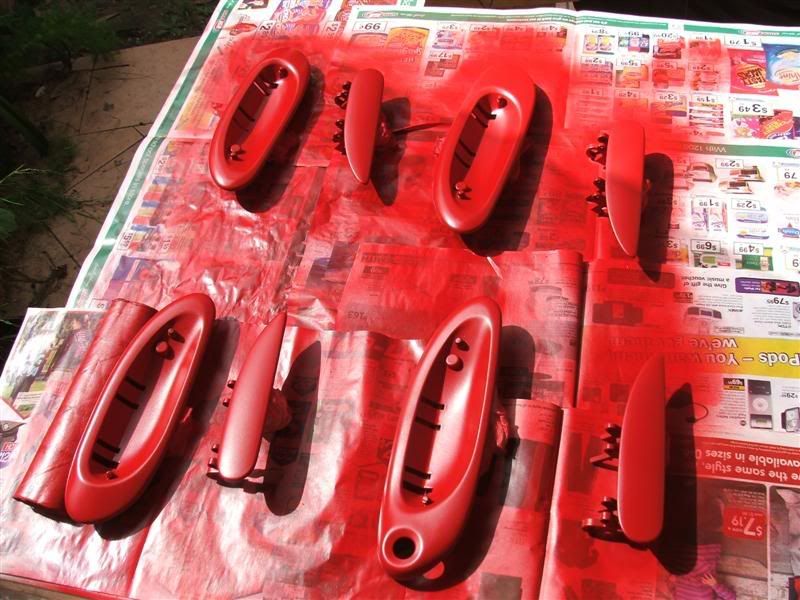
And some before and after shots. 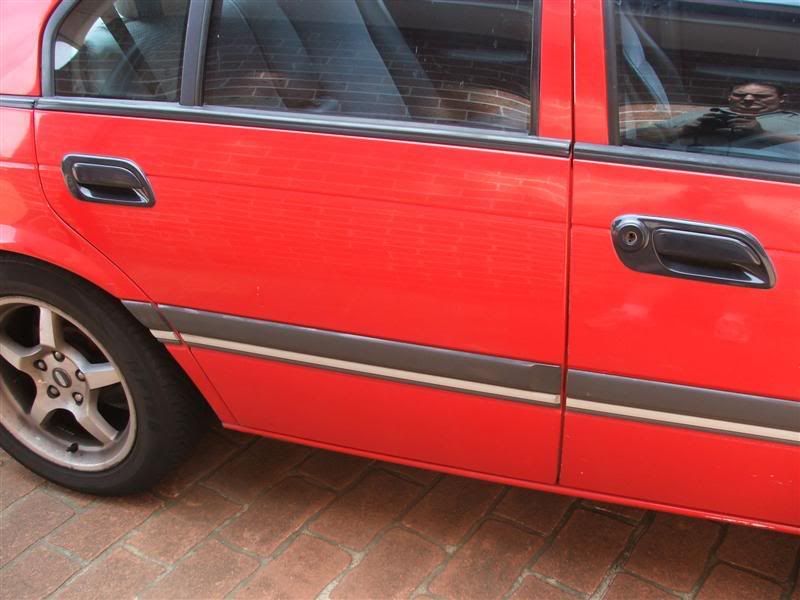
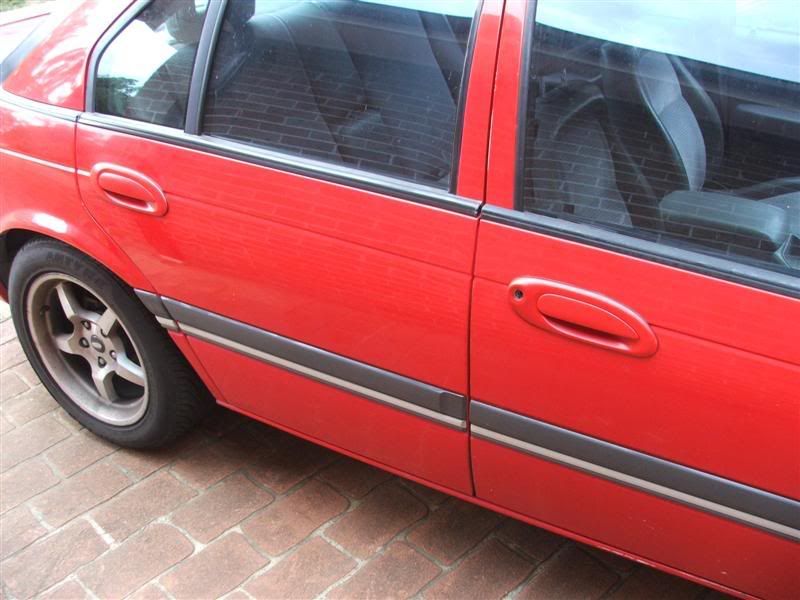
And being EL handles, no locks on the passenger side 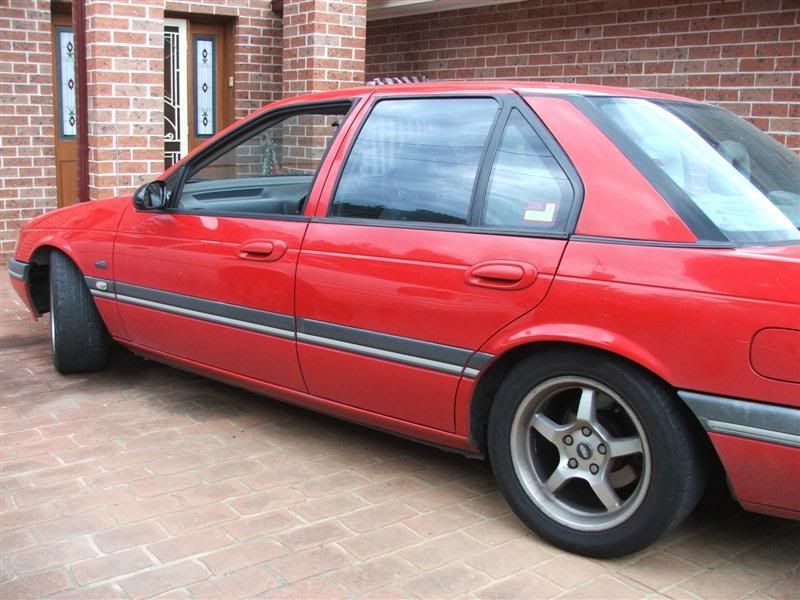
This shot I just like 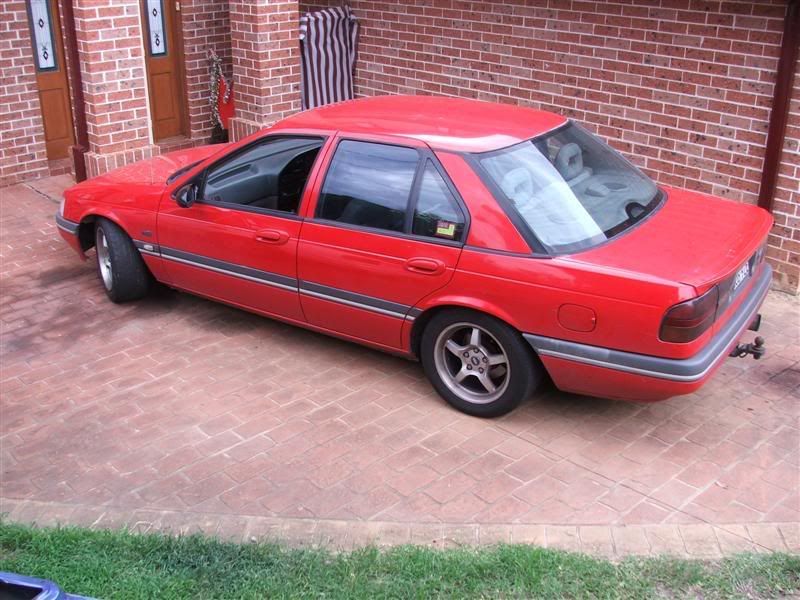
It is amazing how something so simple as this mod changes the appearance of the car, especially when combined with the mirrors. Regards BenJ
_________________ {DESCRIPTION} - Current Ride |
||
| Top | |
||
| BenJ |
|
||
|
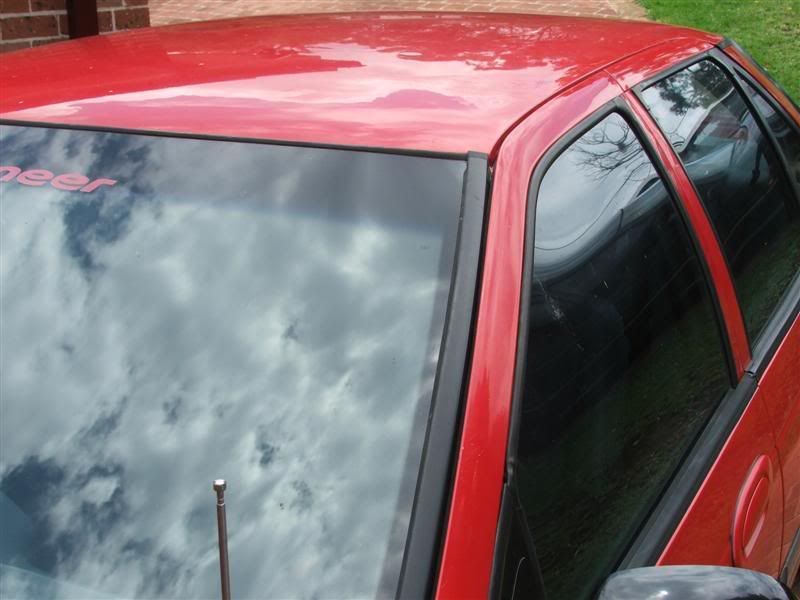
As I said there are a few bits and pieces that need tidying up.
One of the glaring parts was the side trim that runs along the edge of the windscreen. If you have a good look at them they are metal covered with a plastic wrap. Over time the plastic goes brittle and ends up doing this. 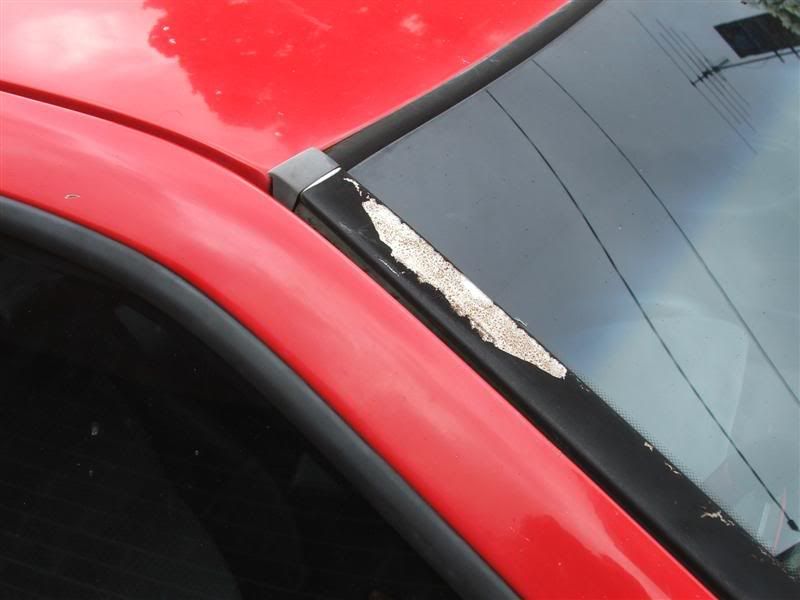
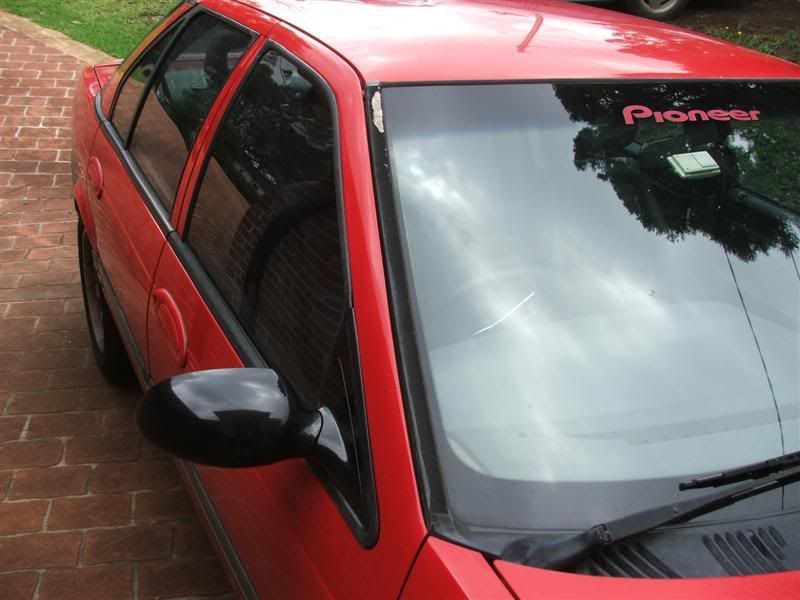
Not pretty really. So was talking to some of the fellas last night at Liverpool and we were comparing cars etc. There was an EF there and I noticed that the windscreen trim pieces were the same. I was going to strip and paint some I had here but that it a lot of work. So this morining I went to Pick and Payless and for $20 picked up a pair from an EL. 10 mins work later and this is what you get. 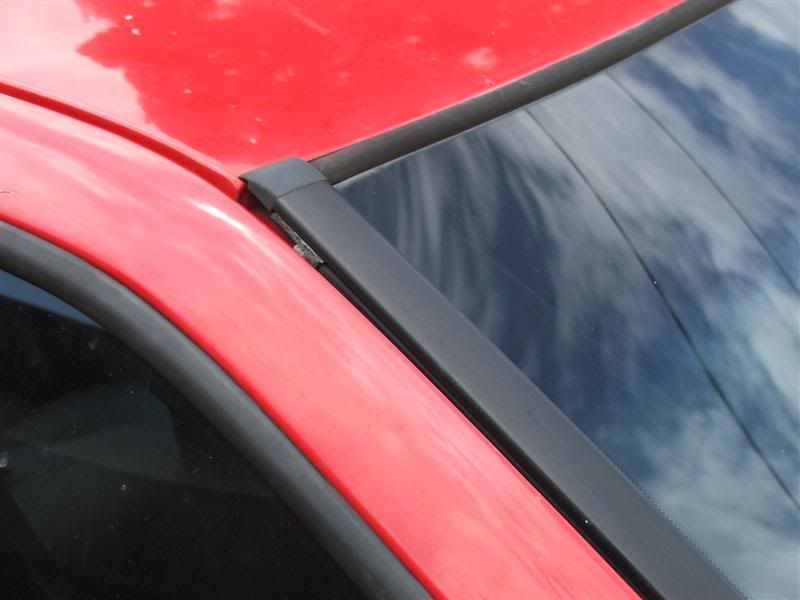
Some more before and after photos 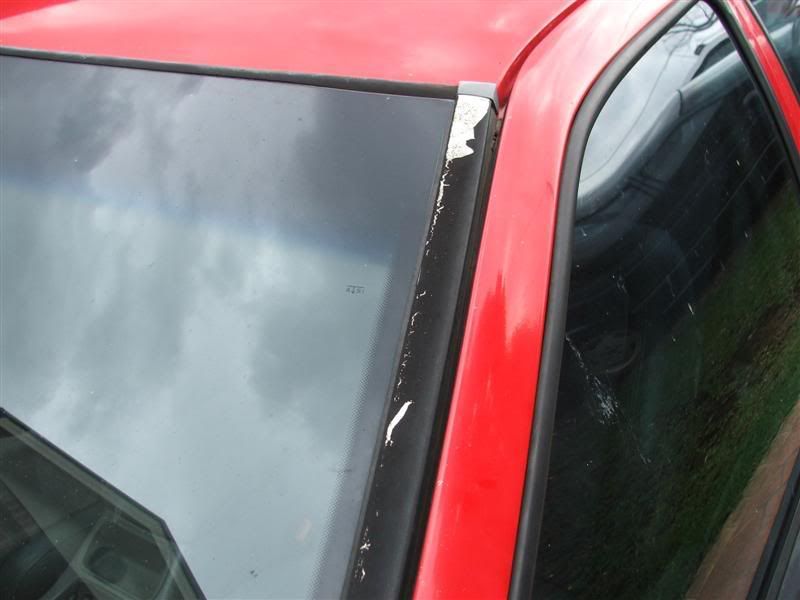

Once you notice how bad they are you can't help but see it all the time, so my apologies in advance if you hadn't noticed yours before BenJ
_________________ {DESCRIPTION} - Current Ride |
||
| Top | |
||
| BenJ |
|
||
|
Someone asked me a question about how to remove the strips, so I took a couple of photos to help answer. OK - Here we go.
Pull the rubber back from the strip. Start at the bottom edge of the windscreen where it hangs past the door, and just pull gently. 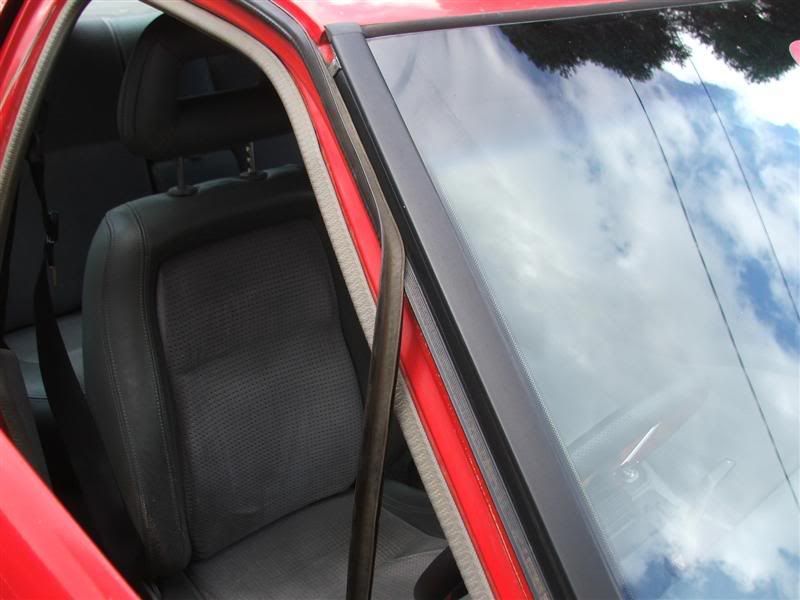
Keep remove the rubber until it is not covering the strip at all. Then undo the philips screws under the lip the rubber sits over. 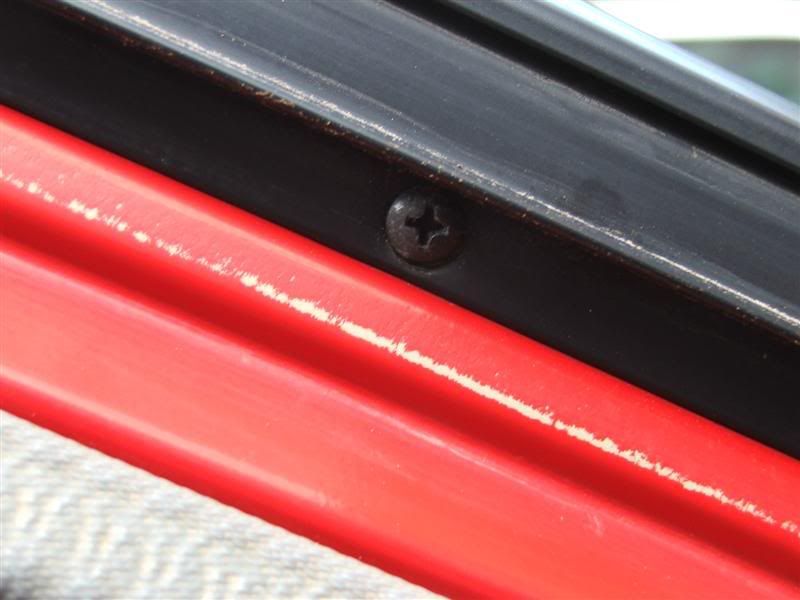
Lastly, remove the little plug indicated by the arrow. Be gentle as you don't want to break it. Then undo the long philips head screw underneath. This will allow enough movement to get the end of the strip out easily. 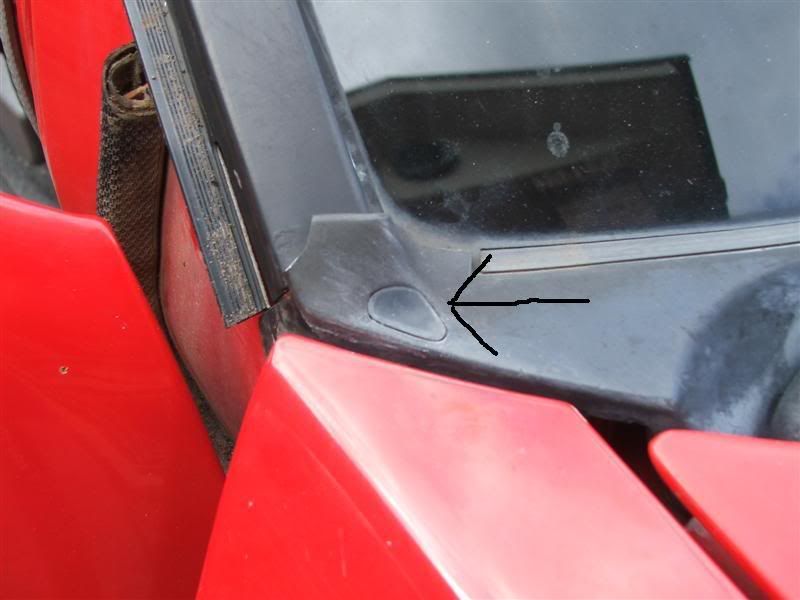
Installation is just the reverse order. Points to note are that when sliding the rubber back on, don't stretch it as you go. Boxcar owners should note that the later ED and EF/EL models have a different rubber that fills the gap between the shut door and the windscreen strip. It will be beneficial to install it to reduce wind noise at speed. Good luck to those who want to fix there own strips. BenJ
_________________ {DESCRIPTION} - Current Ride |
||
| Top | |
||
| BenJ |
|
||
|
Hello Again All
Just a quick update re the later model rubbers and exterior window trims etc. In the EL mirror conversion, I stated that you need the rear external black door trims from an EF/EL wagon to match the profile of the front ones you put on with the mirrors. An interesting point to note is that my ED Ghia has the same trim profile as the later EF/EL. As the ED Ghia is my wifes and currently unregistered (and she will never know unless she reads this) I attacked it with a screwdriver while she was out. What I found out was that not only do you need the strip accross the top of the rear door, the black quarter surround is also different and you need that part as well. Not only that but the trim uses a small bolt and nut to attach the rear to the car and the door I have off an EA does not have the hole there for it, so I had to drill it out. I also swapped out the rubber that starts alongside the windscreen and goes along the edge of the roofline to the C pillar. This rubber is much better designed than the earlier ones and on a cruise on the weekend proved to reduce the road/wind noise quite noticably. Well worthwhile doing and really easy if you can acquire them from either an ED, EF or EL. My last bit of news is that my next mod is a major one. Here is a photo of what I have bought. 
It is an EL engine and comes with all accessories including the ECU and all the parts needed to complete the conversion. I will update as this progresses - hopefully soooooooon BenJ
_________________ {DESCRIPTION} - Current Ride |
||
| Top | |
||
| BenJ |
|
||
|
OK, a small update.
The EL Engine has now been removed from the car and is safely at PaulMacs' place. The engine now removed, looks even better than it did in the car. It is really clean, with no signs of leaks or missuse anywhere. 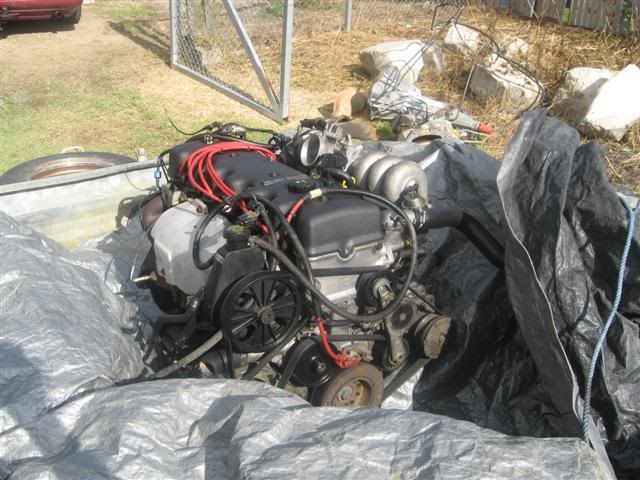

The install date is the 24th Feb. Wooohoooo One week and counting. In preparation of the conversion, I have been busy modding the inlet manifold loom. The reason you can't use the EL loom with the EB is because the plugs on the EL BBM loom are square and the EB uses round plugs. Kudos to Troyman for his guide as much of the knowledge comes from there. I had a spare loom off the log manifold from my EB parts car. To alter the EB loom to fit the BBM manifold, the TPS and ICS plugs need to be relocated to reach the throttle body on the BBM. From the wreckers I sourced EL TPS and ICS Loom plugs as they can be different to the EB. I found that the TPS plugs are the same but the ICS plugs are different. Seeing as I needed to cut the plugs off to lengthen the loom I used the newer plugs. It is possible to use the existing EB plugs, so long as you mount the EB TPS and ICS on the BBM throttle body. Below is the loom before and after I adjusted it. It is now ready to attach to the EL motor. Before 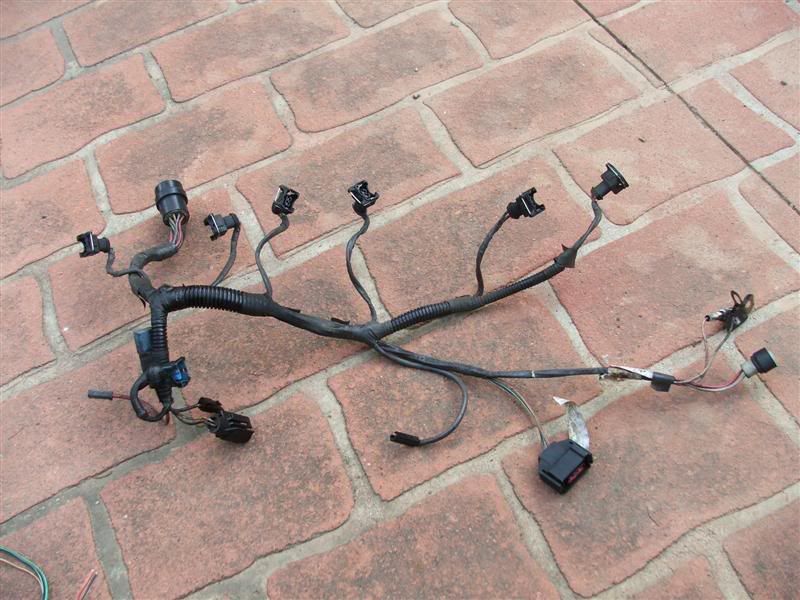
After 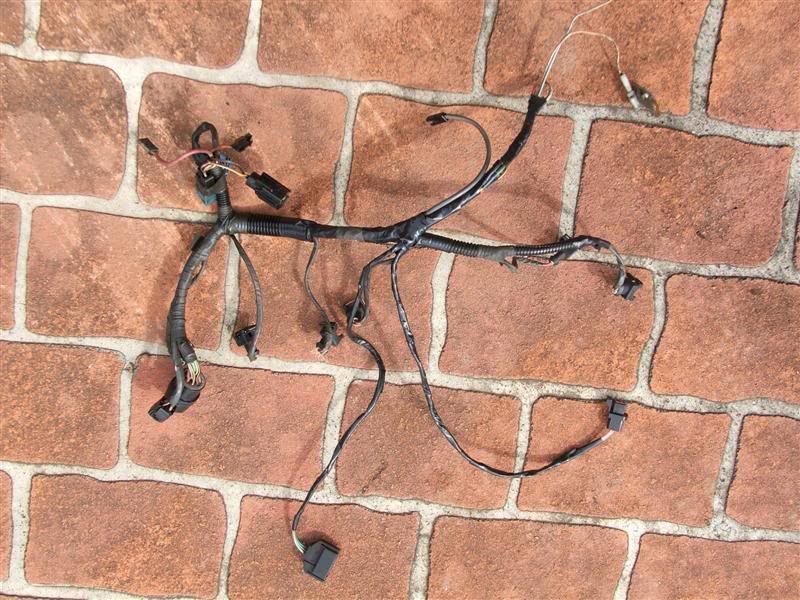
I intend to take a few photos of the conversion and will post a quick guide and any difficulties encountered. Regards BenJ
_________________ {DESCRIPTION} - Current Ride |
||
| Top | |
||
| Who is online |
|---|
Users browsing this forum: No registered users and 0 guests |
