|
| dsyfer |
|
|||
|
Thanks for the thumbs up guys.
Just found out that the TIG has been fixed |
|||
| Top | |
|||
| dsyfer |
|
|||
|
Time to get rid of all the surplus LPG wiring, talk about a spider web
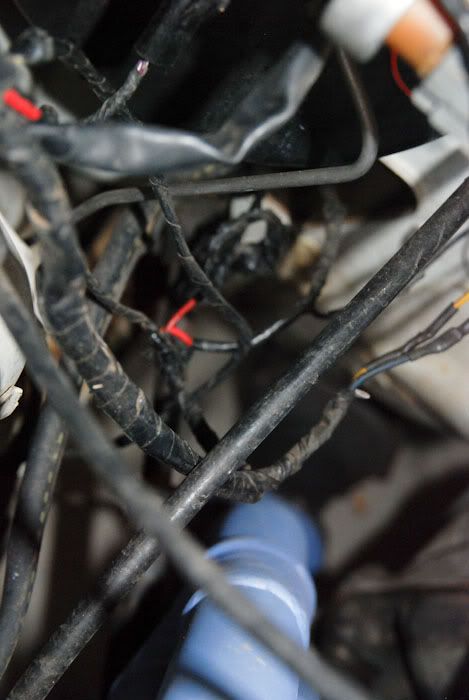 Also removed the cruise, as I never use it with the manual now, just more clutter out of the engine bay 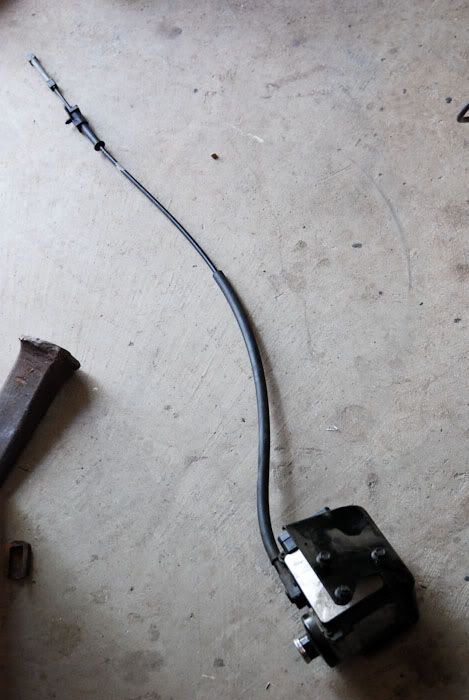 Now without having to unwrap the loom, does anyone know if the brake switch on the side of the master cylinder only feeds to cruise module? The wires from the switch go into the cruise loom, and appear to head towards the plug, but am wondering if they loop back for any other purpose as well? I want to remove the cruise loom and steering wheel switches as well. |
|||
| Top | |
|||
| rumble |
|
||
|
hi mate, clean car im enjoying the thread. as far as the switch in the master cylinder goes my old ef gli didnt have 1 just a blanking bolt until i put cruise in than i replaced it with the switch
|
||
| Top | |
||
| dsyfer |
|
|||
|
{USERNAME} wrote: hi mate, clean car im enjoying the thread. as far as the switch in the master cylinder goes my old ef gli didnt have 1 just a blanking bolt until i put cruise in than i replaced it with the switch Cool, thanks for that, that's what I wanted to hear, I hate unwrapping factory looms. |
|||
| Top | |
|||
| metasaiah |
|
|||
|
This is a very impressive build. Well done on your work so far, man - can't wait to see how it develops
_________________ EF2 Fairmont Ghia. AU2 engine running EF gear. Intake, exhaust, injection etc; 8" rear stockies with 265/50R15 rubber. Shiftkitted auto, J3, custom grille and dash cluster and lots of other useless crap... |
|||
| Top | |
|||
| jvangent |
|
||
|
WOW! great work! love the black and white!
|
||
| Top | |
||
| fiftyone |
|
|||
|
wow, loving the black & white too. definitely subscribing to this thread. love your work!
_________________ ** For Sale ** {DESCRIPTION} |
|||
| Top | |
|||
| Papa Smurf |
|
||
|
Love the interior, most original I have seen for a time.
You must be related to KwikXR, same level of detail to your work. PS; I should have sent YOU the tappet cover I put on a mates car. |
||
| Top | |
||
| facer01 |
|
||
Age: 32 Posts: 284 Joined: 27th Sep 2009 Ride: 1995 EF Ford Fairmont Location: Bundaberg, QLD |
omg the alloy trim is awesome
interested in making me a set? ill polish it |
||
| Top | |
||
| fairlane6970 |
|
|||
|
yeah that is so trick gotta love it!
_________________
|
|||
| Top | |
|||
| MoNGooSE |
|
|||
|
Chased up your build thread mate. Nice attention to detail! I could do with the use of a mill and lathe sometimes... Wish I had the time to get things polished up.
Will be following thread with interest. Not many done up interiors these days. How you going about the interior? Same sort of approach as me? I can put you in touch with a cheap motor trimmer if you're interested.
_________________ EF GT6 - 129.4rwkw - Feautured in Street Fords Issue #77 |
|||
| Top | |
|||
| wholagan |
|
|||
|
{USERNAME} wrote: Also removed the cruise, as I never use it with the manual now, just more clutter out of the engine bay Looking good mate, i like your ideas on the rocker cover and interior spears, will be a sweet ride when your finished, will be watching your bulid! Just one thing tho... check that your horn still works since youve removed the cruise control.. When i removed my cruise control the horn stoped working... I had to remove the circut box from the cruise motor, and plug it back into the loom for the horn to work! I just taped up the loom plug and circutbox together, and hid it half behind the brake booster.. Wholagan.
_________________ XR6, 3''CAI, sick'o BBM, no AC, 2.5''exhaust, special cat, PWR radiator&expansion-tank, BTR, kevlar bands, JMM converter, shiftkit, 4 pin 3.91:1, 31spline billets, minispool, Nolathane, RDA golds, My interior, genuine GT's.. (gallery) SpeedFlow |
|||
| Top | |
|||
| dsyfer |
|
|||
|
{USERNAME} wrote: Chased up your build thread mate. Nice attention to detail! I could do with the use of a mill and lathe sometimes... Wish I had the time to get things polished up. Will be following thread with interest. Not many done up interiors these days. How you going about the interior? Same sort of approach as me? I can put you in touch with a cheap motor trimmer if you're interested. Hey MoNGoose, plans for the interior: Vinyl dye on the soft dash parts and top part of doors, plastic paint on all hard plastic mouldings, new carpet, retrim roof lining. Door trims, as in the picture middle stripe will be trimmed in white leather (if I can get some offcuts, don't want to have to buy a full hide of white) otherwise may need to cheat with some leather look white vinyl (eeek), armrest to be trimmed in black leather with white stitching on the edges, seats I'm not sure on yet, I like the look of the EF seats at the top, but might see if I can make the headrests in to the ones with the open centre section, planning on getting an old seat from the wreckers and see if I can put bigger side and seat bolsters in with some seating foam, then retrim in black leather and white stitching same as the console lid. I have done some furniture upholstery (with stitching) before that turned out quite good, so am planning on having a go at it myself. I have been thinking about this steering wheel, I know it's not everyone's cup of tea, but with the alloy door and dash spears it might work. Plus they are only $250 new, a nice second hand EL GT wheel is half the cost of the ECU I want. 
|
|||
| Top | |
|||
| dsyfer |
|
|||
|
{USERNAME} wrote: Just one thing tho... check that your horn still works since youve removed the cruise control.. When i removed my cruise control the horn stoped working... I had to remove the circut box from the cruise motor, and plug it back into the loom for the horn to work! I just taped up the loom plug and circutbox together, and hid it half behind the brake booster.. Wholagan. Thanks for that, I checked my horn, still works, but I am yet to take out the cruise buttons, will have to check when I'm doing that bit. |
|||
| Top | |
|||
| dsyfer |
|
|||
|
Found some time this morning to do the dash spear in alloy, thought I would do a step by step of the process.
First off, get yourself some aluminum and your spear, trace around the shape (forgot the photo of marking out the dash spear) 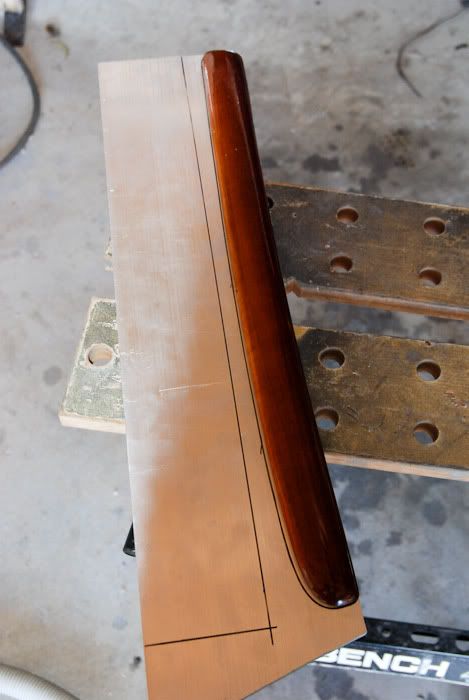 Then you need to cut out the shape, much easier if you have access to a metal bandsaw, but I did one spear with a jigsaw and a couple of Aluminium specific blades, you need patience here as the better the cut the less grinding needed later. 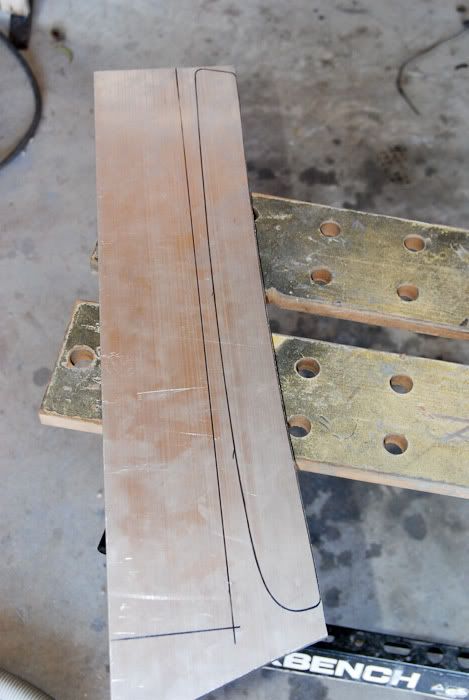 Tools of the trade, I find the smaller 100mm angle grinders easier to work with doing this sort of stuff, Two grades of sandpaper wheels; course and fine, DO use eye protection and a face mask, alloy dust irritates the crap out my eyes. 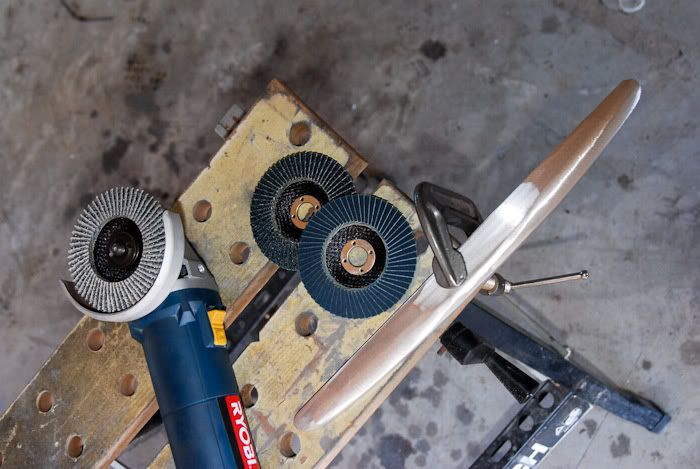 Start shaping, keep the original near by to check shape regularly, I clamp one end to a bench, BEWARE the billet does heat up quite well once you have been grinding a bit, hot enough to burn skin. 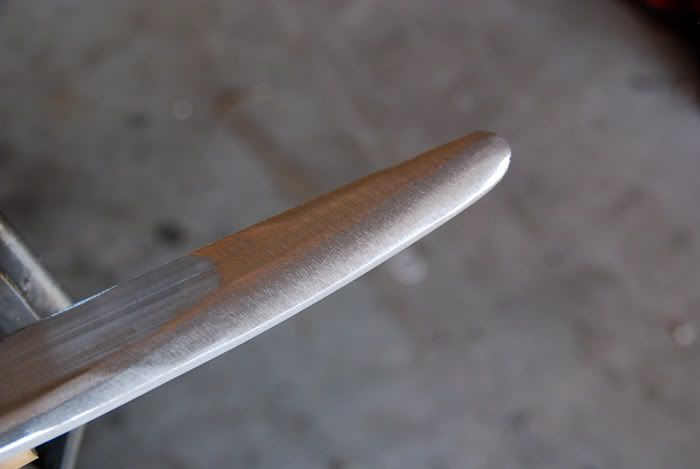 One end shaped, start on the other end 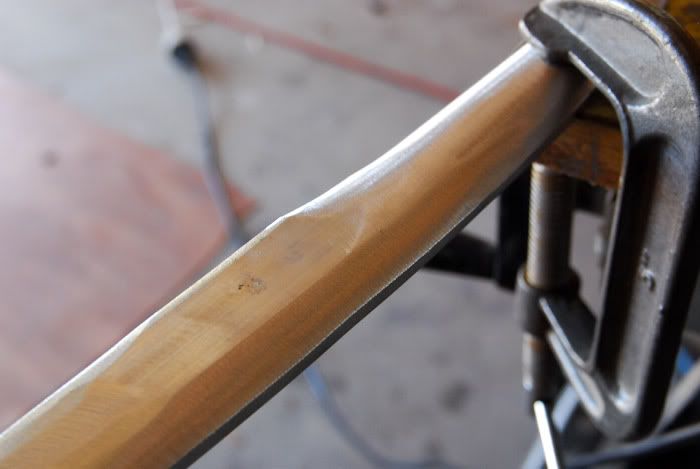 The dash spear has a concave in it to fit the dash, bit of persuading with the rubber mallet is all that is needed 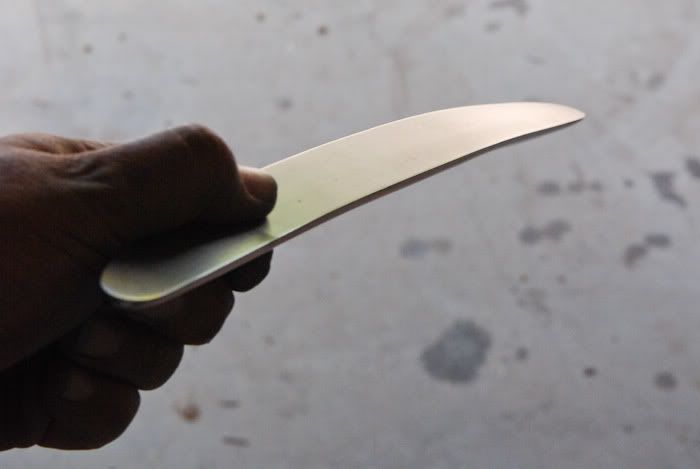 Once shaped and smoothed with the fine sanding wheel (the better job done with the grinder the less sanding by hand is needed) then it is time for hand sanding to make sure it's flat, I hit it with 180 grit wet and dry and a sanding block, not using a sanding block means any bumps left from the grinder won't flatten off, then finish with 240 wet and dry, if polishing by hand I'd recommend going finer with the wet and dry, even to 800 grit. 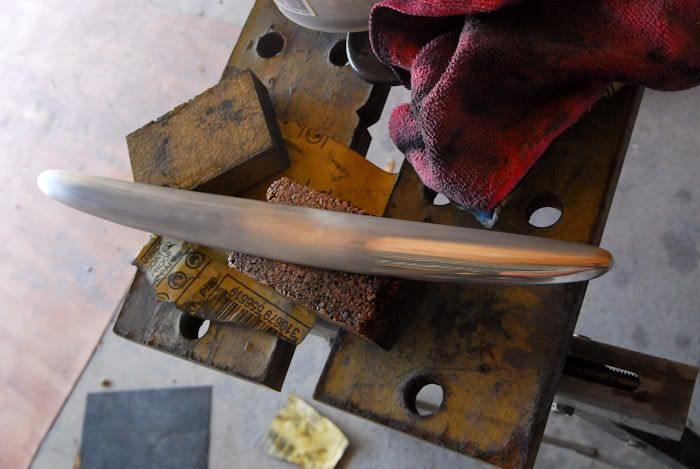 Then finish on a bench grinder fitted with a buffing wheel, I use two stages, first with a stitched buff wheel and a cutting compound, then on a finishing buff wheel with a polishing compound. however if sanded correctly down to 800 grit, autosol metal polish and a microfiber rag will work also, it will just take longer. 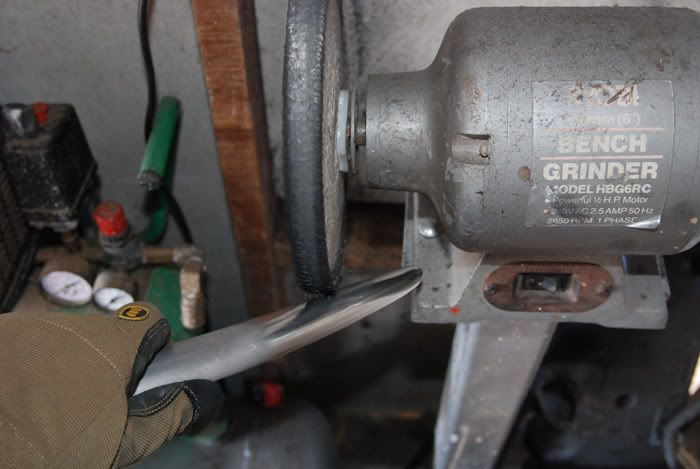 Finished product 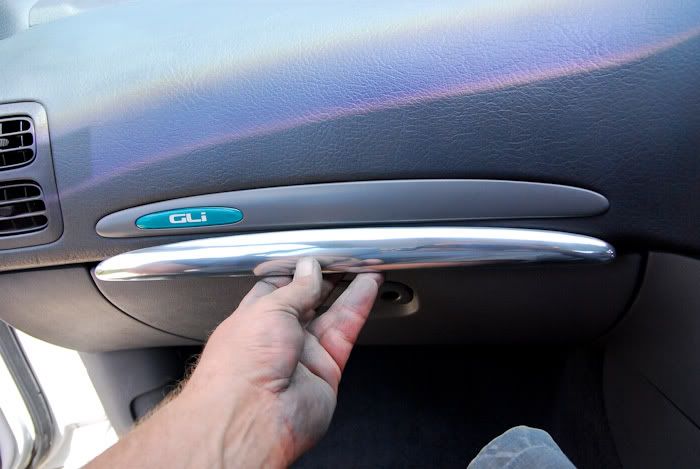 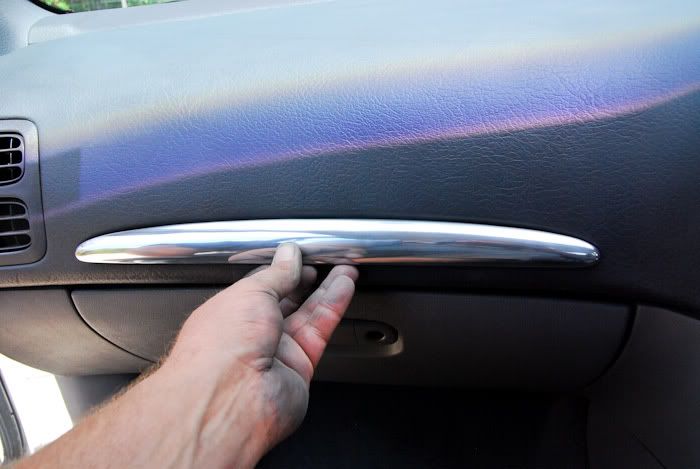 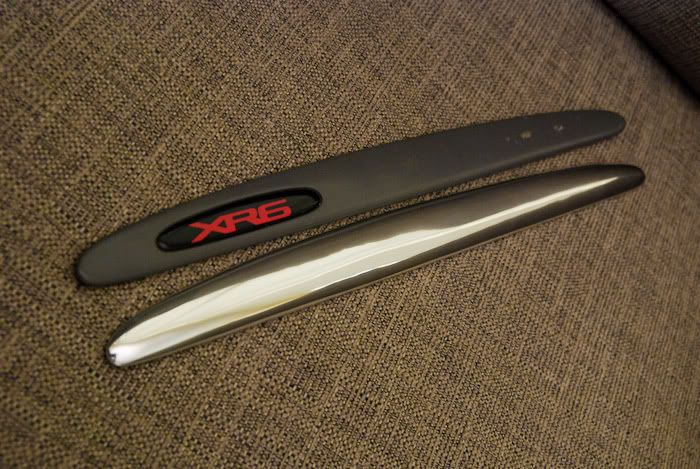 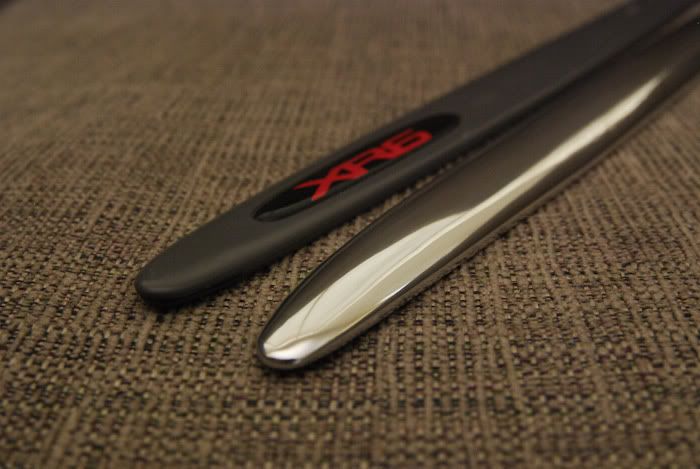
|
|||
| Top | |
|||
| Who is online |
|---|
Users browsing this forum: No registered users and 0 guests |