|
| RohCR |
|
||
|
GENERAL
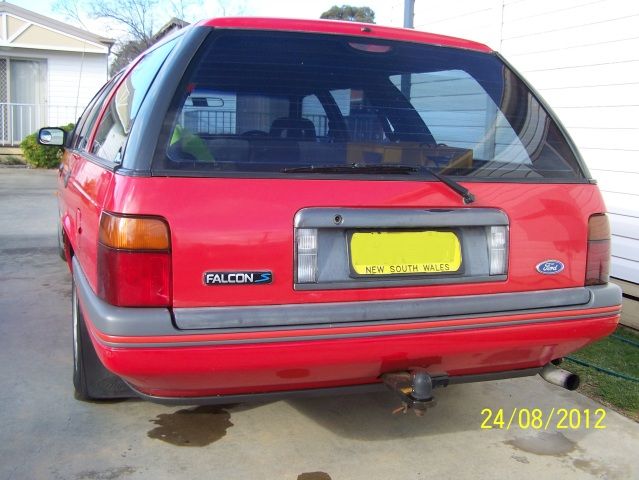
MAKE: Ford (doh) MODEL: Falcon Wagon S Pack YEAR: 10/1991 - first sold 5/92 in Canberra as a private sale. COLOUR: Red MECHANICAL ENGINE: 3.9 Litre TRANSMISSION: 4 Auto DIFFERENTIAL: I'm sure its got one. BRAKES: Yeah, I'll be looking at them shortly - slight shimmy under brakes was a factory option? SUSPENSION: Bitza - Air shocks on rear, Munro's on front. EXHAUST: Genie extractors & 2.25" (both very new) STYLING: The S Pack badge on the tailgate is blue if that counts for anything? WHEELS/TYRES: Factory 5 spoke 15's, 205/65/15 Falkens INTERIOR: groovy polypropylene herringbone weave with the go faster red piping! EXTERIOR: straight body with mandatory rust spot under fuel filler door. IN CAR ENTERTAINMENT: The sheer joy of being there. Will call the Sony & Jaycar Electronics hotline directly. OTHER FUTURE PLANS: Its a keeper. It will be a country car - dang Falcons were made for just loping along easy on long trips. No commute or traffic light drags for this 'ole girl! Must have a minimum factory ground clearance and be able to ride on rough/corrugated roads - so no 20" bling rims. Low engine revs plus torque on tap at 2000 rpm (or as close to this as reasonable), so that'd be about 110 kph, will be the go. Will probably aim to keep it stock. (Wifey reckons she's heard THAT before. Dunno what she's on about?) Mods likely to be low key and disguised where possible. Still lurking and reading the Forums & Tech pages thinking about ideas. Sensible suggestions welcome (whatever you do DON"T mention turbo's - the Wifey can read) MONEY SPENT SO FAR: $1500 plus rego CREDITS/THANKS: The previous pensioner owner who spent a reasonable amount of bucks before finally losing heart with the whole "lets own a big 'ole Falcon wagon" idea. IMAGES Since I've just picked it up, watch this space? |
||
| Top | |
||
| RohCR |
|
||
|
Pic time: (is it my internet connection or is Photobucket a bit dodgy lately?
    Out with the stock factory cassette which doesn't even have a finger mark on the buttons (!) and in with the new. The Sony & Kenwood speakers were a freebie from daughter #3 who never got around to fitting it to her beastie. Modded the factory wires to the Sony input loom with Narva 8 way blade connectors so later fitted amps will be plug and play. Front L & R channel speakers are 2x Kenwood's @ 8 ohms, 50w RMS for each channel, one in original door mount, one in centre console right up near the dash. Fitting them there will require some modding of the rear air con outlet piping that runs under the centre console. Will get a channel from an amp eventually. Rear L & R under the front seats will be 2 x Jaycar CS2286's @ $129.00ea (on order). The small size means it will fit under a seat and is tough enough to take some knocks. I have a pair in a Rodeo ute and they work fine but of course thats a much smaller cabin. Specs are: Power output: 55WRMS, Low pass filter: 40 - 280Hz @ 12dB/octave, Variable gain: 0 - 18dB @ 50Hz, Dimensions: 360(L) x 250(W) x 80(H)mm (data from Jaycar website). I'm thinking some tweeters mounted on the plastic door pillar cover to go with these. The 2x RCA out are as yet unused - saving them for the rear door speakers which will get the 2nd channel from an amp when she of the Ministry of Finance approves the purchase(s). 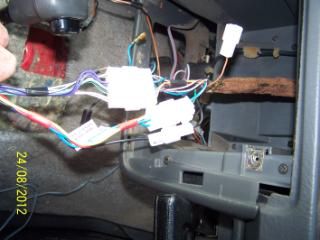 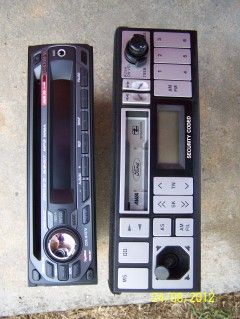 The door trims are out for 2 newly tinted windows - 30% on top of mild factory tint - say 35% ish, to be fitted along with new door locks plus outer handle and lock shroud. I'll also be washing out the inside of the door and preventative rust treating crevices. I only want to pull the trims once because each time there is a strip and refit there's more chances of damaging something, cracking plastic or stripping screw hole threads. 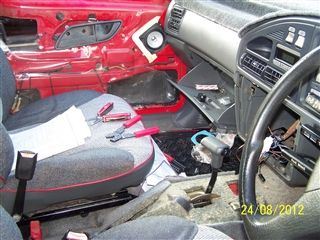
|
||
| Top | |
||
| head_ache |
|
||
|
Looks extremely tidy especially for being a red car
|
||
| Top | |
||
| EF_wanabe |
|
||
|
{USERNAME} wrote: Looks extremely tidy especially for being a red car yes very tidy now onto the extractor's how do they sound tell me about them op!!!! please oh please ive got a set with hi flow cat bought it not long ago but im not allowed to drive due to medical , rate them please lol ? |
||
| Top | |
||
| RohCR |
|
||
|
The Genie extractors aren't noisy, its more a subtle multi-tone note that sounds "nicer" to my ears...like whenever a piece of machinery is operating at its best - a "sweet zone" if you like. IMO, my gut says the extractors aren't a big power improvement - like most mods, its the incremental improvements of many things that all add up. I haven't had the car long enough to get a good average fuel consumption record going.
My Dad has a 92 EB2, 4.0L, stock manifold, 2.25" exhaust and his is a more "wooshy" sound when he gets up it, say overtaking a truck on the highway and his 4.0L definitely has more outright power but is noticeably harsher and is not as smooth in its power delivery as my 3.9L. Even he noticed that. |
||
| Top | |
||
| RohCR |
|
||
|
Work on fitting speakers etc to the doors came to a stop, ended up in hospital for a couple of days. sigh.
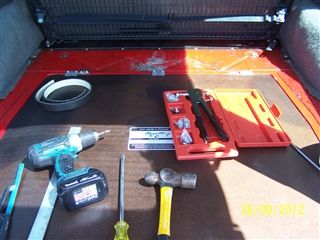
Went out to start the car and it ran crook: barely started and when it finally ran it was missing and idling rough. Whats going on here? Investigations showed a crook coil lead and a dist cap just about out of centre contact travel. And what a cow of a place to put a coil. What were they thinking? So a new Bosch coil, a set of plugs, leads, dizzy cap and button fixed that. Ran good for a day and then began playing up again - running rich and revs varying at seemingly random times. Yep, its the MAP sensor pipe, heat and age hardened & cracked at the back of the tube just off the manifold port. Where you cannot possibly see it. Removing the old coil disturbed it I'd bet. 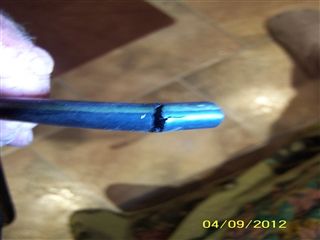 So fit new vac tubes - brake booster, MAP, temp sender, heater & climate control lines - a 21yo car, who'd a thunk it? Since we're at it a couple of cans of Nulon foaming intake cleaner for good measure. 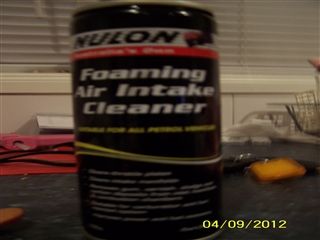 1 can into the throttle body with engine off and leave for 20 minutes. Start engine...outdoors! Then 1 can down the MAP vacuum tube with engine running about 2000rpm. I'd say I'm happy with the results of these mechanical detours from the front door project. Sorry for the not so good pics - camera is normally better than this. I'm also using Multiple Image Resizer - MIR - as a way of keeping the pic kb's down due to a poor internet connection. |
||
| Top | |
||
| BenJ |
|
||
|
Sweet!
Another 91 EB Wagon! Wooohoooo. Your ride looks really tidy mate. Plenty of mods can be done to update and improve it. Looking forward to seeing what you do with your wagon. Cheers BenJ
_________________ {DESCRIPTION} - Current Ride |
||
| Top | |
||
| RohCR |
|
||
|
Ta, BenJ, I always was a sucker for red. The question is where to start mods. I've got the engine running right now and it gets an auto service, diff oil Monday coming so that'll do for now in that area. The suspension is quite good, hoses & coolant now changed, bushes OK, brakes serviceable - fluid new.
So interior it is, for a bit anyway - front doors, console then fit cargo barrier. IMO, this kind of work is the small stuff that nobody notices and cares too much about. Not a sexy as big engine mods etc. Had spare window glasses, so they went off to be tinted and I stripped the doors, cleaned the crevices, rust treated the inside of the door cavity, pulled the locks, cleaned and re-greased the internal mechanisms. Bought new locks and rounded up a tidy set of lock surrounds. Cleaned all the rubbers - were in good nick, not hardened with UV, then fitted EF door insulation but cut and kept the lower inner plastic from the original as a water shield then put in and new speakers. Erk - crappy door locks: 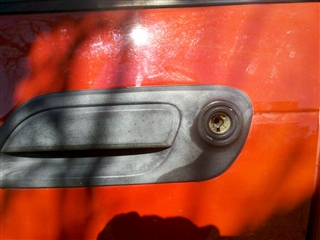 Stripping the door 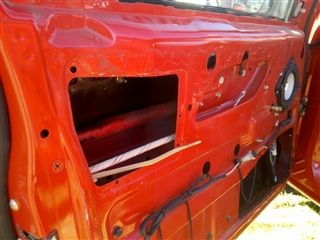 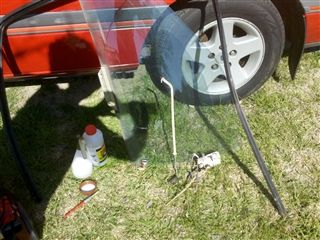 Yuk - 21 years of dirt inside the door lock: 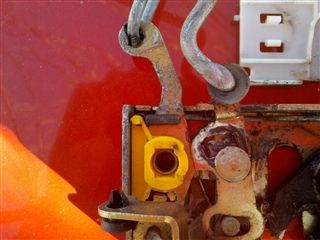 All clean now & lubed with: 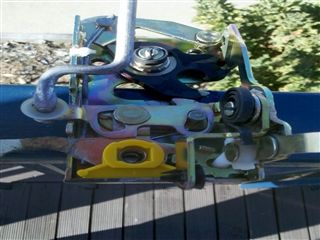 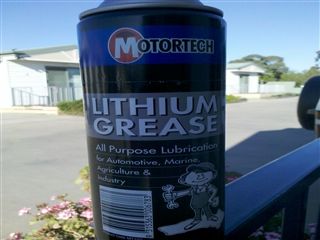 Trial fitting new tinted glass: 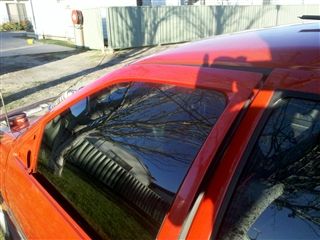 Well on the way:  Inside using EF door insulation: 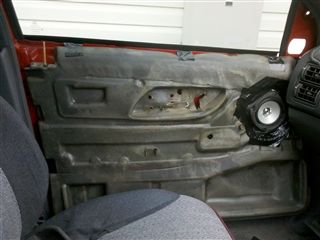 Finish: 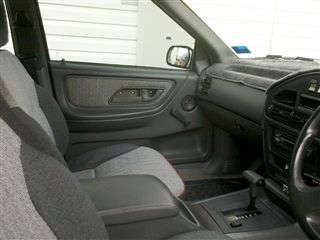 Rinse and repeat for drivers door. Rounded up a Fairmont console, the vacuum formed finish rather than straight plastic. The upholsterer is getting me some grey matching vinyl to trim the straight plastic rear of the console where the rear air passenger vents come out (the plastic deteriorates with age) and some red piping (similar to the S Pak seats) to outline the trans shift and coin trays etc. He'll call when its ready. |
||
| Top | |
||
| BenJ |
|
||
|
Yep, I had a red EBII Sedan.
When I went looking for a wagon, I tried to find a red wagon but wasn't able to locate anything. Got the Black Pearl Ghia Wagon instead. Cheers BenJ
_________________ {DESCRIPTION} - Current Ride |
||
| Top | |
||
| EF_wanabe |
|
||
|
hope i dont sound like a broken record but did you tint the windows your self ?
hope the center console is coming along nice the re trim |
||
| Top | |
||
| RohCR |
|
||
|
Can anyone help with this:
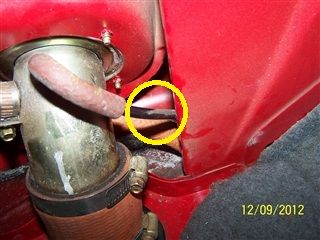 This breather hose from the fuel filler main inlet pipe goes to the engine bay, passenger side and there it ends, not connected to anything. I'm assuming its supposed to go to the canister in the LHS front wheel well but then again maybe not as I cant see how it would connect to it. The Haynes & Gregory's manuals gave no details. Can anyone help with info? EF_wanabe: The red piping hasn't arrived yet...coming from the US apparently. The console has come up well but it really needs that red piping to set it off. No, I didn't tint the windows myself, local glass place did it. |
||
| Top | |
||
| RohCR |
|
||
|
Ah well, still don't know where this breather hose goes to in the engine bay...
Its gonna have petrol fumes so maybe I should just suck it up? Anyway, started the car, the other morning and there was a racket as the fan took out the bottom of the radiator shroud. No radiator damage 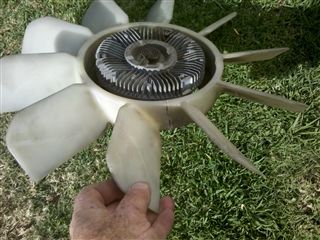 Solution is twin EL/EF thermos. The suckers just slide in - very neat: 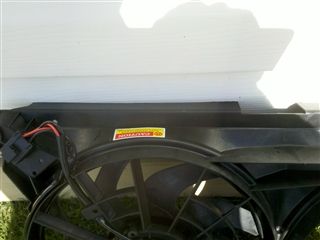 First a good clean of the radiator and a toothbrush clean of the radiator support panel parts that haven't seen the light of day since who knows when: 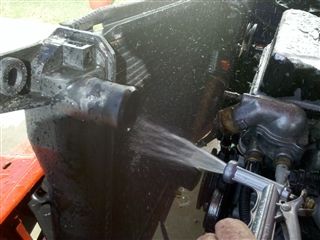 Carefully drilled the top of the radiator mount and used some screw clips scrounged from a wrecked Falcon. Squeezing the clips to grip better is best done on the side of the clip, not the end: 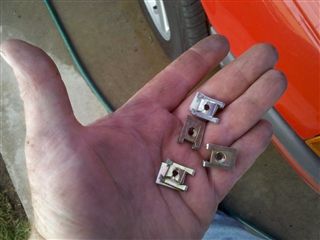  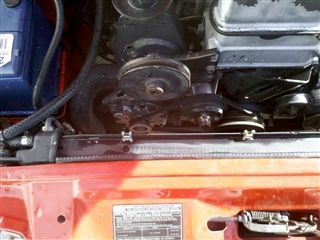 I used four clips evenly spaced, which is probably more than Ford would have used if the EB1 had twin thermo's. Wiring up will be tomorrows job. I'll use a Tridon 95F on/90F off and also put a manual overide on switch. All 3 ports on the housing base are in use. 1 is a computer sensor, 2 is for twin vacuum thingys and 3 is a temp gauge sender. I'm thinking to drill and tap the top or maybe the side of the thermostat housing unless anyone has a better suggestion. There is stuff all room at the bottom of the radiator to use the drain bung. |
||
| Top | |
||
| RohCR |
|
||
|
Update:
The paint on the rocker cover didn't survive a good pressure wash 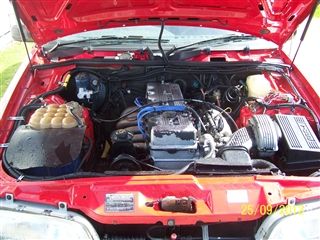 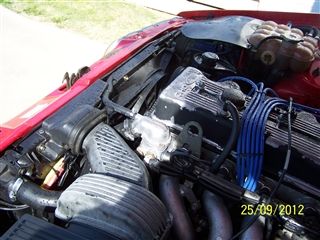 Since the daggy under-bonnet insulation has been taken out a rubber sheet now tops the battery. I made up pos/neg terminal bus bars, will spray with protector after taking the pic. Also running heavy power to the back for a Waco fridge and inverter. 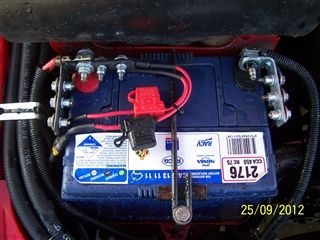
|
||
| Top | |
||
| RohCR |
|
||
|
Went to check the air in the spare tyre early this morning. The wagon has this great lump of fairly solid and shaped pressed masonite over the fuel tank & spare tyre cavity. Dropped the masonite on my fingers when it slipped. Stuff that. What it needs is hinges, rivnut secured of course - not screws - and a new seal. I'll rat out a weak gas strut from somewhere in my travels next:
 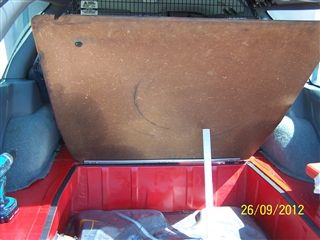 I so lurve rivnuts, esp M6 size. Much better than screws! 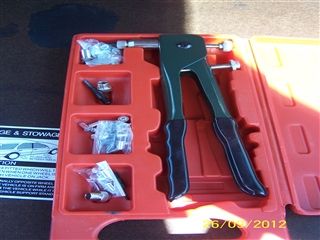
|
||
| Top | |
||
| RohCR |
|
||
|
Ahh, been crook & in hospital again.
Still, life gives lemons, make lemonade....or order some Falcon bits while laid up? The headlight seals are no good, keeping moisture inside the light after any water is around. Actually I got chipped by the Plods the weekend of the Deni Ute Muster for it, no ticket but a comment none the less. 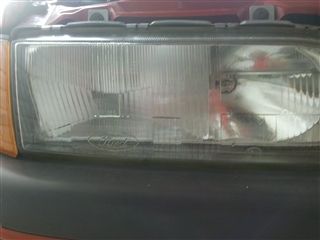 So more "boring" grunt work on the car - no hot camshafts to report as yet! 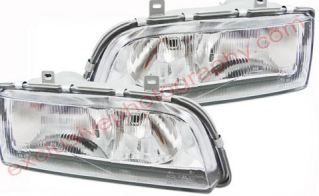 I ordered some new aftermarket headlamps off ebay. IMO, given the price and quick service these guys were good bang for my buck. The quality is acceptable but there is a few not so obvious things to check before fitting: 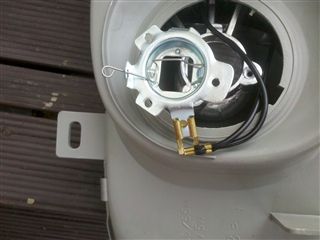 The earth spade clip was a very loose fit on the terminal of the surround. It needed to be closed up with pliers. The fit was that loose. Of course, I've unscrewed the 3 mounting ring screws to get better access to the terminal lug. Also the (+) wiring is heavy enough to run better than 55w halogens in the drive light section, the earth return definitely isn't. 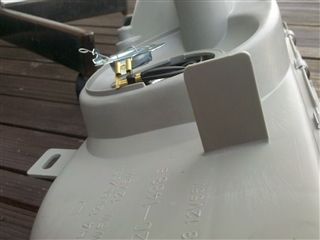 There is a inside hole on a light body lug missing, or at least undrilled. No biggie to fix but this extra bolt adds to the the lights vertical stability when in service driving over rougher roads. The light body on the right of the first pic was the original light body. The old spade terminal lugs were in pretty poor shape, so the new ones are an improvement. And while I was at it, I wire brushed and satin blacked the mounting bolts. 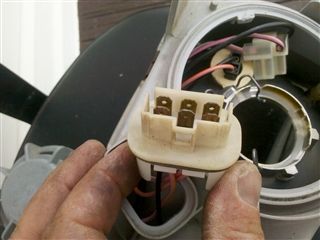 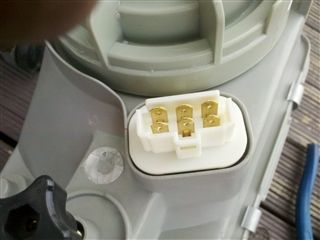 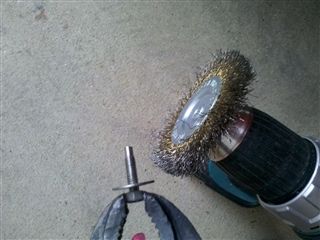 Future plans are for 55w Hi/Low @ 4300k to 5000K HID's and 100W @ 4300 to 5000K HID's in the drive light section so there is no need for me to modify any headlight wiring while I was there - this time. PS, Mechanically, I just took a punt and bought a set of new Bosch AU 4 hole injectors. My bet is they are going to have to be smoother power delivery and idle than the single hole 3.9L injectors So hows your modification week been? |
||
| Top | |
||
| Who is online |
|---|
Users browsing this forum: No registered users and 0 guests |