|
| street_xh |
|
|||
|
Hi all
The following is a build thread on a Ford Ute that I have been working on for the last 12 months. It’s a grey XH Series 1, with EF XR body-kit and a few other bits and pieces. This will be my first build thread. In fact I have rarely, if ever, posted on a forum. I do feel that I have left it a bit late to begin writing a thread, and wish (as most authors that I have read do) that I took more pictures during the build process. I will endeavour to add to the thread every few days until I get up-to-date with how the Ute is progressing. I hope that you enjoy the read! Chapter 1 My X Series Utes 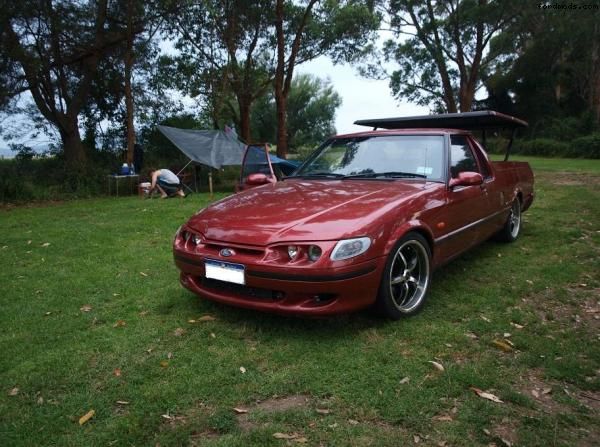 I have always been a fan of X Series Utes and I have wanted one ever since early high school, when I first saw a green XH XR8. However while studying I could not afford/ it was not practical to get one. This all changed when I left uni and started work. I saved up and dropped (yes this is a bit excessive) 10 grand on a red 1999 XH XR6. Not to go into too much detail this car wasn’t too crash hot. It had Redback extractors and a 2.5 inch exhaust system fitted, Koya rims and an awesome hard top. I was never really happy with the red ute. While it seemed to have a bit more power than my mates, but had some rust/paint issues that quickly got worse. It also had many wiring issues and the loom had been chopped and rewired by multiple leckies. This left me out of my depth when it came to trouble shooting. I really wanted something with a bit more go, so I looked into ways of making her a powerhouse! Long story short I installed one of Snort Performance’s Sprintex charger kits with a lot of help from Snort himself. These kits are awesome, water cooled monsters that I reckon really set off the engine bay! Well, you make your own minds up: 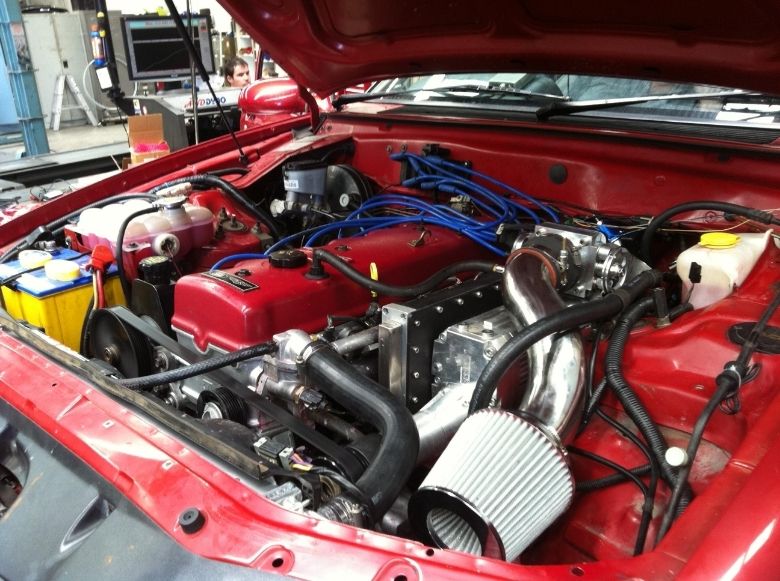 The kit made about 240rwkw on a standard fuel pump and two inch exhaust and had the potential for a lot more with intake temps of just 40 degrees on the dyno! Next I took the red Ute on a trip from Melbourne to Brisbane and back again. I had a few tune related issues but it was still a great trip and I got to see a lot of the country. For the first half of the trip the car was great on acceleration but very average when cruising. It would foul plugs unless I gave it a good thrashing every few hours (tough I know 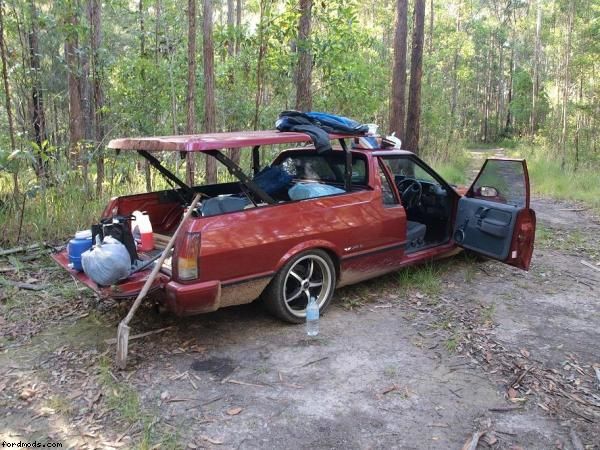 This is somewhere on the road from Sydney to brissy. For the second half of the trip it became a pig, and to this day I’m not sure why, possibly the fuel pump, possibly issues with the bypass valve. After I got back I adjusted the fuel mixtures on the street with a couple of mates. This only just made her drivable. To be honest I had lost interest. The next 4/5 months past and i decided to begin the grey ute! A few pics for the out take 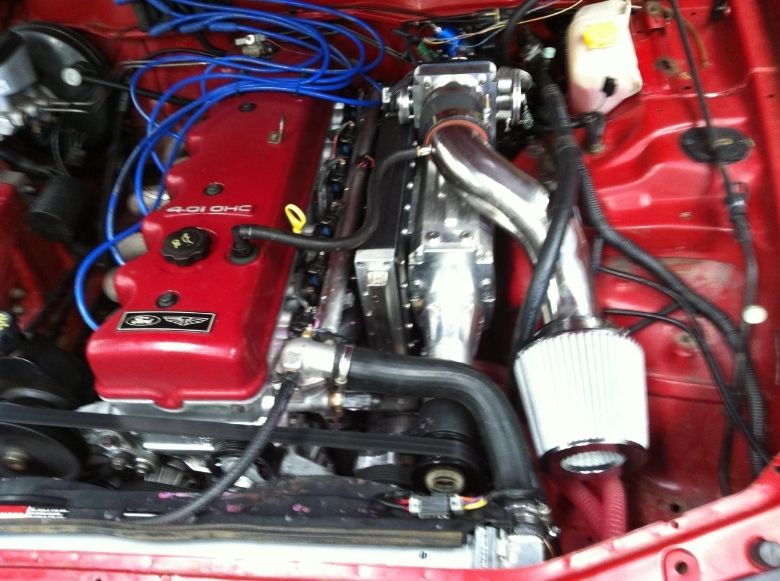 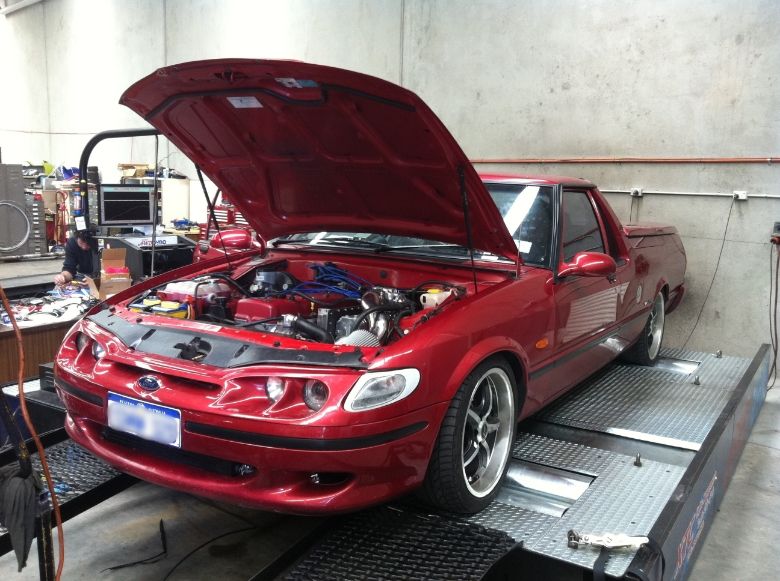 I had kept in touch with Snort over the entire duration of my last build and he had always been there helping me out a giving me sound advice. When thinking about my next project, naturally I gave him a call. I really wanted to build another ute, I felt like my last build had gotten the better of me and I still loved the X Series shape. Snort said he was up to another crack too so after much discussion we decided on an XH TURBO project. This wasn’t to be a massive dragstrip destroyer, but a 300kw daily driver, capable of taking on the occasional bit of track work while also being capable of pulling the trailer on a weekend trip away or work around town. I also didn’t have the cash required for driveline upgrades if we had gone BIG power. (these seem to be more expensive than ever!!) In summation I started looking for a new blank canvas. Enter the Grey XH Series I! 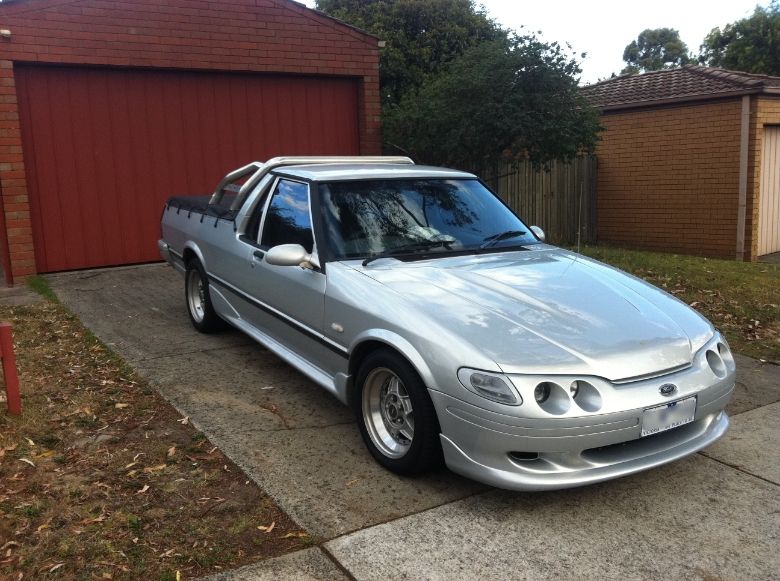 This picture is actually 4 months after I got her but you get the idea As your keen eyes have no doubt already detected the ute is… … Grey silver. Just kidding. It has a b series bonnet bulge, full body kit, simmons b45 rims (my personal fav) and an EF XR6 front end. Yep, I said it, this is actually a dressed up standard XH Ute. A bit of a poser really with its s**t extractors, standard motor and diff, and disgusting try-hard twin muffler exhaust. I suppose I saw this as a challenge, to build this POS into the modified powerhouse it was pretending to be. Actually there is more to it. I found it in Canberra. After having major rust issues with my last build I was looking as far away from the coast as possible. After many weeks (about 3 weeks of intense activity on the Google machine) I found an advertisement for the aforementioned grey poser; “Silver ford xh xr6 $4000”. I had a chat with the bloke on the phone and he assured me the car was running and had only recently gone out of registration, the car was rust free and he’d even put it on the hoist for me to expect. Too good to be true right? The following Monday I took some pre-determined sick leave and flew up to Canberra. While in town I grabbed an unregistered vehicle permit and a fifty dollar cab ride to an industrial estate in Queanbeyan, $3500 in hand. Arriving at a factory there the thing was, looking like s**t, unwashed for eternity in the back corner of the parking lot. The hard top was completely f**k and she needed a jump start. After about 20 minutes I found the owner who told be the transmission was a little tired but the car goes hard, “still does a good burnout” a fact I had already attained from inspecting the rear tyre wells. There was a hoist in the factory where the owner worked but it was in the air and the car it supported wasn’t going anywhere soon. Next we popped the bonnet. Inside was a nice clean bay, I found no signs of rust nor could I detect any oil or water leaks. It was a pity the bay housed a standard xh motor with log style manifold. After asking the bloke why he got me to fly all the way to Canberra to pick up a car that wasn’t even an XR he apologised citing the fact that his mate “said it was an xr6”. f**k me I was p****d as I had grilled him about it in a fair bit of detail. I wished so hard I had asked him for a picture of the engine bay. In the end I gave him 3500 in agreement he would re-register it for 3 months so that I could get work done without movement permits. This also never happened, the Lying Snivelling C*nt. After this I drove her back to Melbourne without any real issues. The car drove great, actually felt like it had as much power as the old red ute (before forced induction I mean!!!). He hadn’t lied about the body, there was no body rust nor signs if it developing which believe me is not common in the 1997 models. The L.S.C. had also been truth-ing about the cars burnout potential This is the only photo I’ve got of her when I got home: 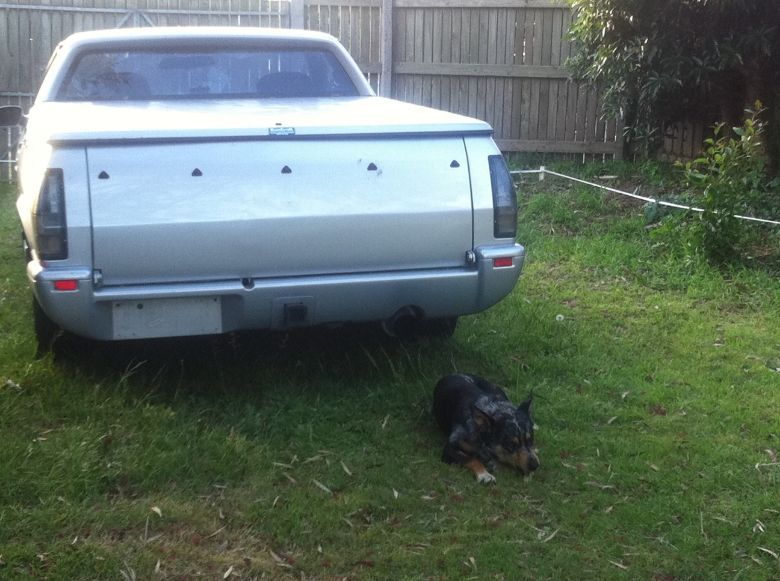 The Pros - Cruise worked, yay - Power Steering was fine (I was weary as i knew one of the things they “fixed” in the series two was high speed power steering issue). - The Audio awesome sound, really top notch - The body. Tidy as f**k, straight as a die, good paint - Near new rear leaves The Cons - s**t teenager speck HID lights installed (I say installed I mean shoved in with no effort or brains) - f**k transmission & differential - non XR - Plently of rattles and squeaks - L.S.C had installed a sub in the area reserved for the spare fuel tank, he had cut a 10 inch hole to do so and I really wanted to install a secondary fuel tank for long distance drives Last edited by street_xh on Mon Nov 18, 2013 2:38 pm, edited 1 time in total. |
|||
| Top | |
|||
| mitchell g |
|
||
|
even though the silver ones a poser, it looks tough as f**k, looks great
|
||
| Top | |
||
| xr8_km |
|
||
|
Queanbeyan.... Say no more. Good luck with the build.
|
||
| Top | |
||
| revcore |
|
|||
|
Love the XH...Looks tough with the Simmons on it and the rollbar.
_________________
|
|||
| Top | |
|||
| street_xh |
|
|||
|
Thanks guys, appreciate the support. I love the bonnet bulge on the xh, I'm not to sure about the body kit though... might pull it off and drive it without for a few weeks to make up my mind.
I recently read your DOHC build Mitchell (well some of it). Looks great! I'll try and do another update in the next day or so. Also trying to find a few more pics!! |
|||
| Top | |
|||
| revcore |
|
|||
|
I'm not usually a fan of body kits but I reckon your ute looks excellent with it on.
_________________
|
|||
| Top | |
|||
| mitchell g |
|
||
|
[quote="street_xh"]
I recently read your DOHC build Mitchell (well some of it). Looks great! quote] thanks mate, currently going around to refine a few ideas i had with it at the start and make them more subtil but getting there |
||
| Top | |
||
| TimmyA |
|
|||
|
Hey man,
Nice looking silver XH i must say... Glad you shared that with us... I was all keen for a turbo charged car and going the full tune route years back... But living out here in the sticks maturity dawned on me one day that trailering it to Melbourne or Sydney (5 or 6 hours) to get it tuned and then hoping to hell I never had any tuning issue when I got it back home seemed unfeasible... If I lived in the city I'd be all over it but I can't something that may turn out to be that unreliable here and then to the help 500km away... So I ended up with a full AUII VCT install in my ED and I'm stoked and the car is basically factory wired AUII with a couple of things I had to add in but it makes it so much tidier than the wiring and crap I had to add into the ED and just starts and goes good now... Good enough for a daily driver anyway... Maybe I'd get it tuned as long as pulling the tune was easy to get back to factory settings played up... But if I was to own a turbo now I'd just by an FG... Glad to see people out there still with the bug but... Cheers, Tim
_________________ {DESCRIPTION} |
|||
| Top | |
|||
| street_xh |
|
|||
|
I know exactly what your saying Tim. With my last build I had a lot of trouble with tune/tuners. It was partly because it was my first build, and I had approached a few things badly (hard lessons learned). Whatever the cause, I have been strung out before a long way from help and its a shocking feeling.
I'd like to try moderate these problems this time by being involved in the tuning process however finding a tuner who is willing to part with a bit of knowledge can be difficult. I will be able to adjust the fuel mixtures in car as I have recently mounted an AFR gauge and a pyrometer in the exhaust. I have done this myself in an emergency before. I have also got an adjustable fuel regulator with a pressure gauge so I can now actually check that my fuel pump is behaving as it should. Ignition should be pretty solid coz I'm thinking of going a multi spark system. I'm gonna try to get my head around how this is set up on the computer in case I ever get strung out a d have to swap parts etc. I found after my first build that the installation I got the most enjoyment out of were the ones that I did myself so I have been trying to get involved and do as much as reasonably possible. That said I'm not going to touch the wiring in of the computer this time, I'll let the tuner take care of that. I am a bit nervous when it comes to the tune part of this build after a previous bad experience. I'll just have to deal with this as best I can when the time comes.. |
|||
| Top | |
|||
| street_xh |
|
|||
|
I've edited this post this morning after a mate told me it needed to be more descriptive...
Chapter 2 Bringing her up to standard The car needed a few things desperately; firstly the 2 dollar hard top had to go. Also, when driving/working on my other XH I had noticed there is a lot of flex in the chassis around the cab. So I started looking around for a roll bar in an attempt to rectify this. I also wanted a tonneau cover to keep my tools dry. I went away from hard tops because I have a two year old Aussie Koolie who loves riding in the tray. After a few weeks of searching I found a sports bar and cover advertised on gumtree. They were both off an XH Ute, and for just $220. The sports bar wasn’t quite as strong as I had hoped but for that price I was pretty happy. The install was a breeze as all I had to do was drill a few holes. Here are some pics of the car afterwards. I treated the tonneau cover with some vinyl protector and it came up great. 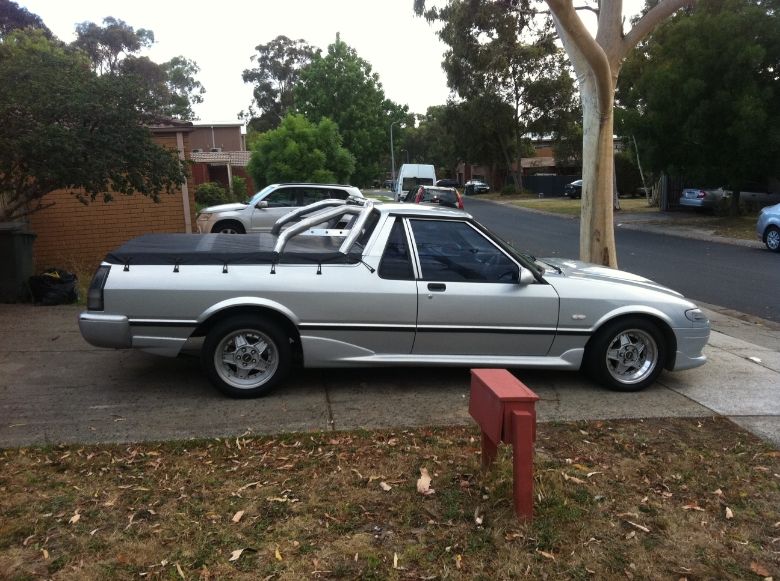 [/URL] [/URL]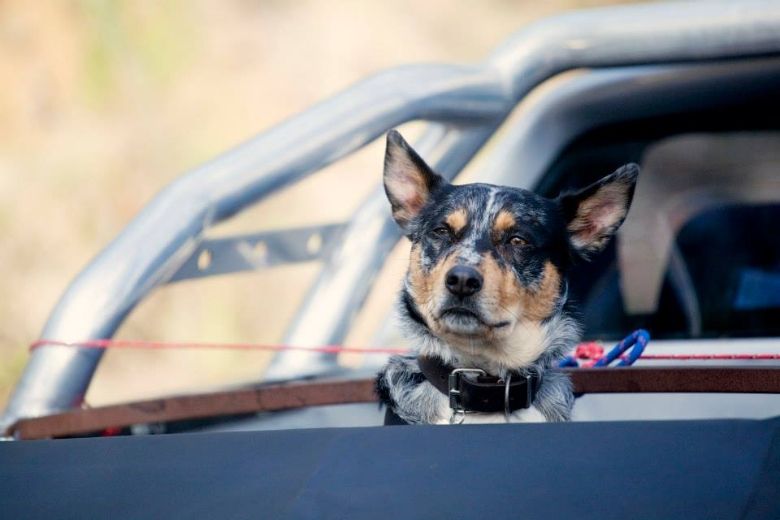 You have probably noticed a drastic improvement in my photographic skills here. I love this picture; it was taken by a friend when we went for a weekend trip along the great ocean road. I also wired in the brake light in the top of the roll bar, this is really bright and handy when reversing as it makes the entire rear view light up: You can just see it in the photo 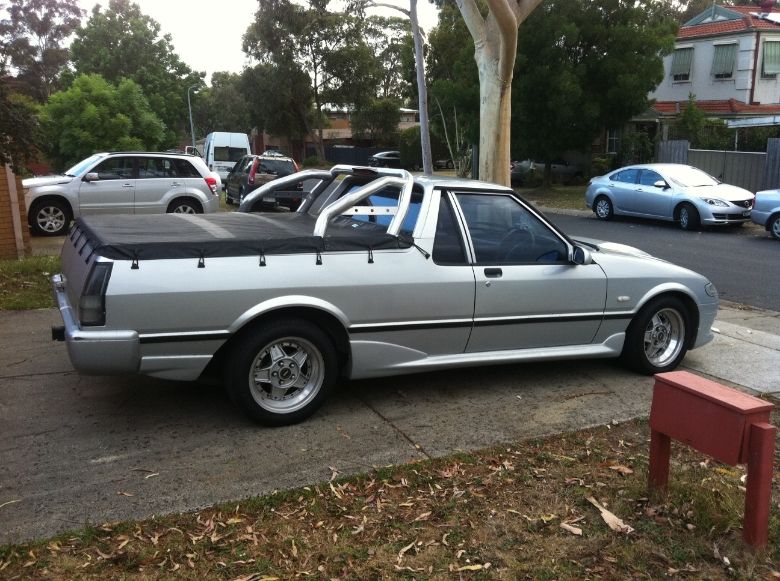 The next thing on the agenda was transmission and the L.S.D. I’d had both of these rebuilt in the Red Ute. So I pulled them out and spent a few nights cleaning both up and repainting. I then installed the gearbox. This was a bit of a mission as I’m from WA and had no-one to assist me in either removal or install, I ended up seconding a psychologist I knew into giving me a hand who, despite having no experience or interest what-so-ever, proved to be instrumental in the completing the job, a very smart bloke. Because we were working on the grass of my front lawn we could only raise the front of the vehicle for the transmission swap. This made it difficult to get access to the back of the bell housing. We ended up using an engine crane from above and a trolley jack from below to manoeuvre the box into position without allowing it to hang off the spline. Sorry but in the mad rush I never got any photos. Next was the rear diff. This was pretty easy to fit up. Still working on the front lawn I chocked the front wheels and removed the old differential from the car. I ended up wrecking one of the brake callipers while doing this. Luckily I had two spares. I then fitted the new one into position, refitted up the brakes and bled them, next i took it out for a test drive! The difference was huge. It was actually a nice car to drive; I found the diff and transmission significantly smoother. I’m not sure if this was just the fresh oils or the fresh new drivetrain. The speedo was also closer due to the change in diff ratio. Needless to say I was pretty stoked Here’s a photo of the diff mid-way through install: 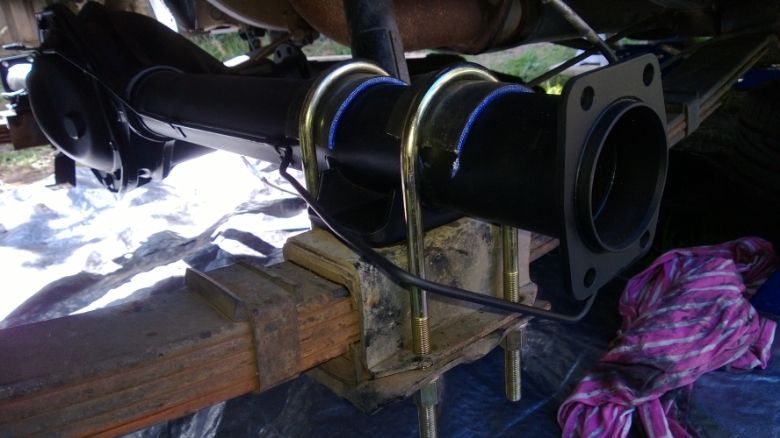 Now that I had a nice tight transmission I started missing the short shift kit from my red ute. Fortunately I still had this too so I fitted it up, along with an AU centre console. The console install is really easy (just search it on fordmods if you’re interested) and I think it looks great. I had been missing cup holders ever since I bought my first X series so this was a top priority. The Au centre console: 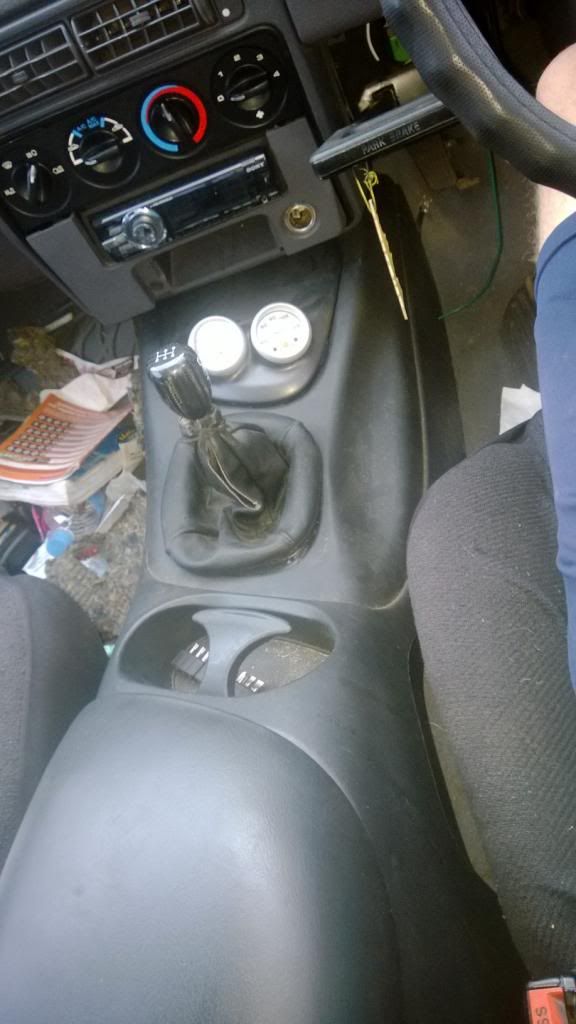 And finally some Gauges: 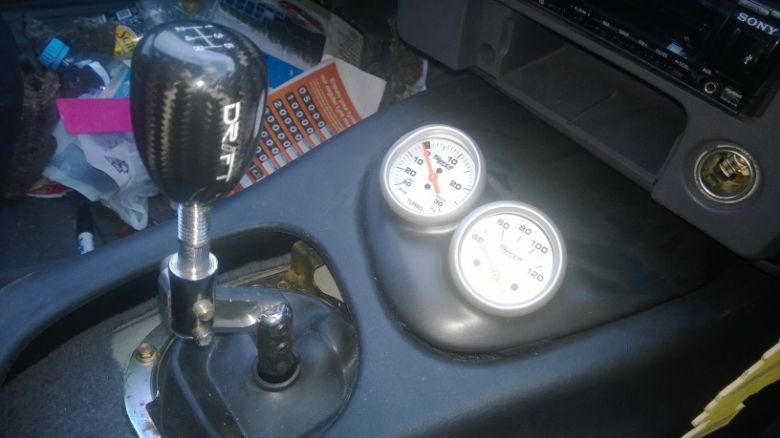 I found the facia for the gauges on the internet. It fits straight in to the front of the au console. Finally I had a Ute that was starting to look enviable. Right about now I was receiving a few goodies from Snort. On his advice I went with a powder-coat black finish with just a few polished features to set the engine bay off! I have some photos of the housing and plenum somewhere… Here they are: 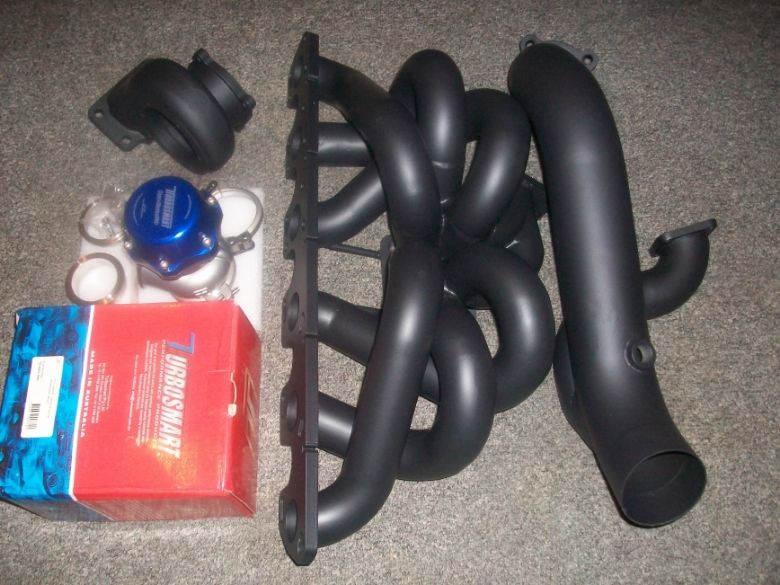 A Snort Performance Stage 6 turbo manifold. I wish I’d taken some shots of the inside. 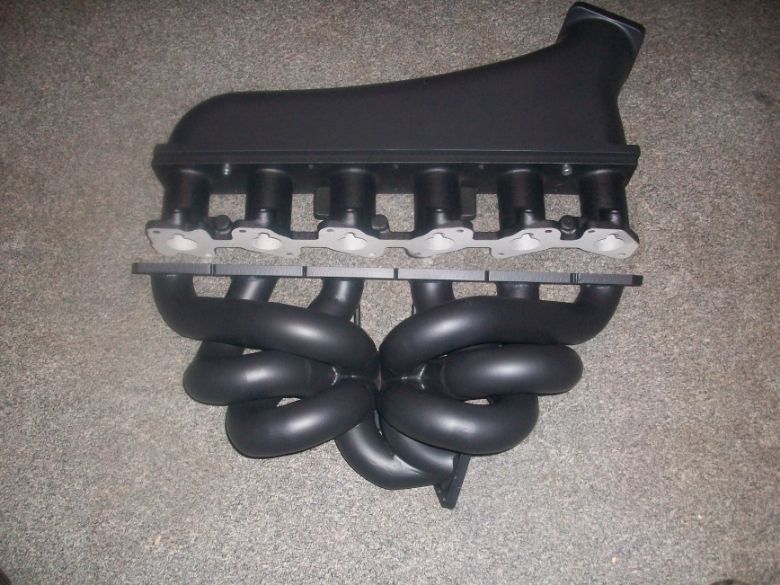 I think the plenum is an ICEMAN 1200. With an shiny 80mm throttle body attached this looks sexy.. 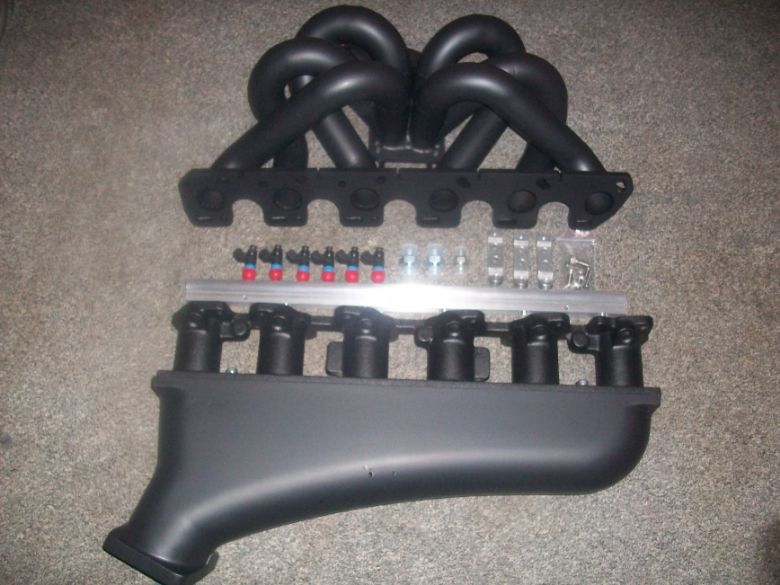 This picture has the billet fuel rail. By now I was starting to think about ignition and computer (I still haven’t reached a decision on this yet). I have still got an EMS Stinger from my last build and Snort is suggesting I go for a multi spark ICE ignition coil. Has any-one used either of these? Are the ICE coils good? They are much more in my price range than the closest competitor. Also, I need a new loom for the computer! My other one has been chopped and soldered way too many times. Can you get them straight from EMS? |
|||
| Top | |
|||
| street_xh |
|
|||
|
Chapter 3
Donk Now to decide what powerplant this badass turbo beast was going to be generating mass torque wheel-spin goodness through. Fortunately, I already had the answer; 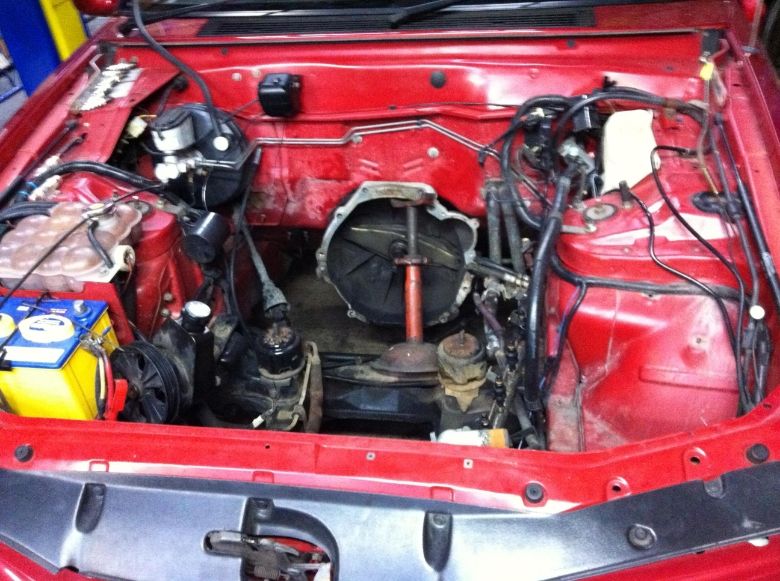 Yes, that is a picture of an empty engine bay. I’m a prick so you’ll have to scroll down!! | | | | | | | | | | | V | | | | | | | | | | | V | | | | | | | | | | | V | | | | | | | | | | | V | | | | | | | | | | | V | | | | | | | | | | | V | | | | | | | | | | | V 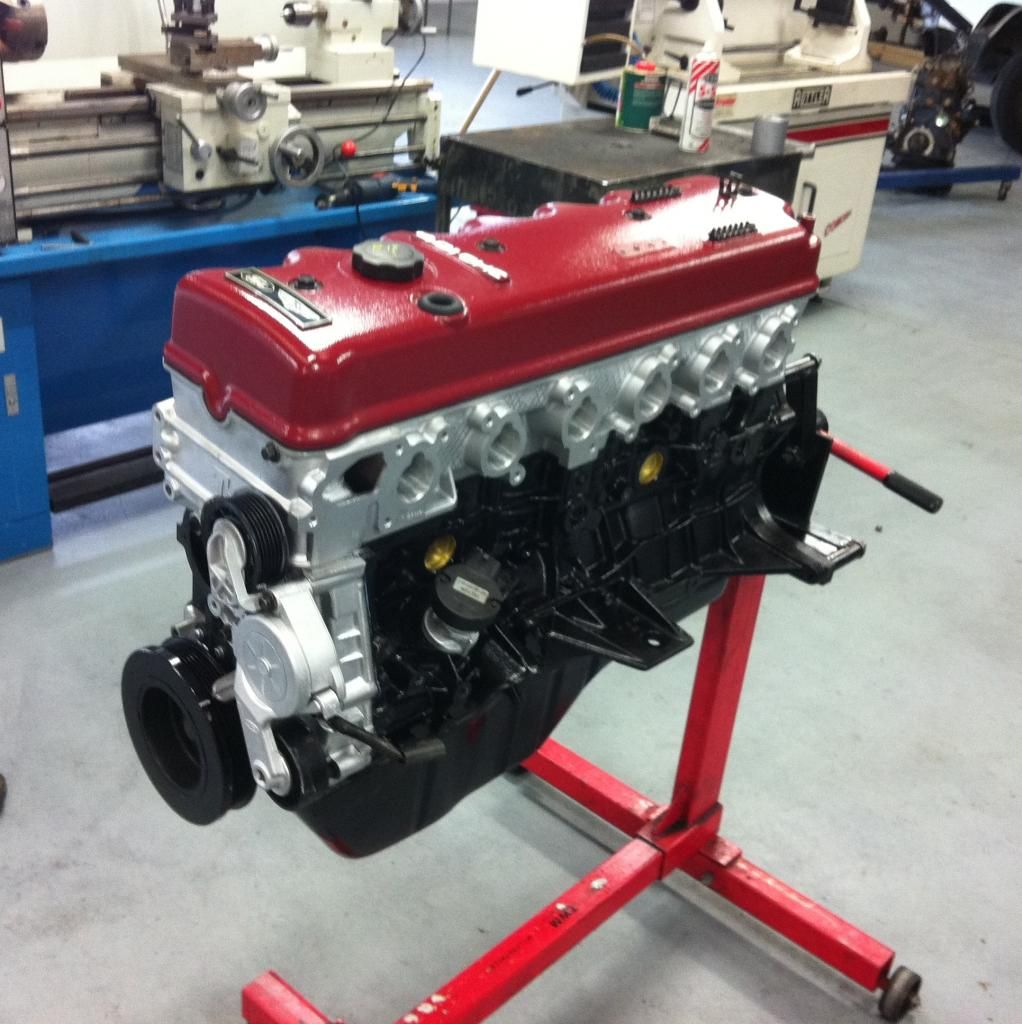 #gofastbits This engine was originally intended for my red ute, but now that I have changed projects it is coming along for the ride. Built in Mordialloc, by Grants Motors, the engine turned out aesthetic. Here is what’s inside: As you can see in the photographs below I have used forged pistons and rods; the pistons are meant for an AU XR8 and the rods were supplied by Grant. He has also ground the head to flow a bit better; apparently you don’t want this too smooth or the gas doesn’t spin as it enters the headers. The cam is out of the red Ute, it has steel pencil marks all over it. After some research grant thinks it is a Tickford development cam. I have no idea how it got there but as I was still thinking supercharger at this time, I decided to stick with it. I’m keen to have a crack at swapping one myself later on anyway. Grant installed heavy duty springs; these still tick to this day :S hopefully not doing damage! But my dad reckons his ticked for ages after he modified his GTS. I have had a chat with Snort about this once too, he was a little concerned. After I have it driving I might go and see Grant to ask him what he thinks. 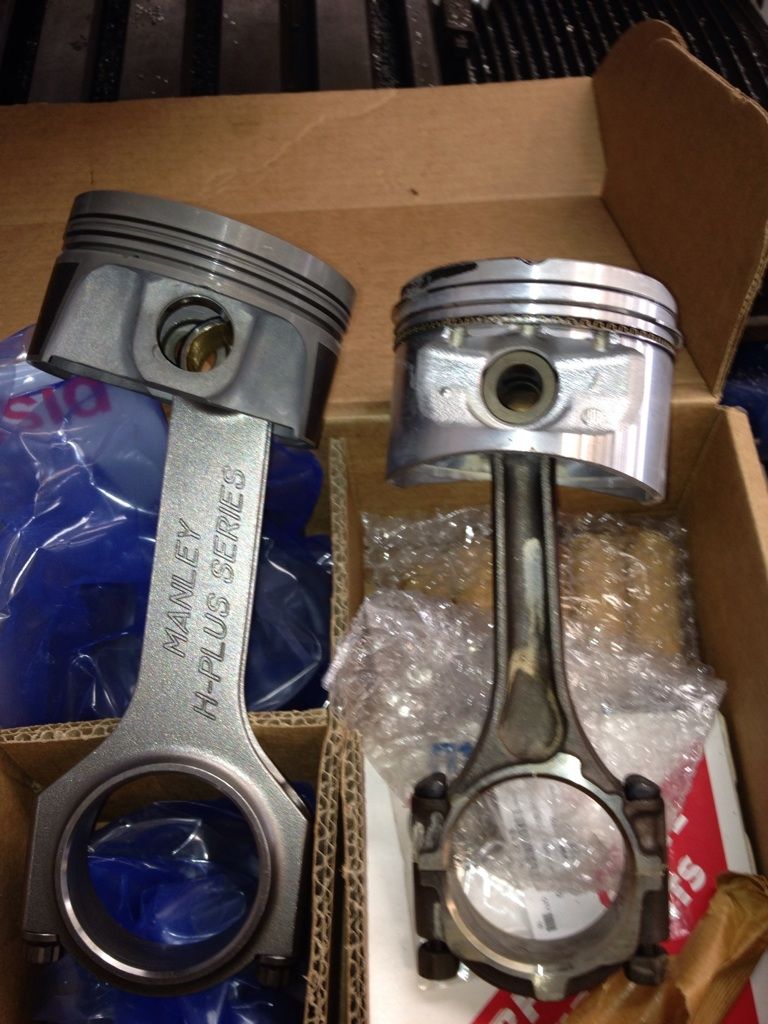 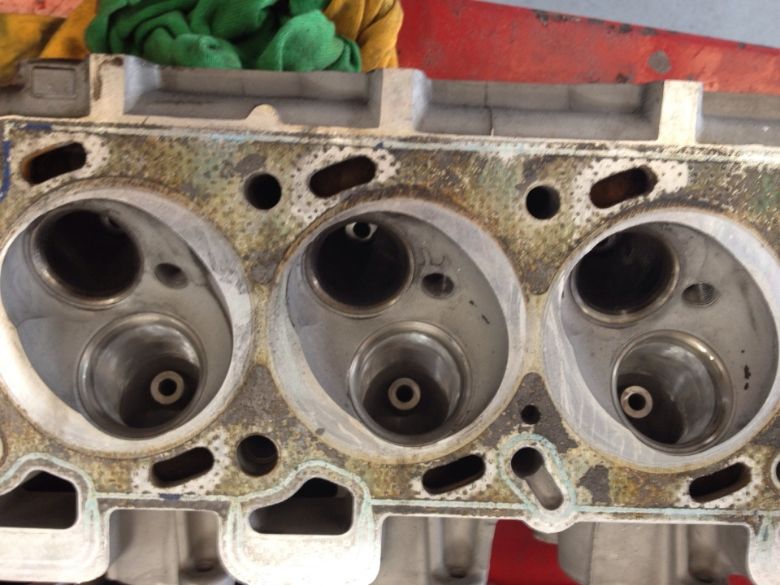 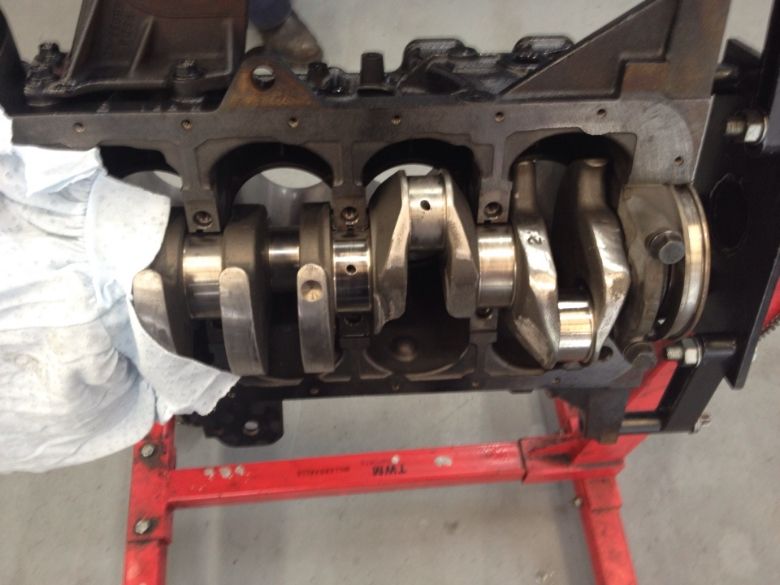 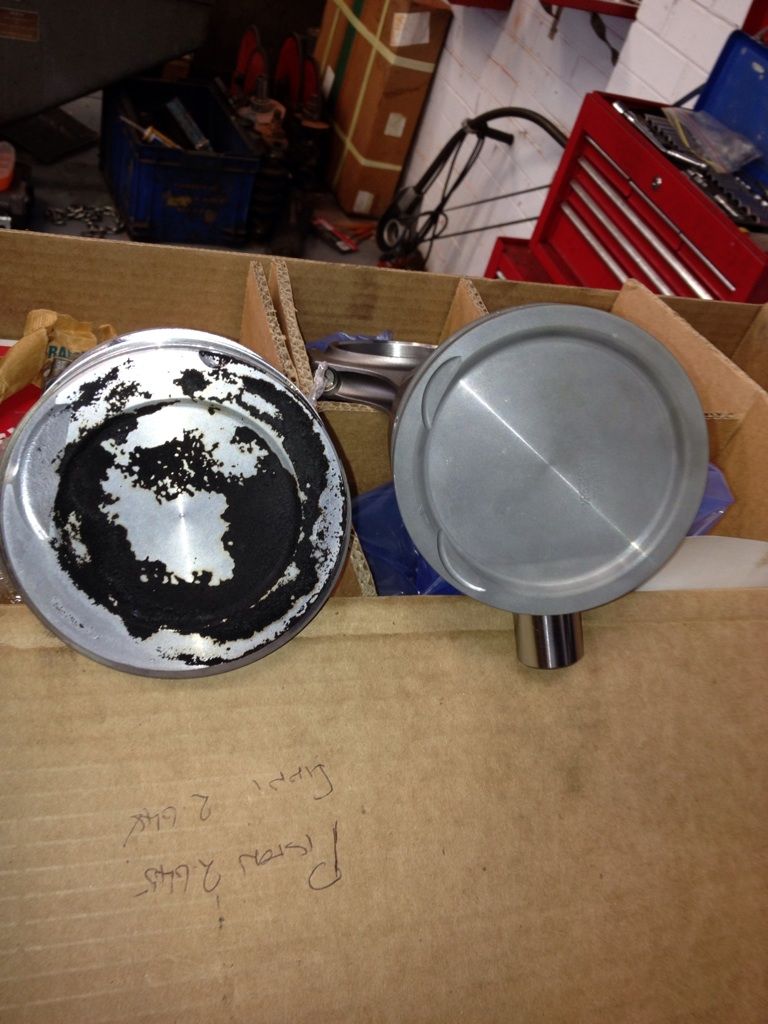 Old versus new 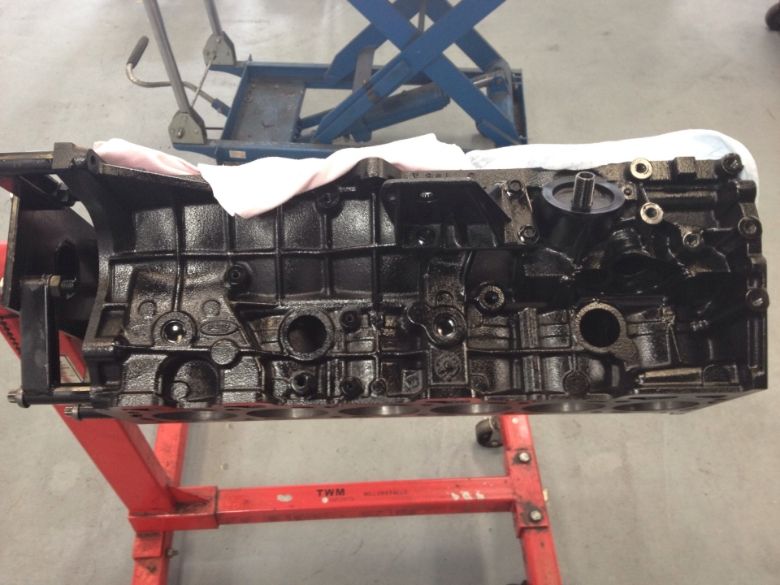 Throughout the build Grant was really good. He helped me out and gave me advice on things he’d learned when building a supercharged V8 in the 90’s. His service was top notch letting both myself and a mate come in and see how the motor was progressing day to day. I’d love to have a go at building a motor myself one day but for now I am too inexperienced and too time poor… 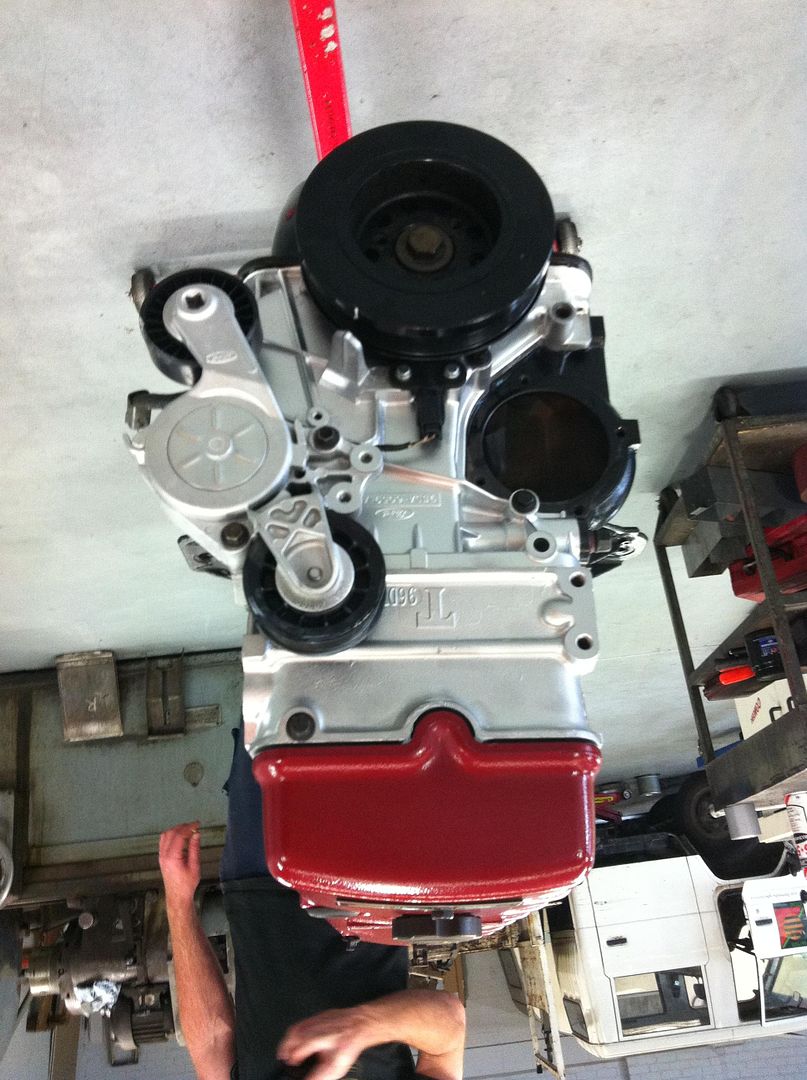 I changed the harmonic balancer to an EF one to add a crank position sensor. Next I added a brand new dizzy, a Bosch genuine one. I had to do this as I had converted the Red Ute to an EF coil pack system which had a cam position sensor where the dizzy goes. Standard coil packs are nothing but a headache. JUST DON’T GO THERE PEOPLE! I’m going be running multi-spark ICE ignition sometime later-on but for now I just installed a new Bosch coil in the standard locale. 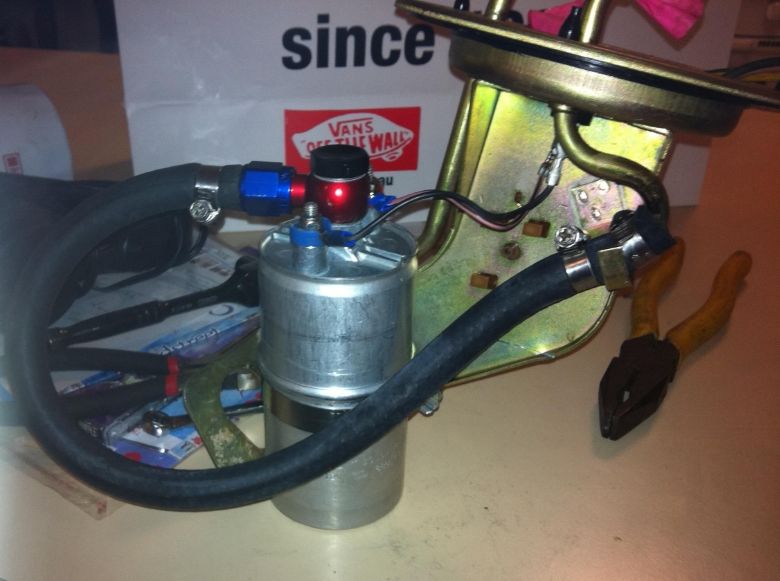 I also installed a Bosch 040 in-tank pump 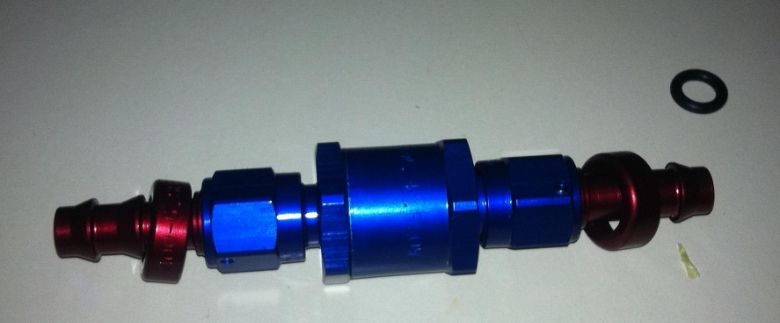 I added a non-return valve after reading up on some common problems that people have been having with 040 pumps. Meanwhile I said good bye to an old friend. I had pilfered most everything worth keeping; doors, panels etc. I now wish that I had grabbed the k frame, the steering wheel, and steering rack but it was too difficult at the time. 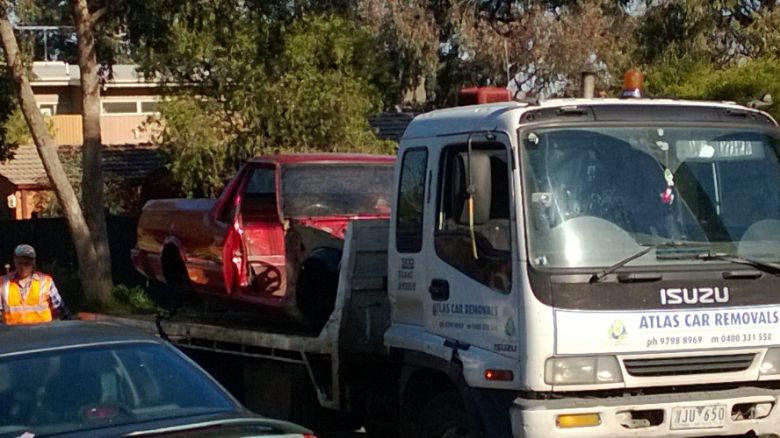 All that was left to do was slip this puppy into The Grey Ute. 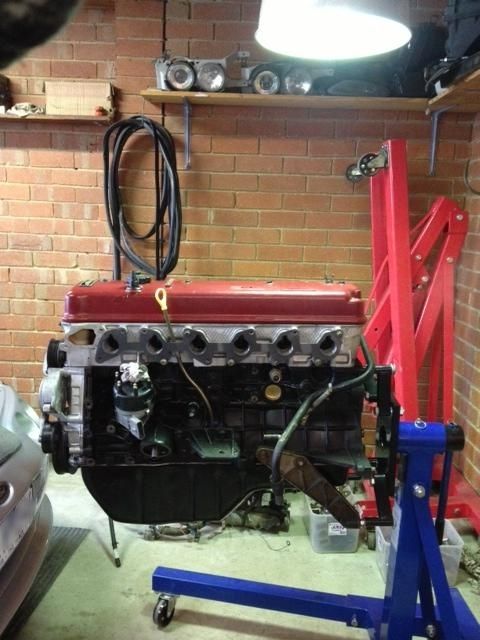 I removed the old motor with minimal trouble, and because I wanted to run the new motor with everything standard, I swapped the intake plenum and all the sensors over. While disconnecting all the vacuum and electrical lines I tried to label everything. This made the install process much quicker. I think on that the old Grey Ute had been f**k with a fair bit, as there were a few interestingly routed vacuum lines and wires. 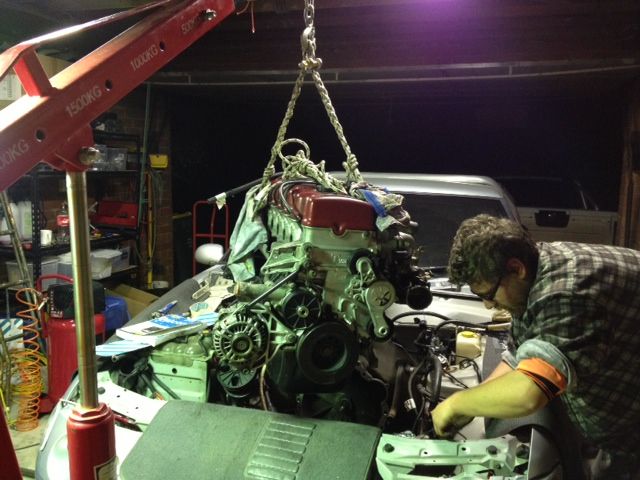 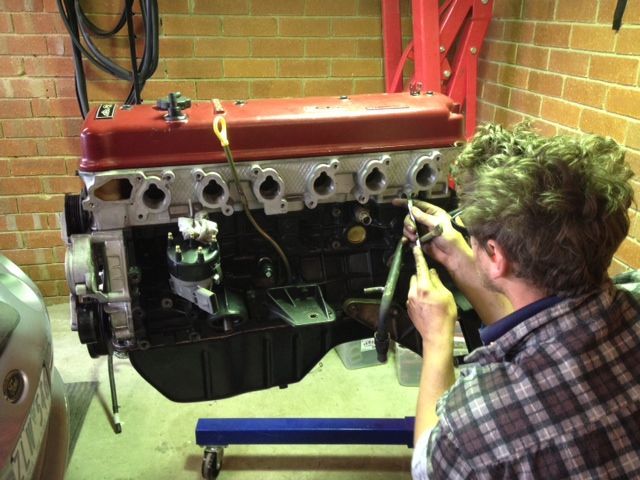 The install took me three weekends (I work Saturdays). I left the gearbox and bell housing in for the entire process while removing the radiator and exhaust headers. I would not recommend leaving the transmission in to anybody else who was looking at changing a motor on their own, the amount of time you spend trying to get engine to line up nicely and slide on is not worth it. This is made 1000 times more difficult without proper leveling equipment. Which leads me to my next point: Get engine leveling equipment. 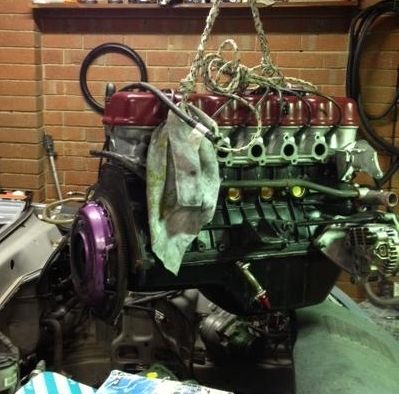 I installed an Exedy XHD (extra heavy duty) clutch while I was at it. This is pretty heavy when driving, however from my research I think that I might need to upgrade to something more serious. Taking the Grey Ute for a quick spin: Who needs a bonnet? 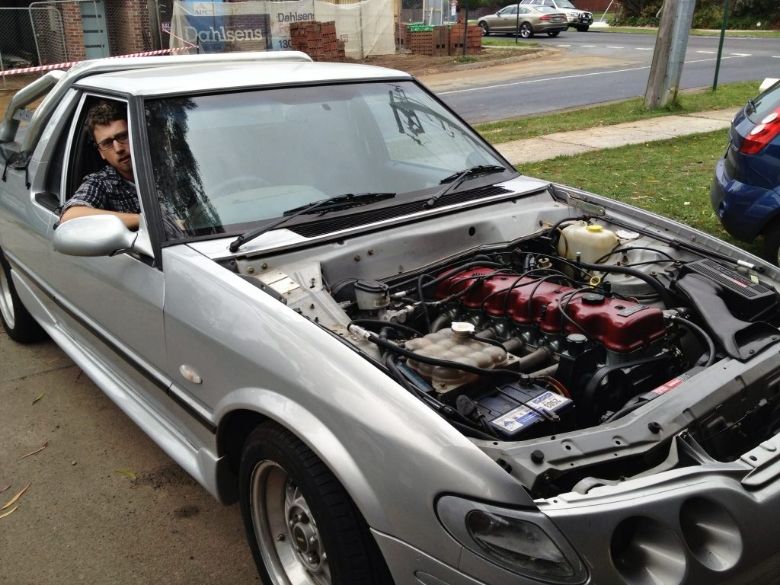
|
|||
| Top | |
|||
| street_xh |
|
|||
|
Chapter 4
Everything was coming together for The Grey Ute. The NEW ENGINE was driving the NEW TRANSMISSION that was spinning the NEW TAIL SHAFT that was twisting the NEW REAR DIFF and lighting up the NEW TYRES. Next was another same old same old snort stage 4 kit install, an impressive power figure and the eventual respectable quarter mile right? ... I was bored with the stage four kit idea. Truth-be-told I was thinking about just getting my block shaved and aiming for a nice 180somthing KW tune. I gave Snort a call and explained to him my sudden lack of interest, induced by my hatred of the way the boys in blue seem to be giving anything with a decent exhaust a canary these days. Let alone when they pop the bonnet and see a great big GT42 hairdryer giving them the double bird. Also legally speaking, cutting out front bars for intercoolers and the like can be difficult if you want to engineer the vehicle later on. Not to mention being pretty bleeding obvious. After having my supercharged Red Ute I had become a bit wiser to how obvious I wanted to make the modifications to my daily driver. Does anybody on here remember a BA XR8 that Paul from CVE and Snort built quite a while back (I think it was around 2006ish). At the time I hadn’t heard of it, Snort showed it to me. The engine bay was stock as a rock, however, a sneaky turbo was hidden just in front of the rear diff. At first this sort of an idea seemed foreign to me. I had talked it over with few people and the general consensus was that remote mounting a turbo would create excessive lag. So on Snorts advice I did some digging. There are some VERY remote/sleeper systems out there! The main build that changed my mind was a turbocharged mustang in the states. It had been running an over bonnet setup but was changed to remote. Interestingly, the car had similar power curve (although the owner didn’t have an original dyno sheet), he also suggested that the mustang displayed cooler intake temps with the remote setup than his original system. While this is only one example and is entirely based on the owner’s experience, it was enough to get me interested. Enter the SLEEPY GREY UTE. 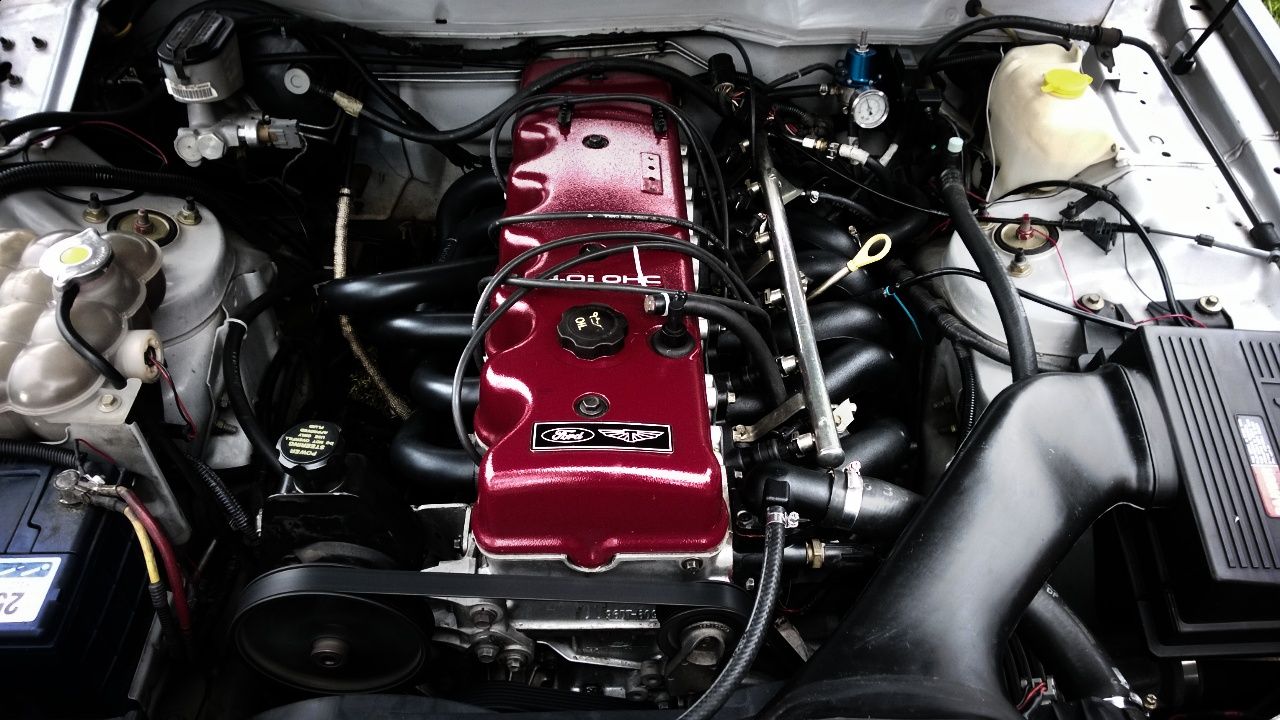 ^^Not what you expect from a turbo engine bay right? First thing to do was to draw up a schematic 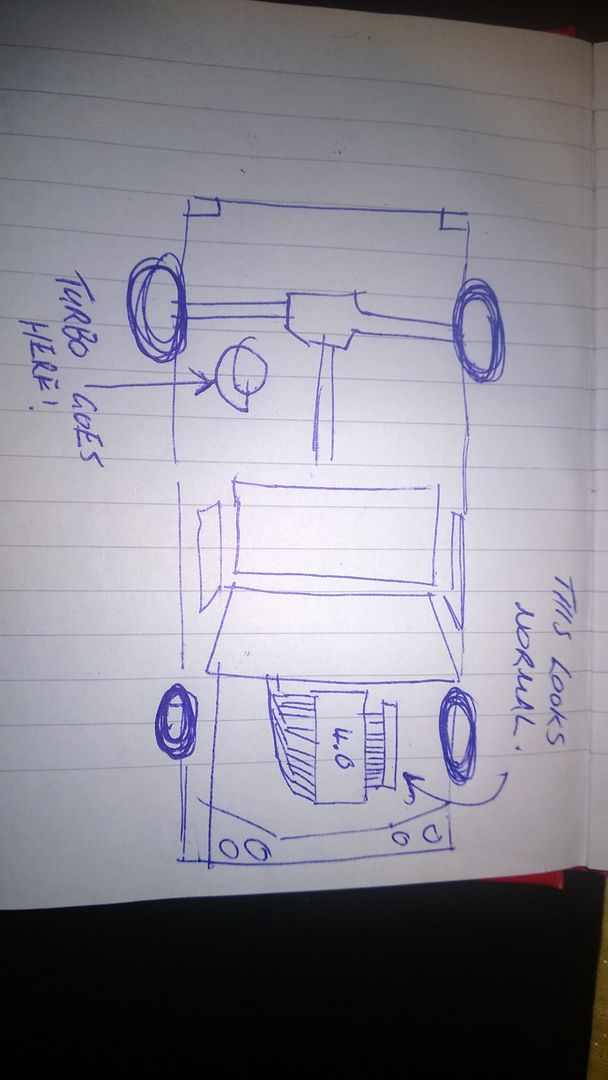 We turned our attention to the intake. This is where Mr Snort came into his element. We were keen to build something unique! So the question was how to get the air from the turbo, back to the engine. All you ford heads know that the air box and throttle body are located at the very front left of the engine. If you carefully examine the above technical drawing you may notice that the turbo is to the right of the car, just in front of the rear diff! Well this is what we (and by “we”, I mean: Snort and I talked it over and then he did all the fabrication) came up with: 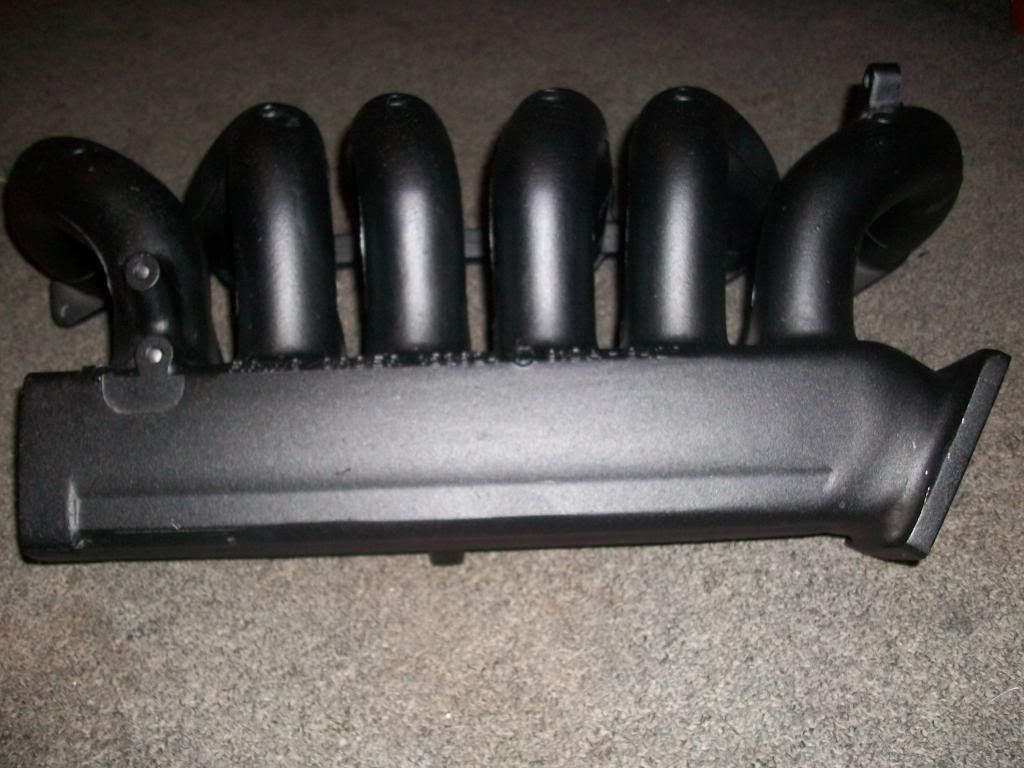 As the viewer has not doubt concluded, we added another throttle body flange to the back of the standard log style intake manifold. We then blocked off the standard throttle body. Now the standard air box and piping is all for show. Here’s a photo of the new intake dummy fitted up in the engine bay. The throttle position sensor can just be seen at the back right.  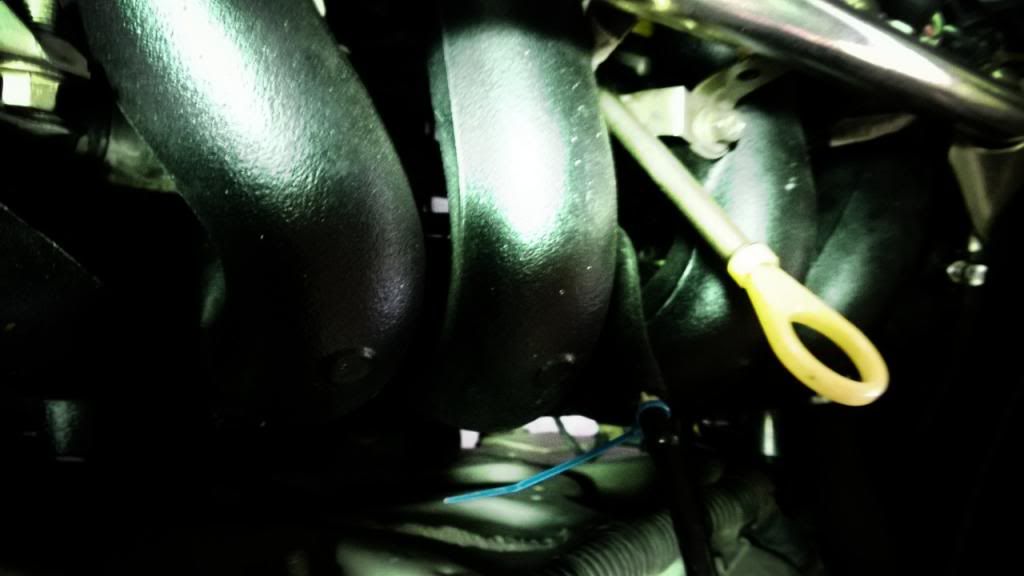 My photographic skills need work. But the point is it’s hidden To give the engine bay that standard-but-nice look I added some ceramic coated Paceys; 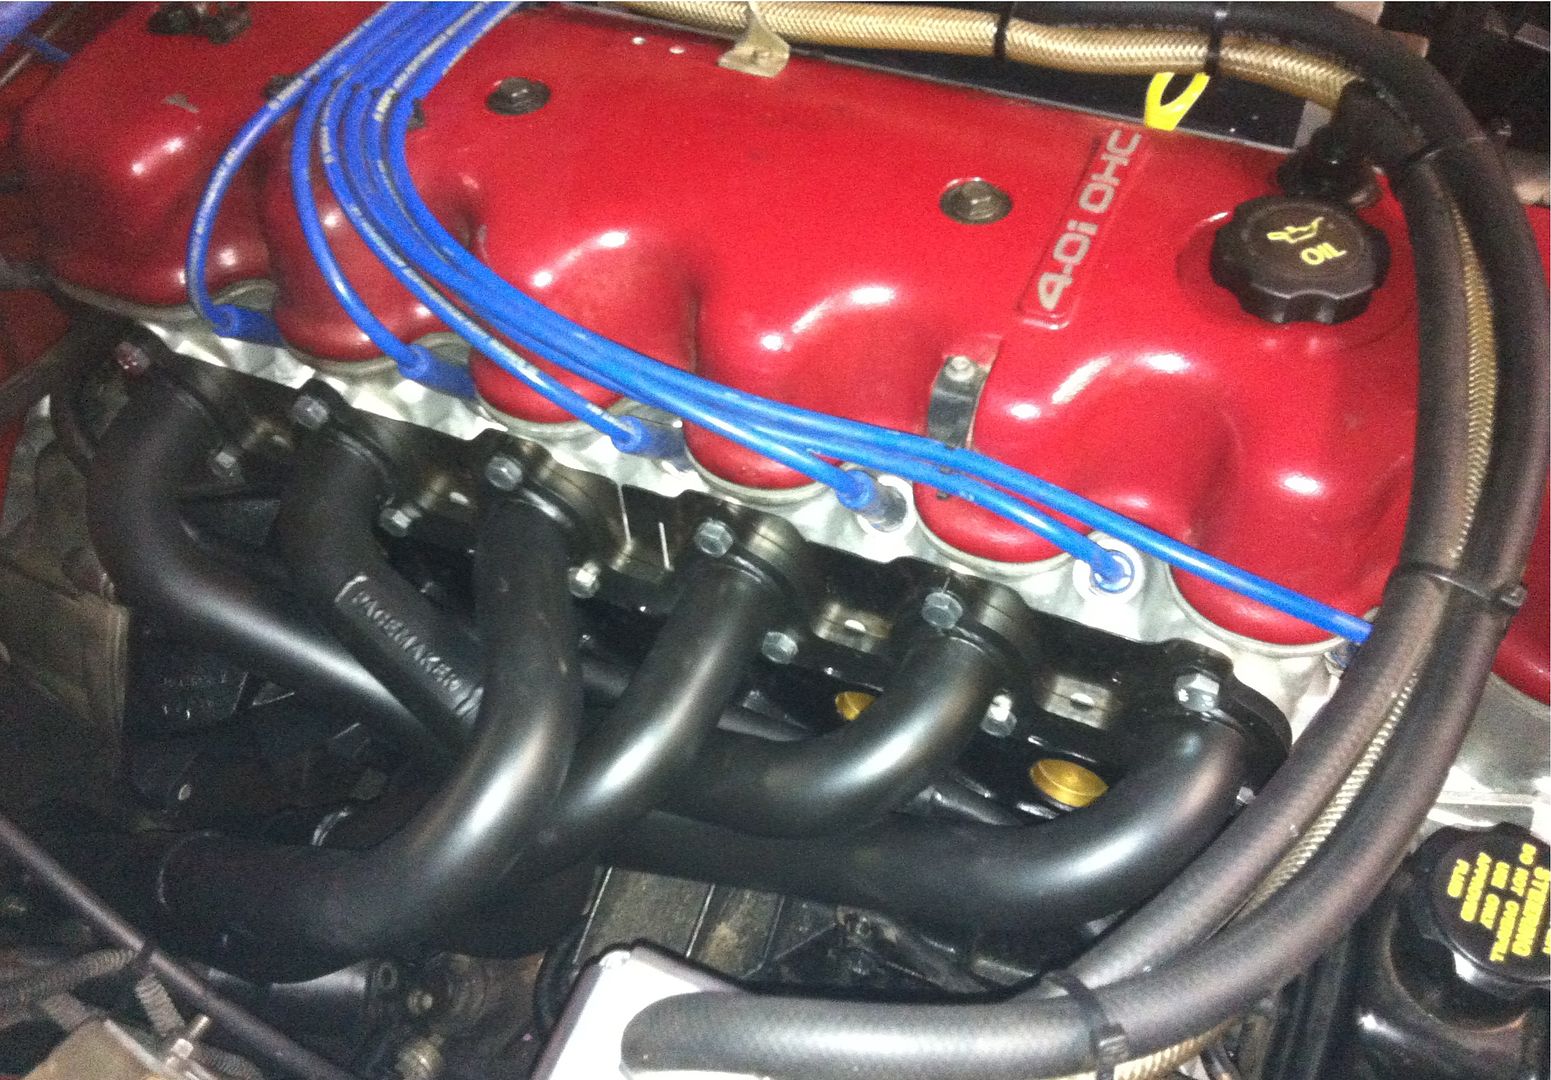 The intercooler setup was always destined for water-to-air. As Snort keeps telling me, “it’s up to 4 times more efficient that air-to-air”. I had seen this result myself on my supercharger kit, which was getting intake temps of 45 degrees. We decided that the turbo should be taken care of first, and we would design the intercooler kit afterwards. That brings me to the turbo. In order to run a remote mount kit, some modification to the configuration of the turbo hardware was required. For starters; we needed to reduce the diameter of the stream of air coming into the turbo-charger. We opted for a Tial intake housing which has a smaller diameter than normal. The reason we did this is that as gas comes down the exhaust piping is cools, and slows down. Running smaller intake housing speeds it back up. Its called the venturi effect. The reason you want this air travelling as quickly as possible is that the speed of the exhaust gas controls how long it takes a turbo to spool up, i.e. the amount of lag. The flip side to this is that running a small housing reduces the top end (maximum amount) of air that can possibly pass through the turbo, reducing its top RPM. This effectively reduces the horsepower of the turbo. There is also an increase to the resistance to the stream of air (which reduces overall efficiency) however this is negligible until the turbo housing sees significant boost, which won’t occur in my setup. Running smaller intake housing also increases the magnitude and volatility of back-pressure on the engine when decelerating. To manage this “boost spike” Snort recommended that we run a larger waste gate (50mm) than he normally would. This larger gate allows pressurised exhaust gases to bypass the turbo quickly and stops pressure from pushing back on the motor. Both of these compensations are about getting an overall balance right and we are relying primarily on Snorts experience here. I’m pretty confident that the waste gate is perfect, but it is hard to tell if the intake housing is correct until I actually drive it. |
|||
| Top | |
|||
| street_xh |
|
|||
|
Chapter 5
The bane of Snort’s Existence Two weeks later a Nissan Navara (kindly supplied by my boss) struggled to haul my fully functional Ute along the Hume highway. We crawled all the way from east Melbourne to the beautiful Murray River border town of Albury-Wodonga. Fourth gear for a couple hundred kms… loved it. I didn’t get in until late in the evening so I dropped the trailer off and booked a hotel room for the night. The next morning I got to Snort Performance HQ to find the man himself very upset. He told me how he had been measuring up the space under the tray and that it wasn’t going to be possible to install the turbo in a location that wasn’t obvious from outside the car. We began discussing the stage four kit again. Then I remembered the area next to the fuel tank, behind the driver’s seat. Where I wanted to remove the sub and add a secondary fuel tank…. this 'smuggling area' described in threads on various ford forums, is sometimes used to store tools and spare parts on long trips, but primarily to get beer into summernats. The next two days were painful; measuring, brainstorming, cutting pipe, tack welding pipe, fitting pipe, cutting holes etc. Here’s a photo I have stolen from XHII XR8 Build FTR009’s thread. I hope he doesn’t mind. His build is one of my all-time favourite fordmods reads, awesome machine 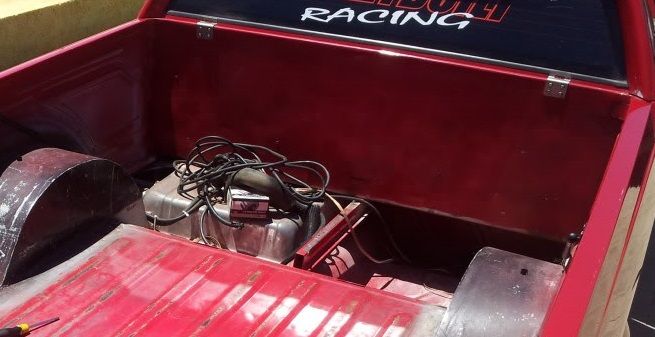 So basically the smugglers den went from something like this ^^^^^ To this VVVV 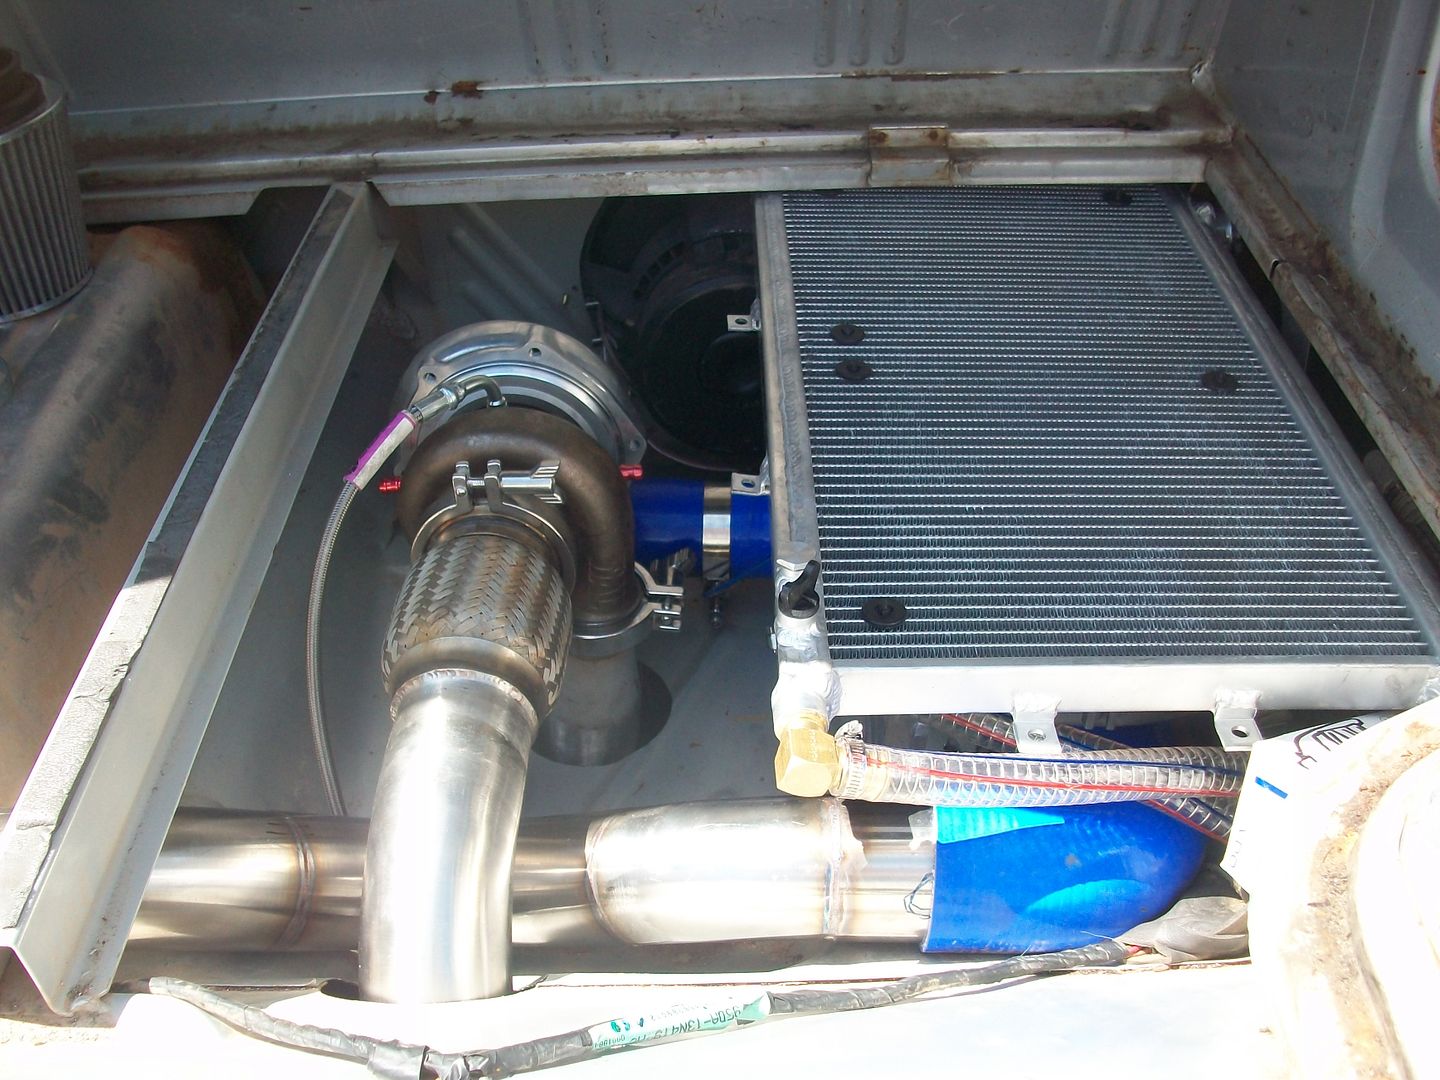 After the weekend i returned Melbourne and Snort continued working on the Sleepy Ute for the next few weeks in between jobs for other (less painful) customers. These photos were taken when we first fitted the piping up. They don't capture the amount of work that went in, it took a few miles of bends and piping to connect everything up. 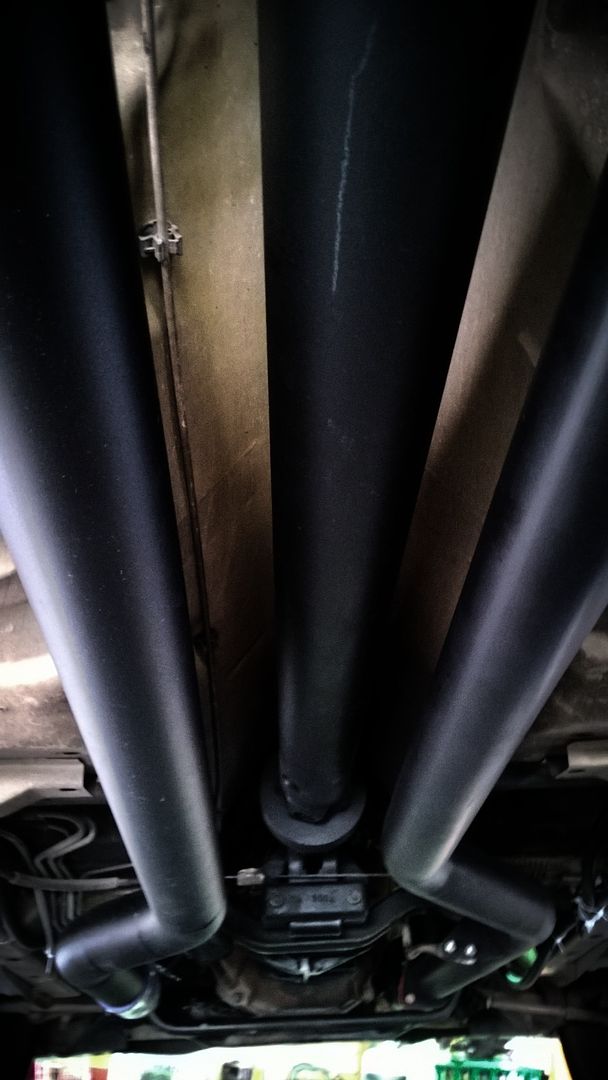 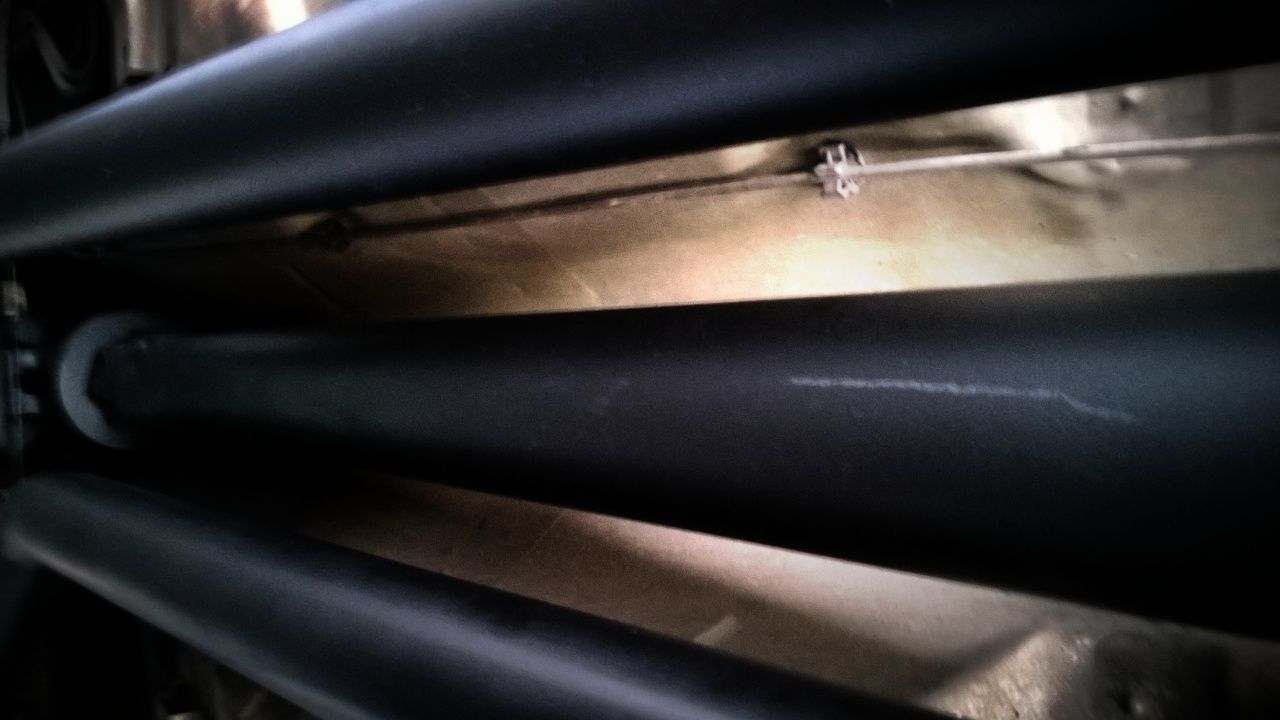 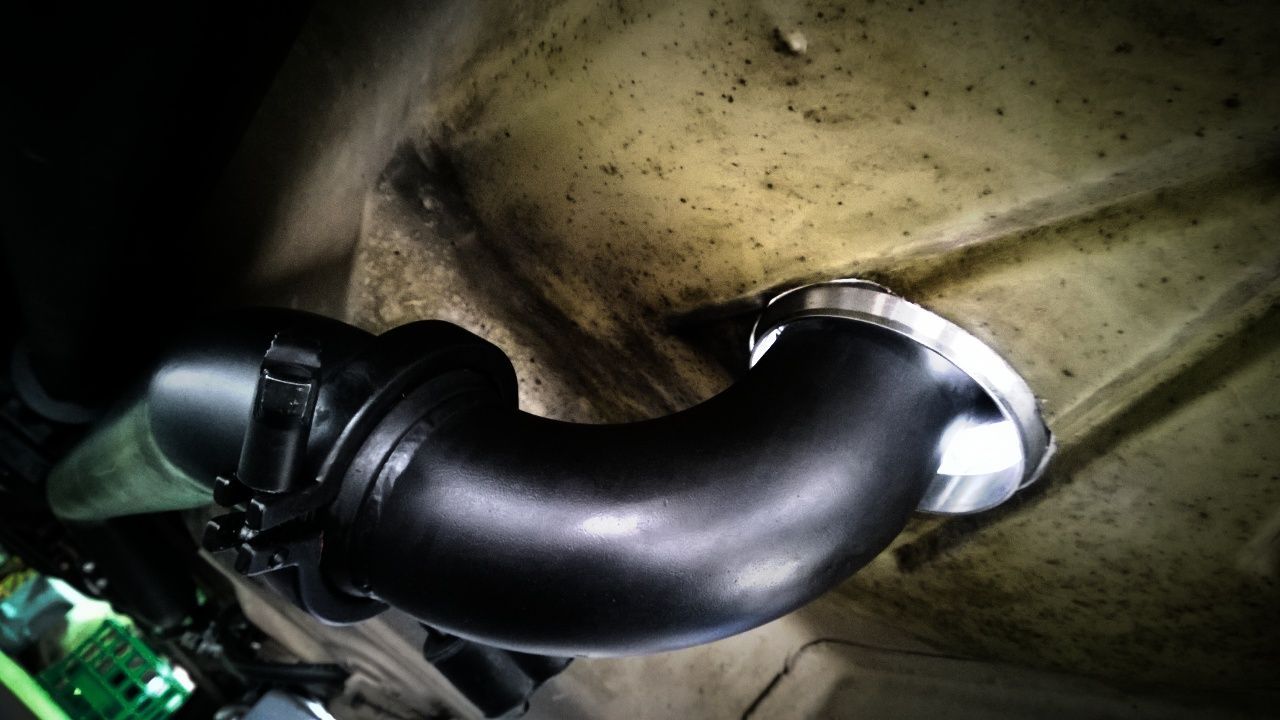 More photos to come |
|||
| Top | |
|||
| mr. cve |
|
||
|
That won't work !! Mid mounts are always laggy !!
That is what everyone told me anyway !! Looks good Oh and trust me setup properly and tuned properly they don't have any lag whatsoever ! My BA had full boost at 1500 rpm and made 280 rwkw @ 3000rpm ! |
||
| Top | |
||
| street_xh |
|
|||
|
thanks mate, appreciate your tick of approval
that xr8 was probably pushing a lot more air than my 6, but even if i can see boost at 2 grand I'll be stoked! have you done a remote system on a six before? any suggestions? |
|||
| Top | |
|||
| Who is online |
|---|
Users browsing this forum: No registered users and 0 guests |