

|
| rainoffire |
|
|||
|
Just a couple of pictures showing how it fitted up to the car.
I should have realised with the extra length out from the lip that the exhaust would sit too far inside the bar, I'll have to get it extended once I get the car back on the road. Apart from that it all fitted up quite well so its time for it to get rubbed back ready for paint. Really glad with how it turned out, I was hoping it would make the car look a bit lower, and I think it does. 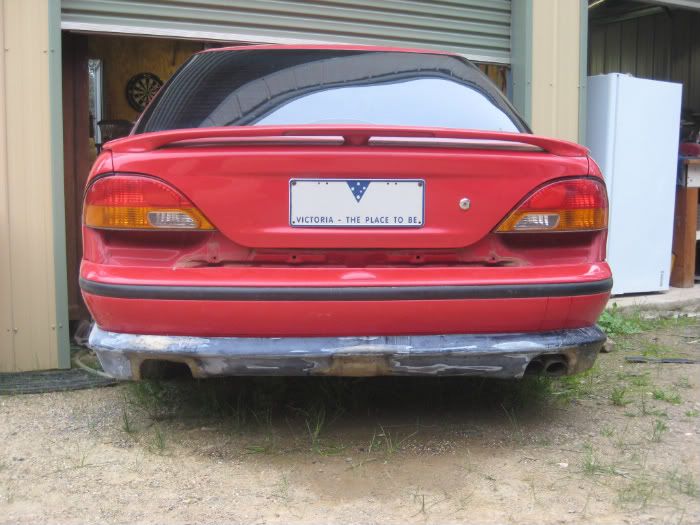 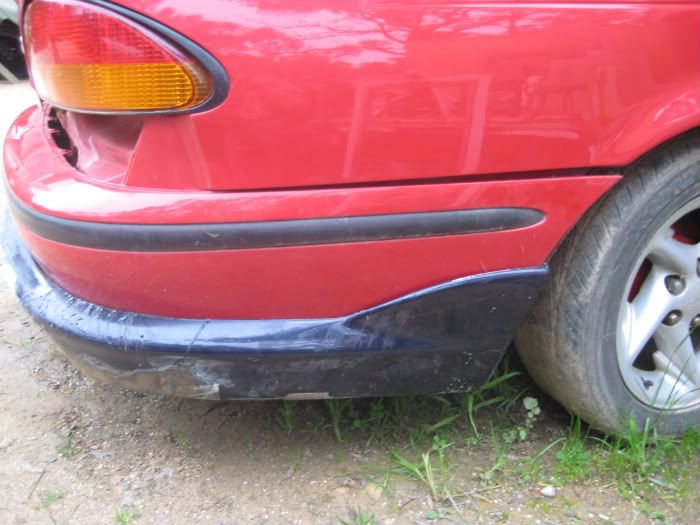 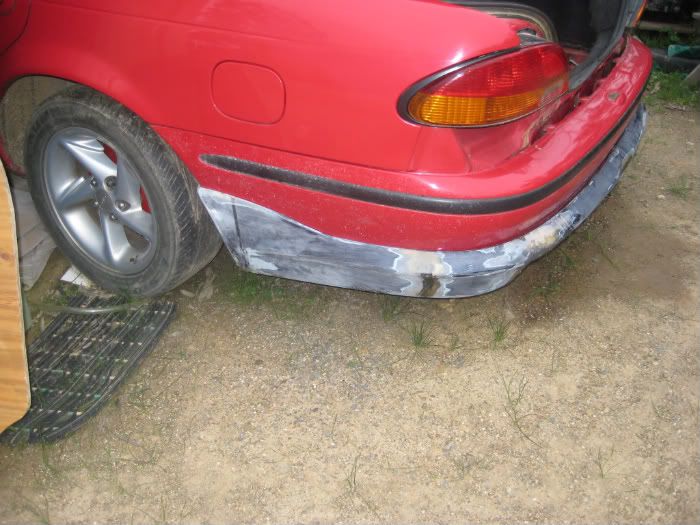 Its interesting you asked about the ED, I've been thinking about posting a couple of pics up, especially because I want to sell it soon. I got tired of driving it around looking all dirty so i got out, cleaned it up and polished up the wheels, got the tyre black out, put a new battery and starter motor in it to spruce it up a bit. Ill post up a couple of picture tomorrow, its nothing fancy though |
|||
| Top | |
|||
| bradley4567 |
|
||
|
rear bar with twin exhaust will look the goods,
do you want to make me one
_________________ ef falcon daily driver |
||
| Top | |
||
| 89.SVO |
|
|||
Age: 36 Posts: 3382 Joined: 11th Mar 2008 Ride: EA SVO, AU2, Toyota Crown Location: Bendigo |
how have i missed this one. looking good. and another Bendigonian
_________________ Daily driver: 2010 Toyota Crown hybrid 3.5L V6 hybrid. 254kw. |
|||
| Top | |
|||
| rainoffire |
|
|||
|
Thanks guys, what sort of rear bar do you have? It would be pretty easy with a non-XR6 rear bumper skirt, this is what i did to my standard bumper to get the skirt on, if you did something similar with a normal bumper, you could easily run twin exhausts
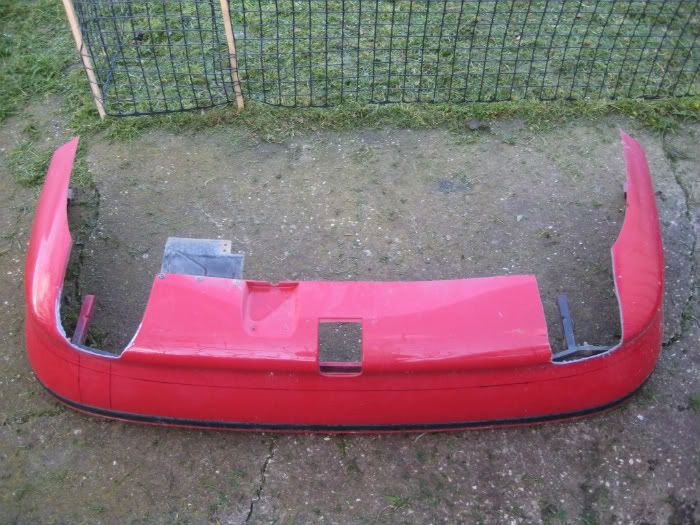 Yeah I wasn't sure on the twin exhaust to start with, but with twin 2.5" dumps I'm hoping it doesn't look to over the top. I was going to get twin 3", but I photo-shopped it up and it didn't look very good at all. It took a fair while to get the bar nice and neat tho. The only catch is I have to fake one side until I work out what to do with the fuel tank on the other side. Because the car is usually run on gas except when its getting a hiding, my plan is to get a 30ish liter tank made up to go where the stock one goes, but not extend backwards as far, which should give me the space to fit the exhaust in, plus it means you don't have plastic near hot exhausts, which is great. Hey WILDEB, I've been on the forum for a fair while, do a lot more reading that posting though. I noticed you were up in Bendigo, I'm actually an Elphinstonian, I just put Bendigo in so people have some idea of where I'm from. Pretty much the same age as me too, I probably know you. Your SVO wouldnt have orignally had the plates SVOSVO would it? Anyway, it was raining yesterday, but i finally managed to get a couple of photos of old Ed, he came up okay with a bit of a wash and polish. Shes stock as a rock apart from Sprintgas, newish monroe shocks with the ELXR6 springs from my other car, and Kumho KH17's all round. Sticks quite well to the road though I must say.   
Last edited by rainoffire on Fri Sep 03, 2010 12:31 am, edited 1 time in total. |
|||
| Top | |
|||
| 89.SVO |
|
|||
Age: 36 Posts: 3382 Joined: 11th Mar 2008 Ride: EA SVO, AU2, Toyota Crown Location: Bendigo |
nah it's not SVOSVO. he still has his. i bought mine from Harcourt North.
_________________ Daily driver: 2010 Toyota Crown hybrid 3.5L V6 hybrid. 254kw. |
|||
| Top | |
|||
| bradley4567 |
|
||
|
{USERNAME} wrote: Thanks guys, what sort of rear bar do you have? It would be pretty easy with a non-XR6 rear bumper skirt, this is what i did to my standard bumper to get the skirt on, if you did something similar with a normal bumper, you could easily run twin exhausts i have an ef non xr read bar
_________________ ef falcon daily driver |
||
| Top | |
||
| rainoffire |
|
|||
|
If you have a non-XR rear bar, just whip the angle grinder out and do what i did to that standard bar in my last post, that the easiest way to get twin tips. The hardest part is getting the exhaust to that point, unless you just want the twin tips for looks.
Still working on the rear of the car, trying to get that rear end looking nice. Removed the badges in the rear fill panel, sanded back the area around the holes, and my mate came to the rescue with the welder, then I ground the welds back this morning, ready to join the rear bar for some paint. 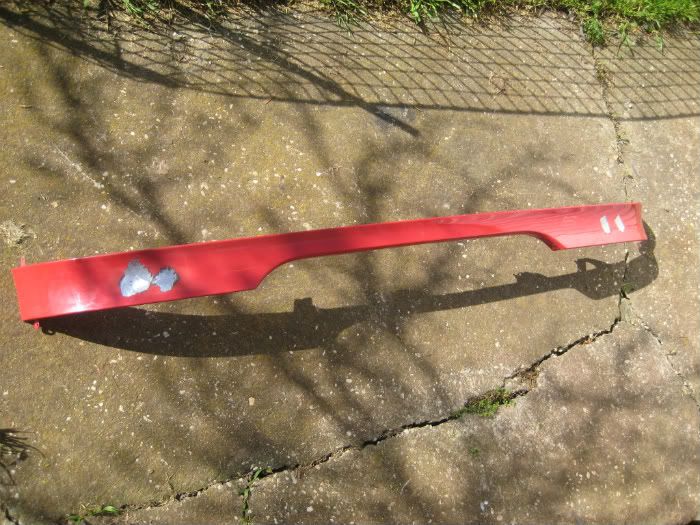 
|
|||
| Top | |
|||
| gusbus |
|
||
|
nice car will look awesome wen done...with the dash where are those two screws that arent in the manual...ive got a parts el i need to get the dash out of to eventually put in my ea
thanks gus |
||
| Top | |
||
| rainoffire |
|
|||
|
Thanks mate,
Its stretching the memory now, its about a year since I took the dash out. I didn't use the fordmods guide, i used a Gregory's manual, and as far as I remember all the screws that were in the dash were shown in the manual. But I'm not completely sure on that. |
|||
| Top | |
|||
| rainoffire |
|
|||
|
Update, finally have everything to put the motor together. The head arrived from CMS this week, so now have in my possession a stage 3 head, 2A cam and full set of reco AU injectors. The head was the original tickford head that came on the car, and has been reco'd, had exhaust valve guides K'lined and extra porting and polishing done. Thanks to Joe up at CMS for doing all the work and organising everything as well as he could for me.
I'm going to try and get the motor assembled this weekend, hopefully get it in the car in the next couple of weeks. I already have an AU headgasket sitting here for it, so hopefullyl the compression should start to look around 10:1 with the pistons, thinner headgasket, and shaving of head/decking of block. Holidays at uni start in around a month, so the updates should start flowing a little faster now!    
|
|||
| Top | |
|||
| A-Bone |
|
|||
|
Some serious work going on there mate looking real good keep it up
_________________ 98 XH 5 Speed |
|||
| Top | |
|||
| johnzy92 |
|
||
Age: 33 Posts: 43 Joined: 4th Aug 2009 Ride: 1997 EL XR6 manual Location: Gold Coast Queensland |
Mate your car made me hold out for my Red 98 xr6! had a funny feeling it was your car with the venom front end! Cheers! If you go ahead with ur boss XR8 Bonnet buldge take some pics and send em my way. Ill post some more up shortly with my buldge painted
_________________ 1997 TICKFORD EL XR6 |
||
| Top | |
||
| rainoffire |
|
|||
|
Thanks guys, good to see there's some people out there watching
@johnzy92 glad to hear that mate!! Yours is definitely coming along nicely too!! I would be really keen to see some pics of your car with the bonnet all painted up, I'm still not sure how I want to do mine, with just a flat bonnet with bulge, or with XR bonnet vents and bulge, or some other sort of bonnet vents with the bulge. Finally got around to starting to build the engine, spent a bit of time on it Saturday. I already had the bottom end assembled, but not have the timing gear all on, plus the head. Tomorrow night I want to get as much of the other parts of the engine in as possible, have to do dizzy/oil pump, cam, all accessories on and then the clutch. Also received my dash faces in the mail the other day, and got a mate to give me a hand putting them in and converting the back lighting to red. Ran into a problem with the back lighting not turning on though, not sure whats going on there. Its a police pack dash going into a fairmont wiring loom with green BCM, so I think I have to do something with a resistor? Anyway, pics  
|
|||
| Top | |
|||
| rainoffire |
|
|||
|
Did a bit more on the engine, gave the rocker cover and timing case a good detailing, dizzy and oil pump in along, sump on properly with gasket, cam in, few other bits a pieces, its starting to look good! Hopefully going in the car next weekend!
Cam going in  Engine looking a bit cleaner  
|
|||
| Top | |
|||
| rainoffire |
|
|||
|
Bit more of an update, got stuck into the car again today. I'm a little disappointed, wanted to get the motor in the car, but ran into a few snags during the day. Apparently late model E-series have a different spigot bearing than the early models, and the bearing I got with my kit was different. The newer ones run roller bearings with a spacer plate, whereas the older ones have a traditional ball bearing. Managed to fix that by drilling out the spacer and using a cold chisel the break it, then pressing in the old style bearing.
 Next problem was on the release arm, at the end that is inside the bell housing. Where the arm presses up against it, there should be something there to retain it in place, but there's no sign of it, and I can remember removing it. The thread where it should be looks like it has clutch dust in it, so I really don't know what happened and when, but its not good. Going to have to source on in the next week, hopefully can get the engine in shortly after that Its not all bad news, managed to get the clutch in and all aligned. I meant to get a photo of the plate before I put it in, but its a bit late now 
|
|||
| Top | |
|||
| Who is online |
|---|
Users browsing this forum: No registered users and 78 guests |