|
| itlookslikeaxr6 |
|
|||
|
Hi everyone,
First photo shoot Done! Went to park before picking GF up from school today. The first picture i took on the way to park theres a 1km drive b4 you get the the park so i stopped and am really happy with how this shot turned out. Second one is when i was walking to my car and had my camera in my pocket. Last this one was actually at the park with the lake in the background. I took plenty but i choose these 3 winners, please enjoy. 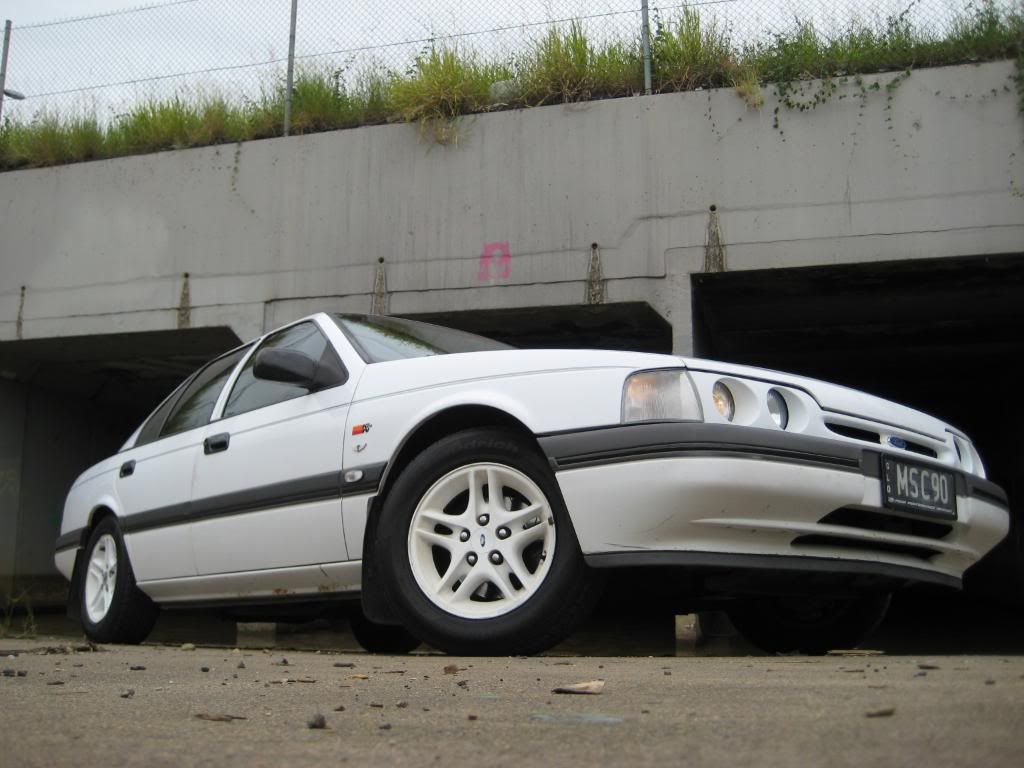 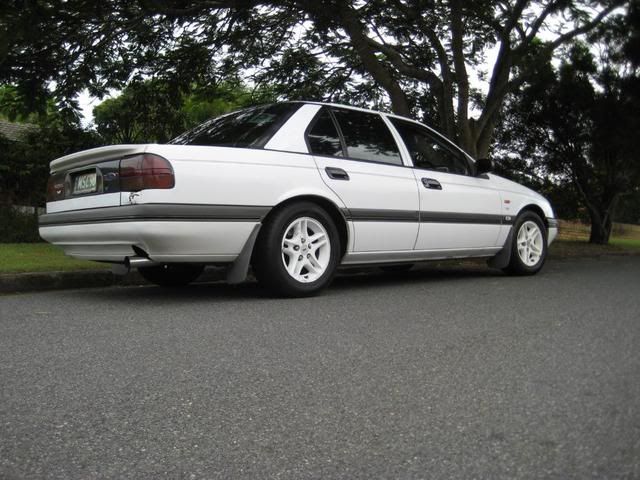  Todays progress Im very happy with progress made today and i pround to annonce the GLi has power windows! It wasnt easy flying as i hit some turbulance. Starting with the right rear door today i did the usual to get started which included the following. - remove door trim Easily done theres 7 screws around edge of trim then the 3 in the inner door handle. - remove plastic crap with out damaging it to much Just work your way around the edge - un-clip/plug the doors old wiring harness 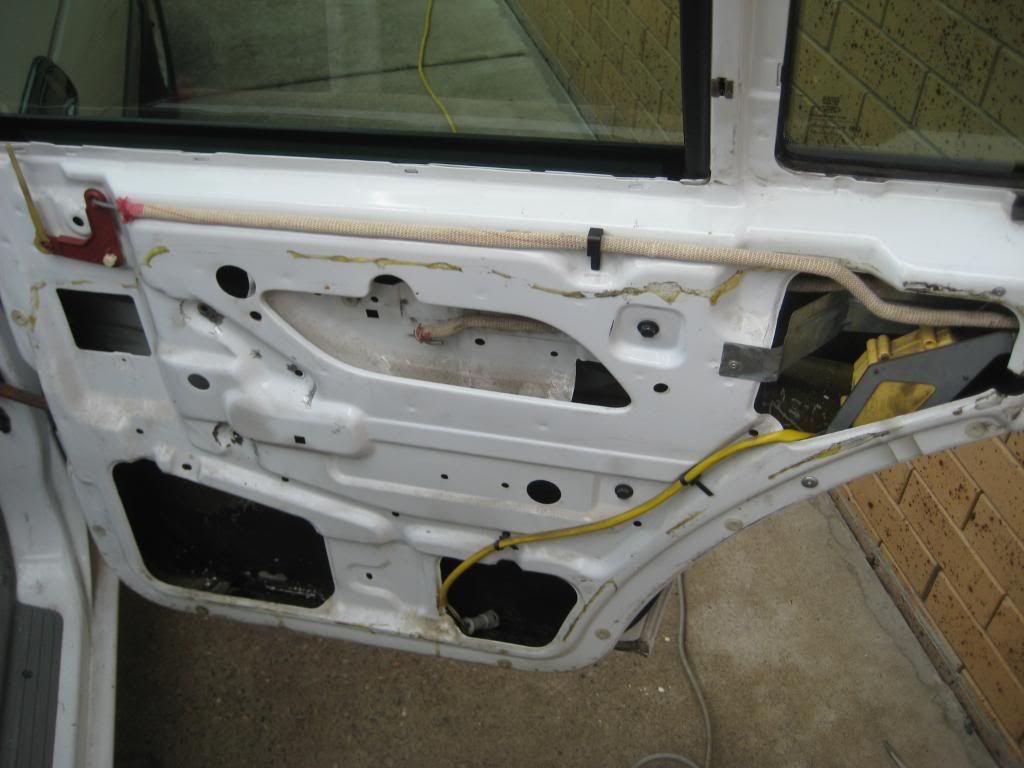 - remove wiring harness I found it easiest after you unplug everything inside the rear door then close that door and open the drivers door. pull the rubber gromit coming from the rear door out then carfully pull out the old wiring harness with it, or if your feel the need you can cut it. Pull out the cable held in by 2 clips, try not to break these as they stop the wires jamming and being damaged when doors are used. i cut the wire from the clips then pulled them out and re taped them on later. Pull out the bottom rubber gromit and unplug the connected wire, while your there fish out the second wire which you will need for the new harness. Put the new harness in the opposite to how you got the other one out, feed the wires through into the door and then place the gromit back in the hole. run the wire down the door and plug both clips back in, connect the 2 plugs and feed them back into the sill and replace that bottom gromit. 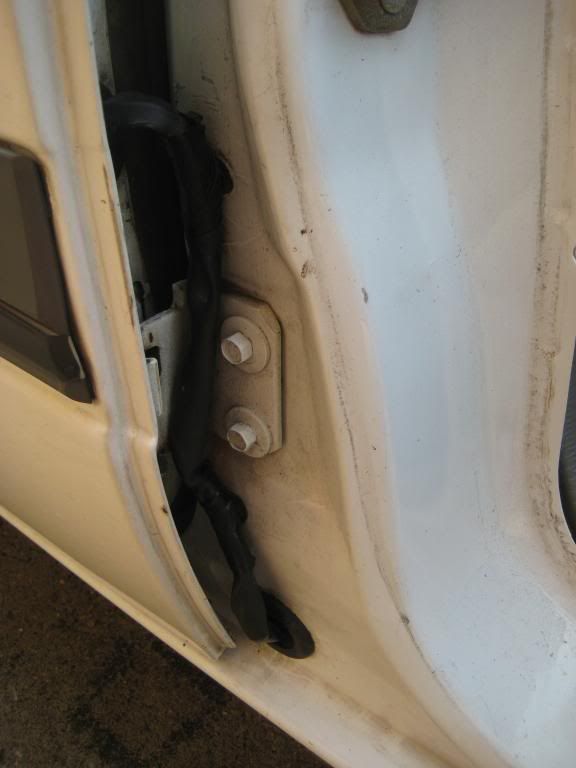 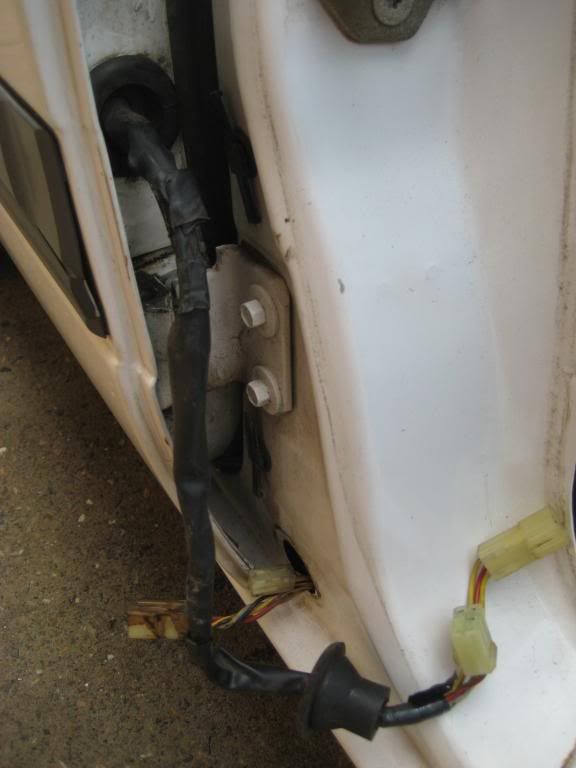 - Swap Mechanisms The rest involves removing the old window mech and replacing it with the power one. The hardest part is removing the motor with is held on by what looks to be "heavey duty" pop rivits.  Once these are out its a couple of screws, maneuver the mech out and replace with the power one. I used a short bolt and nut to hold the new one in as well as used some handy zip ties which clip into holes like the factory ones, this keeps cords tidy. 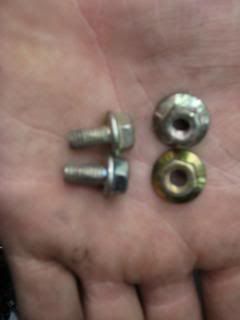 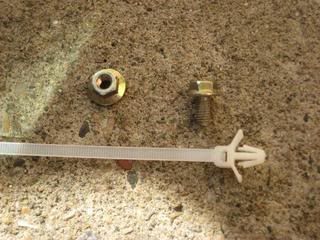 I would recomend testing how the mechanisms to check there condition once you have got the wiring all done, for the back doors you will need to plug in the rear door switch to complete the power grid. With another door i found it was getting jammed under pressure. Here some picture to show what was wrong. I removed the C clip holding the top metal cover and this is what it showed 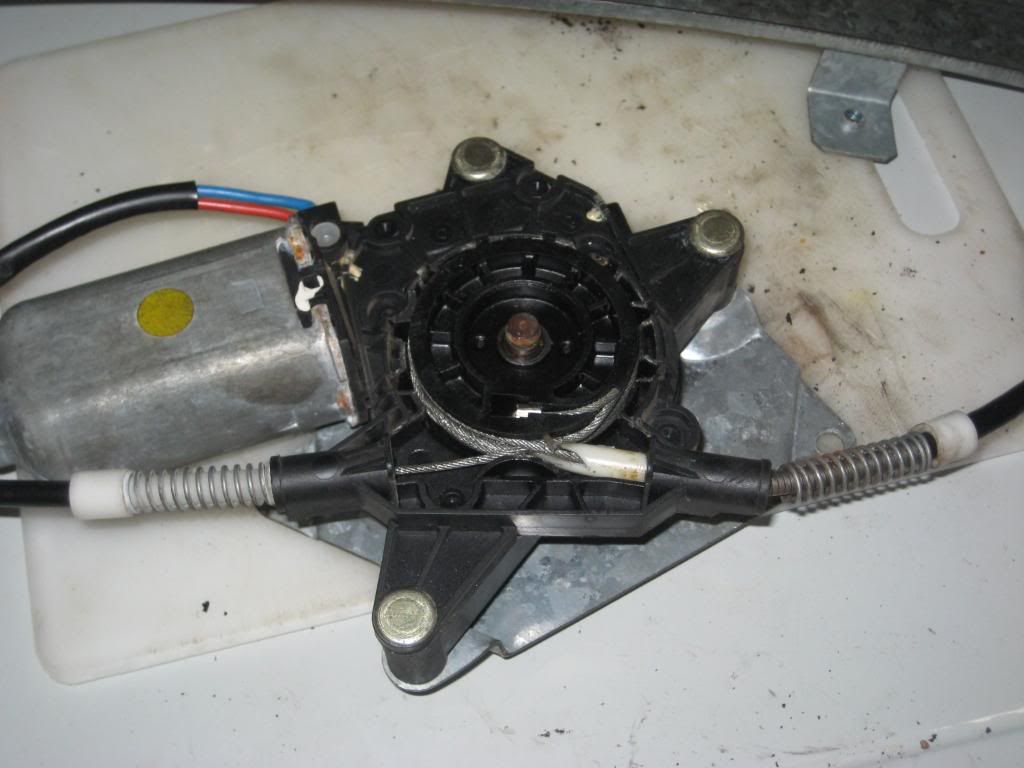 In the following pictures notice the right white plastic peice has snaped and then slide inside and jammed into wheel. This has "di railed" and damaged the wire(refer to picture), it no longer smoothly pass's through the metal tubing. 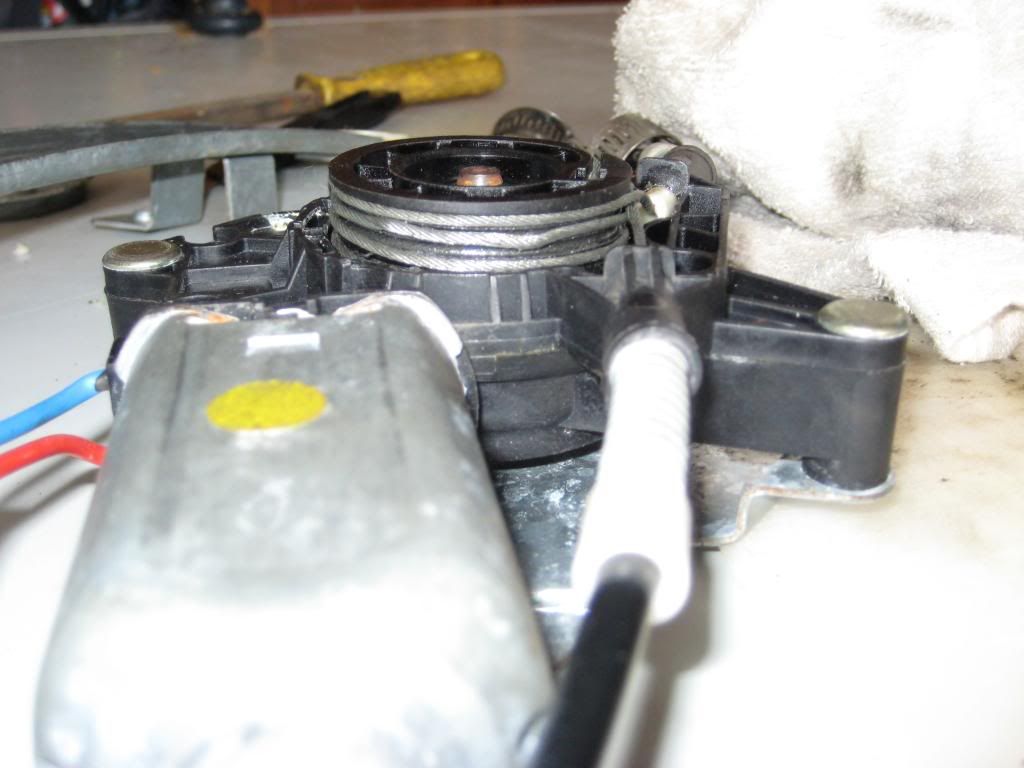 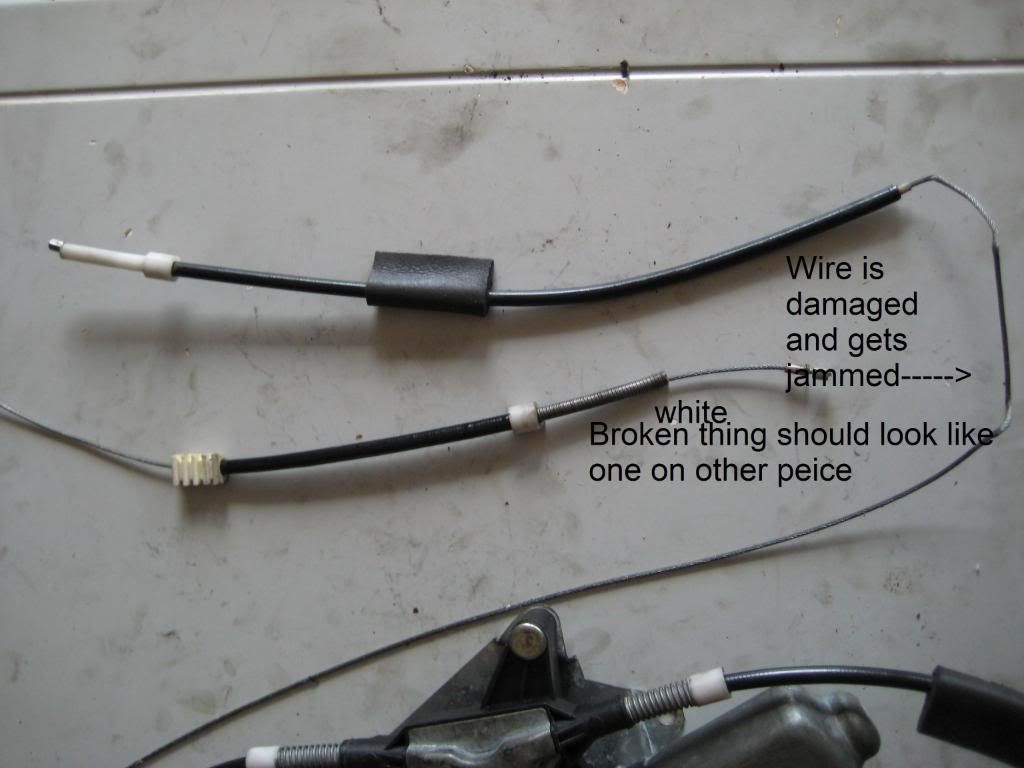 As these mechanisms arnt very cheap i set out to fix it as i have the 4 old manual mechanisms with nothing wrong with them. I used a grinder as i couldnt get a grip on the tabs and had it handy from removing the pop rivits. Then the metal plate will come off and you can bin it.NOW STUDY THE CENTER WHEEL FIRST AS YOU NEED TO PUT IT BACK TOGETHER LATER, once done pull out the center wheel that the wire is wraped around and remove the wire. The wheel should just pop out thou there may be some pressure on the wheel, to release some pressure i found you can pop out this(refer to picture 4). Next picture shows how to remove the wire just to give you an idea. lastly the wires are removed and fitted with the electric motor. 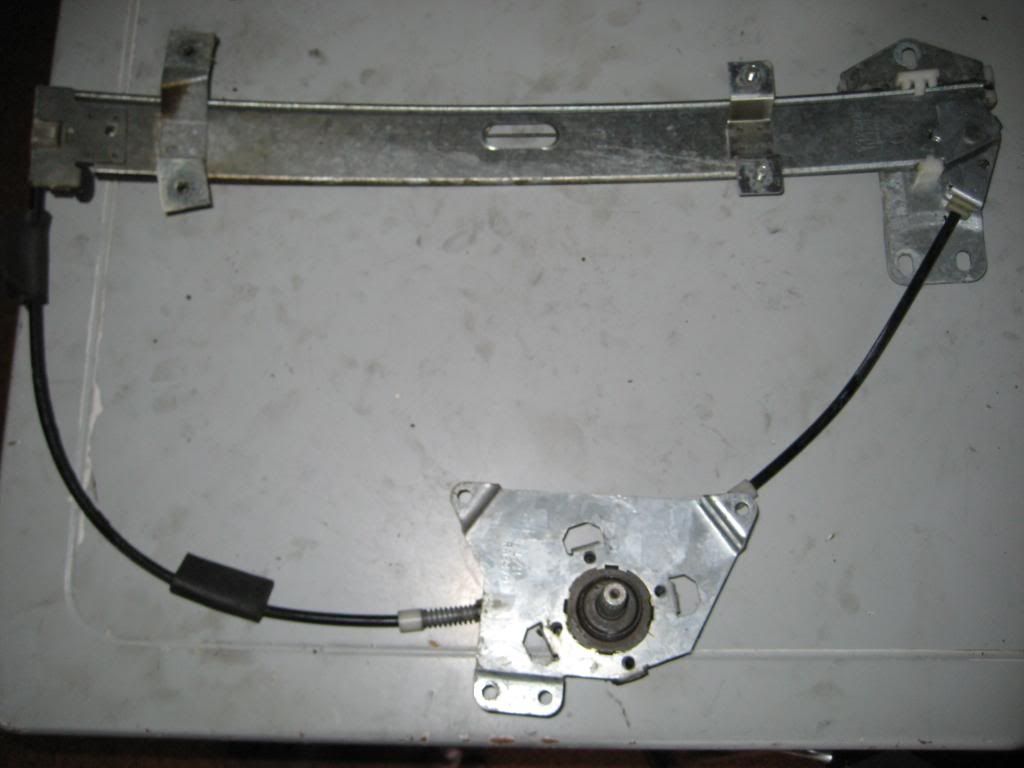 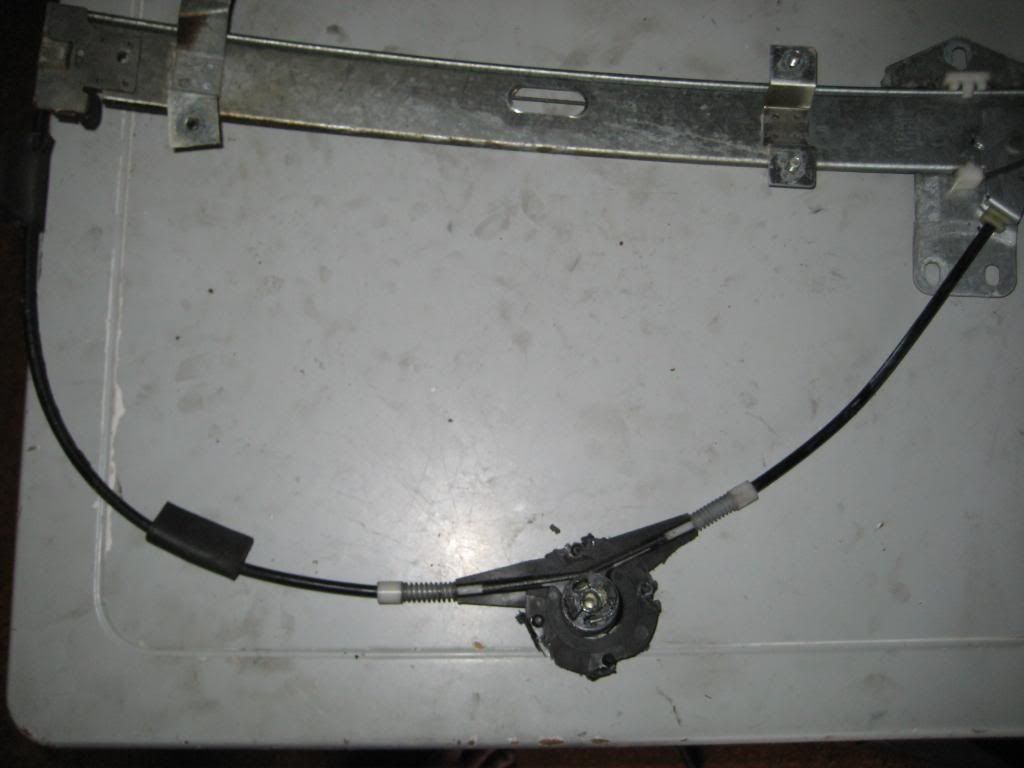 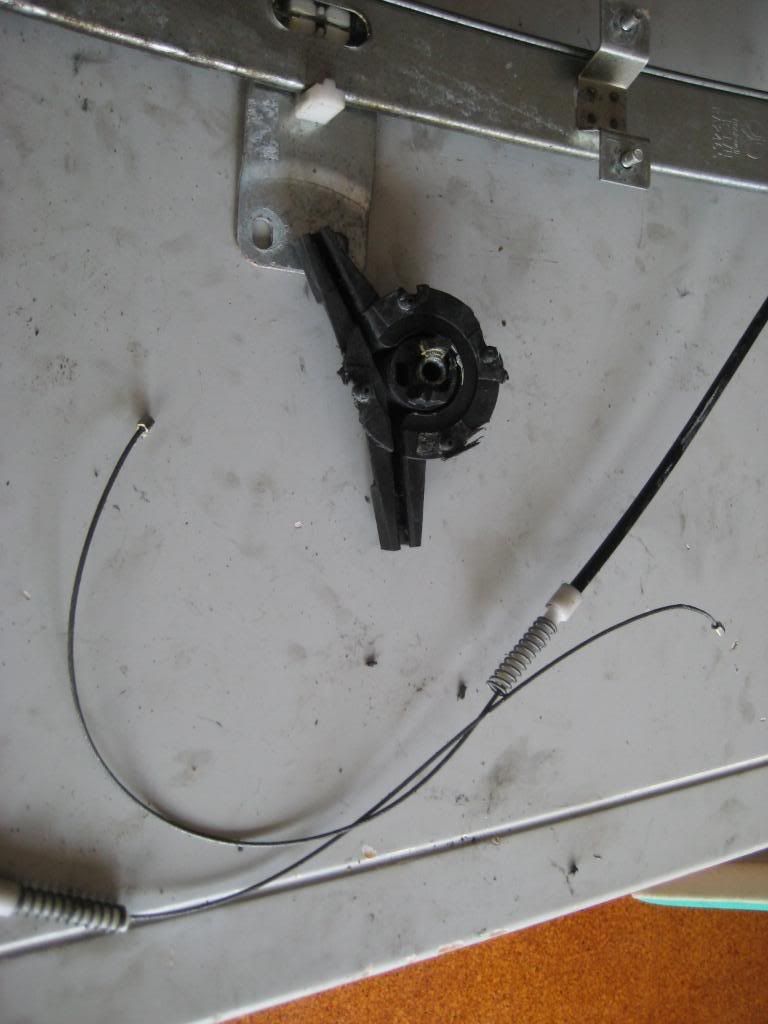 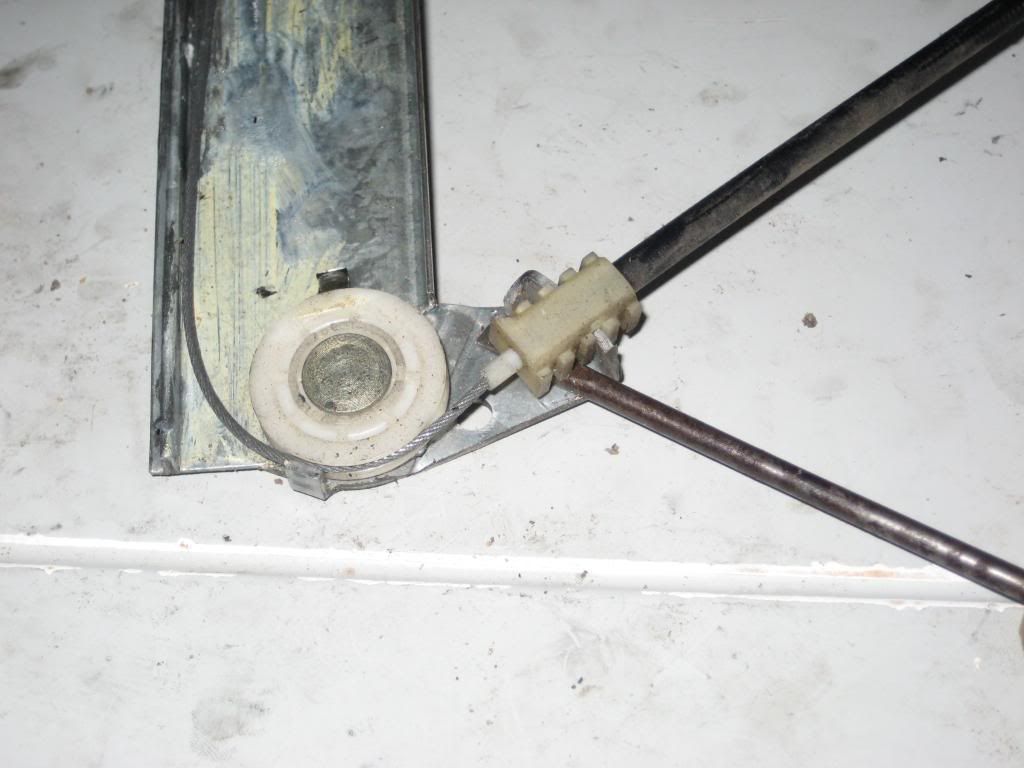 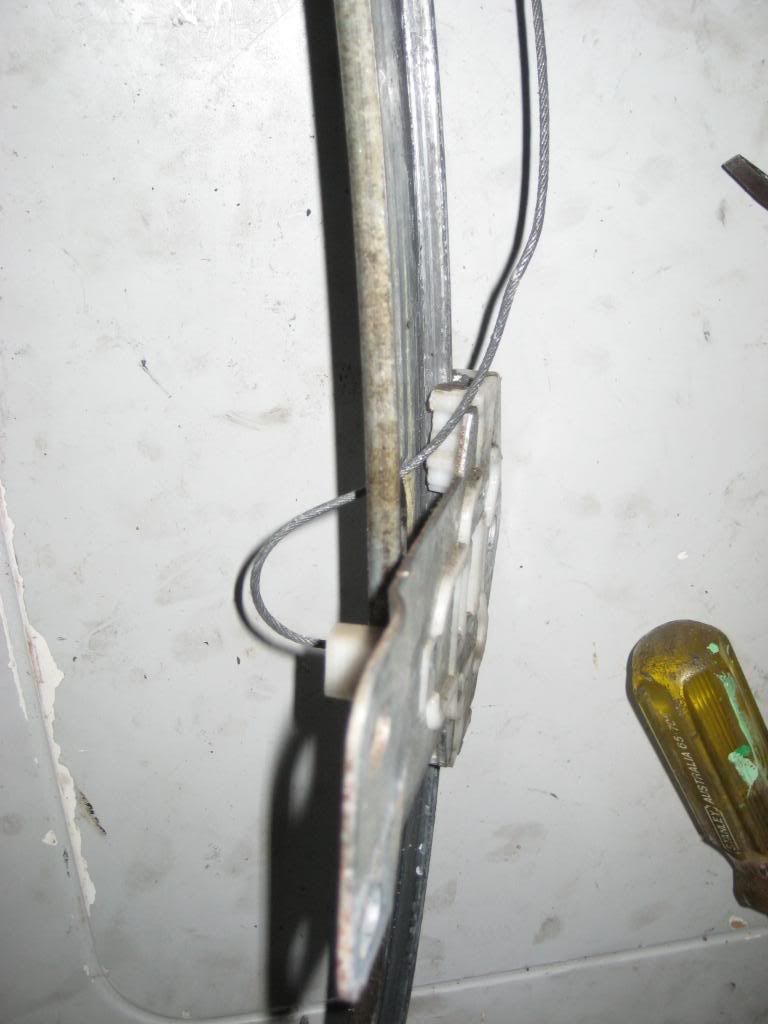  Then work your way backwards and put it back together, dont forget the ceck it works by pluging it in before you go and bolt it all up. I managed to do everything by myself but a second set of hands would be very handy. On another mechanism i just did a quick fix, pictures say it all BROKEN 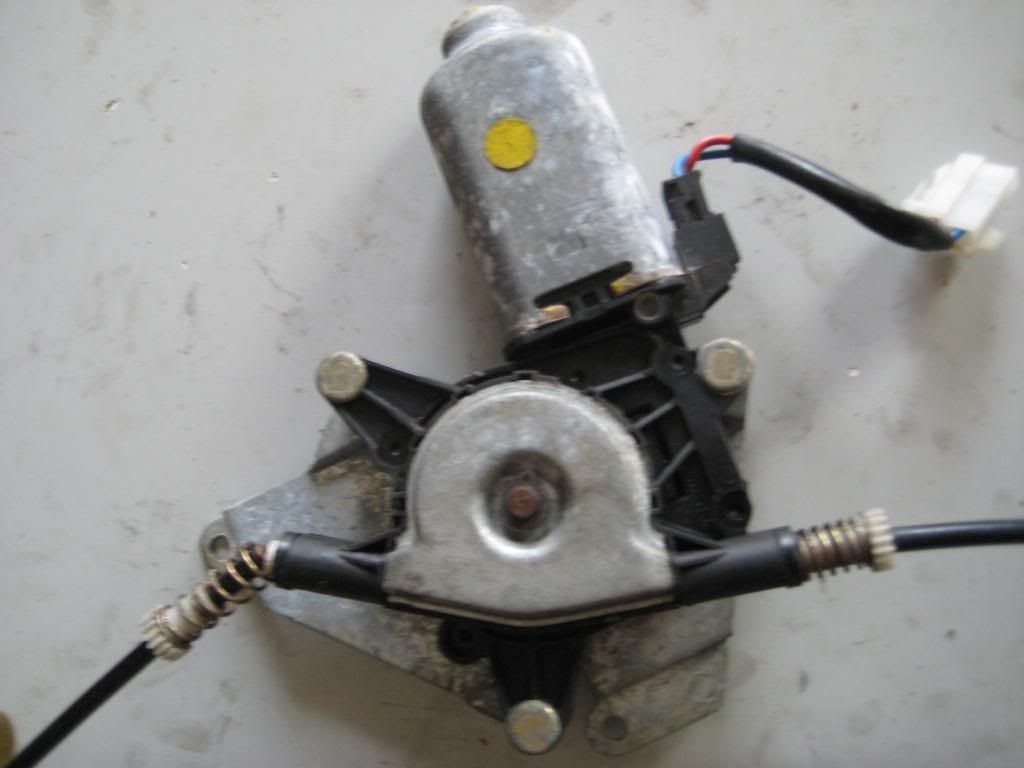 QUICK FIX 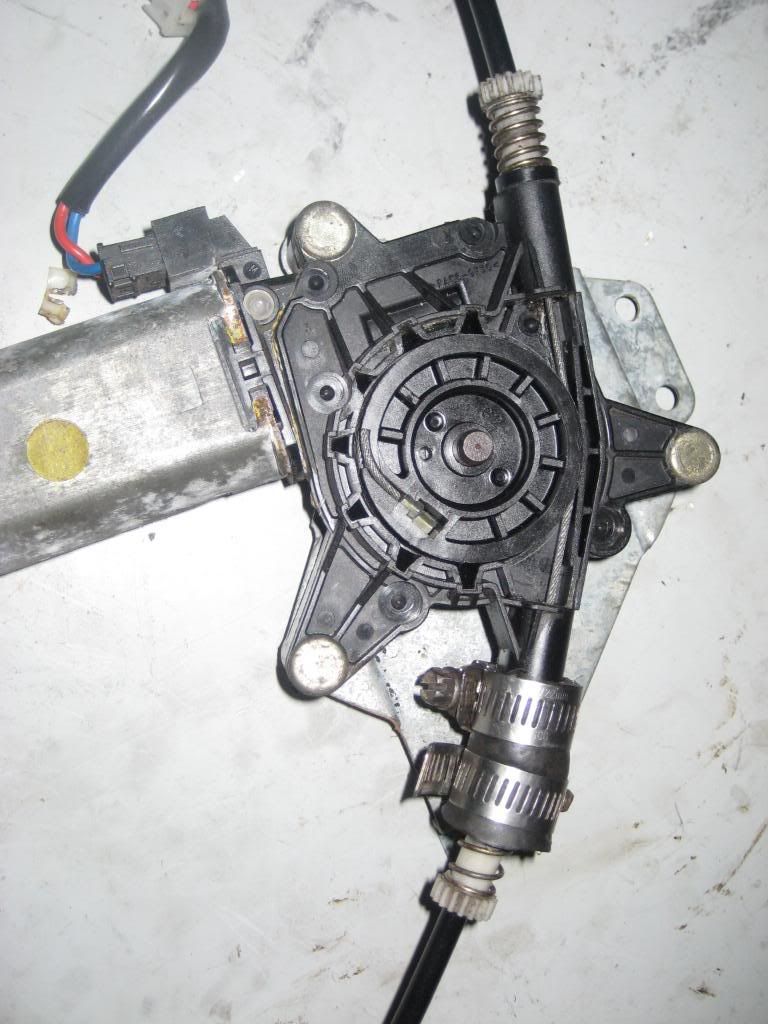 All this does is offer support. And a quick tip, your mums dinner table will get dirty! Here some pictures and a quick recap on work to the front passenger door. i memoved the ecu to get to the door loom plugs inside the car. 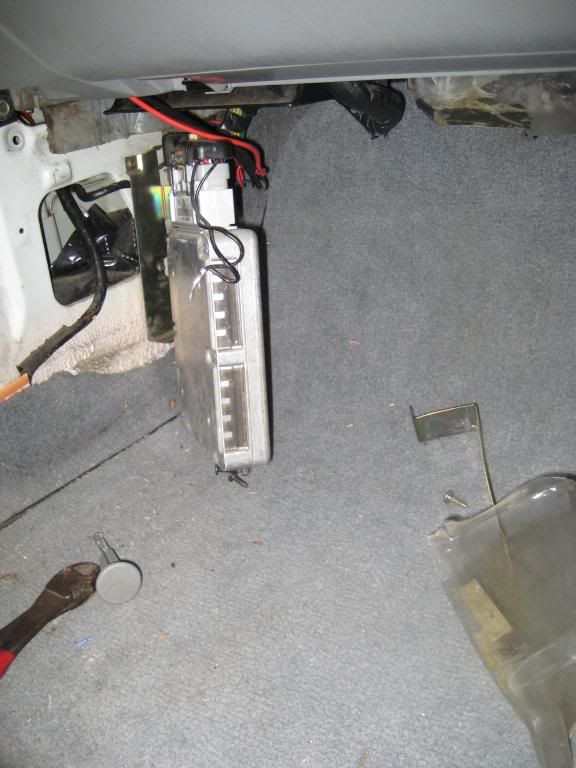 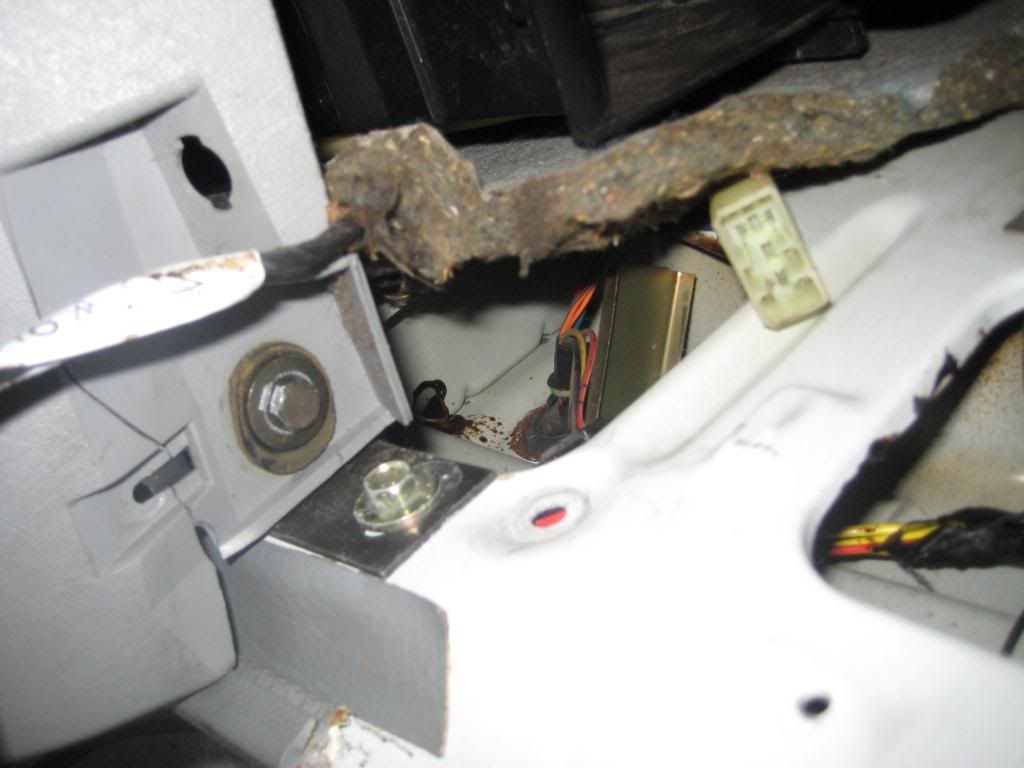 Then pulled the plugs out between the car and door. 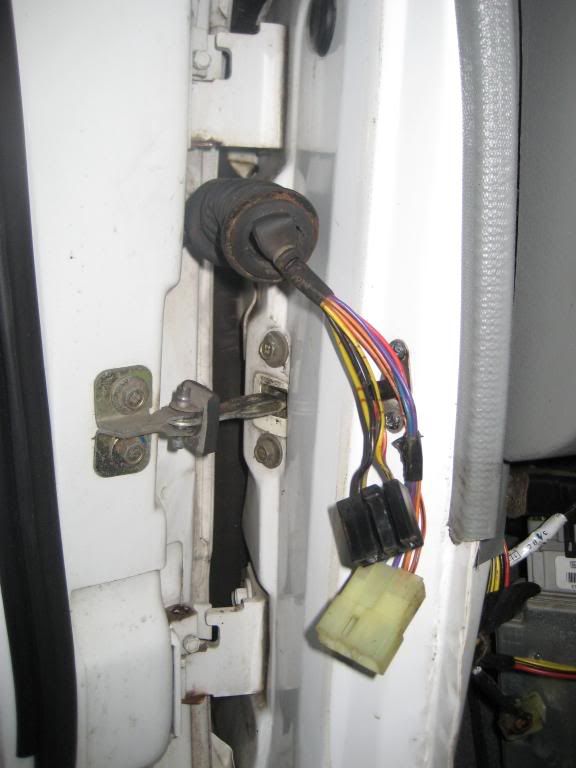 Unpluged ect with the loom inside door and pulled it out. Here the difference in the 2 door looms 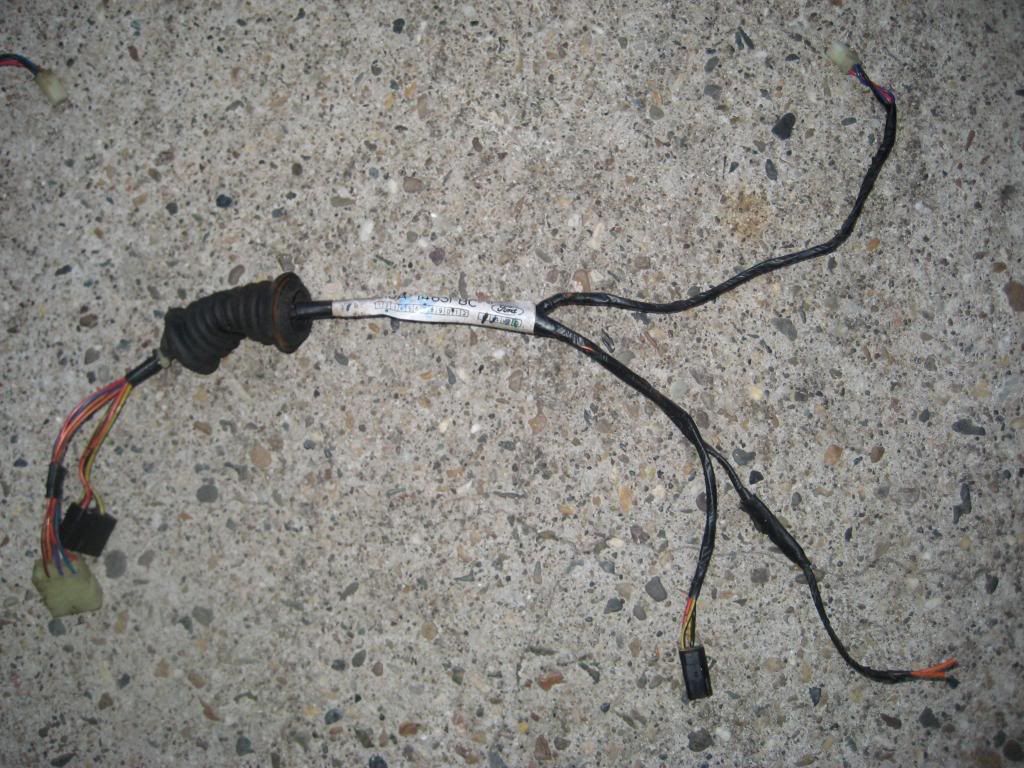 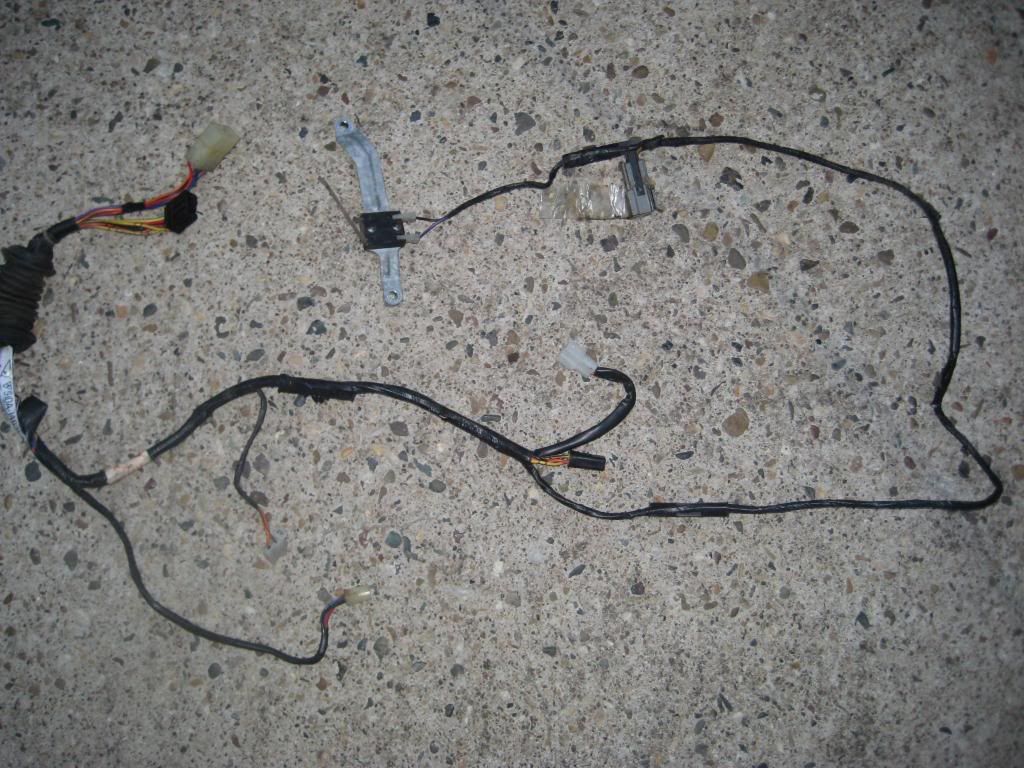 All the swapping of the mechanisms was similar as other doors. I also swapped the door locks as they were in better condition(refer to pictures) 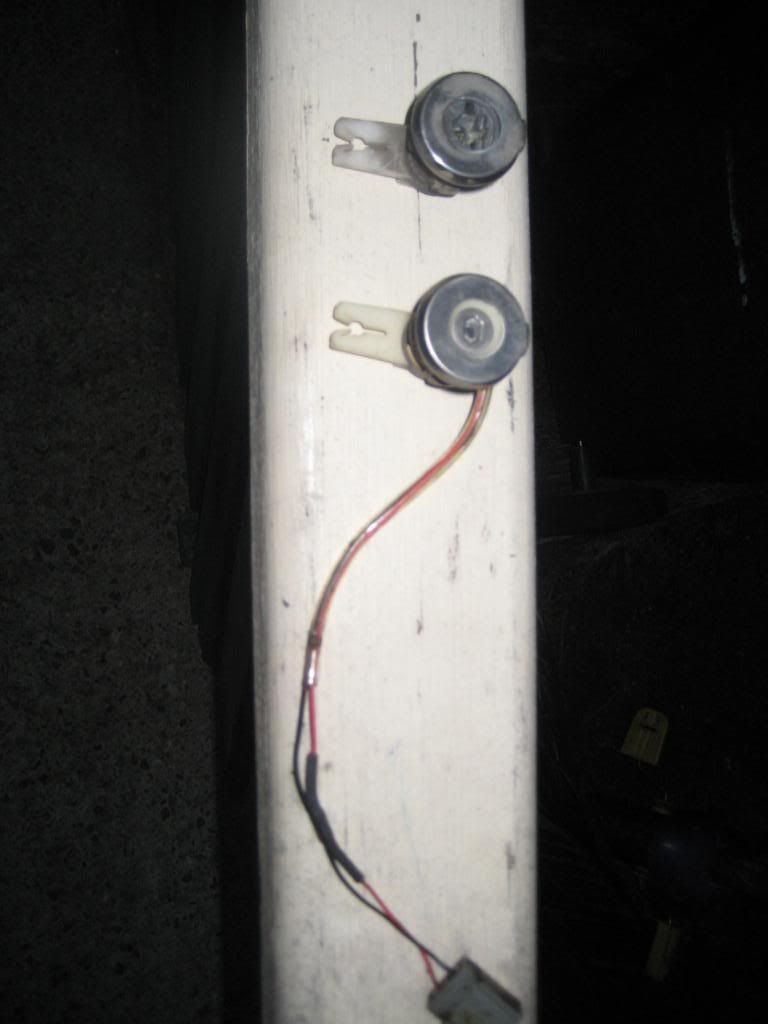 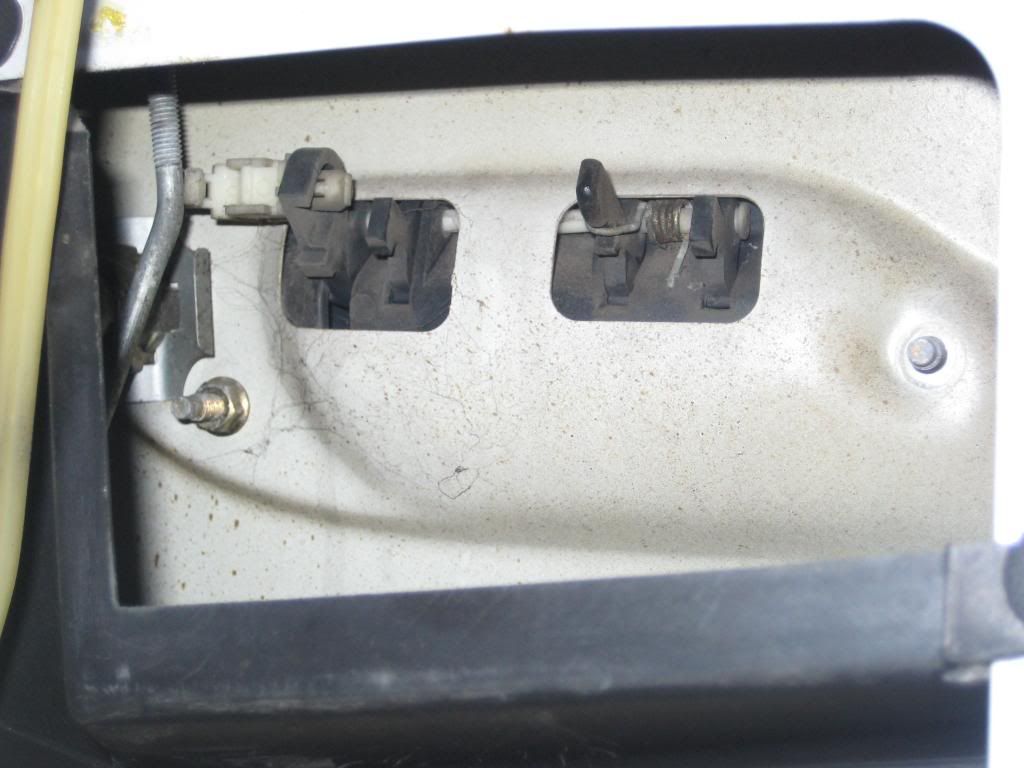 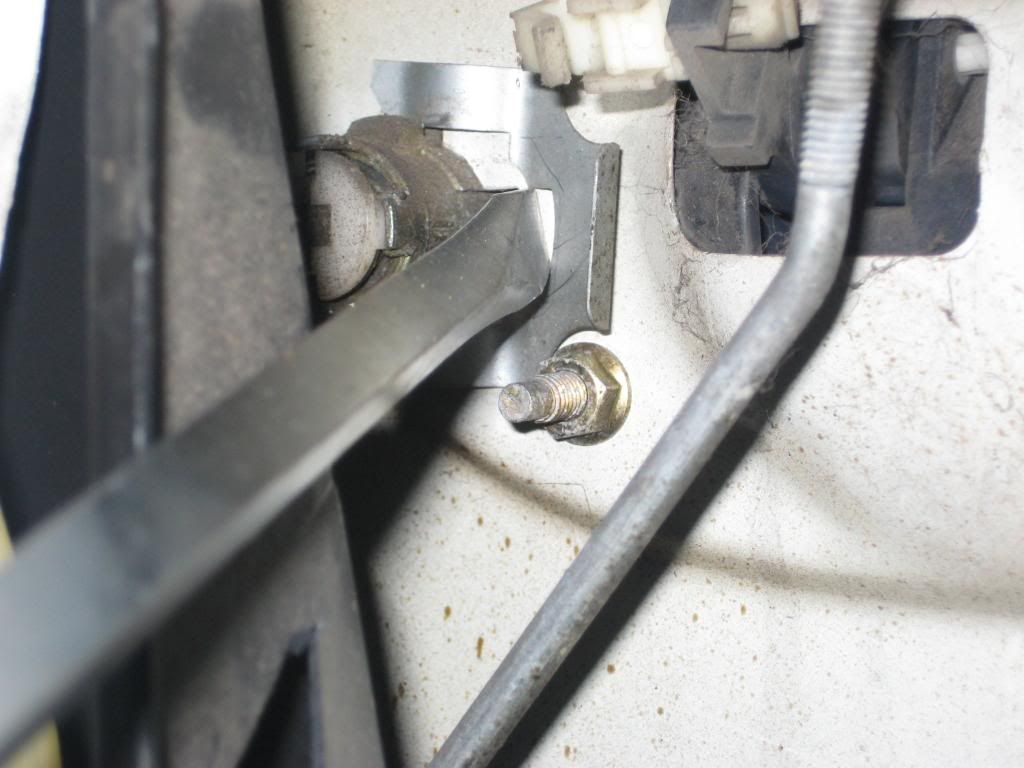 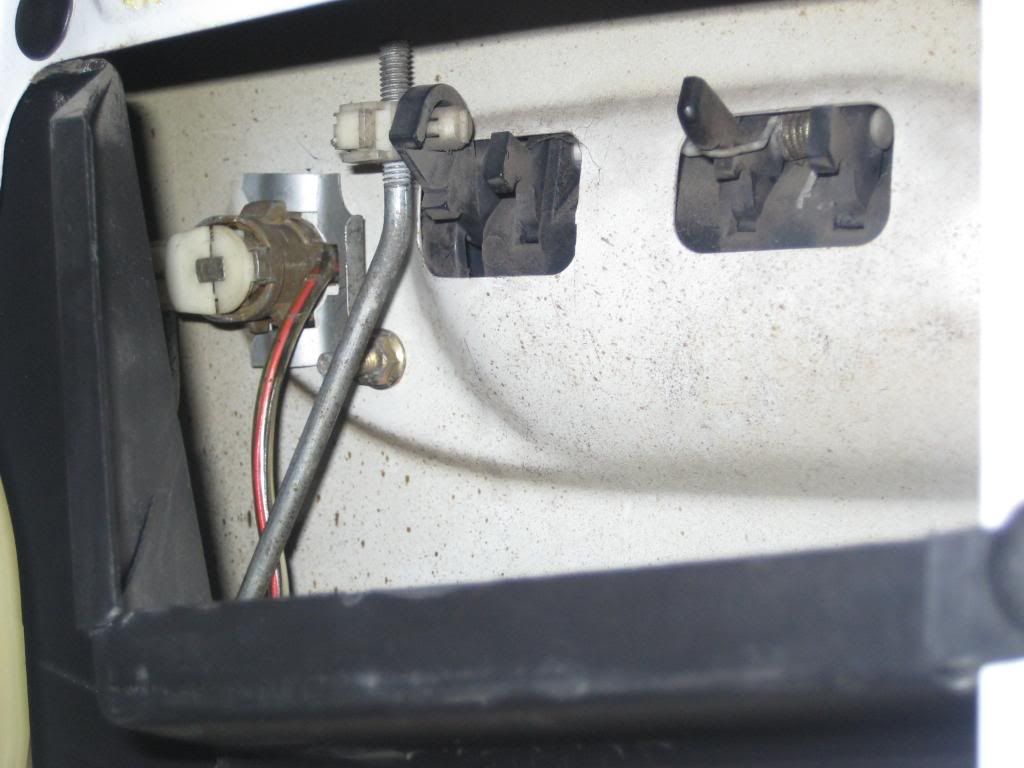 Heres some before and after pictures of the doors 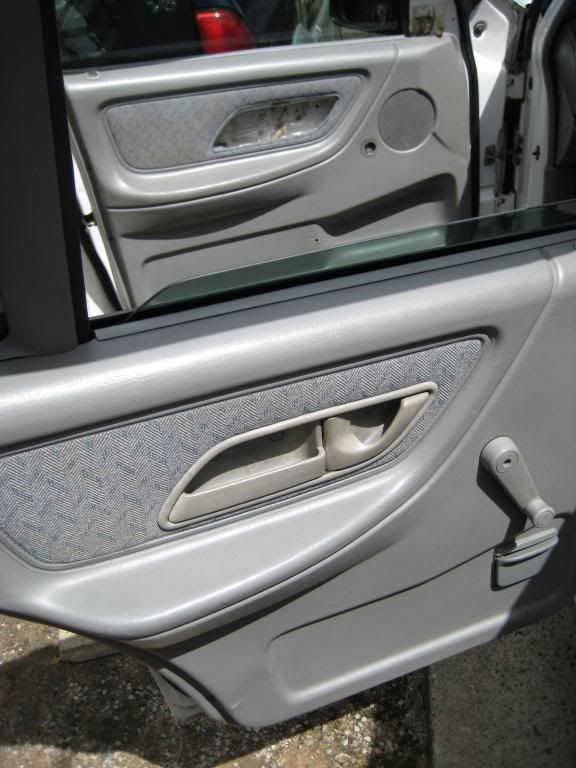 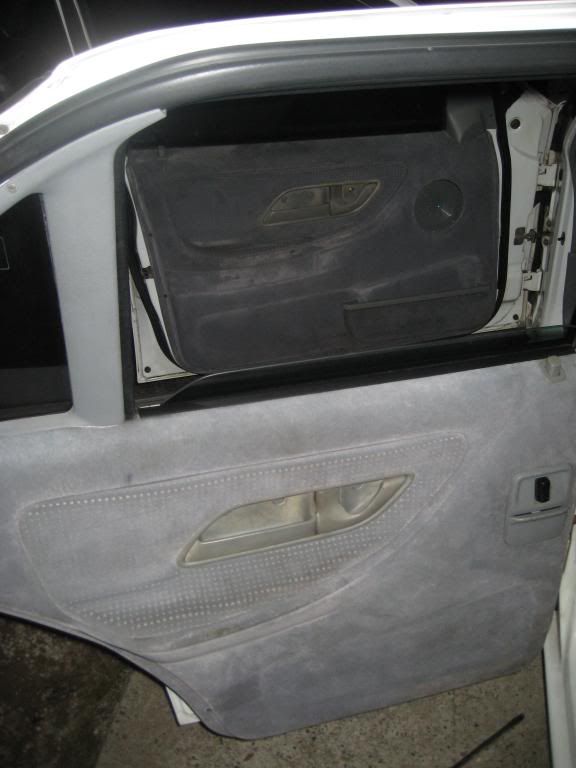 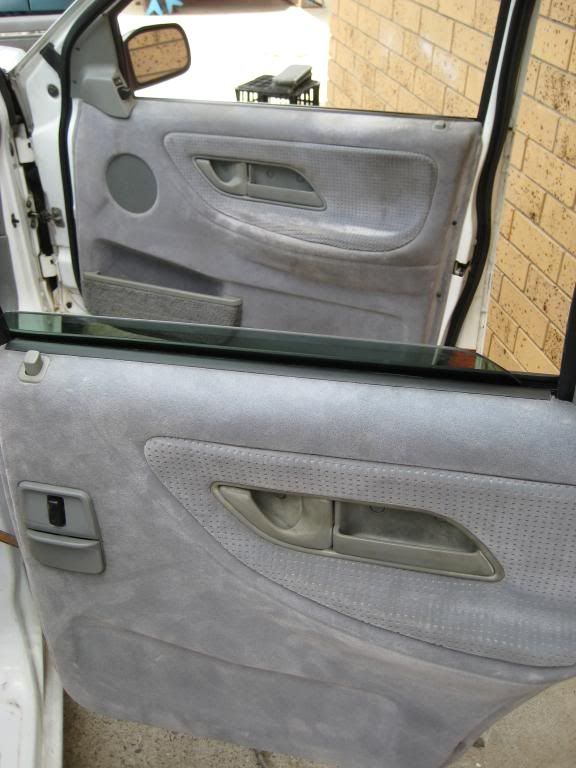 This is all progress made today, hope i didnt go over bored with the pictures. Todays WTF is this question This is were you can contrbute WTF is this thing inside the door? Does anyone know what this is and what it does, when i know that i can figure out if it works. What i can tell you is, Its from inside the door handle only on front doors and when the door handle is opened it pushes down and completes a connection to something. Pictures. 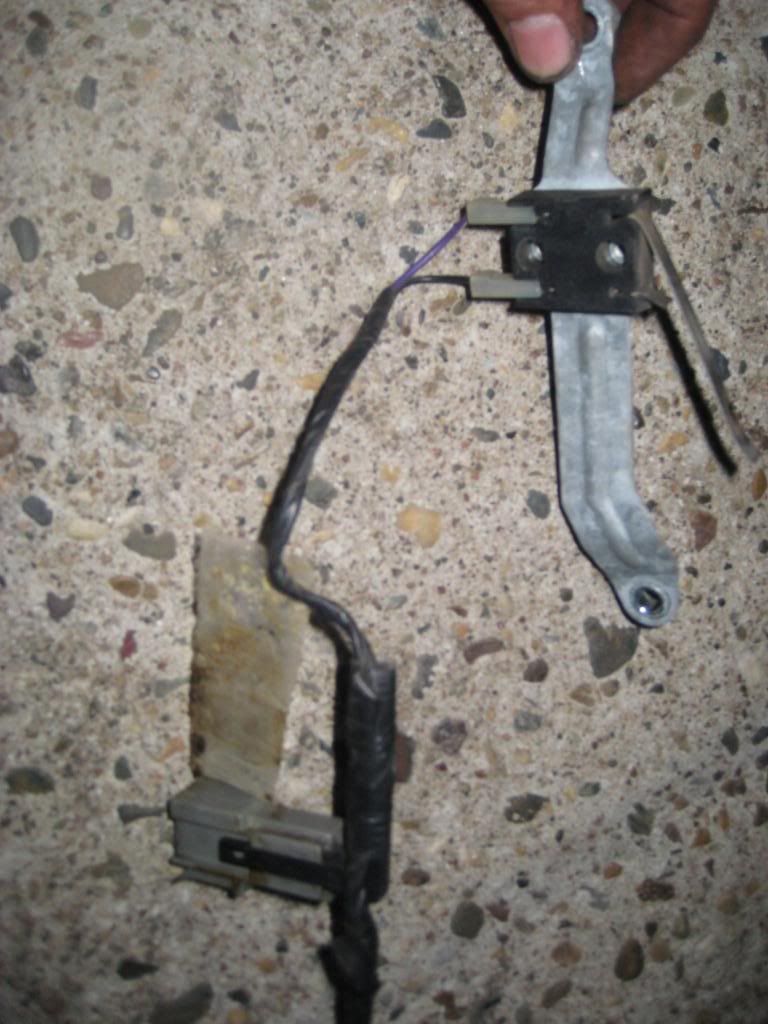
_________________
Last edited by itlookslikeaxr6 on Sat Mar 14, 2009 2:47 am, edited 3 times in total. |
|||
| Top | |
|||
| SLO247 |
|
||
|
Nice photos, I really like the first one.
|
||
| Top | |
||
| itlookslikeaxr6 |
|
|||
|
Thanks man! me too i really like the angle i got with that one. I havnt got any of the back cause there damage under right tail light and the P/S has sill rust you can see.
So i feel the first shot shows the best side and cleanest rim of the car! Regards, Mick
_________________
|
|||
| Top | |
|||
| SLO247 |
|
||
|
The extra bit for the front doors, Is it the piece that makes the doors unlock when you try to open them from the inside?
|
||
| Top | |
||
| itlookslikeaxr6 |
|
|||
|
{USERNAME} wrote: The extra bit for the front doors, Is it the piece that makes the doors unlock when you try to open them from the inside? Negative, its electronic. its hard to see in the picture but you lift the handle to open then a tab on handle inside door pushes down the flexible tab and makes it touch the other, this would complete a electric curcit and turn something like a light on? Is there a chance the outside edge of the door lock lights up, there only small wires with a positive and negitive.
_________________
|
|||
| Top | |
|||
| easpak91 |
|
|||
|
Its for when you lift the door handle the lock will illuminate. Nice little write up, im in the same process at the moment can you tell me how you wired it all up as my ride hasnt had elec windows and im trying to figure out which wire goes where from the switches. Cheers
_________________ WHO EVER SAID "TWOS COMPANY THREES A CROWD" OBVIOUSLY NEVER HAD A THREESOME |
|||
| Top | |
|||
| SLO247 |
|
||
|
You could probably use it to trigger anything.
From memory some of the fairmonts had a system where the interior light would turn on for a period if the exterior door handle was lifted. It could also be something to do with the door lock. |
||
| Top | |
||
| NZEA |
|
|||
|
{USERNAME} wrote: Its for when you lift the door handle the lock will illuminate. Nice little write up, im in the same process at the moment can you tell me how you wired it all up as my ride hasnt had elec windows and im trying to figure out which wire goes where from the switches. Cheers Theres a doco in the tech section
_________________ 1989 EA Falcon column shift - SOLD |
|||
| Top | |
|||
| itlookslikeaxr6 |
|
|||
|
{USERNAME} wrote: Its for when you lift the door handle the lock will illuminate. Nice little write up, im in the same process at the moment can you tell me how you wired it all up as my ride hasnt had elec windows and im trying to figure out which wire goes where from the switches. Cheers Thanks ill check it one night to see if its lights up much, even thou i used the smart lock most of the time. {USERNAME} wrote: Theres a doco in the tech section I didnt even think to look in the tech section! Thanks for your comments guys, ill update progress i made today when i get home tonight dont have time atm. Regards, Mick
_________________
|
|||
| Top | |
|||
| PIMP_LTD |
|
||
|
Nice work mate, power windows are for winners.
_________________ Commodore australia's favorite car??? What a load of s**t |
||
| Top | |
||
| huggiebear |
|
|||
|
looking good. yeah that metal bar also illuminates the inside of the car on fairlanes (i think fairmonts too) aswell as the door locks. its a great feature
|
|||
| Top | |
|||
| itlookslikeaxr6 |
|
|||
|
{USERNAME} wrote: Nice work mate, power windows are for winners. Thanks for your comment:), it wasnt all smooth sailing but hey it was fun. Gave me plenty to do and now i dont have to lean across the car to put the other window down when i want to. {USERNAME} wrote: looking good. yeah that metal bar also illuminates the inside of the car on fairlanes (i think fairmonts too) aswell as the door locks. its a great feature Sounds good, ill go out side now as i type and see if it lights up. Ok they dont light up at all o well im not real fussy about it. Todays Progress This morning before a doctors app. involved pulling out the front and rear seats, center console and carpet. I gave the fairmont interior which will replace the GLi interior another quick spray with the carpet cleaner which works well. Im also swapping the carpet because mine has sand in it (from previous owners location) which is impossible to vaccum out as well as the other being in better general condtion. First this in the morning will involve removing the current saging head lining then replacing it with the one from my t5 EA which is in prefect condition. the head lining in the fairmont is brand new but not stock patter/material. But i took it out and will be selling it along with the fairmont center light and rear map reading lights with wiring loom/harness. Sorry no pictures of total progress today, will have some before and after pictures posted once interior is in. TODAYS WTF IS THIS Q This is were my fellow fordmod members can help me out. WTF is this plug i found on the passenger side just under the carpet?  Photo shoot Heres another shot of my car, just because i can:) Currently on the hunt for new places to shoot around my area. 
_________________
|
|||
| Top | |
|||
| BenJ |
|
||
|
Does your car have ABS? If not I believe that is the plug for one of the Rear ABS looms.
BenJ
_________________ {DESCRIPTION} - Current Ride |
||
| Top | |
||
| NCIILANE |
|
|||
|
Excellent work Mick,
Just had a read through your thread and it's good to see there's another boxcar fanatic in the making Keep up the good work mate, I'll be watching the future progress of this beast with interest. Cheers, Mick (have to be a good bloke with a top name like that
_________________
|
|||
| Top | |
|||
| SLO247 |
|
||
|
I really like what you are doing with the car.
If you want the door handle light triggering system working, you will have to add all the wiring in. Your barrel probably doesn't have illumination either, so you would have to swap that or install the lighting onto yours etc. |
||
| Top | |
||
| Who is online |
|---|
Users browsing this forum: No registered users and 0 guests |