|
| TimmyA |
|
|||
|
Ash,
How's it going mate? I found one wrecker with one and they wanted $400... Retail from Ford is $505...Trade from Ford would be less... So that's a waste... So no not really as yet... The search does continue though... Still getting around to drawing up the board for the buttons and resistors... May happen tomorrow... Had some other tasks to be doing... It really hasn't progressed since the last update about the circuit board... Picking up an LSD on Monday which will go in for driveability reasons and then I'll hang onto the Lokka... Also bought 5 metres of SMD5050 LED's with my last pay... http://cgi.ebay.com.au/ws/eBayISAPI.dll ... K:MEWNX:IT $61 AUD atm on sale... Bargain... Replaced the boot light with them which was a fluoro and rattled and sometimes didn't work... So the part I didn't get any photos of because I didn't think of it at the time... I wanted to hide the wires on this thing and make it neat... In the box part behind the water channel of the boot I had a hole next to the original boot light where I had a toggle switch mounted... Left about 10mm hole when I removed it... With the LED strip if you remove the double sided tape from the rear the pads are under there mirrored off the front... so I soldered my wires at 90 degrees to the strip... Made a basket around it out of electrical tape and filled it with a hot glue gun for rigidity and insulation properties and fed the wires up through this hole and you physically can't see where the wires come off it... Works great at night... 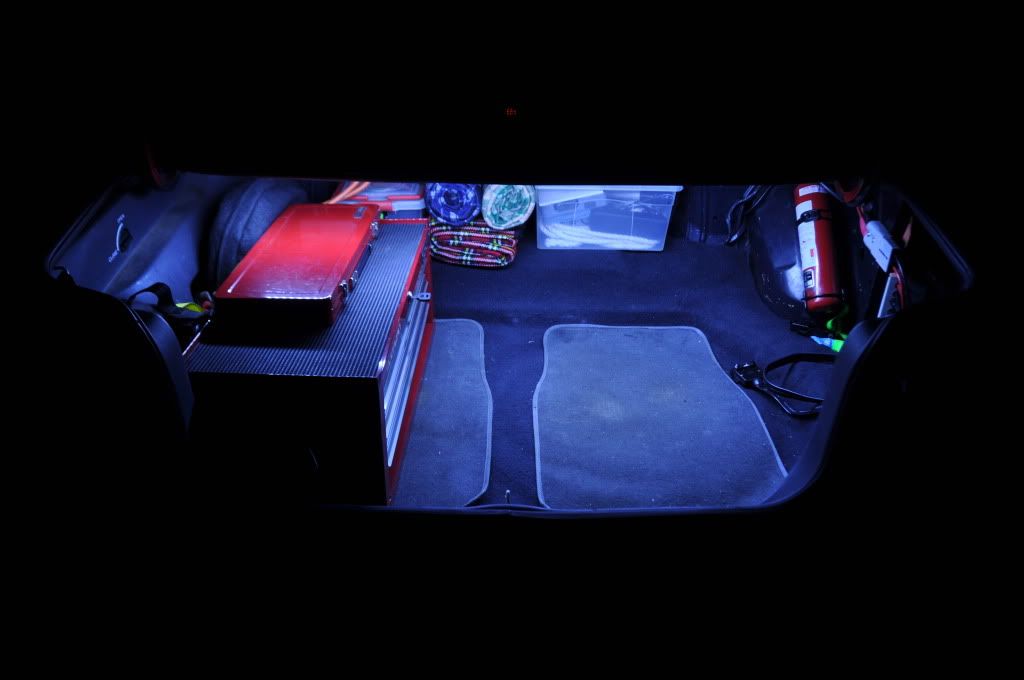 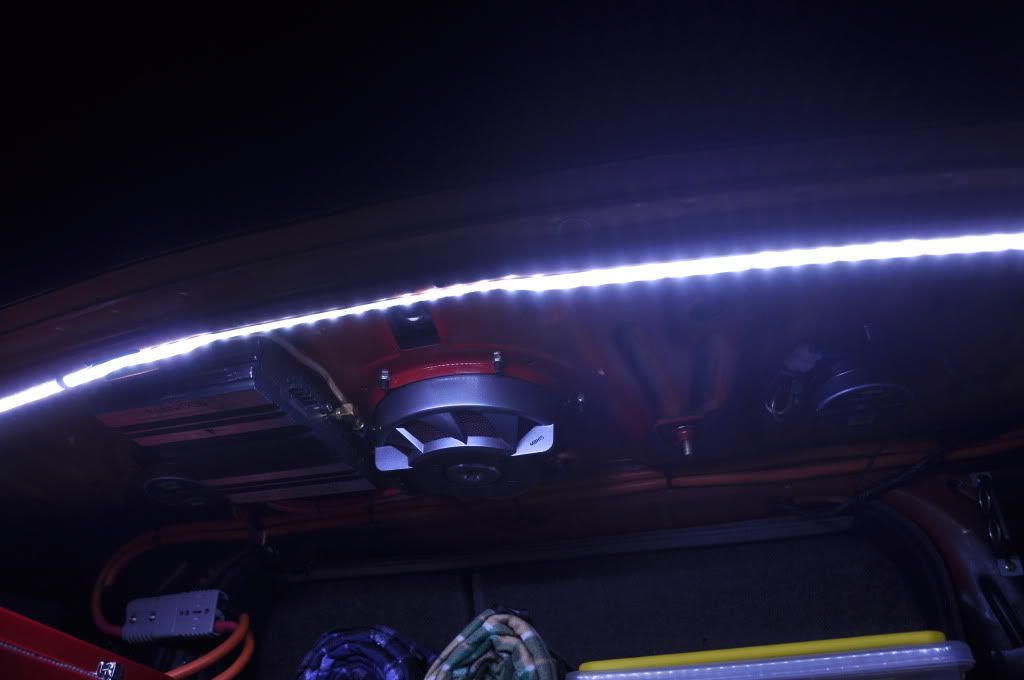 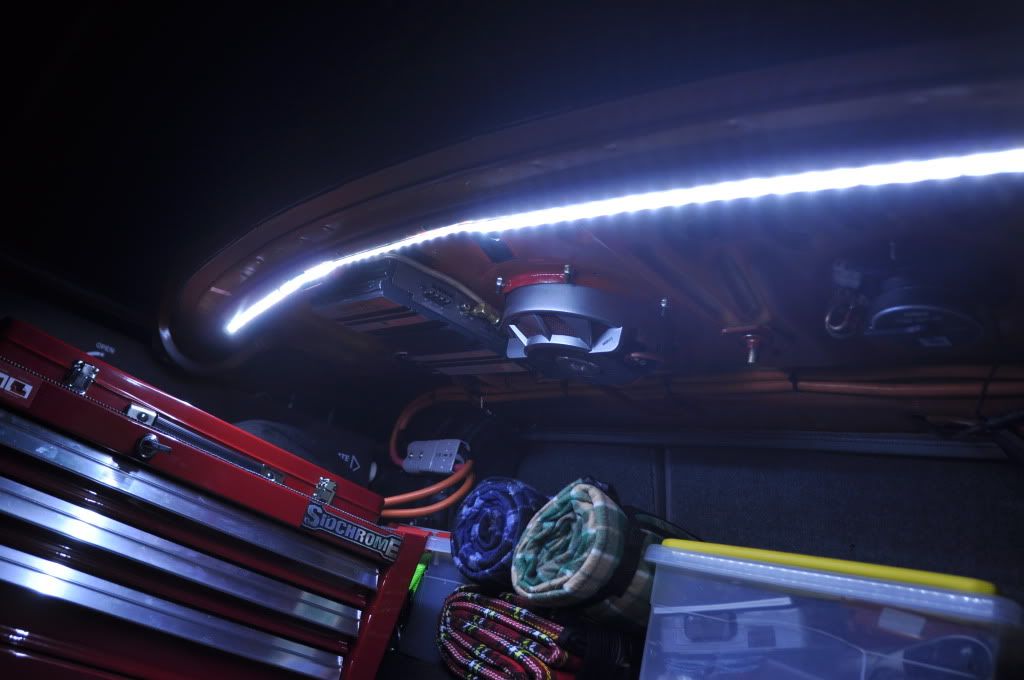 So that is another thing crossed off... Also today I did an oil change and changed the height of the front end... Tried to get a touch lower so that it sits lower than the back... I was running std shockers with Pedders grey springs... Now I'm running Pedders GSR shockers with std springs and it is a little lower but lower again may be ideal so I may end up putting Pedders' red springs on these shockers yet... These shockers have a 20 or 30mm lower spring carrier so you can run a std spring and get the lowered look... lowers it more than the lowest of Pedders's springs anyway (grey ones)... Will wait and see how it settles over the next few days and go from there... As always poking along... Sort of dismissed the steering wheel a bit I guess until I actually find an airbag... But not doing much tomorrow I think so will attempt to get the other board drawn up and then hand it to the little brother to scale and photo shop it so it can be etched... Best do that soon though... etching doesn't work real well in the cold weather... Cheers, Tim
_________________ {DESCRIPTION} |
|||
| Top | |
|||
| TimmyA |
|
|||
|
{USERNAME} wrote: Going alright thanks mate. Looks like you've still been busy as usual. Those LED's are great mate. I'll be hooking those up in the mystery van. Might even grab the same 5m you got, that's a good price. EDIT: I just bought some. Free postage!! Looking like it might take a while for an air bag to turn up. I'm sure one will eventually that doesn't cost you $400 or more. I've been working on my steering wheel and have been thinking about the next one to do which got me thinking about your FG wheel. Anyway, hopefully something comes along soon for you mate. Thats it mate $61 bucks... delivered to your door... For anybody reading this and not entirely sure about them... They can be cut at 3 LED intervals... You know where these points are because it is where the 4 gold contacts are... You just cut right through the middle of them... Now these are epoxy covered to make them water proof... I didn't get them for their waterproof capability... I got them because the epoxy insulates them as opposed to a bare board and also adds some strength to the board to hopefully help prevent any fatigue... So to solder wires to the next section you need to remove this epoxy from the 4 little contacts... So I started of cutting down with a Stanley being careful not to cut through the board then then breaking it off with my finger nail... But what seemed to work equally well was it you get your soldering iron... Use the point and run it in a line just behind the contacts and use it to melt the rest away from over the top of the contacts... You can press right down and run it across the board... As long as you don't hold it still for too long it doesn't damage the board and seems to get rid of it all off there... I would recommend NOT breathing the fumes in though... Wouldn't know what's in it... 4 contacts... you hook your positive red wire to +12V contact the others ones are R-G-B which I guess stand for Red Green Blue on the multicoloured strips... So were just want to short all three together and hook the black to all three... Easy... Yeah Ash those airbags are by no means in common supply... I'll keep watching out... Something will turn up sooner or later... It may end up being when Ash buys an FG to part out as he did with that BA {USERNAME} wrote: Impressive boot. Is that ya everyday boot items? All ya need is a geiger counter and ya set Yeah mate that's it... All the crap that goes everywhere I do... What do we have... couple of ties downs... pairs of work gloves (when I'm gardening), jumper leads, battery pack behind the toolbox, some picnic mats I have no idea where they cam from but make a nice space filler, another just in case thing maybe. Cheers, Tim
_________________ {DESCRIPTION} |
|||
| Top | |
|||
| TimmyA |
|
|||
|
I bought mine on the 11th and they got here on the 25th so 2 weeks which isn't all that bad for China...
I'm thoroughly stoked with them... Nearly tempted to buy more though I'm not sure where I'll use them... I was thinking day lights would be neat too... I had envisioned them running over the top of the grill, between it and the bonnet... Running in from the edge of the grill and dropping down and stopping just as they hit the low section... may look like eyebrows I was thinking... Only thing is I'm not sure how I'll mount them... I'll have a fiddle when I get more time... May end up looking like crap yet... I have a mate building a speed way car and he wants an interior light in it so he can see when he is fastening in at the night events... so a strip of this cable tied to the roll bar over head will work the part for sure... Next time I'm thinking about it I'll stick the multimeter in it and see how much that bit over a metre long strip actually draws... Curious what sort of run time you'd get before flattening the battery... I recon it'd have to less than an amp worst case... If so on a 55AH battery it should run for 55 hours... All fun and games... I really like these SMD 5050 LED modules... they are best on the market at present I'm sure... Cheers, Tim
_________________ {DESCRIPTION} |
|||
| Top | |
|||
| TimmyA |
|
|||
|
If it helps I will get my back side into gear tomorrow and measure it for you...
I'll also hook the rest of the roll up and measure it and we'll add the two together and that'll tell you what you're expecting per roll... Have you decided what you are doing battery wise for the van Ash? Just one big gel cell or a couple and how many amp hours total you are thinking? Or you'll buy batteries to suit the load... As opposed to make the load suit the batteries like most do? Cheers, Tim
_________________ {DESCRIPTION} |
|||
| Top | |
|||
| TimmyA |
|
|||
|
Is all good mate... I'm never phased...
_________________ {DESCRIPTION} |
|||
| Top | |
|||
| TimmyA |
|
|||
|
Picked up my EL 3.45 LSD today... Very happy... Seems rather tight on the test bench...
Now it is just the issue of nutting through what needs to be changed/acquired to make it fit in an ED... Obviously the handbrake cables are going... Brake lines will be fitted... I'm thinking the backing plates, caliper brackets, calipers and discs are all changed for the ED ones... The EL calipers mount on the front while the ED ones mount on the back of the diff... Just hoping the ED caliper brackets fit over the 4 bolts there (same hole centres) though I can't see why they'd change... Gotta pull the axles out to change these... That means I'll fit my axles to get the shortened wheel studs while I'm going... As long it all lines with existing bolt holes that all looks fairly straight forward... The thing I have no idea about is upper trailing arms... This diff has one set of holes... So I need advice on whether I can use the ED arms or I need to find EL arms... Would be nice to have the right arms here ready do before I pull the old one out and find out they don't line up... AFAIK the lower ones never changed from EBII to EL? Other than that it all seems fairly straight forward... Something that I'll do when I find the time... Cheers, Tim
_________________ {DESCRIPTION} |
|||
| Top | |
|||
| TimmyA |
|
|||
|
Good Evening to all...
Have sorted the diff out... 20mins after being on the phone to BenJ I know where I stand... Cheers mate... The thought at this stage is that the upper trailing arms I have will work fine... I need to pull the axles and swap the backing plates, the caliper mounts & calipers, and seeing as I'll have my axles out I'll use the ED ones simply to save me shortening the wheel studs... Today I picked up another axle bearing and seal as I had to replace one leaking one... Now I'll do the other too... Just have to make up brake lines to go across the diff and remove the handbrake cable... Should work goodo... Last nights purchase on ebay was from the states... Attachment: $(KGrHqQOKjYE1BPqnQ,6BNdjlIfBTg~~_12.JPG This is a TFI from a yankie vehicle where they mounted it in a heatsink and mounted it away from the dizzy... So with my knowledge of TFI modules I'll make an extension lead to bring the wiring out from under the manifold and mount this somewhere like behind the passenger headlight or where the vac module for the ED cruise went or where ever else may look good and not so hot... Haven't had one fail yet... But I'd sooner not find out... The document for doing this can be found here... http://www.therangerstation.com/tech_li ... te_tfi.htm I'll get the heatsink blasted and toss the module... Modify as shown here... Make the extension lead up out of a braided cable or two and Bob is your Mother's brother. I'll photograph it all and make it into a bit of a doco I feel... Other thing I'll keen on is moving the coil somewhere from the vibration of the motor and tilting it 90 degrees so it isn't "hanging" from its base as such... So it sits down... They fail because of the way they hang and cause a split in the epoxy housing and let moisture in... My car will not start straight up after I pressure was the motor and I know it is not the dizzy so I am thinking my coil may already have issues... Counting the days... Just had the urge last night to modify these two ignition system components before all hell strikes... Esp after the troubles like BenJ has had with various bits... I'm keen not to go there As the saying goes: "Prevention is better than cure". That's all folks Cheers, Tim You do not have the required permissions to view the files attached to this post.
_________________ {DESCRIPTION} |
|||
| Top | |
|||
| TimmyA |
|
|||
|
I actually don't have a clue...
Have no idea in the world what it looks like at this stage... but something like that I'm guessing? Teeth count? Thanks mate
_________________ {DESCRIPTION} |
|||
| Top | |
|||
| TimmyA |
|
|||
|
Cool... Sounds like the one... That'll be a good starting point I'd reckon...
Thanks mate...
_________________ {DESCRIPTION} |
|||
| Top | |
|||
| TimmyA |
|
|||
|
Ah... very nice...
As always send me the details and I'll wire the goods through... I have your account details saved these days... Cheers mate...
_________________ {DESCRIPTION} |
|||
| Top | |
|||
| TimmyA |
|
|||
|
Progress at very last I say...
Circuit boards are now drawn up... I transferred them to press and peel this arvo and just etched them both... Will take them to work tomorrow and put some tinning compound on them and tin these ones as opposed to enamel them... Reason being it will make it easier to solder the SMD buttons on for the board that actually goes inside the button housing... That enamel can be hard to solder through sometimes and you're best to try and avoid needing to heat SMD devices up to much where possible so having it already tinned helps with that... More progress soon... For now I'm still hunting for an airbag if anyone reads this... Notice FTG have to FG's currently but both have the airbag deployed... Ash... Not sure if I mentioned it but that gear arrive sometime last week... Looks good cheers... Diff is slowly getting more sorted... Starting to get a good visualisation of brake lines required... Should be able to get it pretty well all set up before hand so it is simply just a pull mine out, put it in, swap axles... Considering pulling backing plates and calipers and caliper plates off our spare car as well the lines of it and seeing what can be used and what needs to be made up to do the job... Ben if you read this... You were saying the "T" ends up practically on top of the breather on the EF/EL diff... Looking at my ED diff the weekend just gone the breather actually screws through the "T" on the ED diff... So if it lines up on the EF/EL diff I can use it to hold it place as if it were factory... Cheers, Tim
_________________ {DESCRIPTION} |
|||
| Top | |
|||
| BenJ |
|
||
|
{USERNAME} wrote: Ben if you read this... You were saying the "T" ends up practically on top of the breather on the EF/EL diff... Looking at my ED diff the weekend just gone the breather actually screws through the "T" on the ED diff... So if it lines up on the EF/EL diff I can use it to hold it place as if it were factory... Cheers, Tim Correct. That is what I meant, but was a bit hard to describe. That is exactly what I did in my sedan. Keep up all the good mods. Cheers BenJ
_________________ {DESCRIPTION} - Current Ride |
||
| Top | |
||
| TimmyA |
|
|||
|
Ash,
Not wrong mate... Will get there eventually... By then I'll have everything made and it'll be a direct swap I'd say... Everything else will be made and finished... Other achievement is I traced out the NL cluster... So the blank on the cruise buttons on the FG wheel will actually scroll the odometer now... Use the extra button for that... Saves reaching through the wheel all the time... Ben, All good mate,,, We're on the same page now... Will sort through it and get some pics and that as things progress... May help someone in the future... Cheers guys, Tim
_________________ {DESCRIPTION} |
|||
| Top | |
|||
| TimmyA |
|
|||
|
Good news lads...
1 days down... 5 more days off work remaining... Things I'd like to do: *Pick up the old man's car we bought *Install the new HID 55W Hi and Lo beams into my car *Install the cam shaft *Install the NL Cluster (requires cam shaft to be done first) *Install LSD... *Finish buttons for the FG wheel Today I rewired the trip computer... Moved the data line from pin 34 and spliced into pin 58 as per BenJ's recommendations... Appears to be pretty accurate at this stage... Data wire at the cluster is no just for it... So it will be almost stick straight in... Bit more work left in the adaptor for the cluster... Put a nice plug on the extra wires and wire in the LCD illumination... Pics (Everyone loves them) 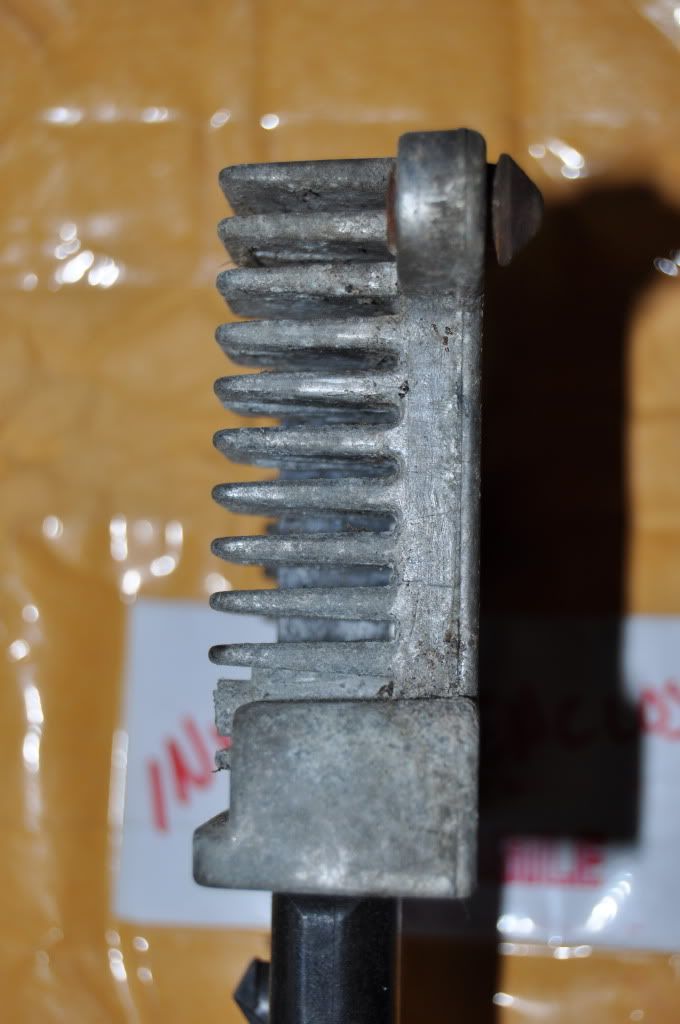 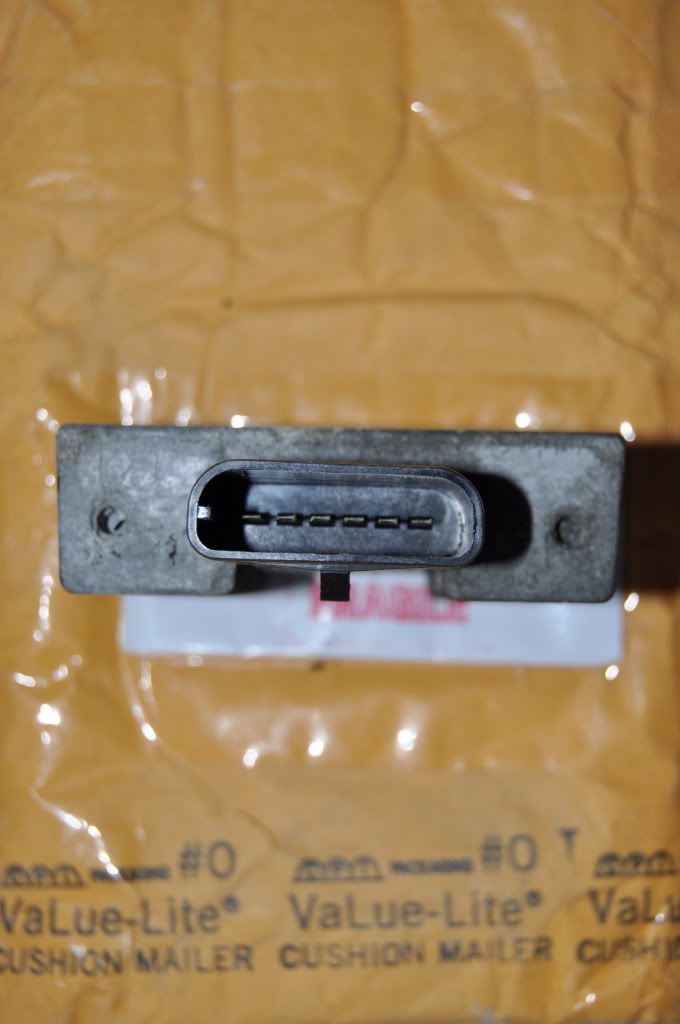  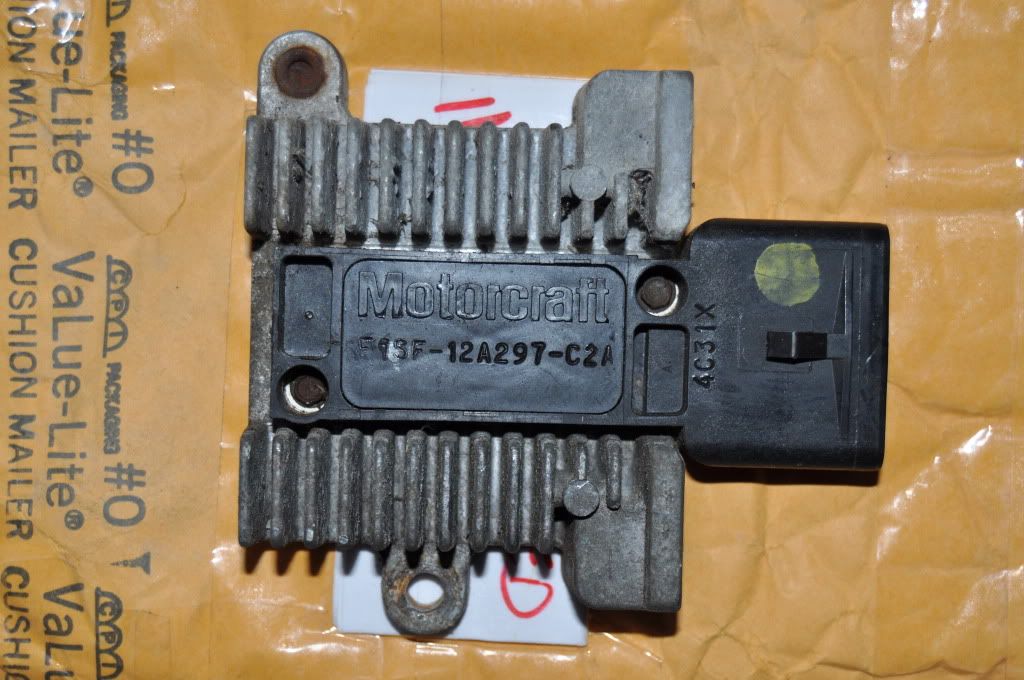 This wont happen this weekend... Involves making up an adaptor similar to the TFI-SIM units I made... Get a TFI clear the guts out... Use it to bring the PIP wires out of the dizzy to the module... Should look neat when done... So gotta set this up... remove the fins that need to go... Get it cleaned up a tad... Relocating the coil from it's "hanging by the neck" type position ford gave it may be part of this phase too... Also this turned up:  Ordered it 12 months ago and altronics finally got them in... Lives in your cigarette lighter, always charged... Fairly bright little sucker... Can hang onto it in your mouth for hands free work I discovered...Always handy to have... {DESCRIPTION} Currently $15 each... Will post updates and pics as things progress over the weekend... Cheers, Tim
_________________ {DESCRIPTION} |
|||
| Top | |
|||
| TimmyA |
|
|||
|
Howdy Doody All...
Progress HID lights are installed... Partial nightmare... Not a straight retrofit... But very happy with the end result... I now have high and low beam HID's installed... H1 Lows and H3 highs and dropped the colour temp from 6000k I used to have in my lows to 5000k now in both lamps... Originally I had halogen high's... Both bulbs are 55Watts... Previous lows were only 35Watts... Kits are from an Australian seller, but imported from China (what isn't?) all up cost me $202 inc postage... This bloke seems to make a living from HID retrofits (business cards and all) so he seems to be confident in his product and back it by experience... Quite happy as opposed to buy a cheap and nasty kit straight from China... Sooner pay the bit extra and have peace of mind and a local seller... Issues are... Firstly as always finding somewhere to hide the ballasts while still keeping them close enough to reach the required points, the leads could've been 2 inches longer and my life would have been a hundred times easier... For those of you who have never used HID's, or have older style HID's the new 5th generation ballasts are a fraction of the size of the old ones and also in the lead the lead that runs to the lamp is the ignitor in a separate box... This little box is a pain as it takes flexibility out of the lead and makes it hard to feed through tight holes... Ballasts almost identical to those I use can be seen here 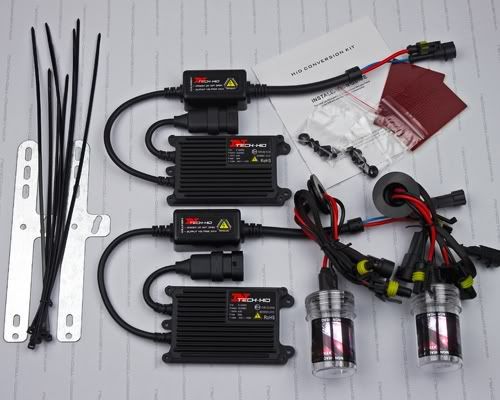 Issues with the new low beam 55W bulbs... Those familiar with XR lamps know the wiring for the lows comes in through the plastic cap on the rear of the lamp... So I removed the old bulb, fitted the cap to the new bulb (fiddly task)... Installed it in the headlamp and the cap wouldn't screw on... The back part of the bulb was 5mm longer than the old one and was sitting up just enough to stop it... Painstakingly with a dremel with a cut off wheel I remove the bottom 5mm (roughly) of plastic being careful both not to cut the wires and not to expose the pins inside the plastic base by removing too much... People should be aware that on the bulb side of the ballast voltages reach above 20,000V so insulation is crucial and any nicks,etc can be detrimental to the bulb and anyone who may contact the damaged section of wiring... Blew all the plastic shavings out and then discovered we have a winner... Same as the lows for the highs... Rubber back on these though, so removed the factory fly leads and fed the bulb leads through the rubber... Installed it... Fitted to the car and though hmmm that HID bulb is touching the inside of the glass... Pulled them back out, check with the verniers and yep... If the bulb was 1mm shorter it would have missed... It may not have hurt it, but wasn't risking it... So 2 washers... Filled some grooves into them and space the bulbs back nicely... Bent the holders just a tad to make them clip in again and the rubber backs just (only just) clip over the lamp again but that fixed that up... Very happy at first glance... Better colour (hated that blue tinge, crap for visibility)... Now they are the middle between warm white and cool white... Quite pleased... The angles are up to crap again so fix them up and then all set... As always, bummer about the warm up time but happy with the effect of them... Tomorrow is to remove the low beam timer and lock the low beam relay on a different way so as to avoid the flicker when changing from low to high... Will make this happen by changing my patch harness for the BA combo switch... Then reassemble the car again... And on to a new project... Some pics for the sake of night time pics... Day time ones will happen in the day time of tomorrow (ironic hey? Lows: 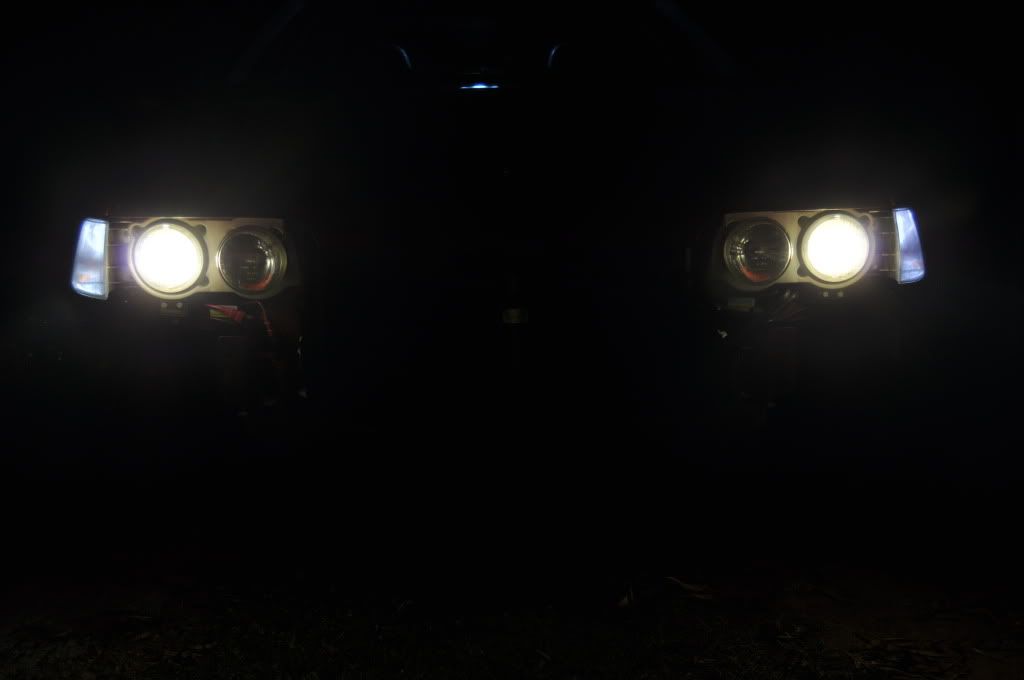 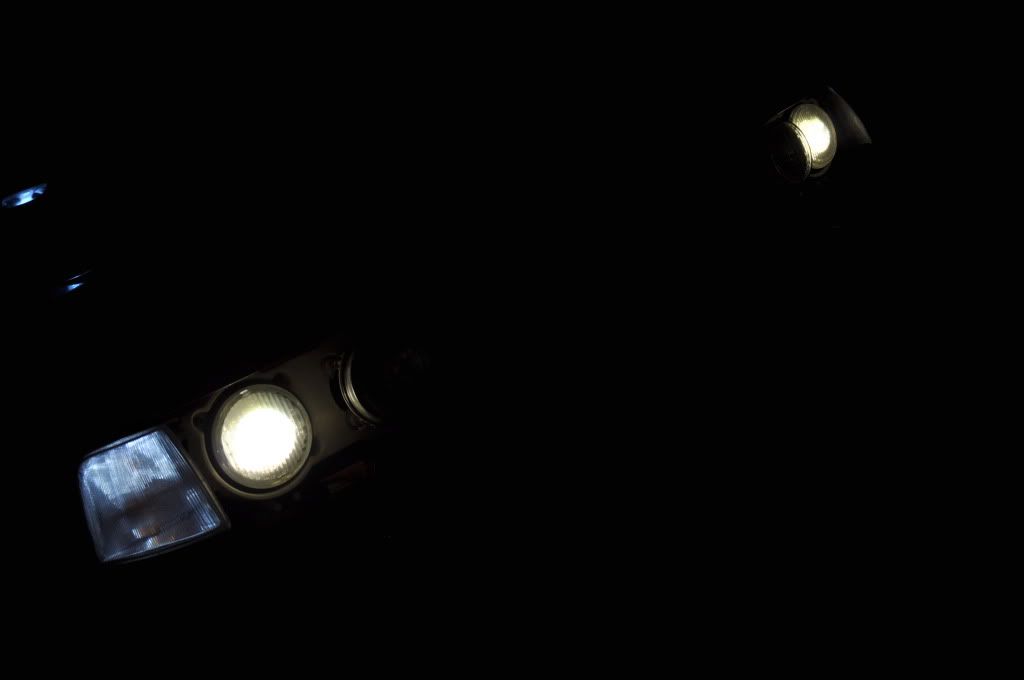 Highs: 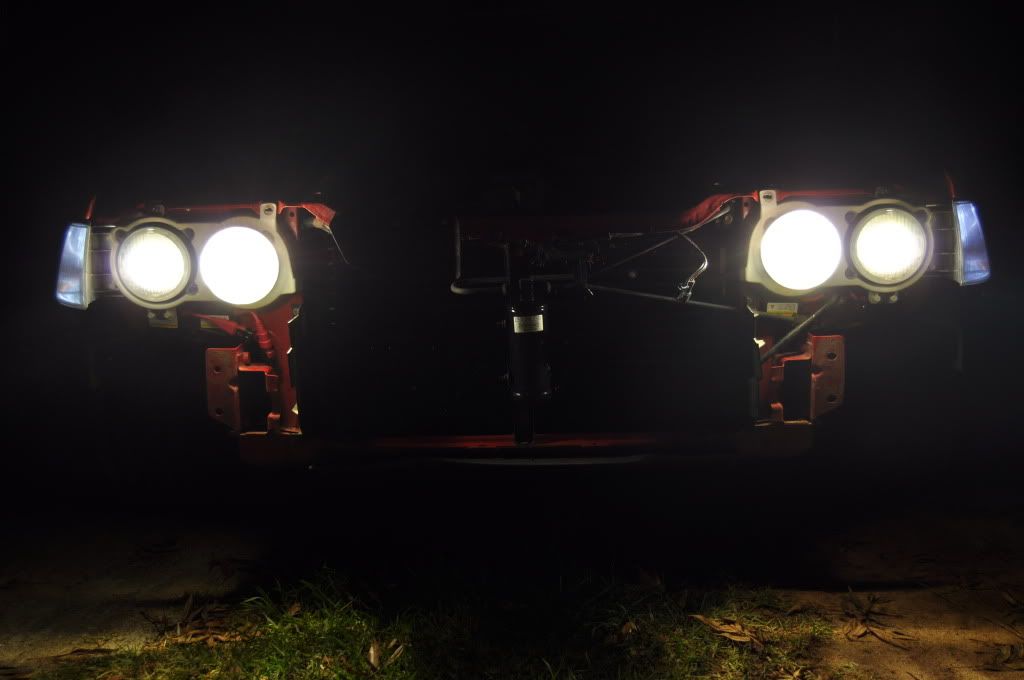  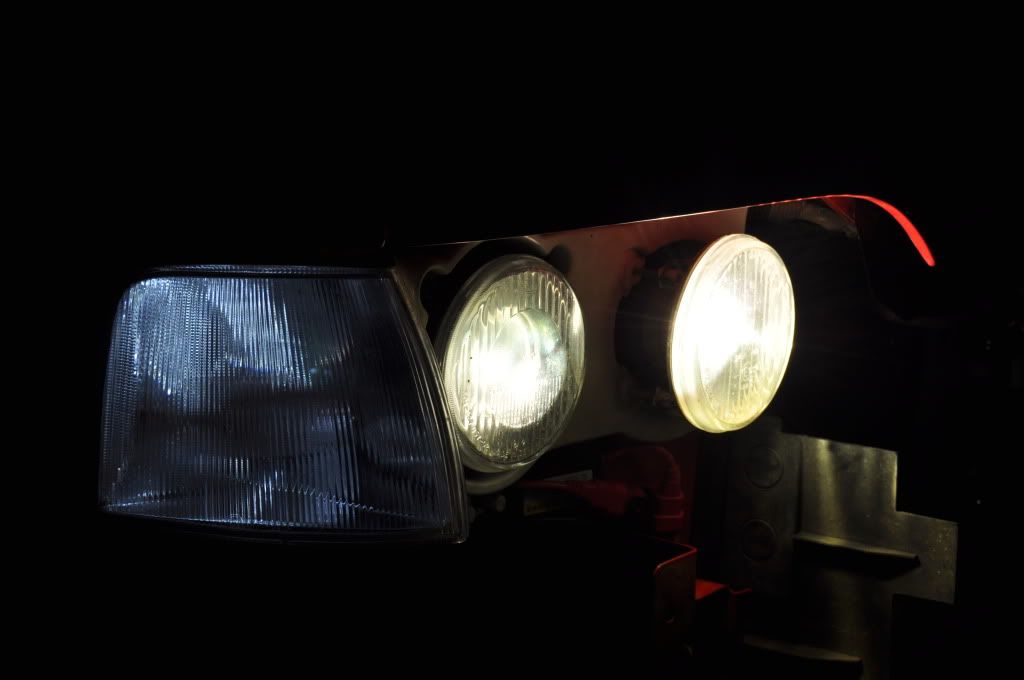 Ballasts: 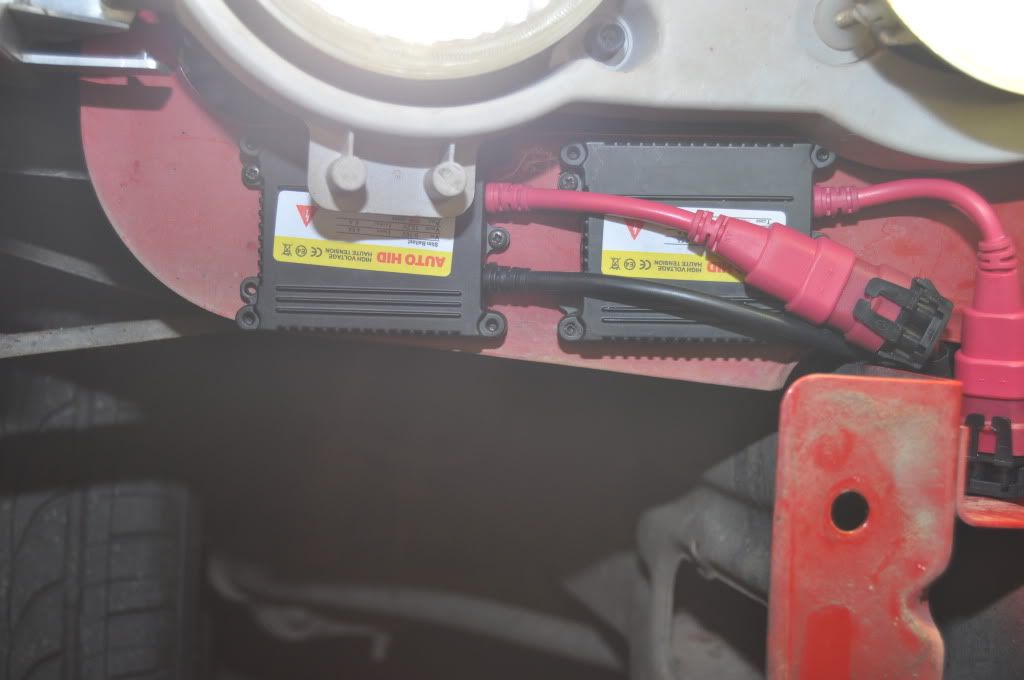 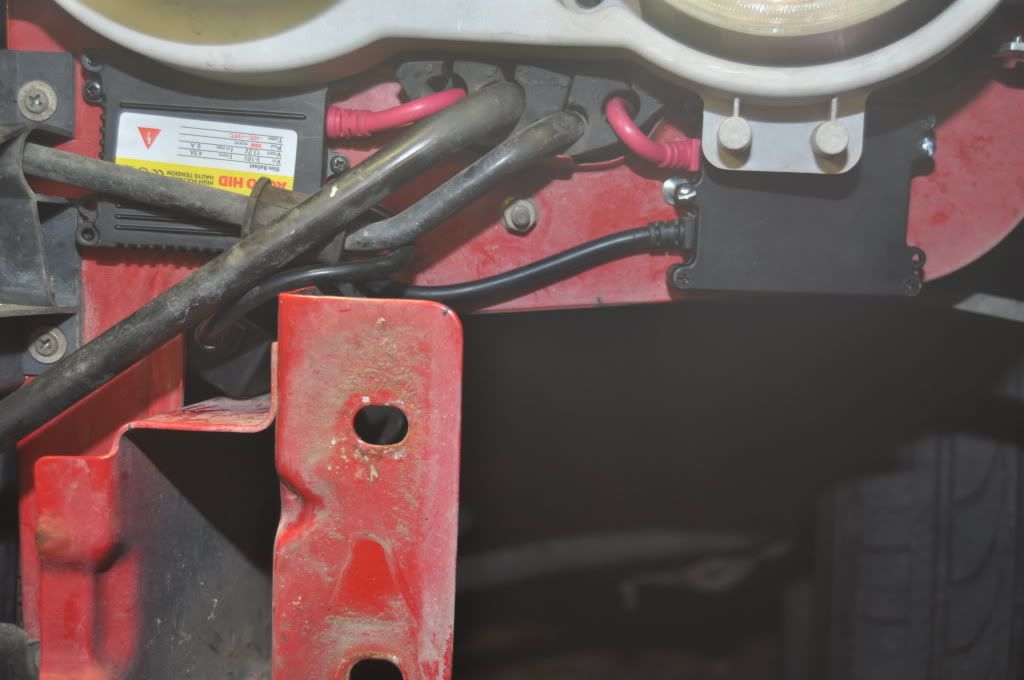 Wiring: Note: Behind the high lamp you can see the black box the bottom under the AC pipe, this is the above mentioned separate ignitor. On top of that is the red plug, this is the 12V plug into the ballast, On top of that again is the two black single pin plugs that feed into the lamp. 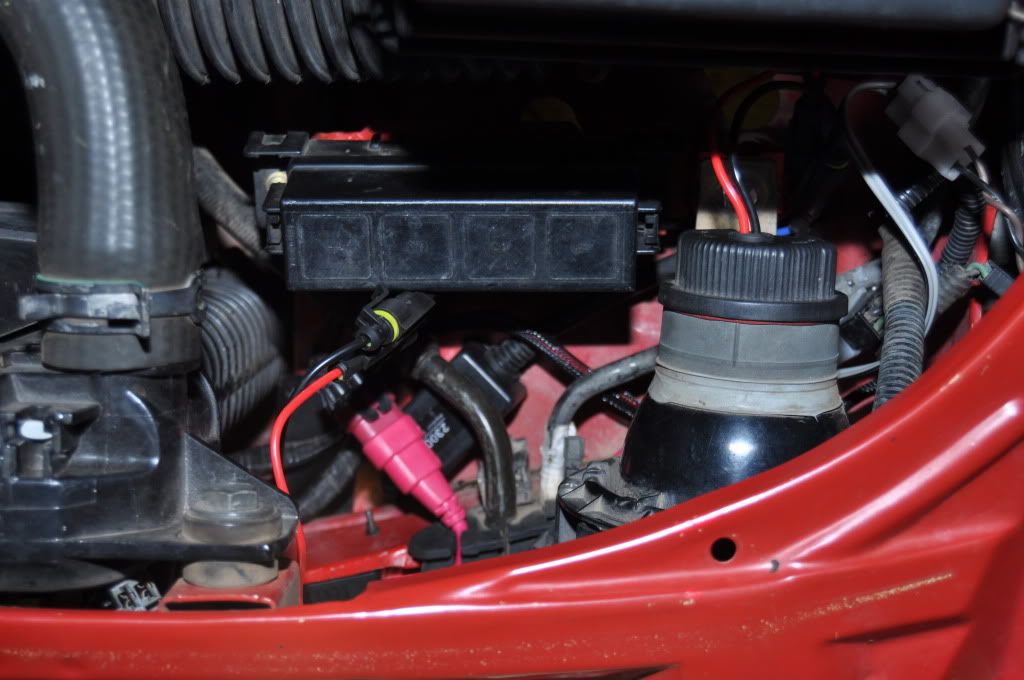 Output: (No where near aligned but you get the idea) 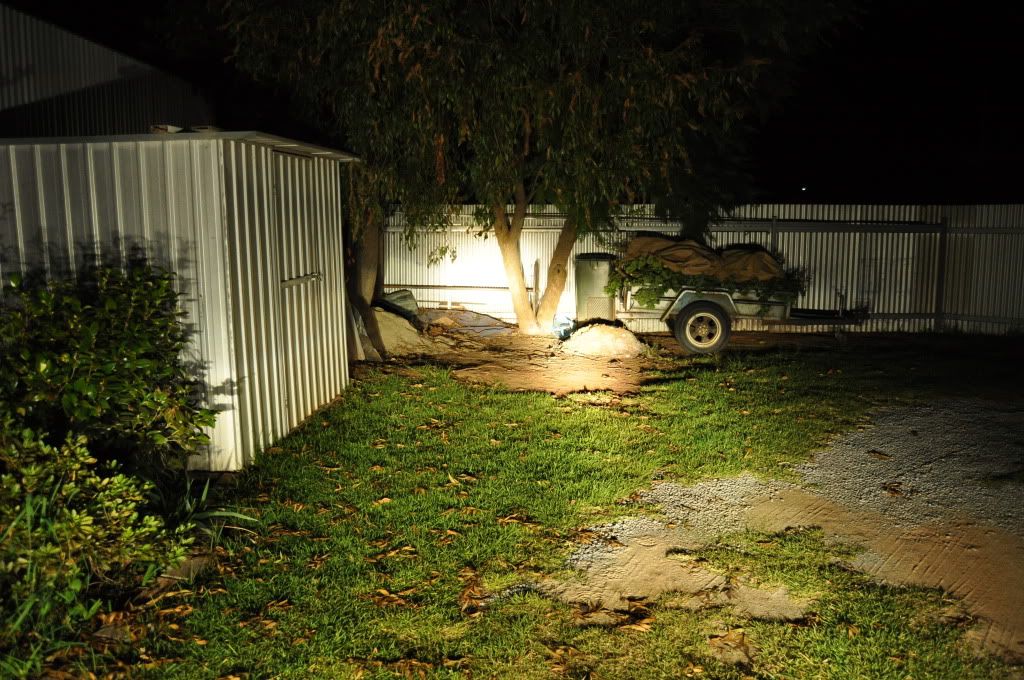 Naked XR Look 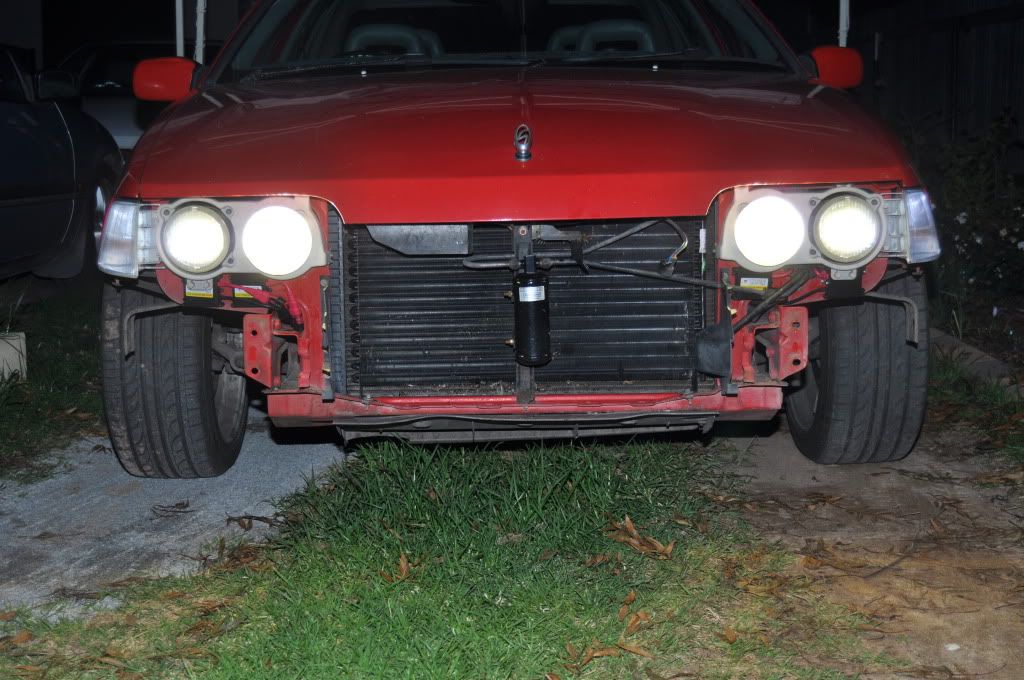 And another post to come tonight on a different topic... Cheers...
_________________ {DESCRIPTION} |
|||
| Top | |
|||
| Who is online |
|---|
Users browsing this forum: No registered users and 0 guests |