|
| TimmyA |
|
|||
|
well sucess yesty despite battling one nasty a** severe case of hayfever...
Wiring for bbm and vct is all done... I had already pulled in the wire for the bbm when i did my thermos so it was simple as picking up a power out of the ecu loom and putting the pin on the wire and stickining it in the ecu plug... The vct was looking hard to get the wiring in for... As we all know when you don't have automatic climate control you end up with that spare blue plug near the thermostat housing... So i am going to use those two wires to run my vct... Just lengthen them a bit once the phasor is in place... The two wires run back into the cabin behind the glove box in the connector that joins the ecu loom to the dash loom... This is where they end if you don't have a high series dash... So i added in the pins in the factory dash loom plug, used some spares from my wiring box...... Joined one to power and picked up power, earth, the other wire from the engine bay, and a tacho pulse off my spout wire i ran for the nl cluster... Ran them to a 4 pin plug which is part of the dash loom... And then put a plug on the freq switch and anchored it in the empty cavity to the left of the glove box... Just to the steel bracket on the end of the dash with two zip ties... This way if the dash ever comes out the freq switch and all it's wiring is part of the dash loom... Started the engine and stuck a test light between power and trigger pins... Vct, the lamp went out at what looked like a touch under 3000 (looking at the uncalibrated dash tach)... And bbm lamp went out around the 3800 mark as spec'd by ford... Down side is i can sort of hear the relay in the dash sometimes... If it bugs me in the future i'll pull the relay out of it and make it all up with a big npn transistor... Wont hear solid state switching... This is the beauty of running power to sensors and then switching them to ground like the eec does... Just use a large npn transistor and you're covered... It is functional though... Just a matter of plugging in the bbm gear and extending the wiring to the phasor and it is a go-er... One thing crossed off the list... cheers, tim
_________________ {DESCRIPTION} |
|||
| Top | |
|||
| BenJ |
|
||
|
Nice work as always Timmy!
I am going to have a go at ditching the EB Fusible links and swapping in the EF/EL setup, so you may get some questions in the future. Cheers BenJ
_________________ {DESCRIPTION} - Current Ride |
||
| Top | |
||
| TimmyA |
|
|||
|
that is a nice mod too ben... The fusible links fill up with corrosion and refuse to unplug and you have run those bus bars and such....
Neater... Easier... Wasn't hard to do... Its cut the plugs off for the fusible links... Crimp spade terminals on and clip into the bottom of the fuse brick... And then you pull out the old alternator wire like i did or leave it there and hook the white wires attached to the block to the alt and batt respectively... You can relocated the hego fuse into the brick too... Or leave it under the header tank if you're not phased... You need to join the grey wire up out of the alternator for the dash jewel... Easier to get the entire el system right down to the alt as it has the wire spliced into it to power the field and is it's own loom... Has a mounting point to hang the loom off a bolt on the p/steer pump... Either pull the eb stuff out then or just leave it in the corrugated conduit... Do you have abs? There is a fuse for that too... Not sure where power for it comes from on the early e series... You'll be on your own there if you have abs... And lastly is a big power wire for the thermos... Again crimp a big spade connector on the wire and it clips straight into the bottom of the fuse block... The crrimp terminals are the 8mm male spades they call 'quick connects' sometimes... I got mine from an auto sparky here... You just need the crimper than rolls the tabs... No joining wires... And looks as good as factory when done... Here to help if you're stuck... Was just a matter of sorting out which coloured wire out of which link was which circuit... I have the factory manual and can help if you don't have the literature... Good luck cheers, tim
_________________ {DESCRIPTION} |
|||
| Top | |
|||
| TimmyA |
|
|||
|
An Idea arose today!
I know, i know... Not another one? I bought myself a TFI heatsink from the states a while back... Have decided while the intake is out I'll make up the remote mounting kit and install it as well so that the chances of the TFI ever dying shall be greatly reduced... For new followers this is the general idea of a TFI heatsink (image from earlier in my build, full post can be found by using the contents pages at the start of my build): So I had a spare Bosch TFI floating around from my TFI-SIM units... Gutted it tonight and will clean the gel out tomorrow... This will be what goes in the bottom of the dizzy... I'll run 3 shielded wires from it to the TFI mounted in the heatsink which in theory will end up near the airbox somewhere away from the heat... Had some spare loom with the 3 wires with the braid on them so I'll use that to run the PIP wiring to the TFI... This TFI that is gutted is basically an adaptor... I could use 3 male spades to push into the bottom of the dizzy, but then it leaves the gap around them for debris to enter through... Using a gutted TFI to mate with the dizzy will seal this hole and I'll pick up from the three pins inside the TFI and bring them out... Will upload pics as progress on this unit is accomplished... Finished the remaining two looms for the TFI-SIM units I have here still that nobody ever wanted... So I can set the epoxy in all of them in one go once I have made the "adaptor" out of this TFI... On a side note I searched ebay for these heatsinks as they are never an easy thing to find cheap... And noticed they now make remote TFI kits in the states... What I'm doing all ready to go... Only thing I disagree with is how they use the TFI adaptor... I wouldn't use the TFI plug as people may get confused and plug the car loom in the this gutted TFI possibly damaging something... {DESCRIPTION} You get the idea though... Cheers, Tim
_________________ {DESCRIPTION} |
|||
| Top | |
|||
| TimmyA |
|
|||
|
Can't say much has been achieved the last few days... Just home from Holidays today...
Been in Wangaratta for a few nights... Did some shopping and sight seeing so I thought best to post up the happy snaps... Beach At Wang  Footbridge Over The Ovens At Wang  The Ovens  Gold Dredge At Eldorado - Continuous Clam Shell Chain  Control Bridge 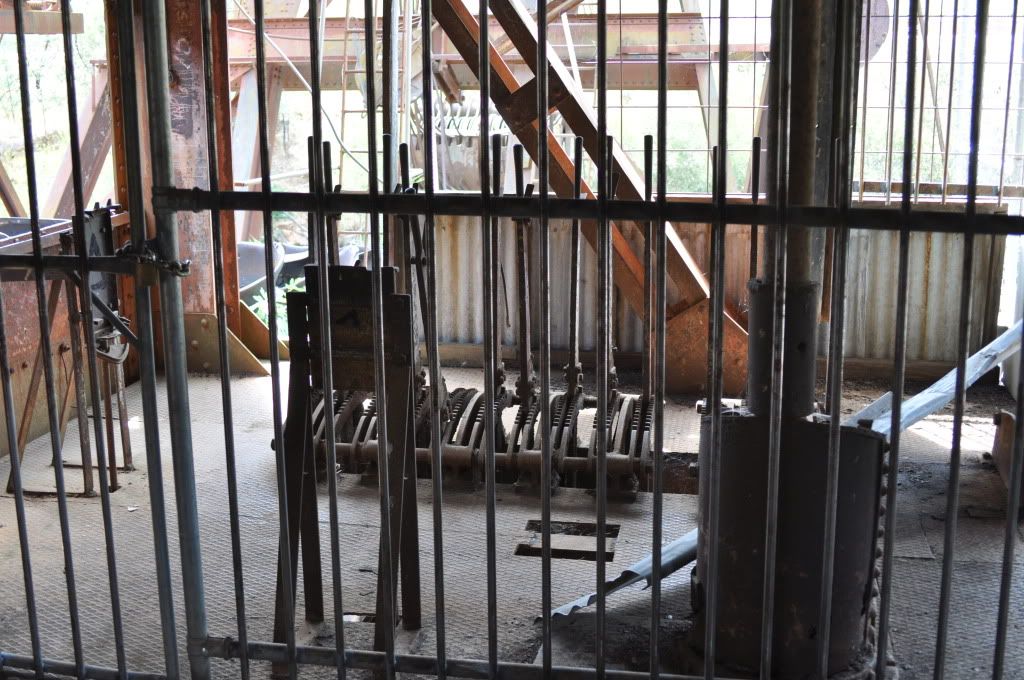 The Driver's View 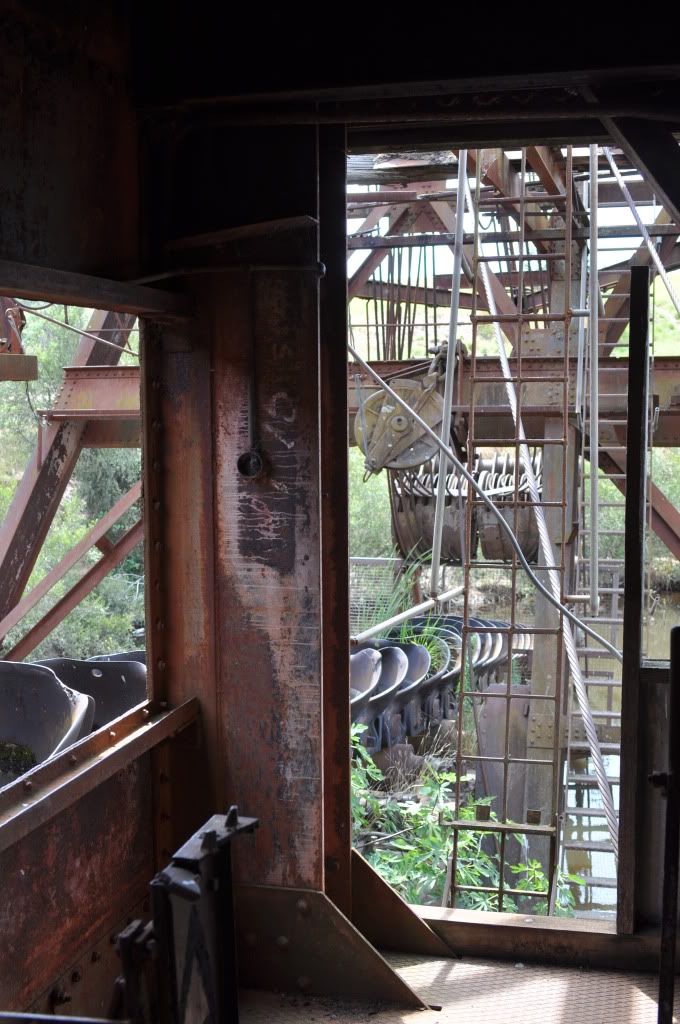 It Is A Mighty Hunk Of Steel 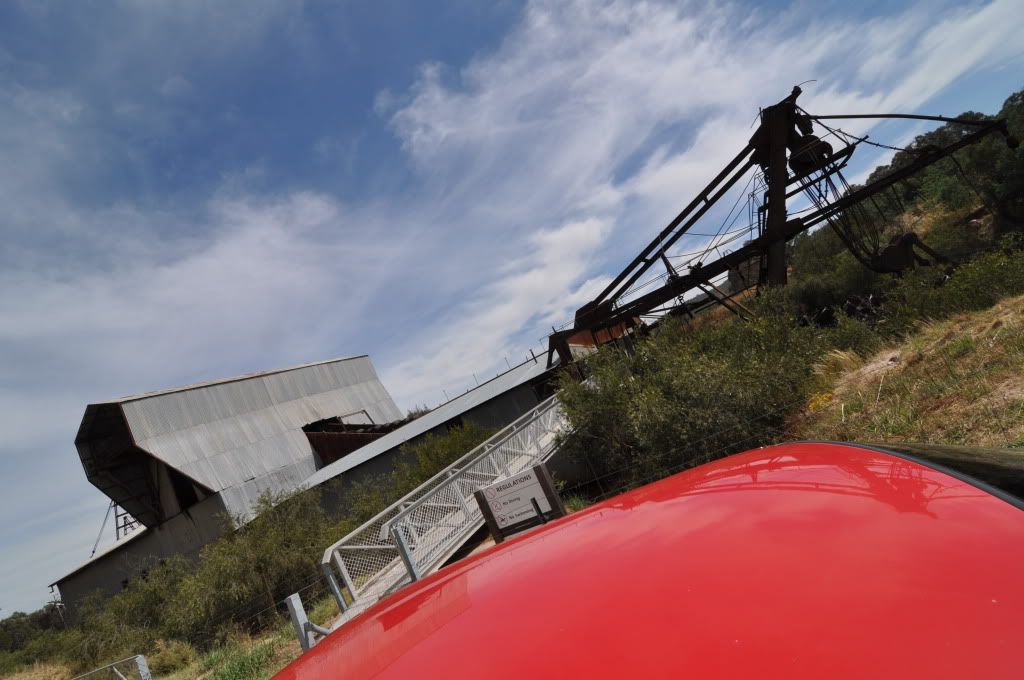 Beach On Reid's Walk  Swing Bridge View  Old vs. New 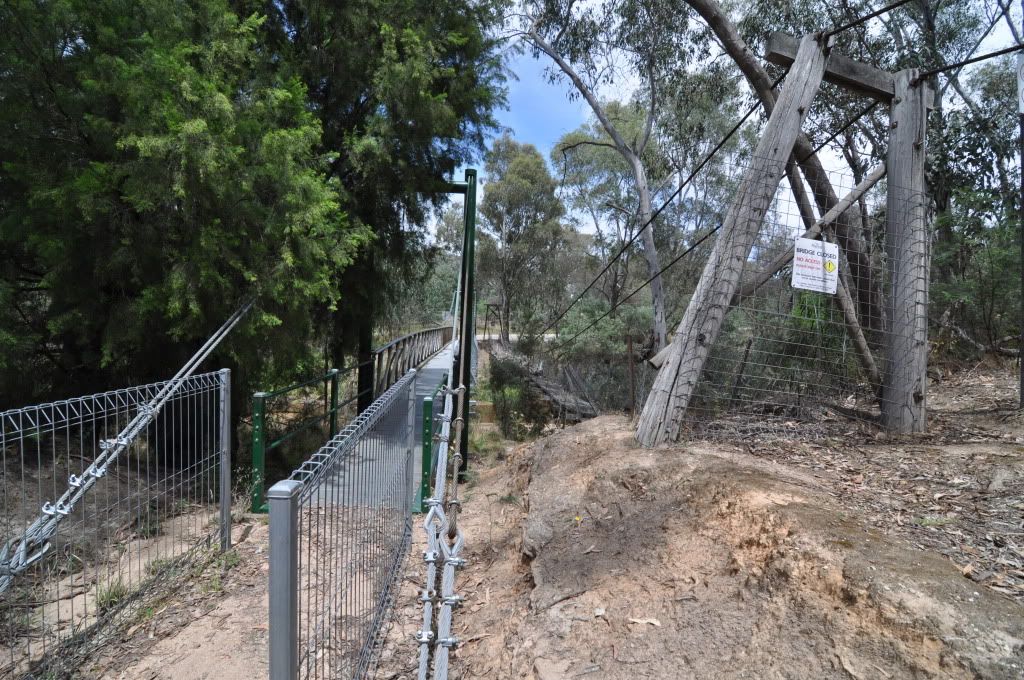 And The Car At Eldorado Park  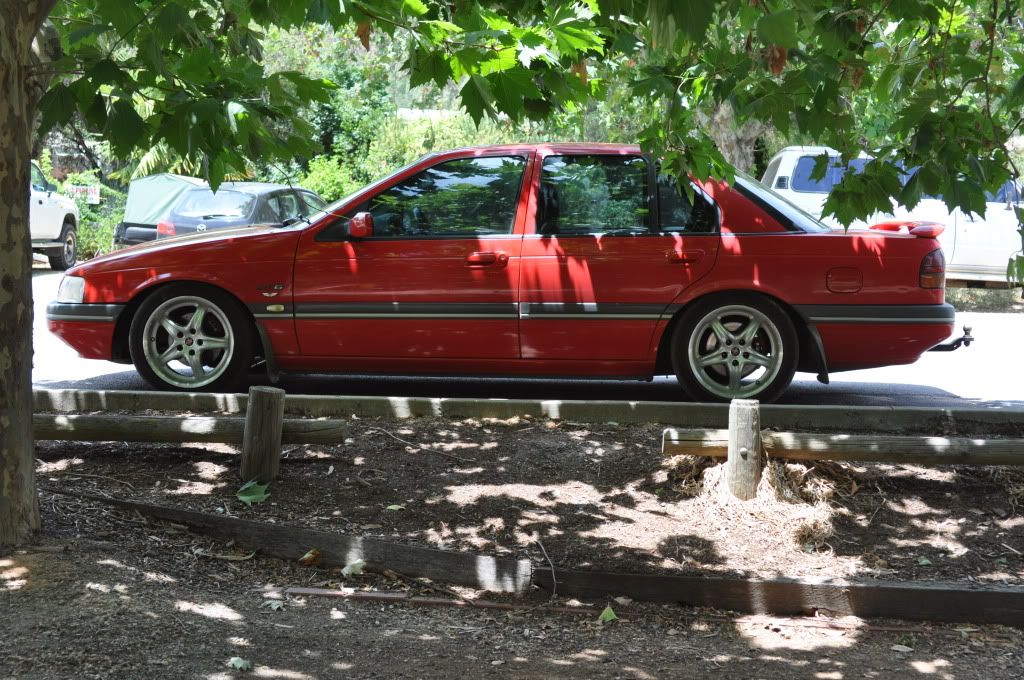  Was a good trip... Nice to get away for a bit... See something different... Go for a drive... No car troubles which is always a plus... All in all was an enjoyable few days... Cheers, Tim
_________________ {DESCRIPTION} |
|||
| Top | |
|||
| TimmyA |
|
|||
|
Something I've been meaning to add up for a few months is our repair for the recirc flaps in the e series cars... We all know they break and stay on fresh... And they are all ticking time bombs... The good news is my old man came up with an idiot proof repair... We have fixed three of e series falcons this way so far...
You start by disassembling the recirc box... It unclips apart... Measure it all and make up something of the nature as follows: This is the finished product... 4 pieces of steel braised together 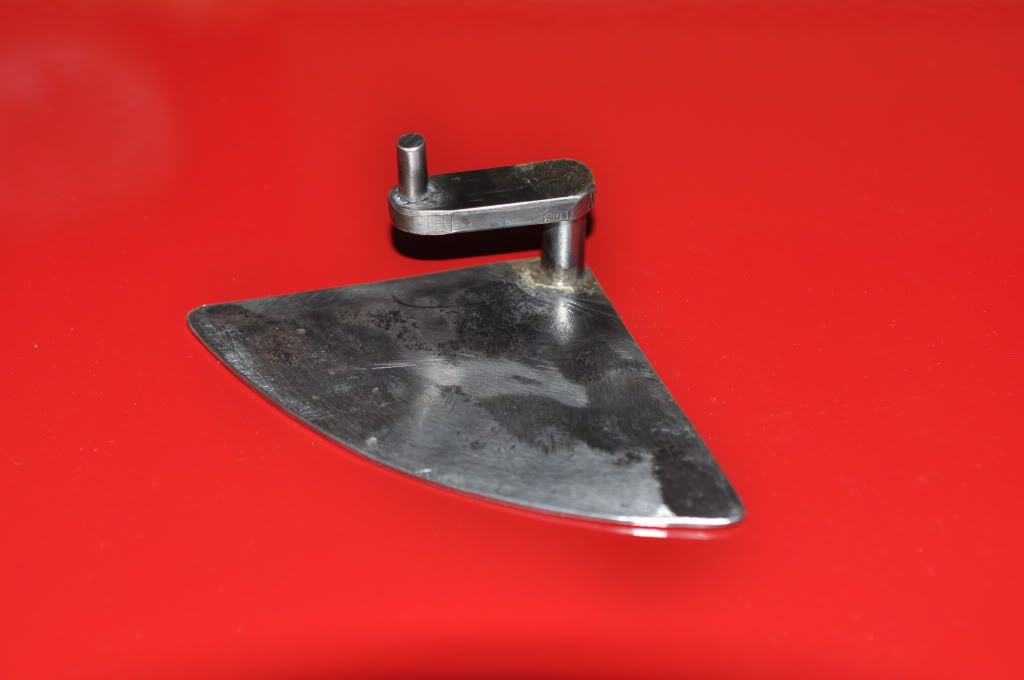 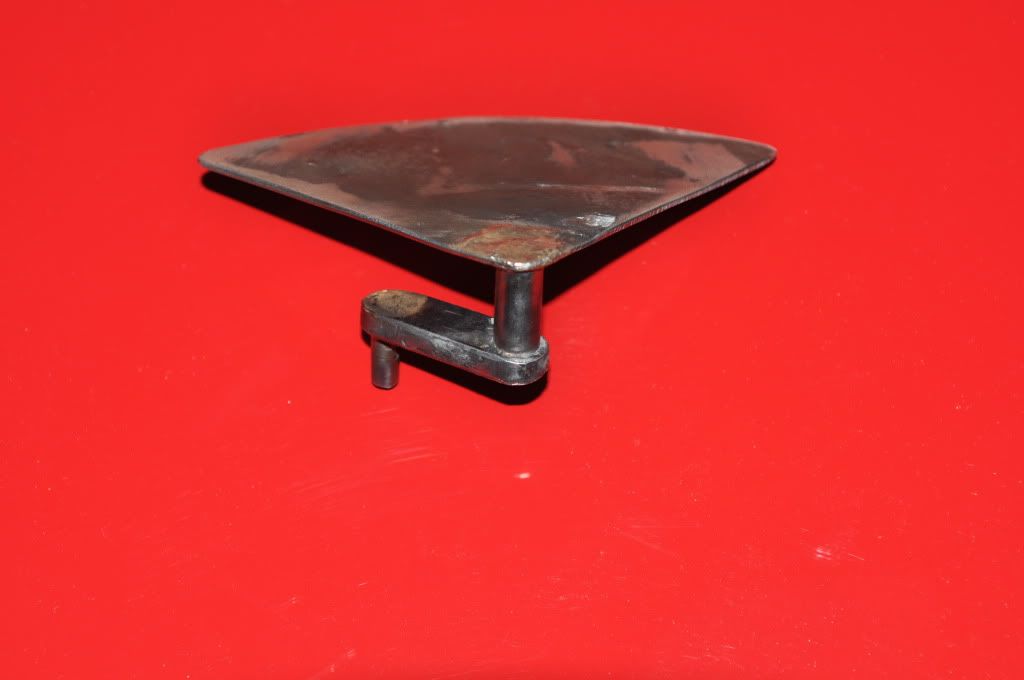 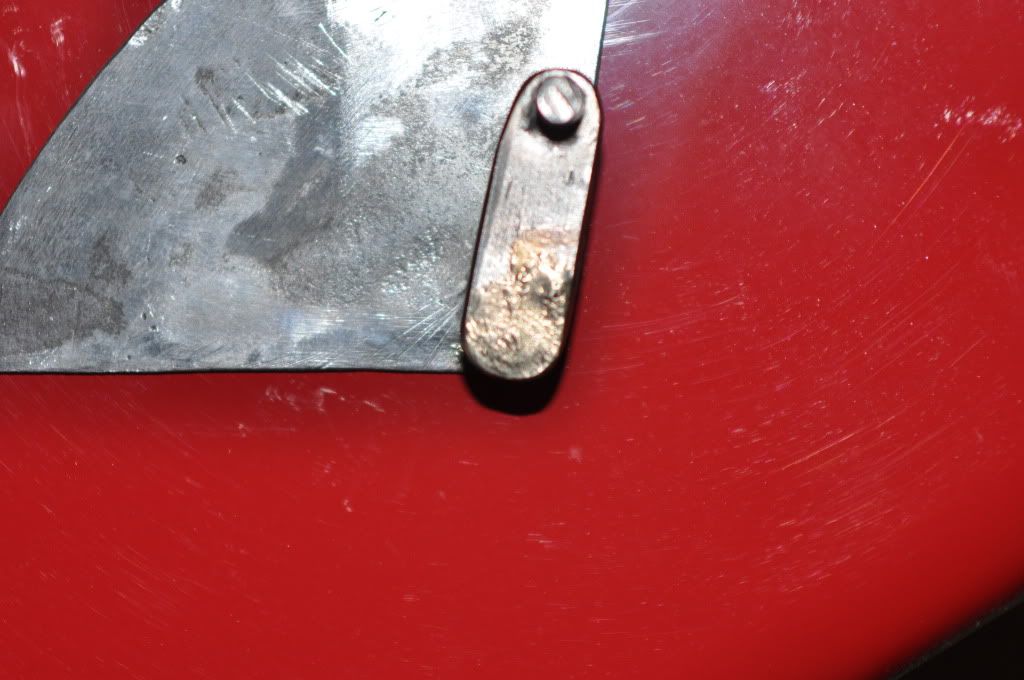 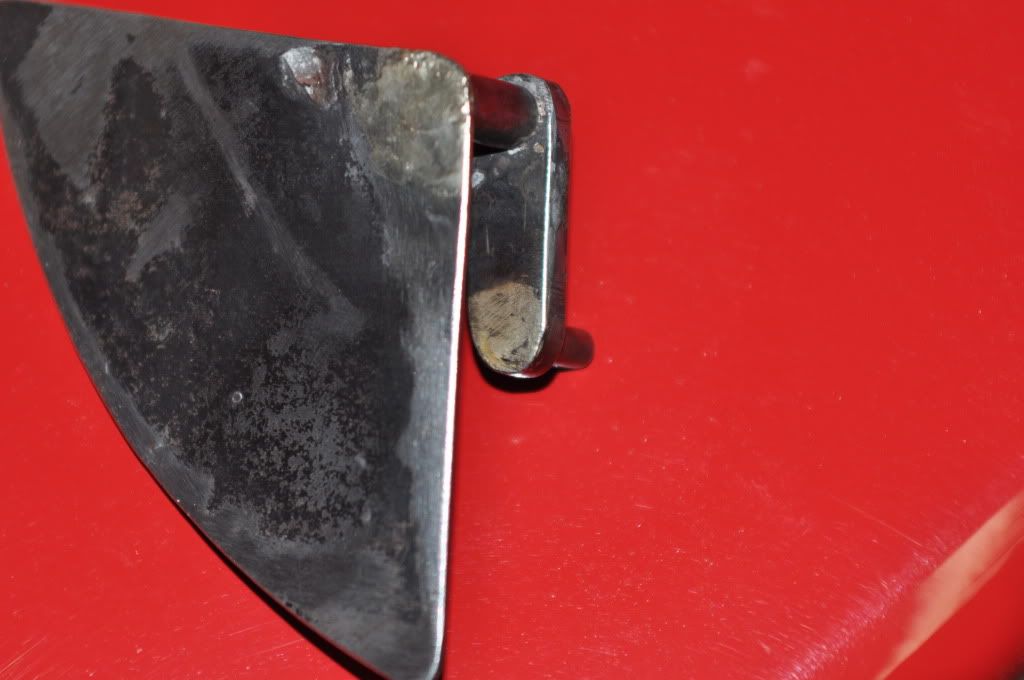 Imagine the end of the flap is the sector shaped piece of steel... The rod coming out of it is the pivot... Then the next piece of flat steel is the crank arm... The last round piece of steel is what the plunger hangs onto to pull the flap up or down... From factory it is all plastic and the pivot rod shears in half... meaning no mechanical contact from the plunger to the flap... Modify the flap to look like this 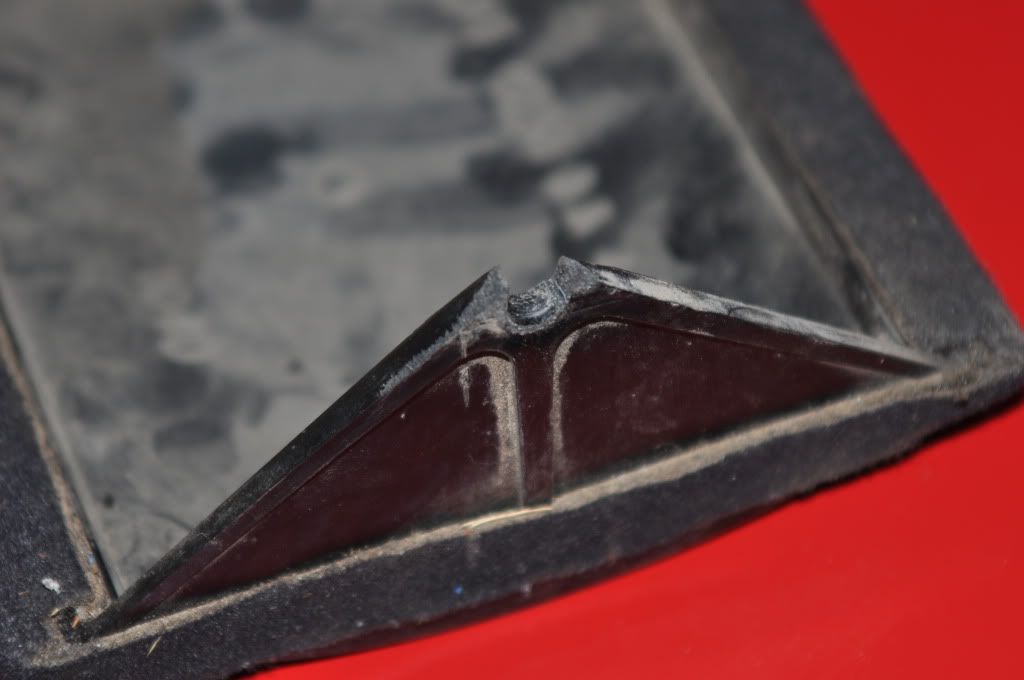 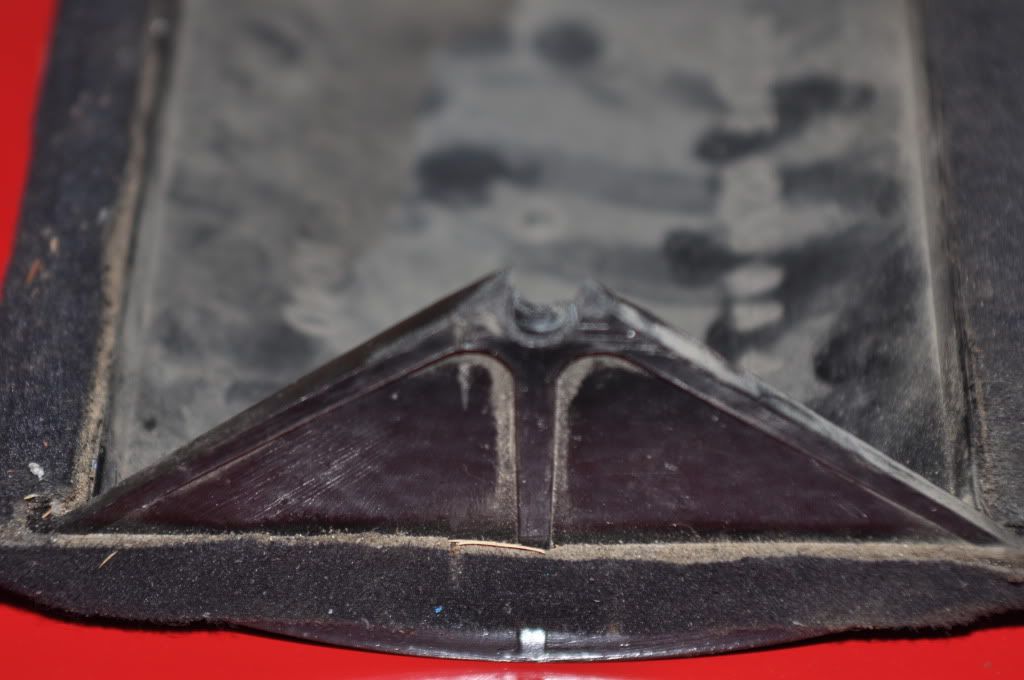 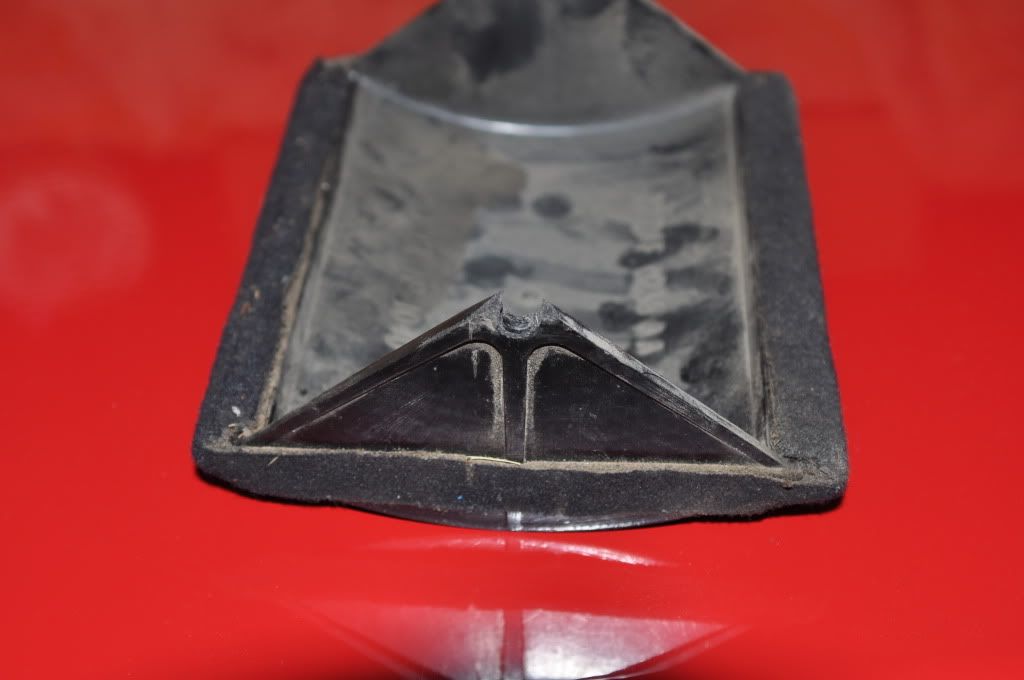 The steel piece we made sits inside the groove we filed in the flap like so 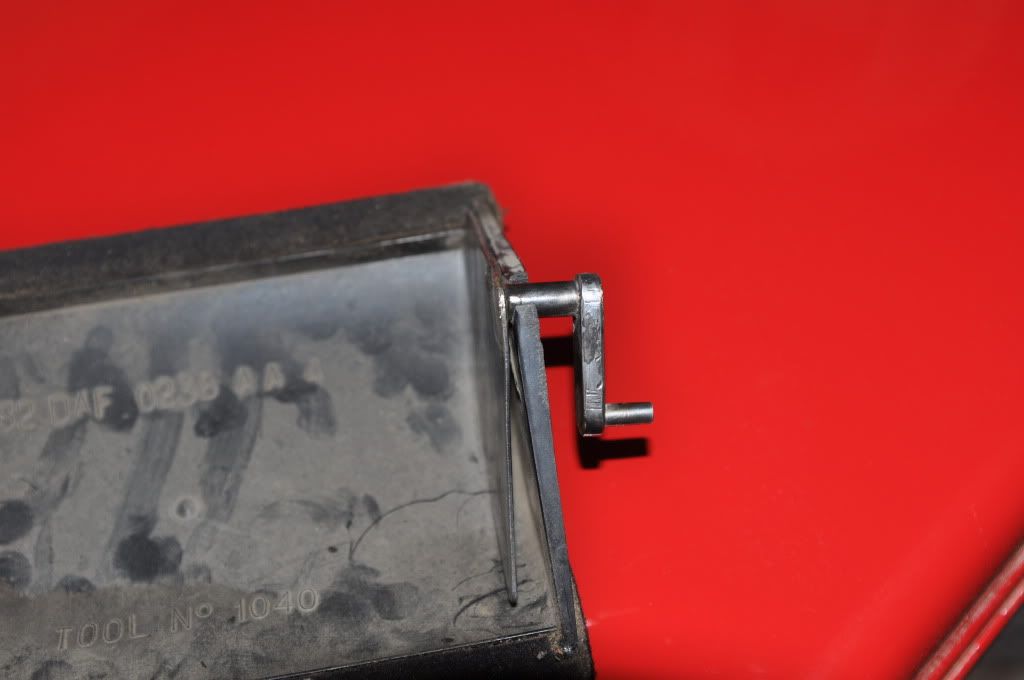 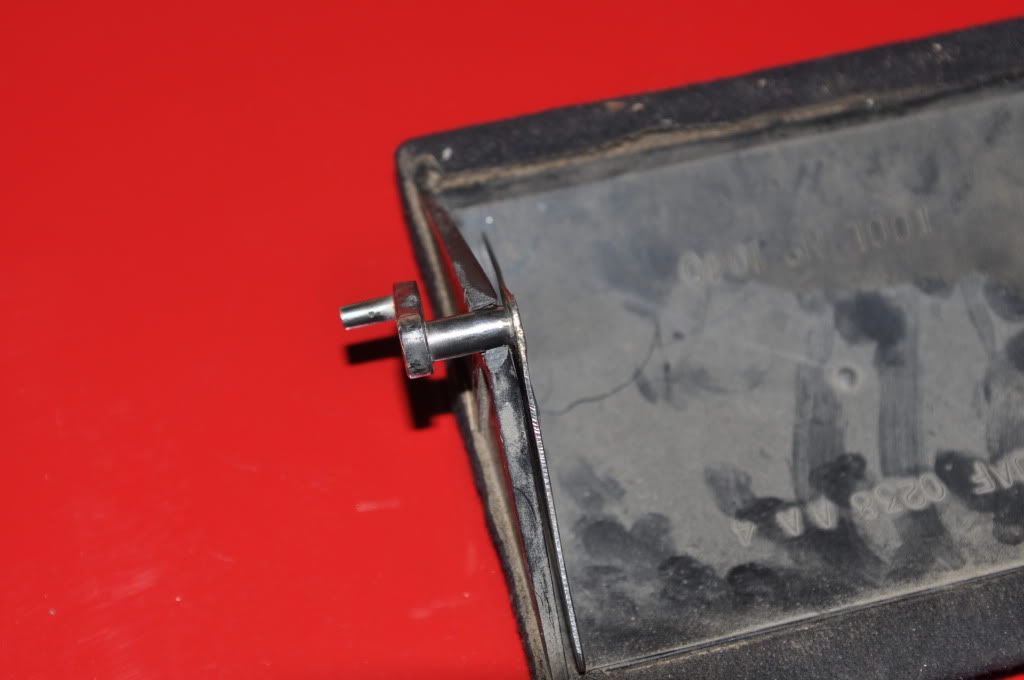 And you just use 3 small pop rivets with the head on the plastic side so it doesn't rub on the side of the box... Will never break again... We have repaired 3 on our own cars here now... And dad has done many more at his Ford dealership this way... Cheers, Tim
_________________ {DESCRIPTION} |
|||
| Top | |
|||
| TimmyA |
|
|||
|
Hey All,
Technical enquiry this time... Those who have fiddled with a VCT may be able to help me... I am still trying to work out how this phasor seals to the phasor housing... Took some photos but was short a couple of hands so the measurements don't look like exactly what they measured at... But measuring here: 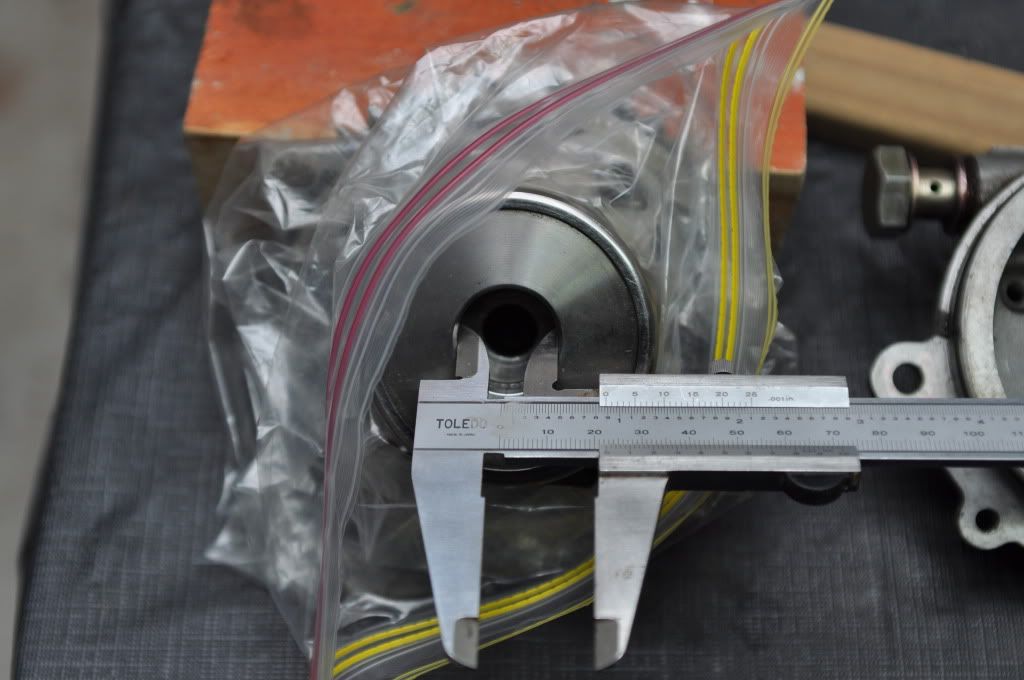 I have a hole size of very close to 23mm And measuring here:  I have a O ring size of of 22-22.5mm depending on how hard you want to squeeze the O ring... Basically it is loose inside the phasor by about a mm so, What causes these to seal? The only thing it seems to seal in is the internal spring inside the phasor as the ID of the spring is around that 22-22.5mm mark... But because my phasor came in parts, I have reassembled it... That internal spring is conical, and I think I have installed it the right way around... As against the end of the phasor with the 23mm hole there was a seat for the spring and the big end of it didn't seem to sit in the seat properly while the narrow end did... So is that the go? The O ring seals in the spring? Or am I missing a part? Though I can't see any extra pieces on George's pictures he emailed me... Cheers, Tim
_________________ {DESCRIPTION} |
|||
| Top | |
|||
| TROYMAN |
|
||
|
the o ring is ment to be the seal, but i assume either there is a minimum clearence between the o ring so there is o ring lubrication, or the o ring might expand after oil has got to it...
my o ring had gone hard and had a tear in it and still operated fine but did suffer some low oil pressure at idle.. |
||
| Top | |
||
| TimmyA |
|
|||
|
thanks troy...
Maybe so... Guess all i can do is put it together and see if it works or runs too lower oil pressure... George is sending me new seals... So i'll swap them out anyway... It is a funny arrangement anyway... Not entirely sure what the idea is behind it all... Cheers, tim
_________________ {DESCRIPTION} |
|||
| Top | |
|||
| TimmyA |
|
|||
|
OK...
Little more progress on the remote TFI set up... My old man cleaned out an old Bosch TFI I had lying around that I was unable to use for my TFI-SIM projects... Due to where I had to drill holes for the cables on the TFI-SIM It broke the tracks inside the TFI housing... Because I drilled the hole in a different spot for this project, I was able to use this Bosch housing... It has the added advantage of having bigger tabs to solder to... Stuck my head under the bonnet and decided to bring the cable out the top of the TFI housing as opposed to the bottom... It didn't need the plug so I ground that off... Broke out the tabs inside I didn't need... Drilled the hole for the cable... Tinned the terminals... I ran the dremel through the back side of the housing to break the earth track... Commonly the earth track runs from the pin in the 6 pin plug... Along the bottom inside the plastic... Picks up the earth tab that the second screw earths to the dizzy... Continues up and then picks up the PIP earth spade terminal and then across the top to the internal earth terminal... Because the actual TFI will earth the loom pin and the pip pin to the body, I didn't want them earthing to the body in here... So with the dremel I cut out a section between the earth screw tab and the PIP earth... This way the earth wire I used wont ground to the dizzy through that tab... It'll happen inside the real TFI... Just looks like a groove in the back of the housing... (Shown in second photo down on the right hand side)... Reason being grounding at two spots creates an earth loop and you can hear it as an unwanted hum with amplifiers... And at work with high voltage two earths on screens and the sort can cause huge circulating currents... So I thought best not to have circulating currents on signal wires... You'll get something that looks like this: 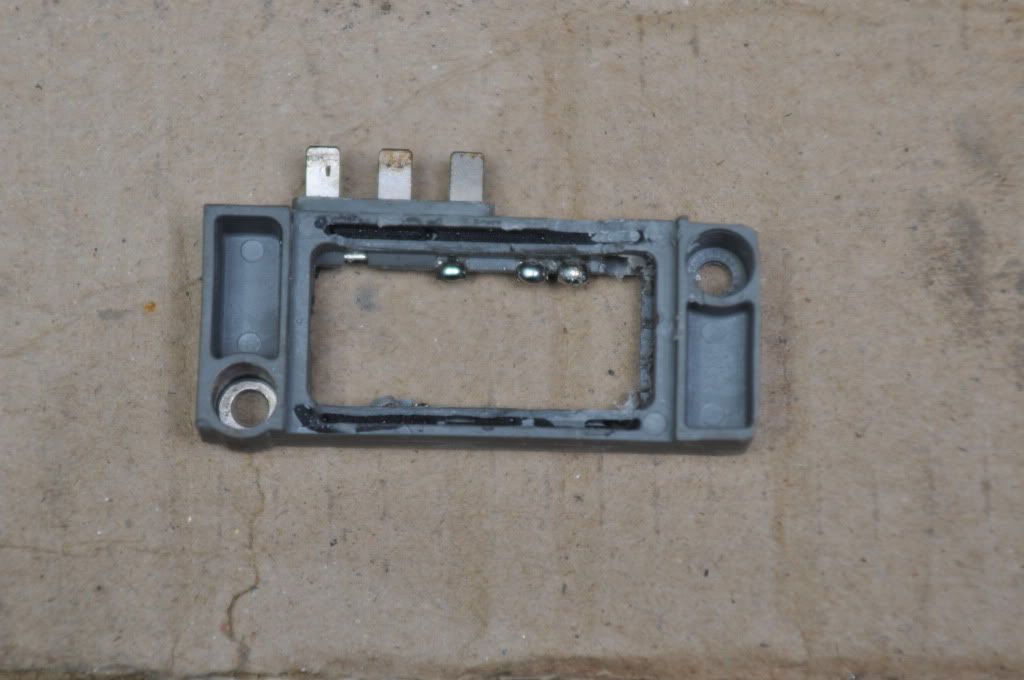  Terminated the both ends to some extent... 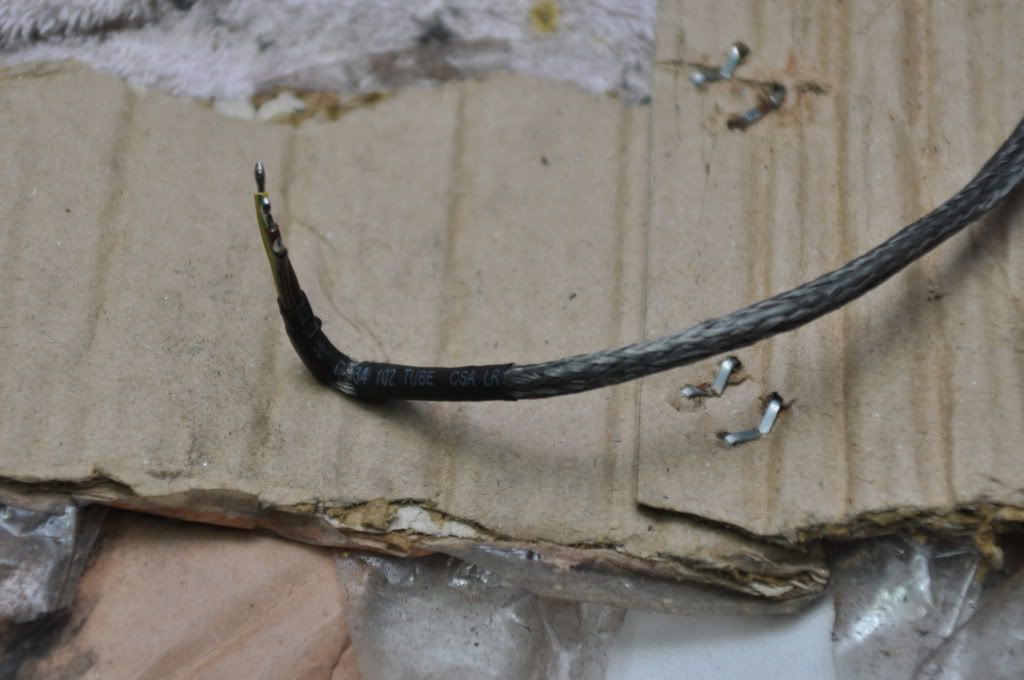 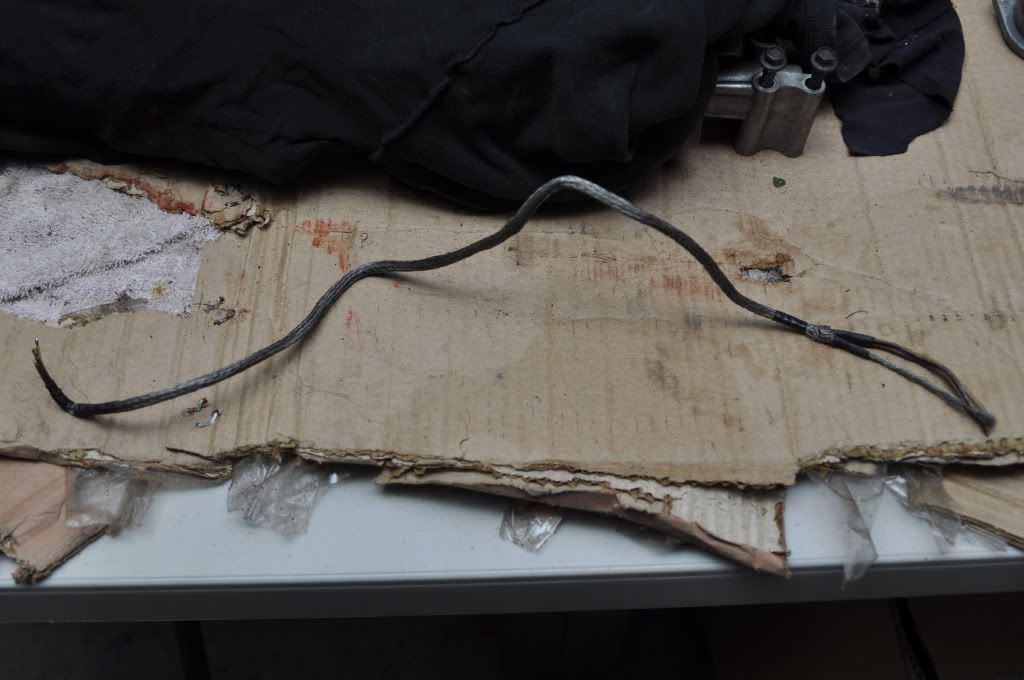 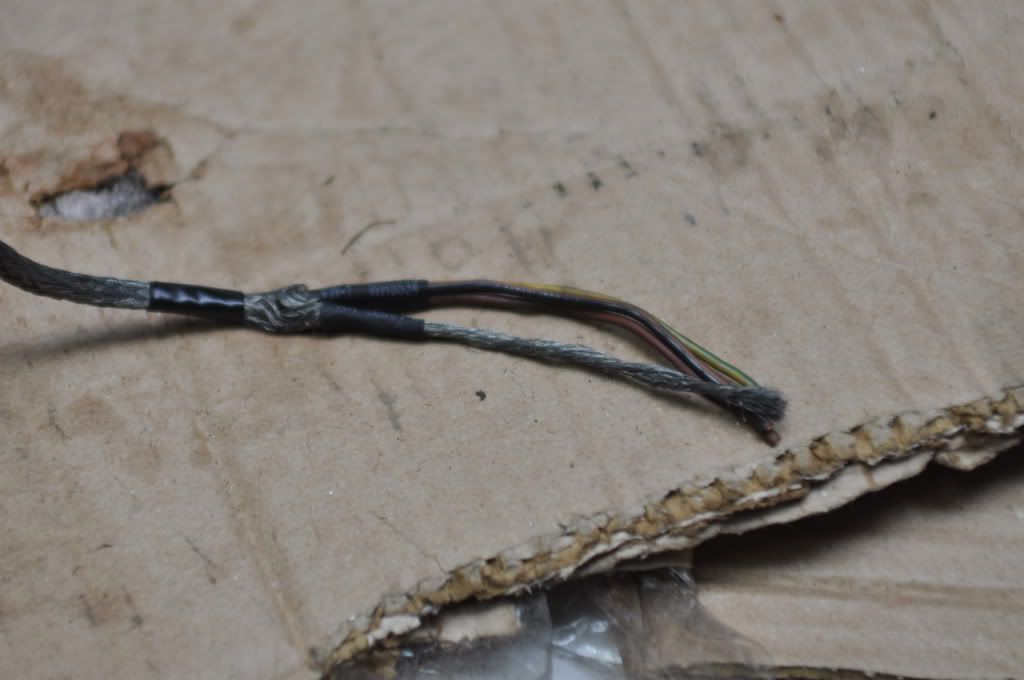 Soldered it in place: 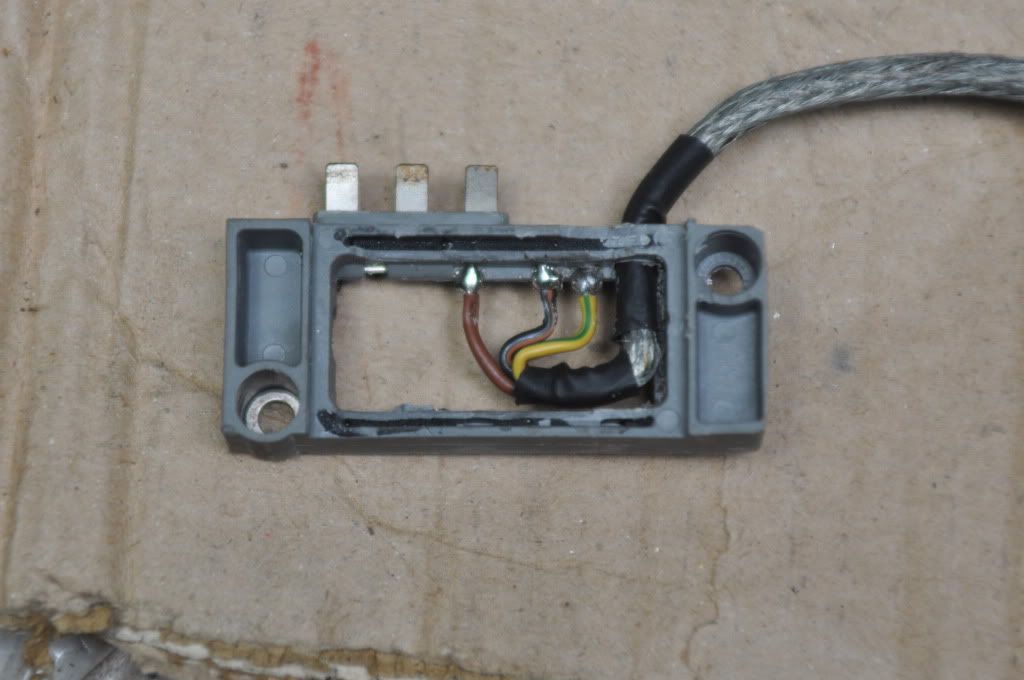 Sealed the hole around the cable and then glued the aluminium back plate on again... 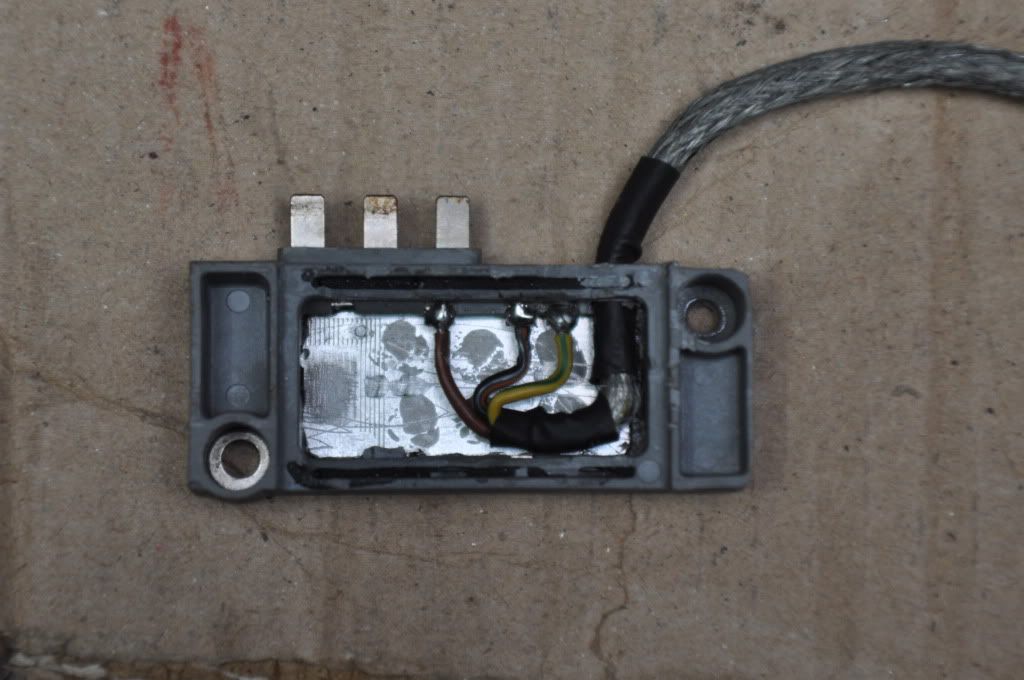 Lastly filled it with the fancy epoxy resin I have here for sealing electronics... 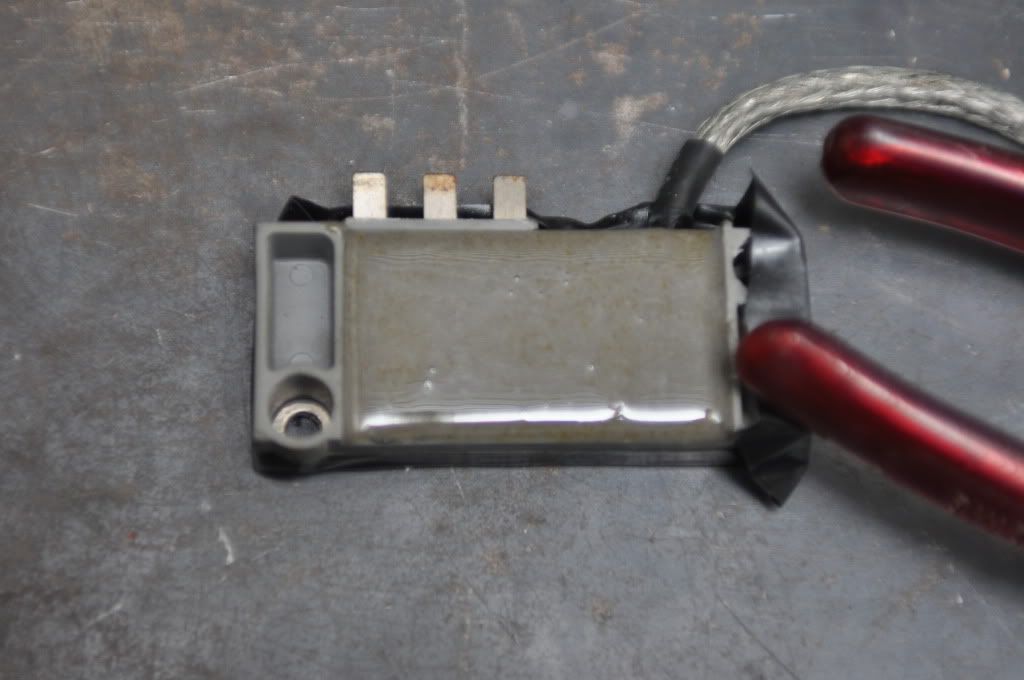 Also did the last two looms for the last two TFI-SIM units I never quite finished making... These two never ended up sold and lost interest in finishing them... So while I was making resin up I decided to complete these too... 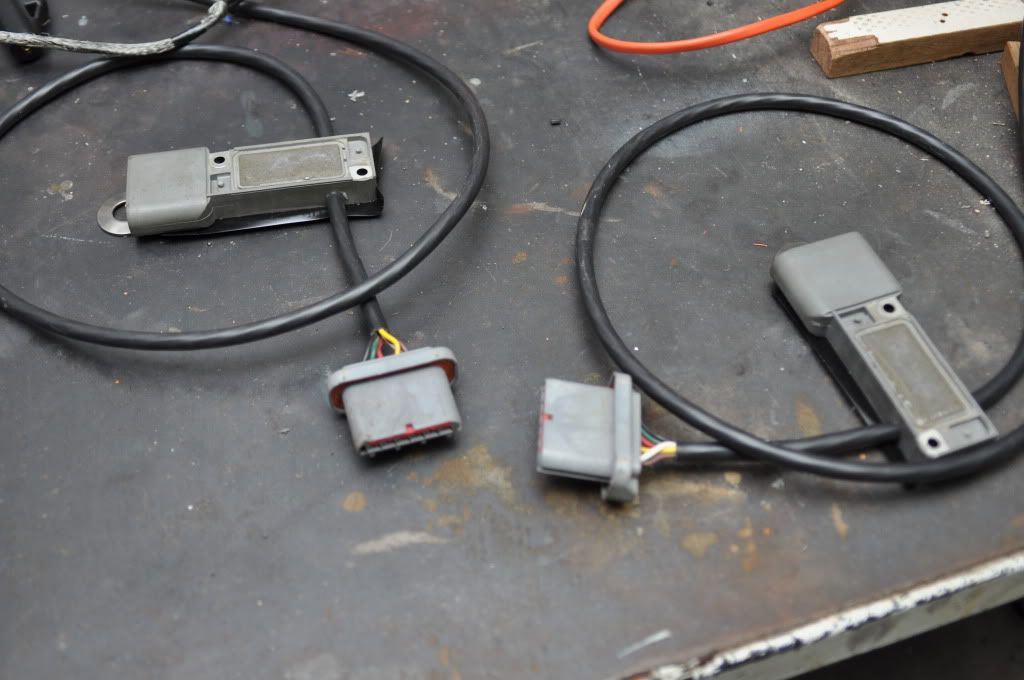 Just gotta tape the braid up now and put some of that ugly corrugated conduit on it... May as well tie it in with the corrugated conduit theme Ford decided to run with... Spent this arvo making up the new fence for my house seeing as though the other one has rotted away... Starting to run out of car things to do atm... Nearly set for this VCT install... Cheers, Tim
_________________ {DESCRIPTION} |
|||
| Top | |
|||
| TimmyA |
|
|||
|
G'day lads...
Got me a cope of the VCT section of the AU Genuine Workshop Book... Very unhelpful... Here it is for those wanting a read... Attachment: VCT.pdf Now been trying to work out how to dial it in... The Ford manual says never adjust the bolts in the front of it... They must assume that nobody knows how to dial in a cam... Because you'd need to dial it in if you ever had a head gasket shaved or the timing chain aged and stretched or whatever... So the spec it gives is no1 intake opens at 12deg BTDC at .05mm so this is where I'll have to dial it in at... On a side note... I rang Camtech and old mate there believes he has a profile or two for a VCT cam... He has no blanks (not sure if they even make them?) But they can do it in a regrind... He tells me no even the slightest cam change will run on the computer though? And I really don't want to have run a J3 chip... Reason I'm doing all this is so I can go away from the J3 chip... Then I can run a straight EEC-IV with the BBM... The reason I had so much car trouble had to be the chipped computer... Now I have an EL XR6 computer in it, it hasn't missed a beat once... So I have lost all faith in any sort of computer chipping... Jason said every so often you need to pull the chip out and clean the corrosion off the pins and that... Thoughts anybody? Not sure what to do now... Get the cam re-ground... Risk it on a std computer... Use the STD VCT cam... Will ring Wade when they open next week... See what they say... Cheers, TIm You do not have the required permissions to view the files attached to this post.
_________________ {DESCRIPTION} |
|||
| Top | |
|||
| TimmyA |
|
|||
|
http://www.jimmockmotorsport.com/mail_o ... _Order.php
JMM's pricing... Troy was right $490 for that cam off them... And no doubt if you rang them they'd say you'll need the computer for it... Which is another $1200 Cheers, Tim
_________________ {DESCRIPTION} |
|||
| Top | |
|||
| TROYMAN |
|
||
|
i think the vct regrind will be ok on the e series ecu, camtech may have assumed your putting it in an au, hence the reason why the ecu wont like the cam...
im really liking the remote tfi idea, where did you get your heatsink from?? |
||
| Top | |
||
| TimmyA |
|
|||
|
When I mentioned the bag of tricks that it'll be he said for your set up I can't comment on what it'll do...
Came out of the states... From what I can gather the TFI was remotely mounted on a hand full of models of cars of there... And I bought a heatsink and TFI off one of them... The TFI to suit these vehicles looks identical... 6 pins in the plug and all... But don't have the three dizzy pins... I have no idea how they work... But all people do, which I've now done, is break some fins off the heatsink to allow the dizzy pins to pass through... It is getting bead blasted to clean the bit of corrosion off it and when it is back I'll get some snaps up... It appears there is two types of heatsinks too... At the risk of putting up ebay links that will in time expire... Here you go: http://www.ebay.com/itm/OMC-VOLVO-PENTA ... 2c6168df8d http://www.ebay.com/itm/FORD-92-96-PICK ... es&vxp=mtr http://www.ebay.com/itm/TFI-MODULE-EFI- ... es&vxp=mtr The pre fab remote kit is cheaper than buying a new one and comes with enough bits to satisfy most people... Not sure of its build quality or anything though... But it would serve its purpose... As I mentioned before I don't like the way they used the TFI plug on the "adaptor" TFI... Leaves it open for some tool to mix it up and worst case short something out... Hence why I hard wired mine... http://www.ebay.com/itm/MUSTANG-BRONCO- ... 2318526fab I think I paid like $30 - 40 all up inc postage out here... Just kept searching for them... They don't come up often... When I found a cheap "unknown condition" one I thought bingo... Didn't need the module anyway... Had it here for months and months now... May even be able to entice someone to sell you just a heatsink anyway... The other type of heatsink is a s**t load cheaper now I look at it... http://www.ebay.com/itm/Ignition-Module ... es&vxp=mtr http://www.ebay.com/itm/94-95-FORD-MUST ... es&vxp=mtr http://www.ebay.com/itm/FORD-MOTORCRAFT ... es&vxp=mtr Would involve an angle grinder to open up room for the top three pins though... Anything has to better than being bolted to the hot engine though... If you ebay them you need to be on the yankie site (aka www.ebay.com) otherwise they don't show up even in an international search normally... Cheers, Tim
_________________ {DESCRIPTION} |
|||
| Top | |
|||
| TimmyA |
|
|||
|
So ah...
Anybody got a spare VCT cam lying around they don't want? As a just in case? I doubt I'll find one without buying a head... But it is worth asking I guess... Cheers, Tim
_________________ {DESCRIPTION} |
|||
| Top | |
|||
| Who is online |
|---|
Users browsing this forum: No registered users and 6 guests |