|
| PhilMeUp |
|
||
Age: 54 Posts: 13 Joined: 20th Jul 2011 Ride: 2007 Falcon XT - Taxi Location: Perth, Western Australia |
The driver’s seat belt in my taxi has been due for replacement for a while. I went looking on the internet and through some service manuals for a guide on how to pull the plastics off but couldn’t find anything.
I figured “stuff it” - I’ll have a go, and if I break the plastics then I’ll replace them. It turned out that I managed to guess right. This is common - the seat belt frays over time. When it’s only minor you can cut the frayed parts off with a sharp knife, or melt them away with a cigarette lighter, but sooner or later you are going to have to replace the seat belt. 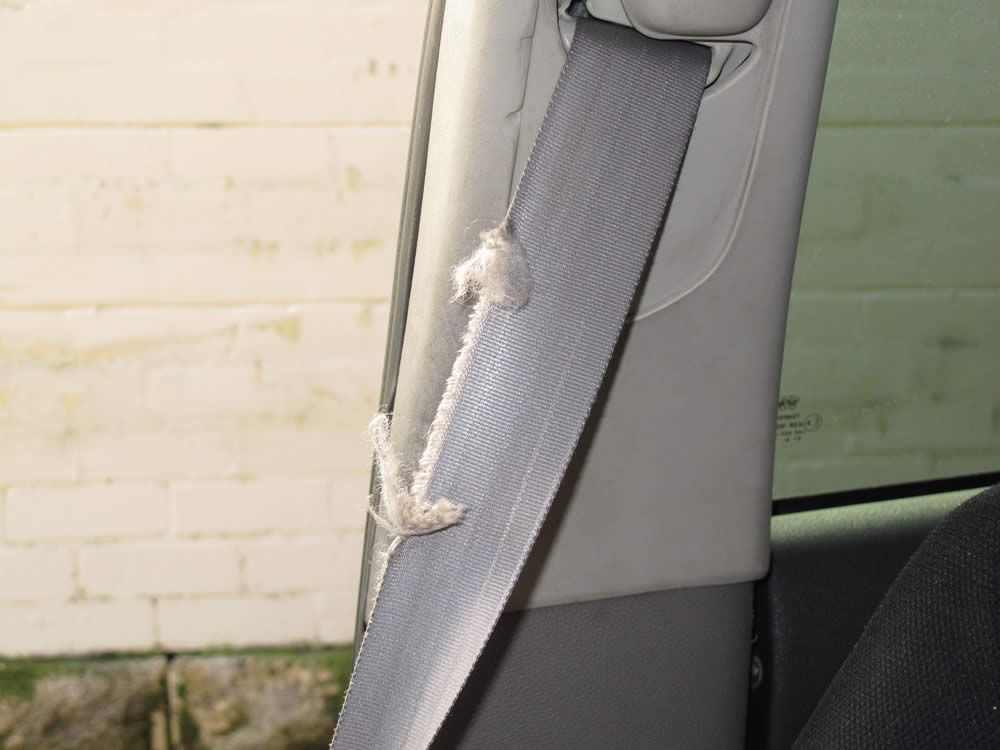 This is the bit that had me stumped at first - it turns out that you just poke your fingertips in behind the plastic and pull it out. There are two clips behind the plastic that attach it to the car. 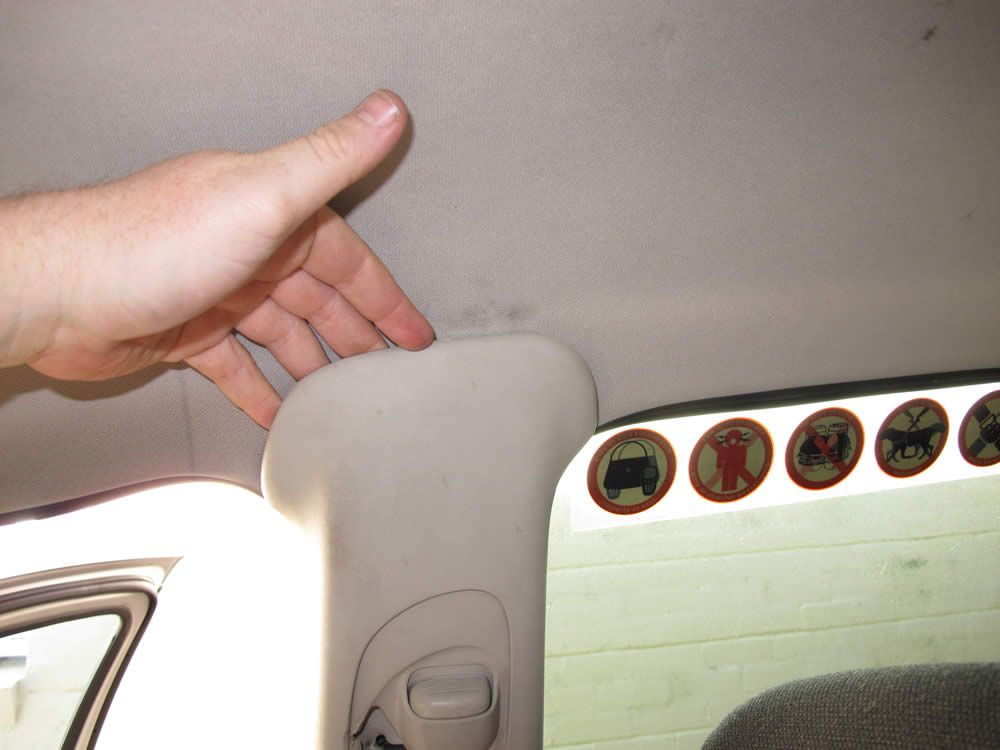 These are the two clips on the other side of the plastic. 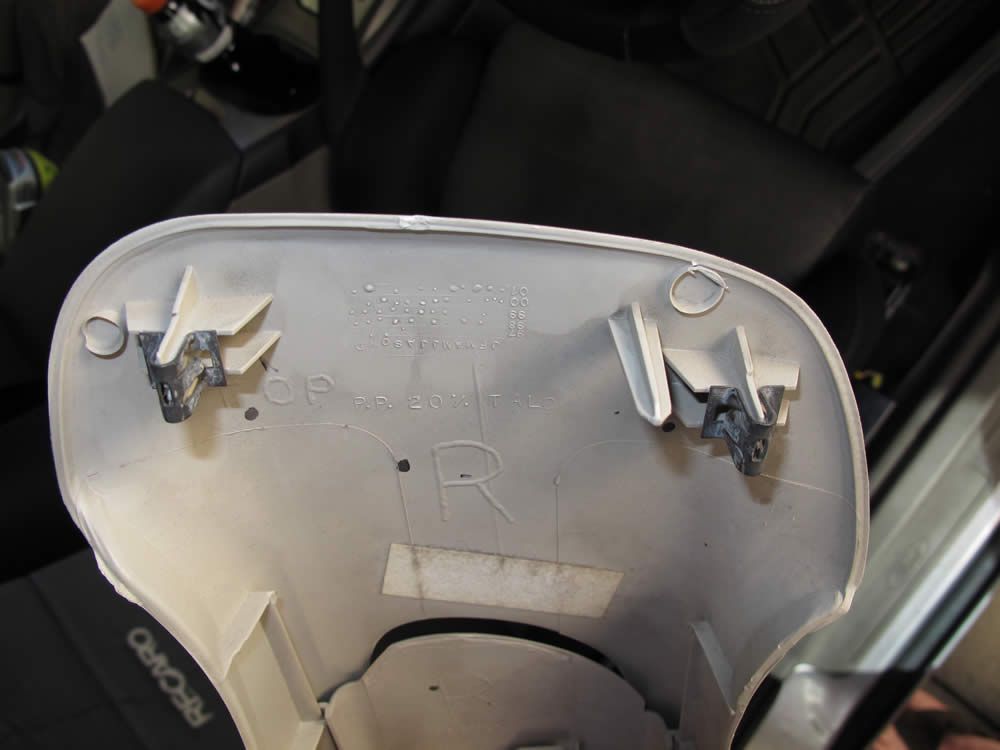 Where the clips clip into on the car pillar. Very simple stuff. 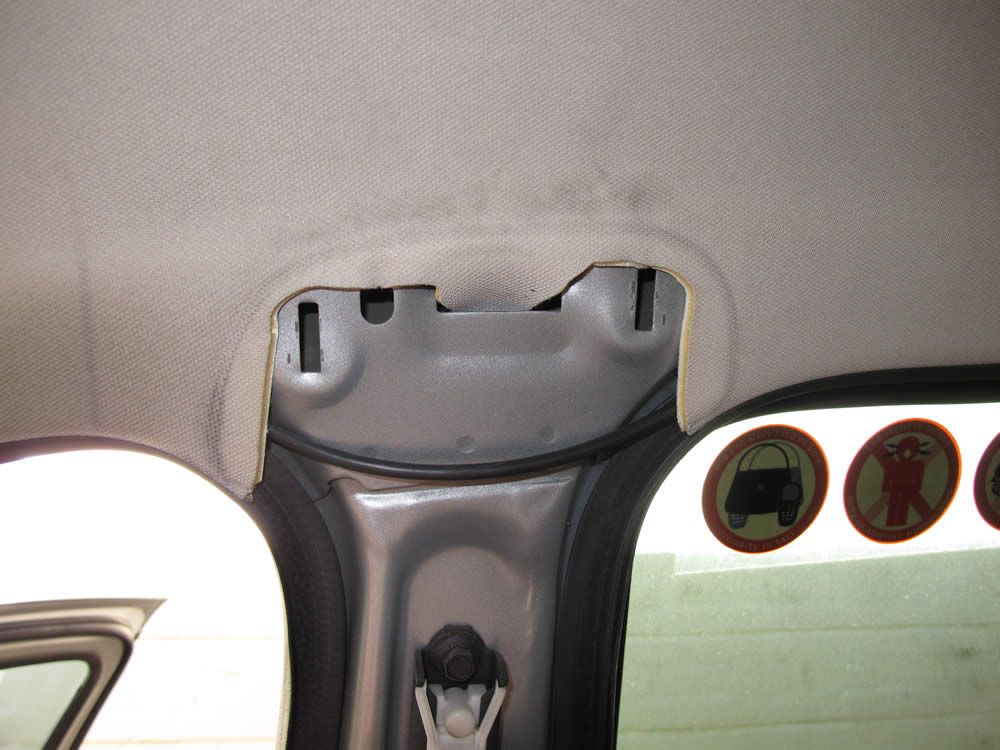 At the bottom of the top pillar plastic there are these two tabs, which go into the bottom plastic. Be careful not to break these when you are removing the top plastic. 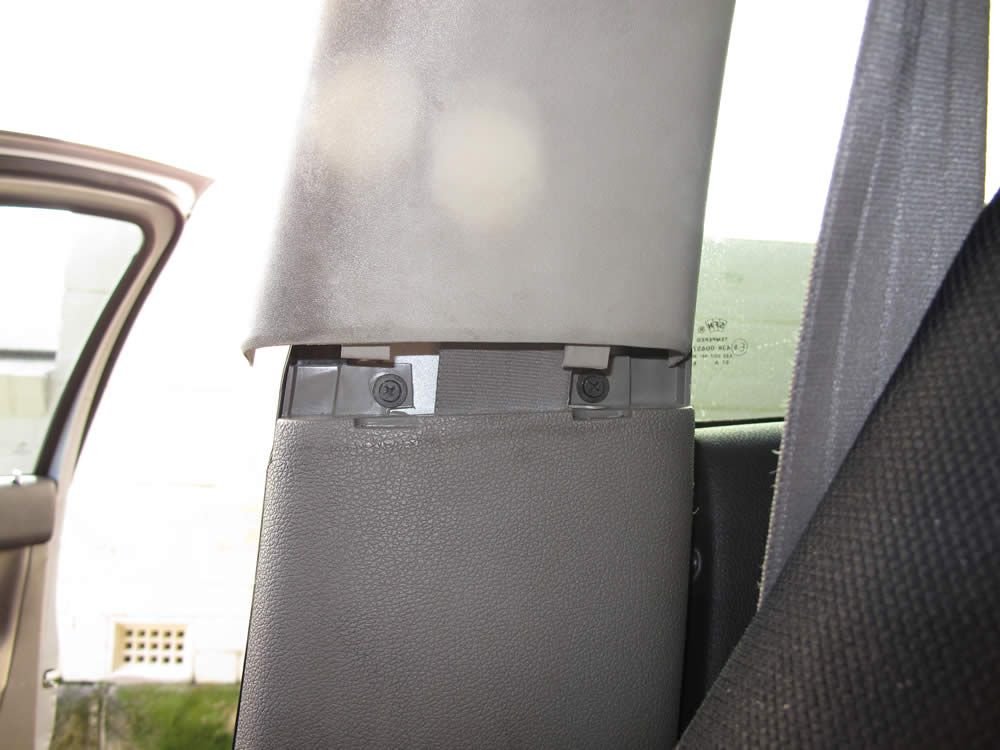 Once you’ve got the top plastic loose then you remove these two screws, which help to hold the bottom plastic in place. 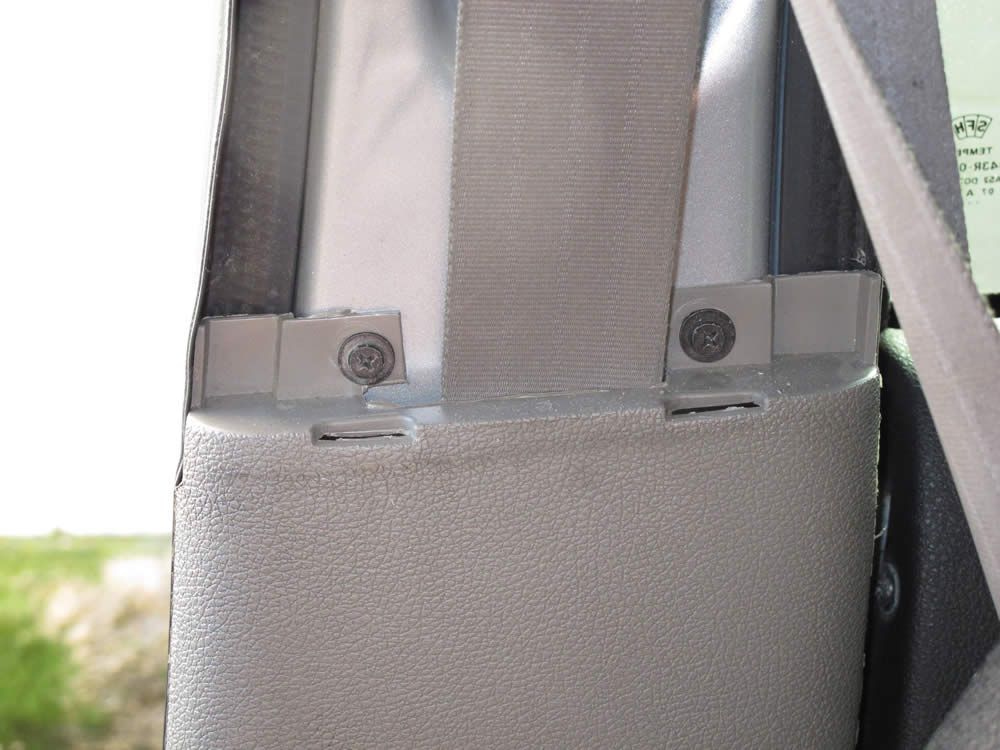 I can’t remember when and where I bought these from, but they have proven to be very useful. Teng Torx socket set. I’ll be using the T50 for this job. 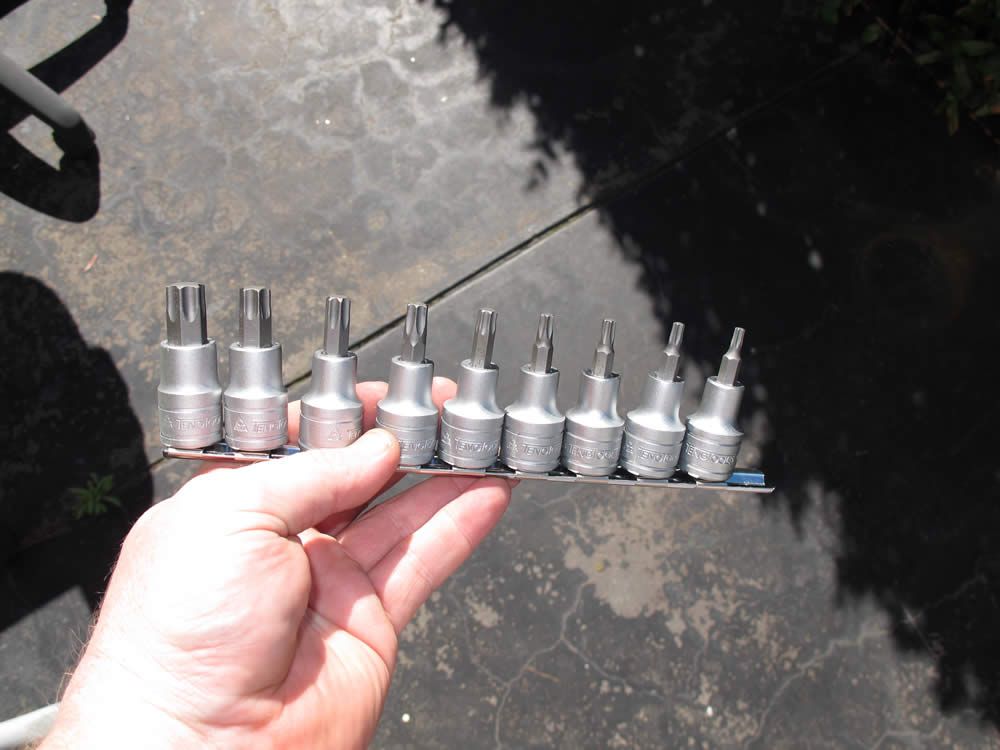 Once the plastics are removed it’s time to start removing the actual seat belt. Do NOT touch the silver bolt in the middle - that’s part of the seat belt and gets replaced with the new belt. The bolt to remove is the top black one, which requires a 10mm socket. 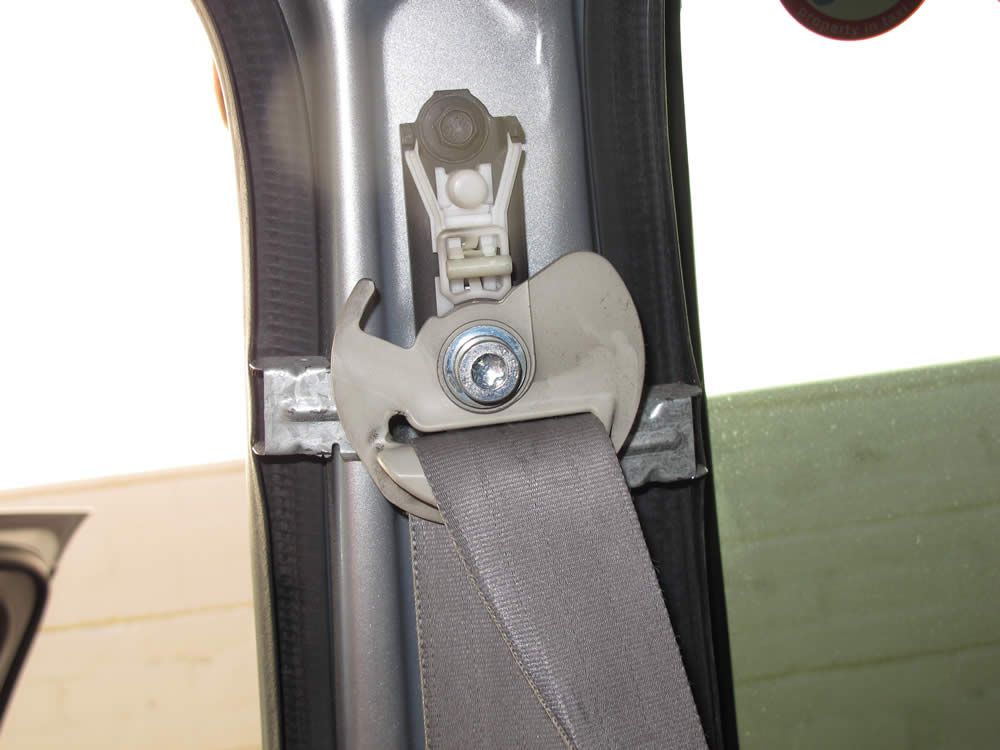 At the bottom of the seat belt the bolt is covered by this plastic cover. I removed this easily by levering it off with a flat blade screwdriver. When you do this, do it gently so that the plastic cover doesn’t fly off to somewhere where you can’t find it. 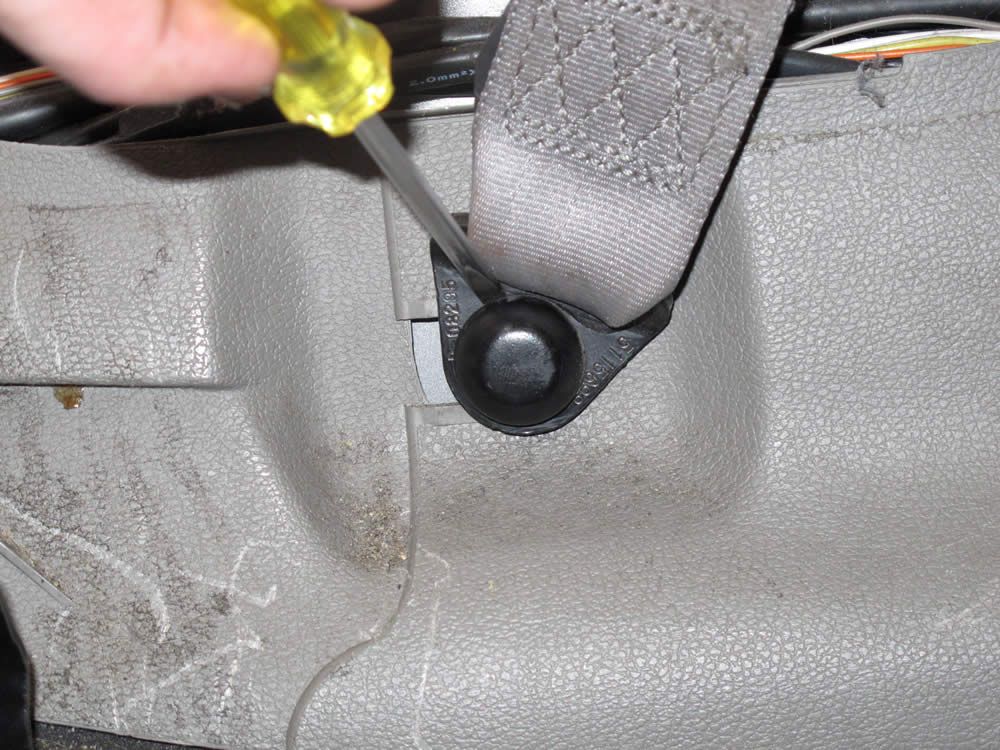 Once the plastic cover is removed there is this T50 bolt. 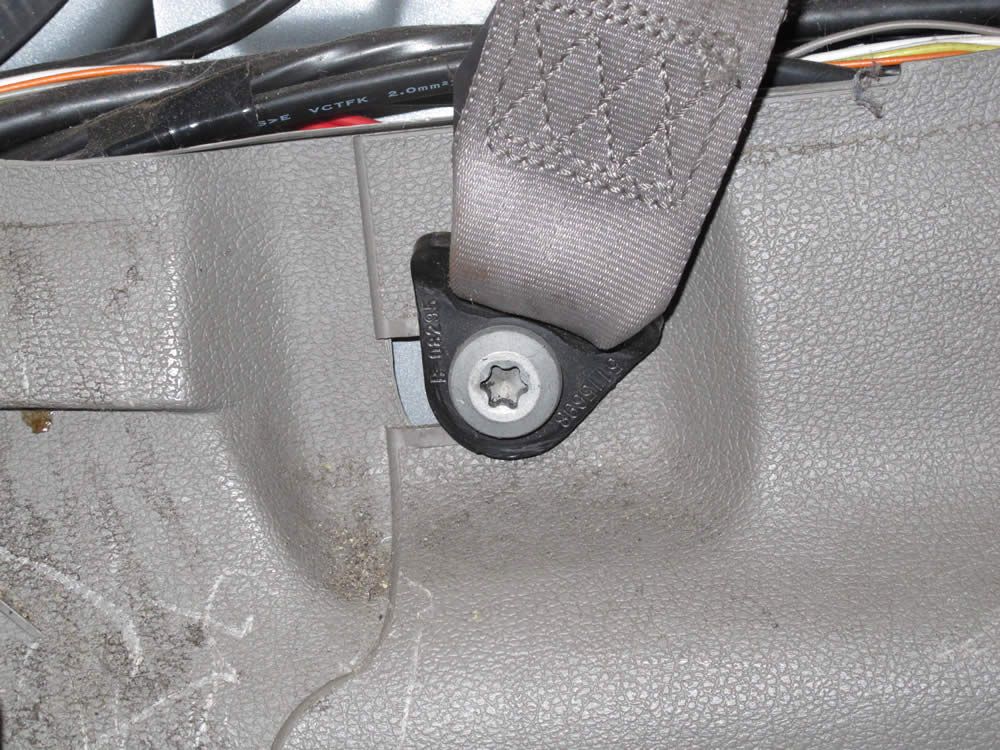 A photo of the new seat belt, which also includes the upper mechanism. As you can see, the Torx bolt that I mentioned earlier to not loosen is part of the new belt. 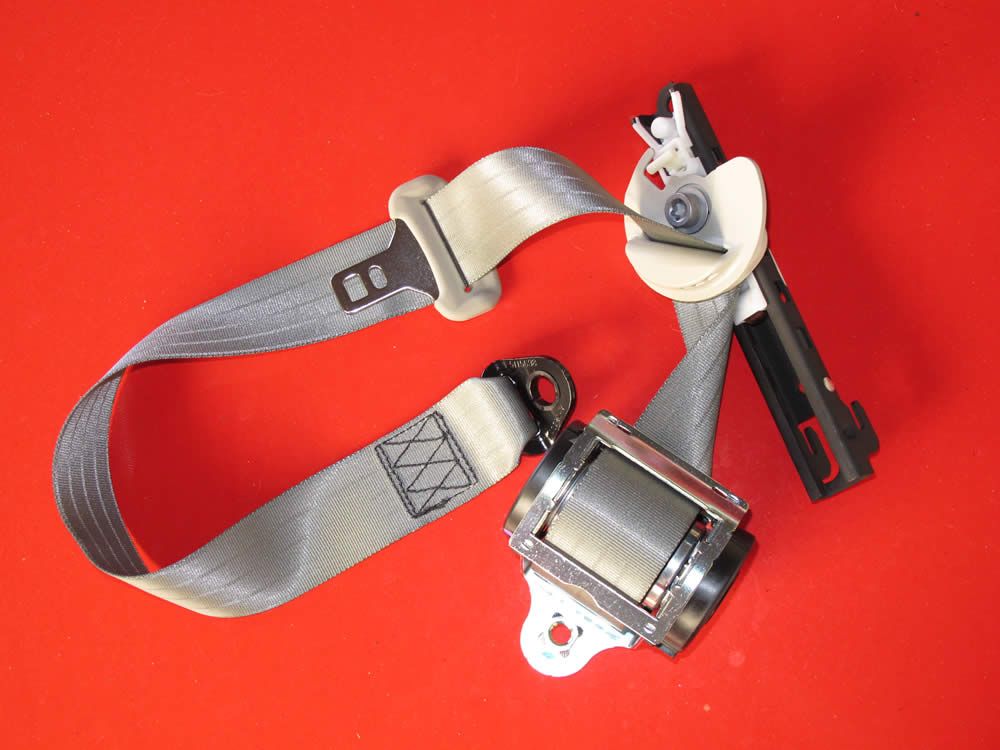 Once you have removed the old seat belt there will be this bracket. Mine fell out just after I took this photo so it was handy to check on the camera which way it goes back on. There are two small prongs that go into the hole to hold the bracket in place, and I then bent them out a little bit so that the bracket would stay there while I put the new seat belt into place. 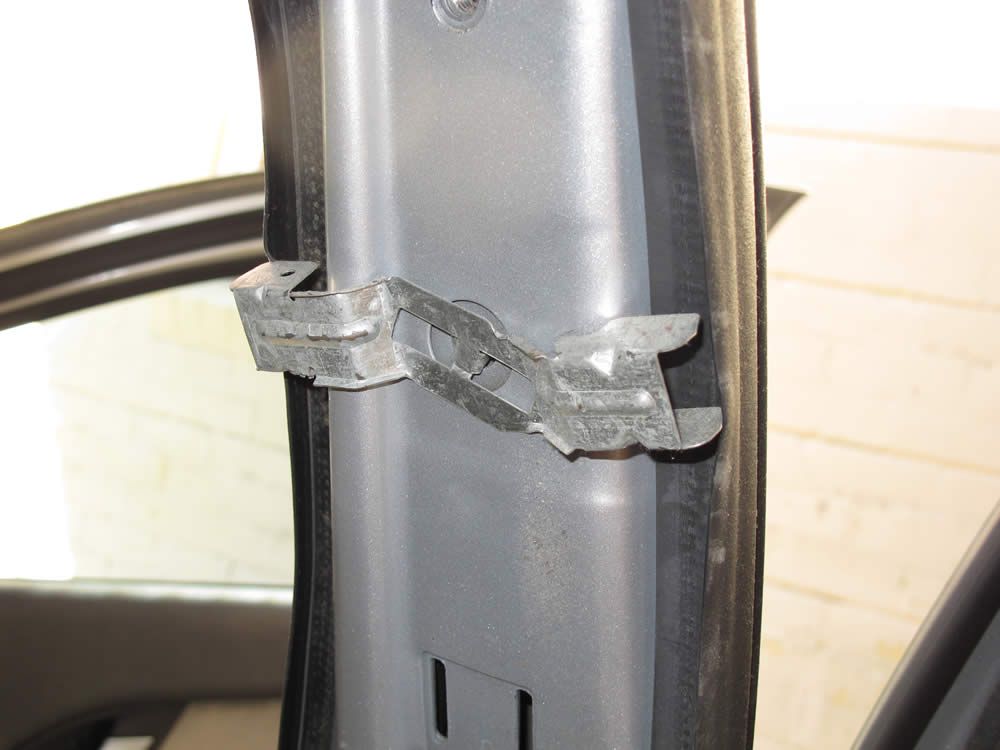 Once I had the plastics out I figured it was time to clean them. Off to the laundry I went. 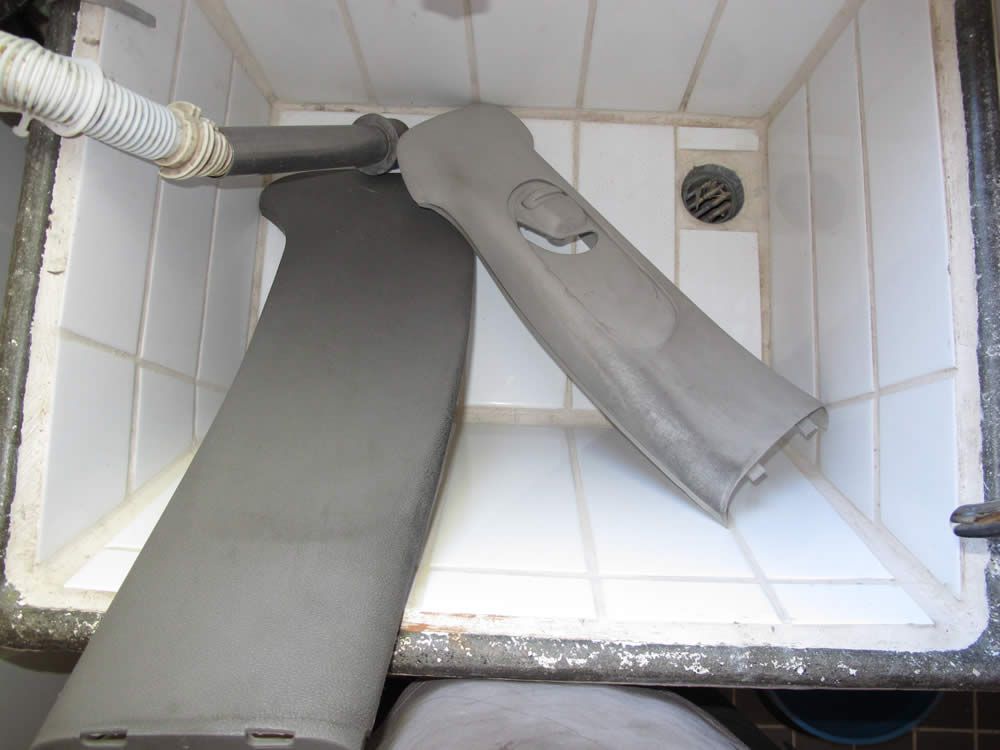 I tried a couple of things, but this is the stuff that I ended up using. You can buy these aerosol eucalyptus oil spray cans from most large supermarkets and chemists. This stuff is extremely useful for cleaning anything plastic. You can see the clean streaks on the left of the photo - that’s where I sprayed the stuff on and wiped my finger over it - it took a few seconds for the eucalyptus oil spray to soak in, but once it did the grime came off easily. 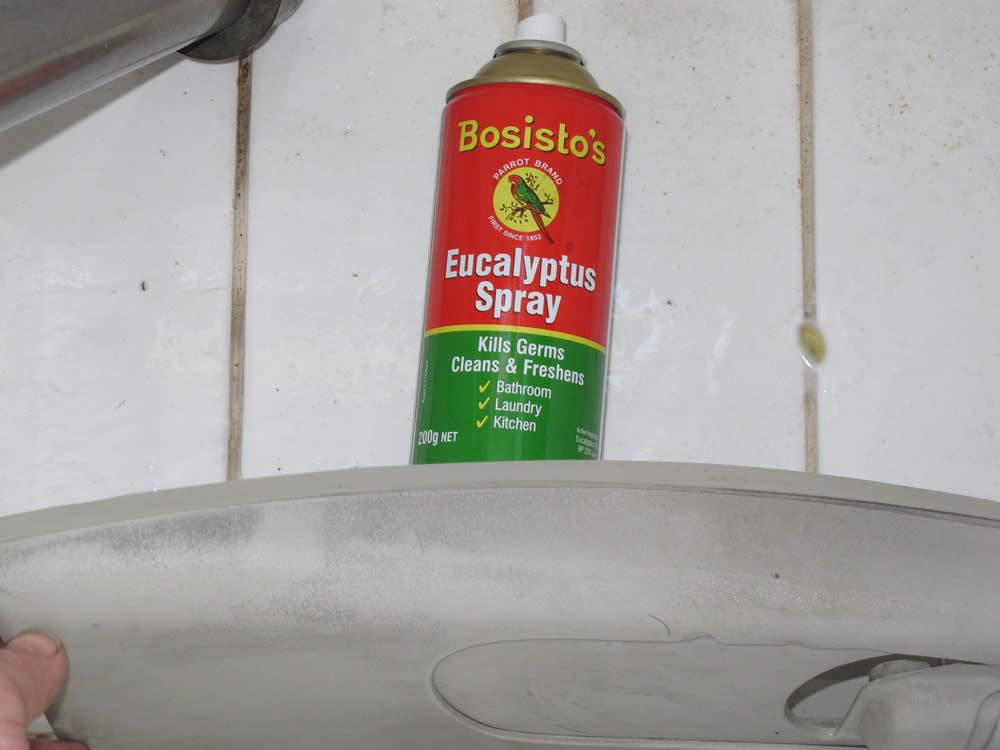 Thanks to the eucalyptus oil the plastics ended up looking a lot cleaner. 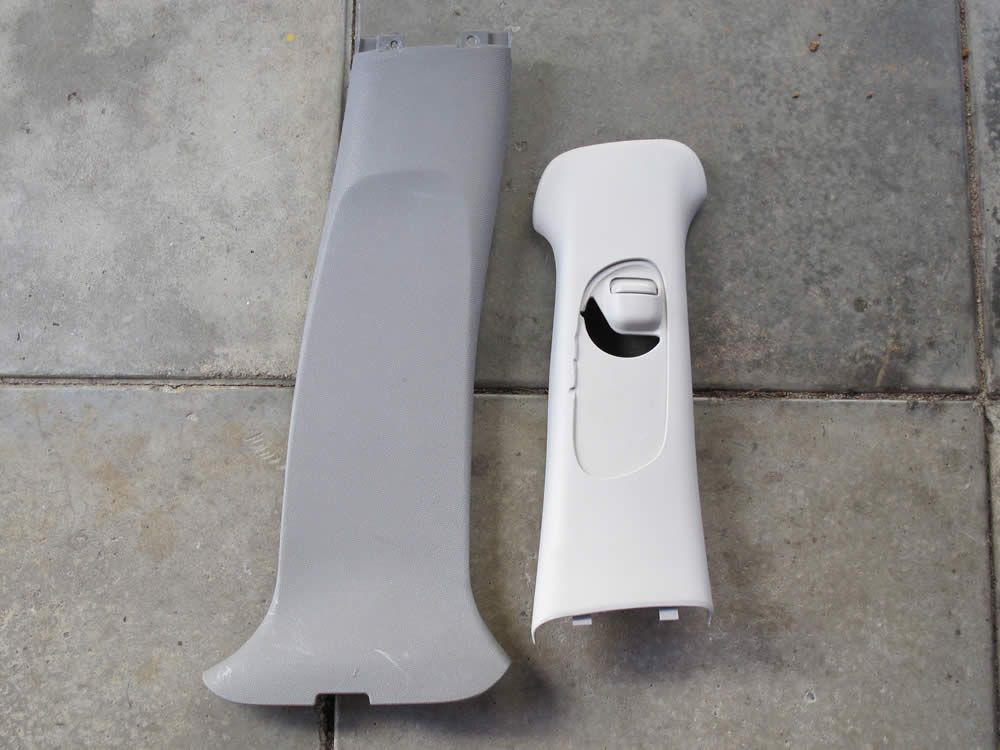 Now it was time to get back to the car. At the bottom of the seat belt, the belt roll is held in with this T50 Torx bolt. Removing it was easy enough, but it was a bit fiddly getting the bolt to line up with the new belt roll. 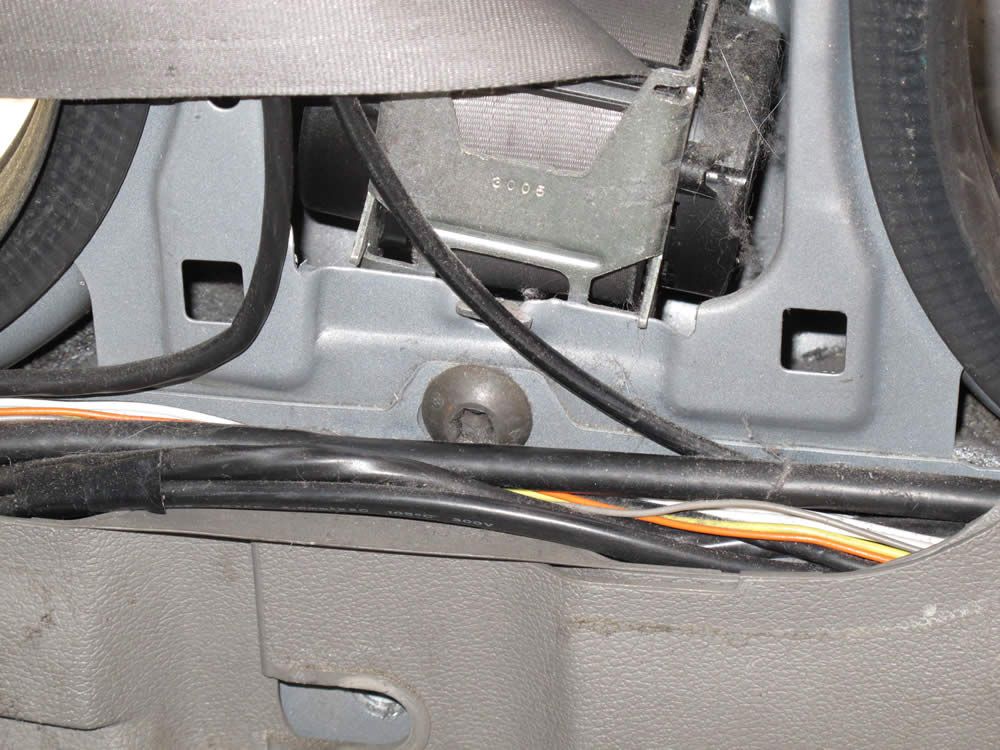 The upper mechanism is held in place just by the one bolt at the top. At the bottom there are two hooks - you put the mechanism into place and slide it upward a little bit until the bolt hole lines up with the thread in the car pillar. Then put the bolt back in. 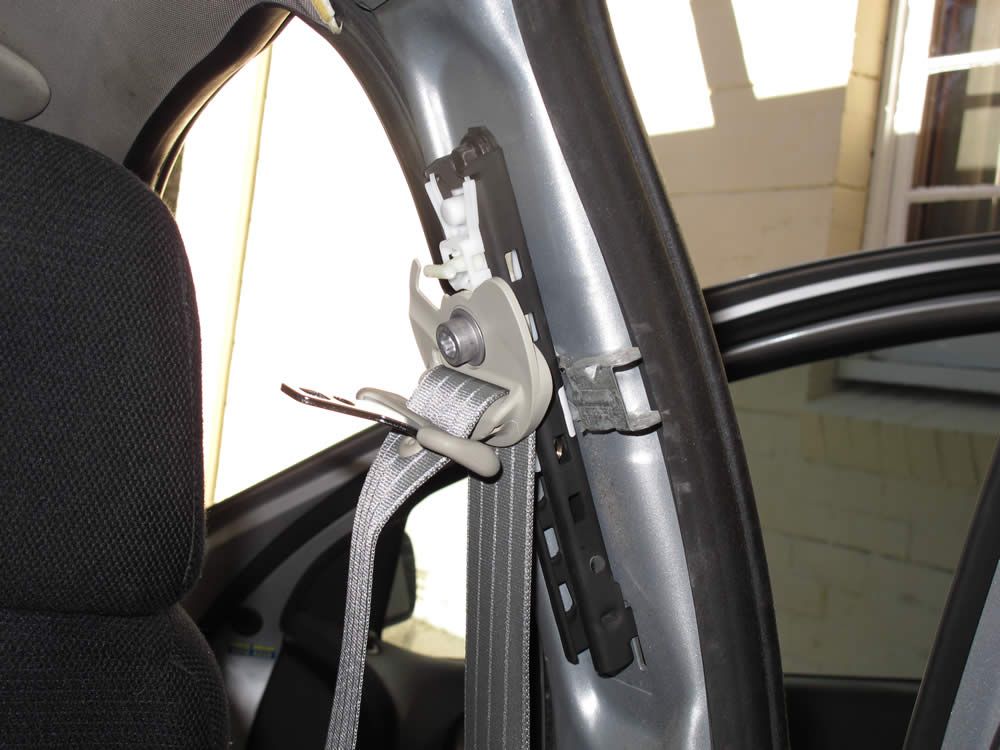 By now it was all coming together. This is when I remembered that I feed the seat belt through the top plastic, before putting the bottom seat belt bolt back in. 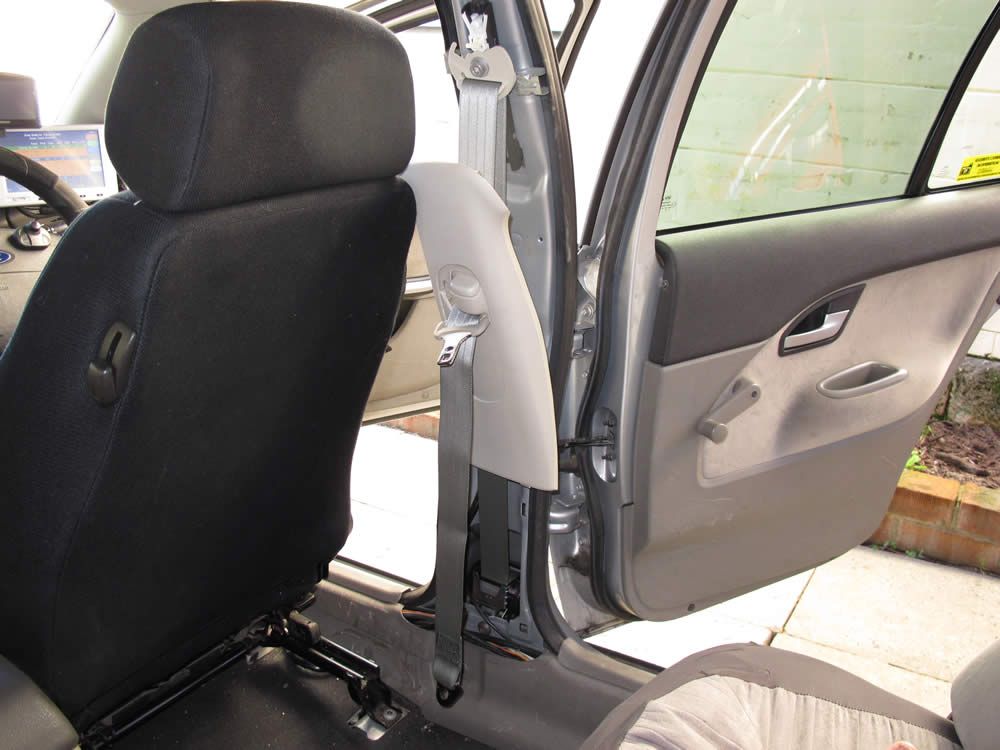 Once the bottom bolt was back in, it was time to get the plastics back into place. The bottom plastic was easy enough. With the top plastic, you have to make sure that it lines up correctly - that circular shaped bit in the middle goes over the silver bolt on the seat belt. You have get this lined up to get the top plastic back on correctly. 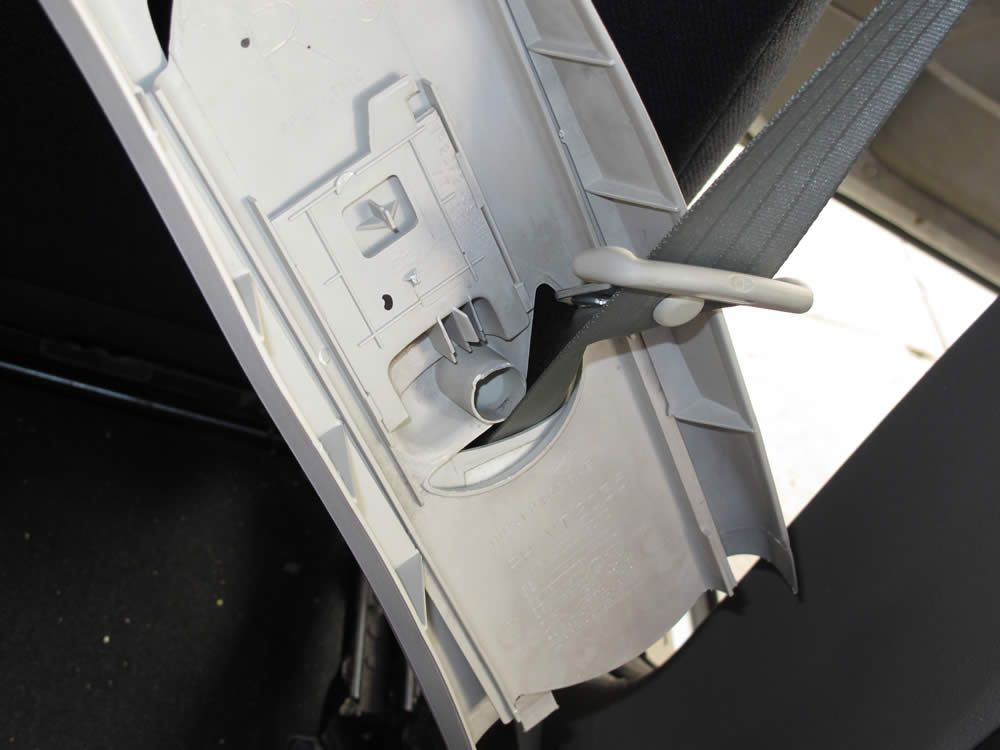 This is the bolt that the circular bit goes over. Not hard to do, but essential. 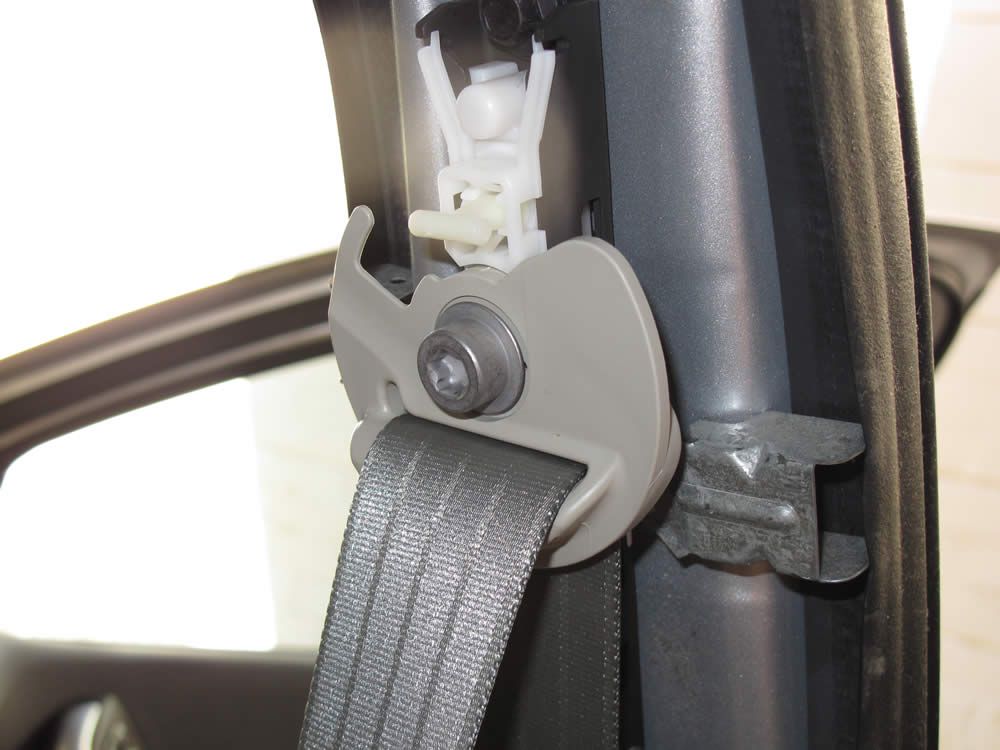 I had to slide the adjuster guide up and down a bit to get things to line up, but it wasn’t difficult to do. 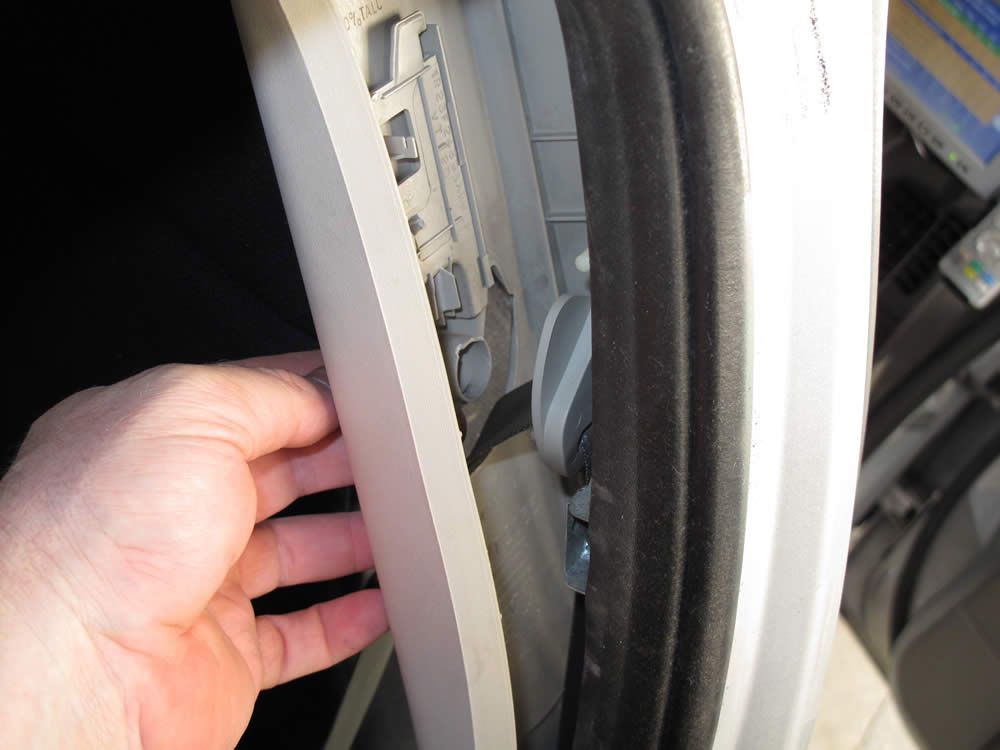 The completed job. Everything is bolted into place, and I’ve put the plastics back in. Note that the door seal rubbers go on the outside of the plastics in all places. There were areas where the rubbers ended up on the inside of the plastics, which I sorted out with a combination of fingertips and poking a flat blade screwdriver in there and rolling it along to feed the rubber back out. 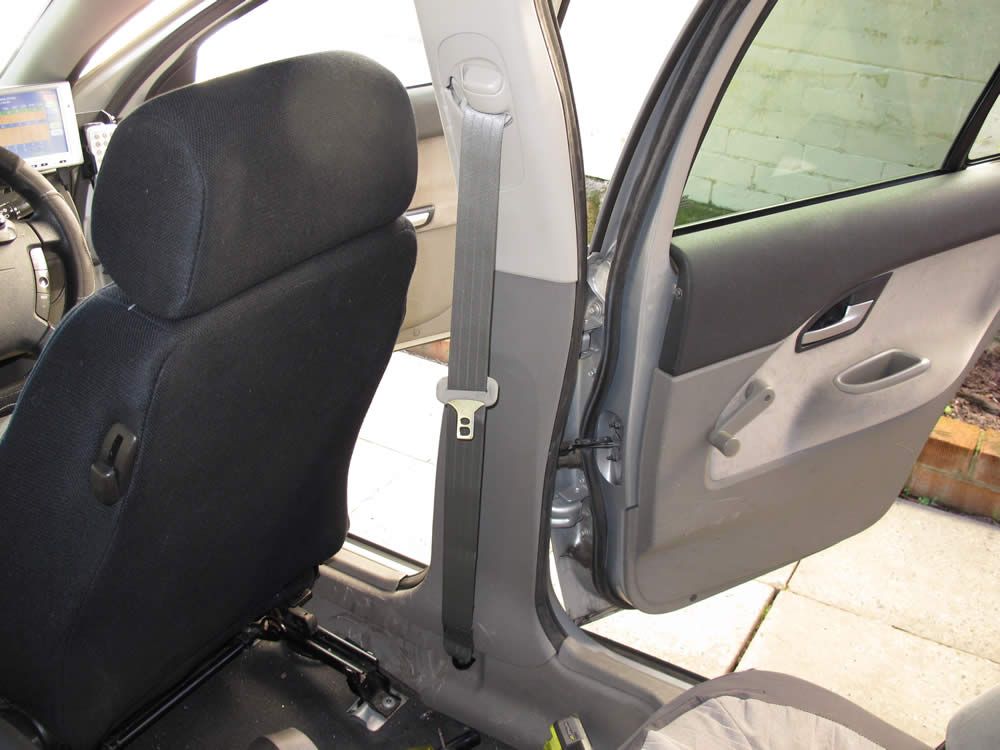 There was an instruction guide in the box with the new belt, which I found to be quite useless - it didn’t cover how to remove the plastics.    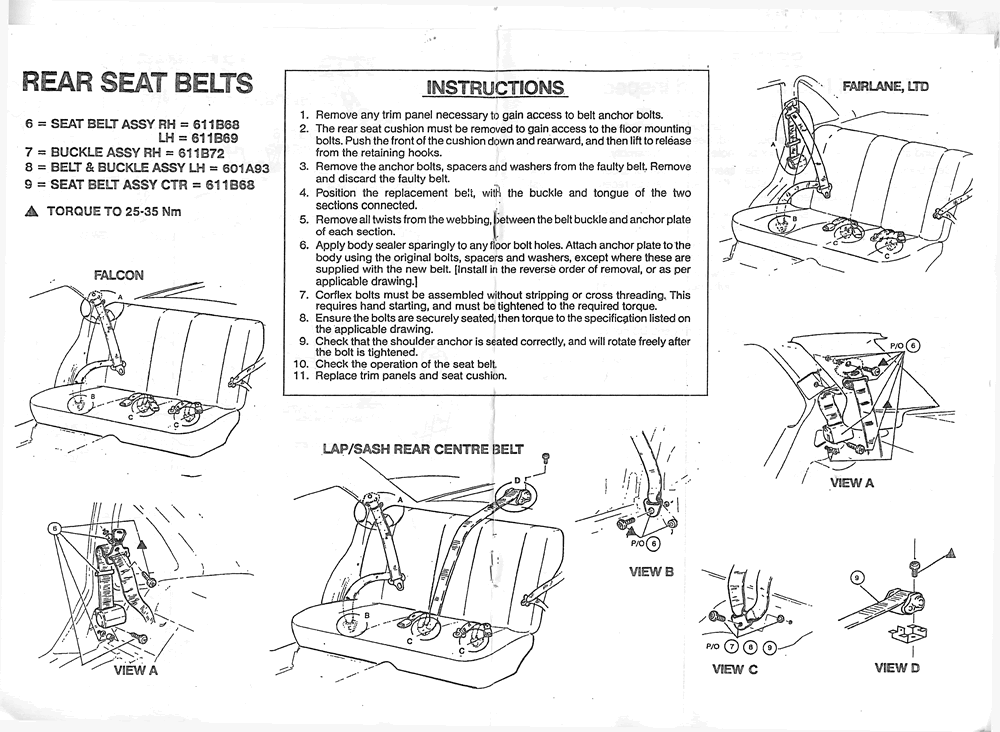  I’ve kept the old seat belt for now - I’ll look into getting it re-webbed for next time (ie just the belt part replaced). That way I’ll have a spare sitting at home, ready to go. If re-webbing is cheap enough then I’ll do it at least a couple of times a year - I like having a seat belt that retracts easily. |
||
| Top | |
||
| 93EB |
|
|||
Age: 48 Posts: 2487 Joined: 6th Oct 2005 Ride: 93EB Fairmont / BA Falcon XR6T Location: Western Sydney |
That is an excellent and well detailed write up. Well done. I will move this into the technical forum for you.
The time you spent to do this is much appreciated.
_________________ 93 EB II Fairmon8 with 17' EL GT's / Clear indicators / H.I.Ds / Sports exhaust / Lowered 2' / K&N / XR6 ECU. |
|||
| Top | |
|||
| Mad2 |
|
|||
|
{USERNAME} wrote: That is an excellent and well detailed write up. Well done. I will move this into the technical forum for you. The time you spent to do this is much appreciated. +1 very good info & easy ta read now i just have ta pick sed car up............. |
|||
| Top | |
|||
| TROYMAN |
|
||
|
nice work... thread now a sticky...
I also changed the title as this also applies to au and ba aswell |
||
| Top | |
||
| AussieG62013 |
|
||
|
I know this is old but I have an OEM replacement and it does not come with a new bolt at the top instead it tells me to reuse the old bolt.
|
||
| Top | |
||
| Mad2 |
|
|||
|
{USERNAME} wrote: I know this is old but I have an OEM replacement and it does not come with a new bolt at the top instead it tells me to reuse the old bolt. which 'old bolt' are you talking about? as i believe you can use either top bolts. |
|||
| Top | |
|||
| AussieG62013 |
|
||
|
{USERNAME} wrote: {USERNAME} wrote: I know this is old but I have an OEM replacement and it does not come with a new bolt at the top instead it tells me to reuse the old bolt. which 'old bolt' are you talking about? as i believe you can use either top bolts. The top bolt that the seat belt is threaded into the round plastic guide. |
||
| Top | |
||
| Mad2 |
|
|||
|
{USERNAME} wrote: {USERNAME} wrote: {USERNAME} wrote: I know this is old but I have an OEM replacement and it does not come with a new bolt at the top instead it tells me to reuse the old bolt. which 'old bolt' are you talking about? as i believe you can use either top bolts. The top bolt that the seat belt is threaded into the round plastic guide. as in the chrome bolt in your pic? {DESCRIPTION} then yes, just make sure it's in good condition. i reused mine. |
|||
| Top | |
|||
| Winston |
|
||
|
Hi PhilMeUp,
Thank you very much for taking the time to write and upload this guide. I wouldn't have been able to change the driver's seatbelt on my late father's Falcon without it. It's a sentimental vehicle and you've done me (and no doubt others) a solid favour. The only thing I would add is that in order to remove the lower plastic panel, the two screws at the top of the panel need to be removed firstly, and then the plastic panel is pulled towards the inside of the cabin, disconnecting two clips in the middle of the panel secondly, and two guides at the bottom of the panel thirdly. Cheers mate. |
||
| Top | |
||
| Mad2 |
|
|||
|
{USERNAME} wrote: Hi PhilMeUp, Thank you very much for taking the time to write and upload this guide. I wouldn't have been able to change the driver's seatbelt on my late father's Falcon without it. It's a sentimental vehicle and you've done me (and no doubt others) a solid favour. Quote: The only thing I would add is that in order to remove the lower plastic panel, the two screws at the top of the panel need to be removed firstly, and then the plastic panel is pulled towards the inside of the cabin, disconnecting two clips in the middle of the panel secondly, and two guides at the bottom of the panel thirdly. Cheers mate. be carefull when removing the lower plastic as in you don't break the lower clips/guides. |
|||
| Top | |
|||
| Who is online |
|---|
Users browsing this forum: No registered users and 0 guests |

