|
| ToranaGuy |
|
|||
|
WOW! I'm gobsmacked! That's some serious modding going on there, great to see it done!
Cheers ToranaGuy
_________________ I am the ToranaGuy!|74 Lh Torana Turbo|78 Hz PanelVan|86 Mighty Boy Ute|93 EB2 Ghia,GT Mockup,5spd,LPGI,Full Leather|2 x EB Xr8 5spd's|{DESCRIPTION}|{DESCRIPTION}|{DESCRIPTION}| |
|||
| Top | |
|||
| BEAR80 |
|
|||
Age: 45 Posts: 683 Joined: 4th Mar 2010 Ride: BF Fairmont Ghia & TS Magna Location: central coast |
this looks like it going to turn into one hell of a car.
i like those mags of the orange falcon, what condition are they in?, what size are they?, and can you put up pictures of each one cheers bear |
|||
| Top | |
|||
| tony.martin11 |
|
||
|
Ooh s**t Yeah! This is gonna be one hell of a car afterwards. Kudos goes to you BBQburner for this work!
_________________ BANNED USER |
||
| Top | |
||
| tony.martin11 |
|
||
|
EDIT: posted in the wrong thread
_________________ BANNED USER |
||
| Top | |
||
| bradley4567 |
|
||
|
your not mesing around here are you,
so how did the cluster transformation go?
_________________ ef falcon daily driver |
||
| Top | |
||
| Deff |
|
||
|
Awesome job mate, blown away by it so far.
|
||
| Top | |
||
| bbqburner |
|
|||
|
{USERNAME} wrote: WOW! I'm gobsmacked! That's some serious modding going on there, great to see it done! Cheers ToranaGuy Cheers {USERNAME} wrote: this looks like it going to turn into one hell of a car. i like those mags of the orange falcon, what condition are they in?, what size are they?, and can you put up pictures of each one cheers bear I'm not getting back to the car till sunday, but I'm very sure they are in good condition with no damage, The tires require replacement. {USERNAME} wrote: Ooh s**t Yeah! This is gonna be one hell of a car afterwards. Kudos goes to you BBQburner for this work! {USERNAME} wrote: your not mesing around here are you, so how did the cluster transformation go? Cheers, I'll finish copying across the rest tonight
_________________ I enjoy the symphony of mechanical harmony, |
|||
| Top | |
|||
| tony.martin11 |
|
||
|
{USERNAME} wrote: {USERNAME} wrote: WOW! I'm gobsmacked! That's some serious modding going on there, great to see it done! Cheers ToranaGuy Cheers {USERNAME} wrote: this looks like it going to turn into one hell of a car. i like those mags of the orange falcon, what condition are they in?, what size are they?, and can you put up pictures of each one cheers bear I'm not getting back to the car till sunday, but I'm very sure they are in good condition with no damage, The tires require replacement. {USERNAME} wrote: Ooh s**t Yeah! This is gonna be one hell of a car afterwards. Kudos goes to you BBQburner for this work! {USERNAME} wrote: your not mesing around here are you, so how did the cluster transformation go? Cheers, I'll finish copying across the rest tonight YAY! cant wait to see it finished... Keep up the 5-star work quality
_________________ BANNED USER |
||
| Top | |
||
| bbqburner |
|
|||
|
I wasn't happy with how the front LHS brake line ran, basically went all over the place and trying to use the BA lines for the rear brakes didn't work,, so I bit the bullet and made new ones that are more suited to the EL body.
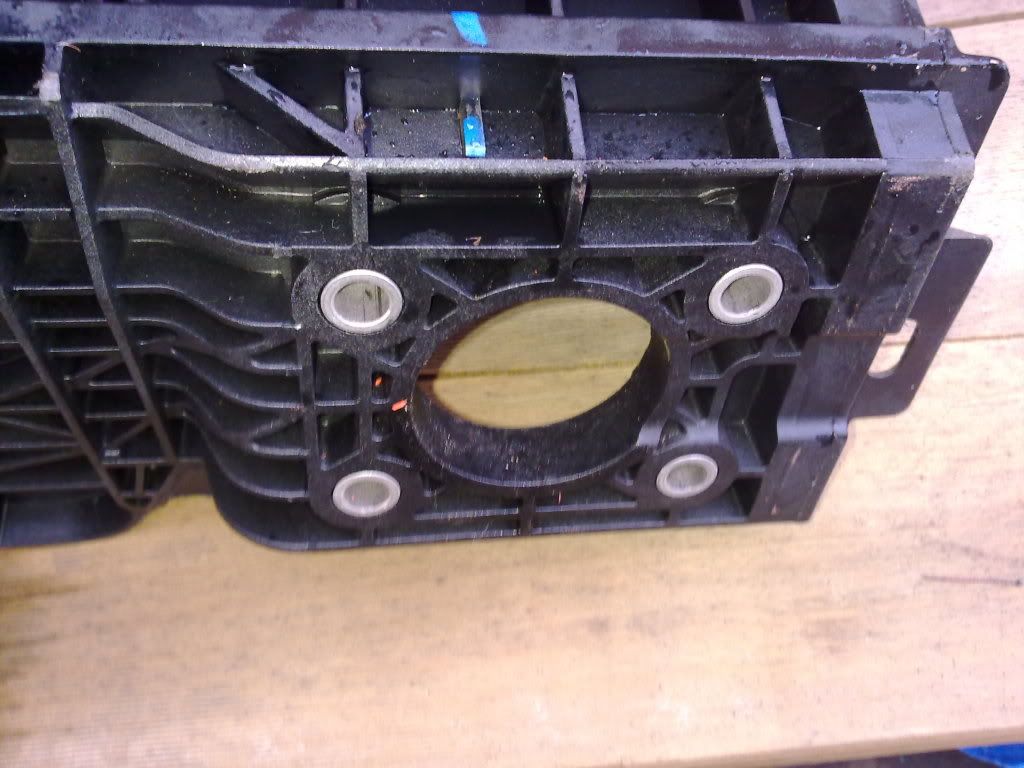
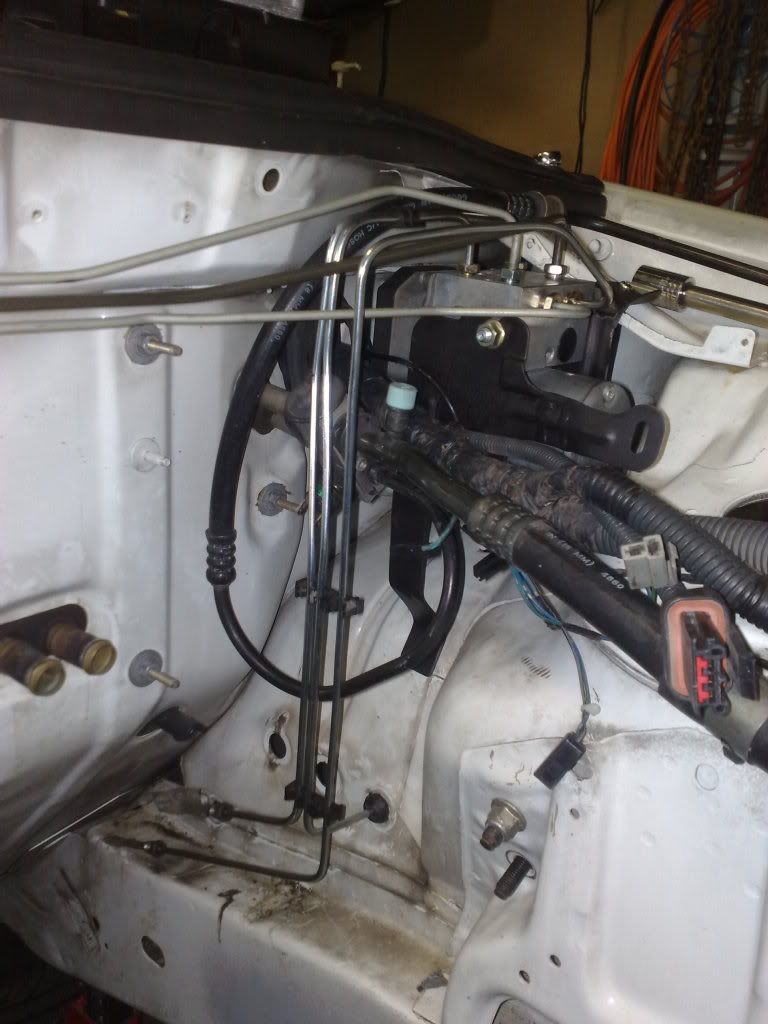 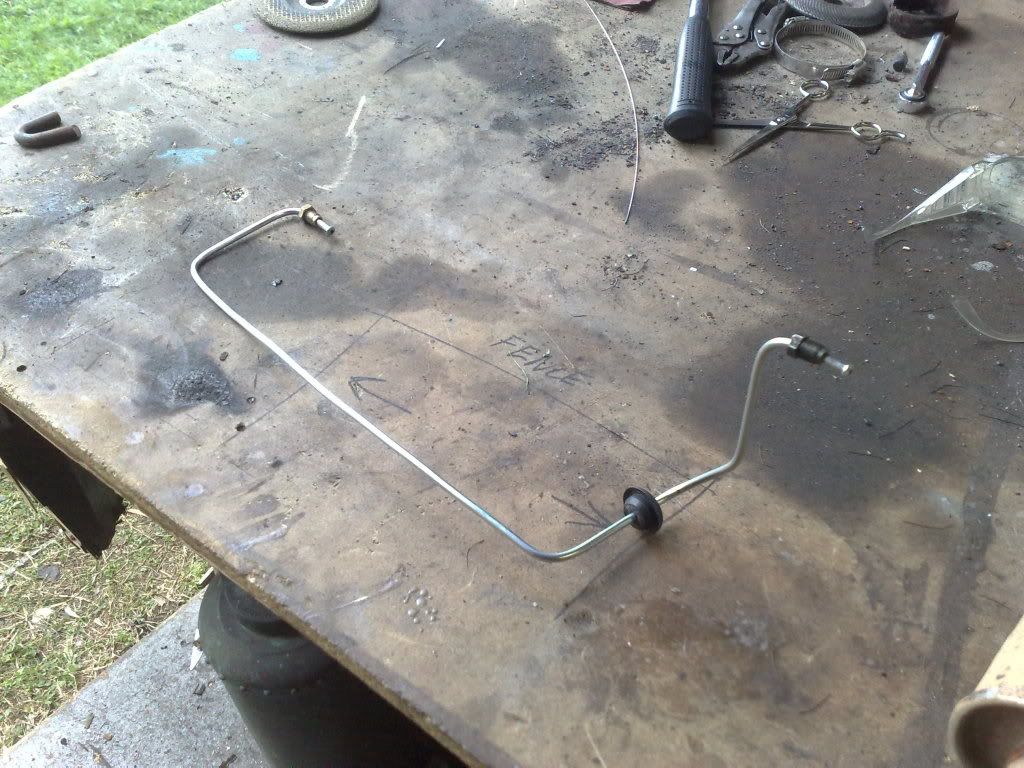 I also fitted the brackets for the front flexible lines to the body. 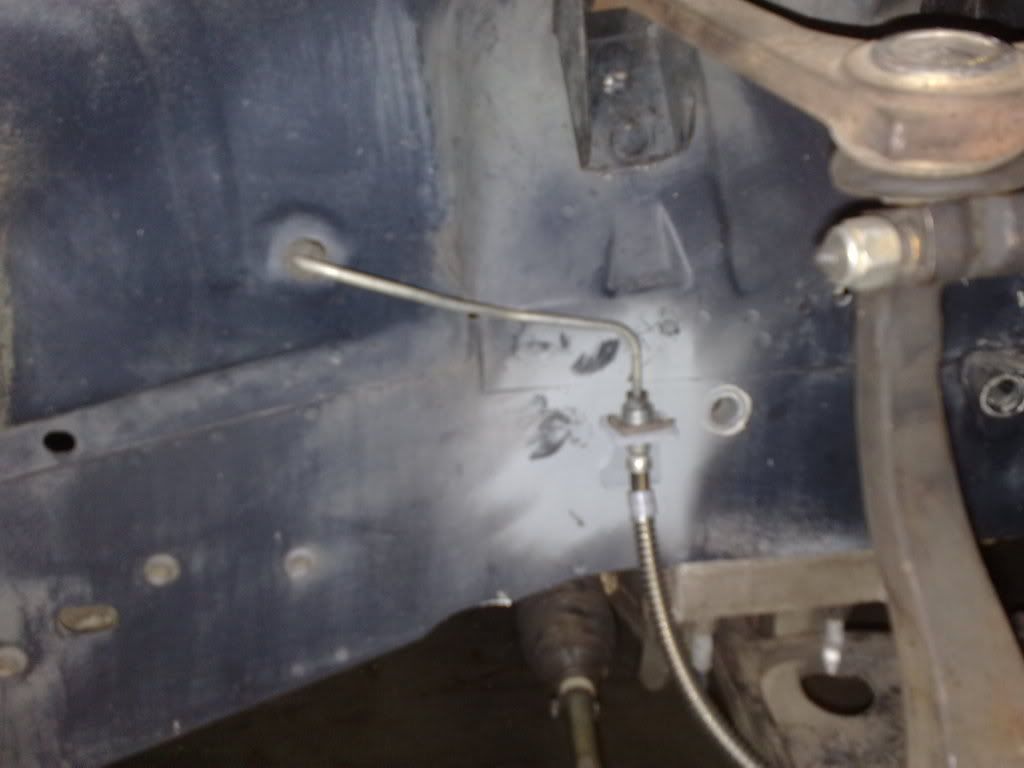  Using the rubber blocks off the BA because they have 5 holes instead of the four the EL item have i was able to run the second brake line down the body. 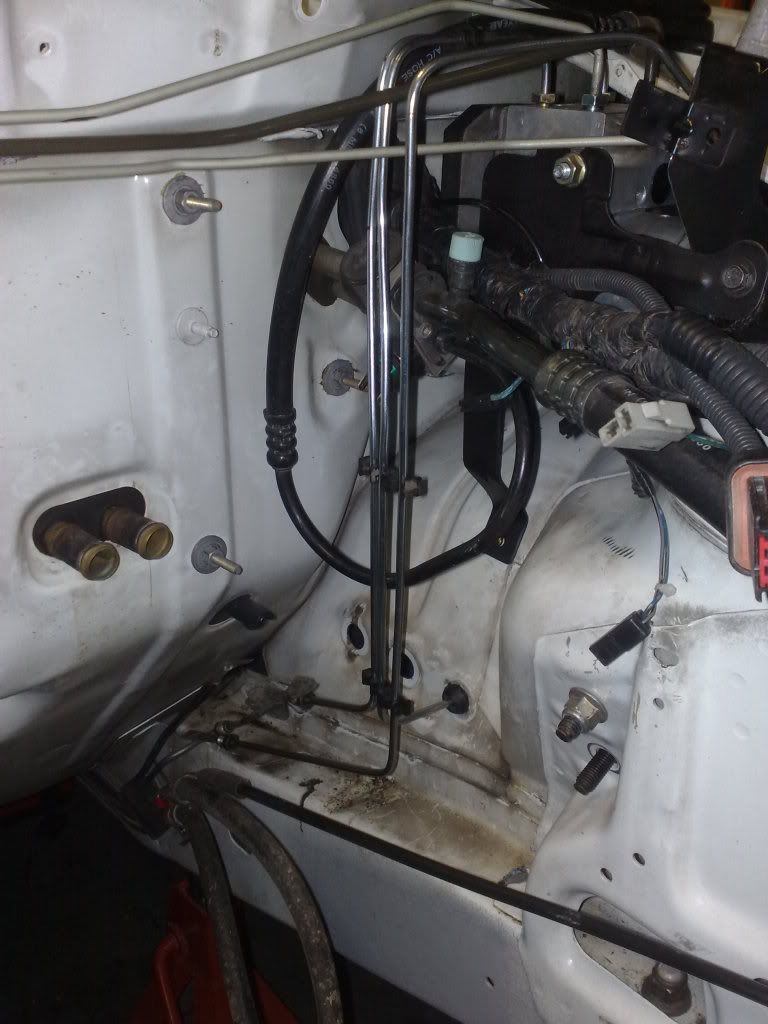 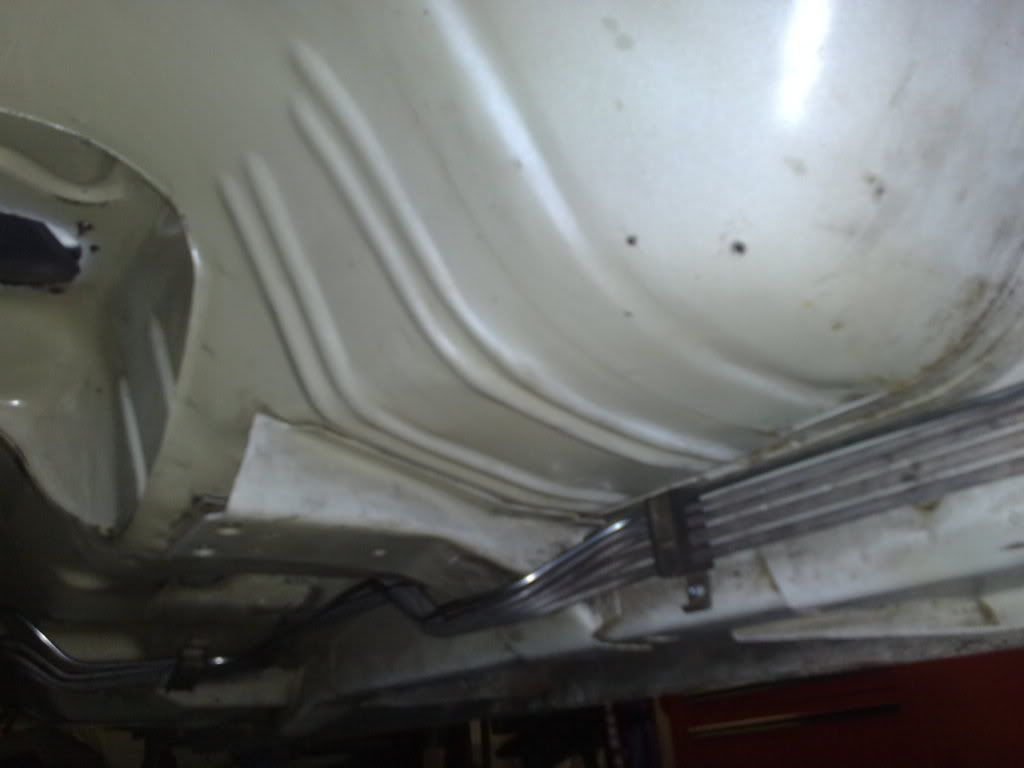 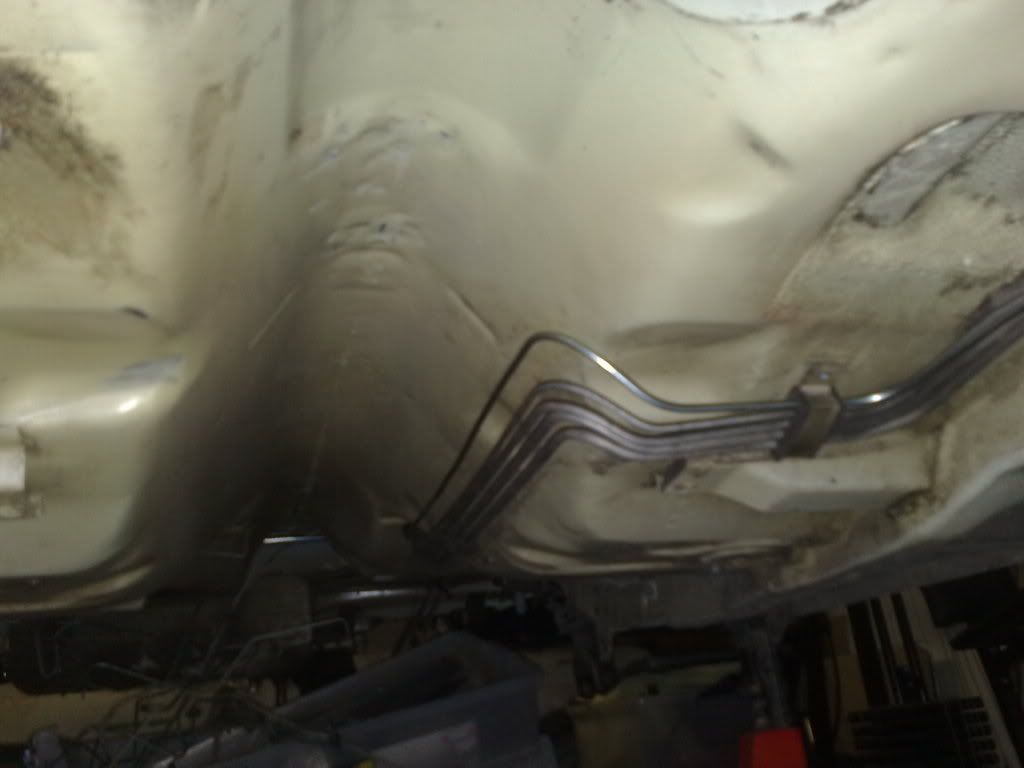 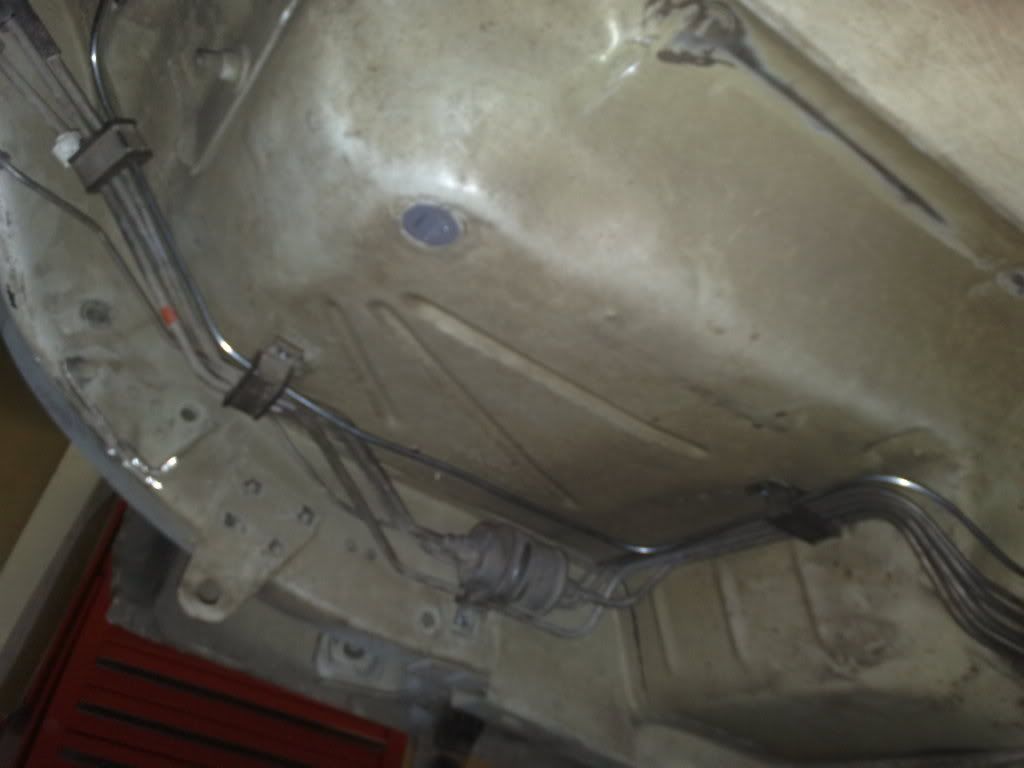 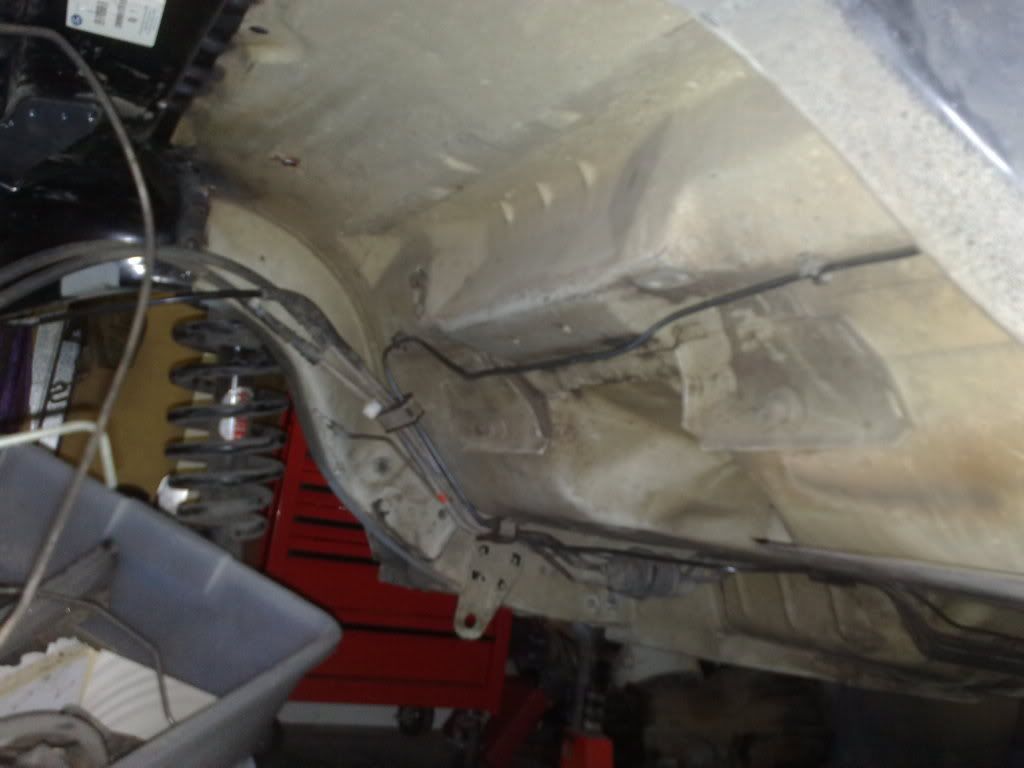 Still need to finish up the joins in the engine bay and fit the flexible lines in the rear, I'm guessing the AU uses different rear lines then what came off the EL. The EL items hit the front arm of the IRS cradle. I'll have to buy some AU items and fit them up, need to replace them anyway, not real keen on using the 13 year old EL items anyway Sorry about the out of focus pictures, camera doesn't work well in low light Some better pictures that are in focus showing the brackets in the front wheel arch and showing the space around the ABS and ECU 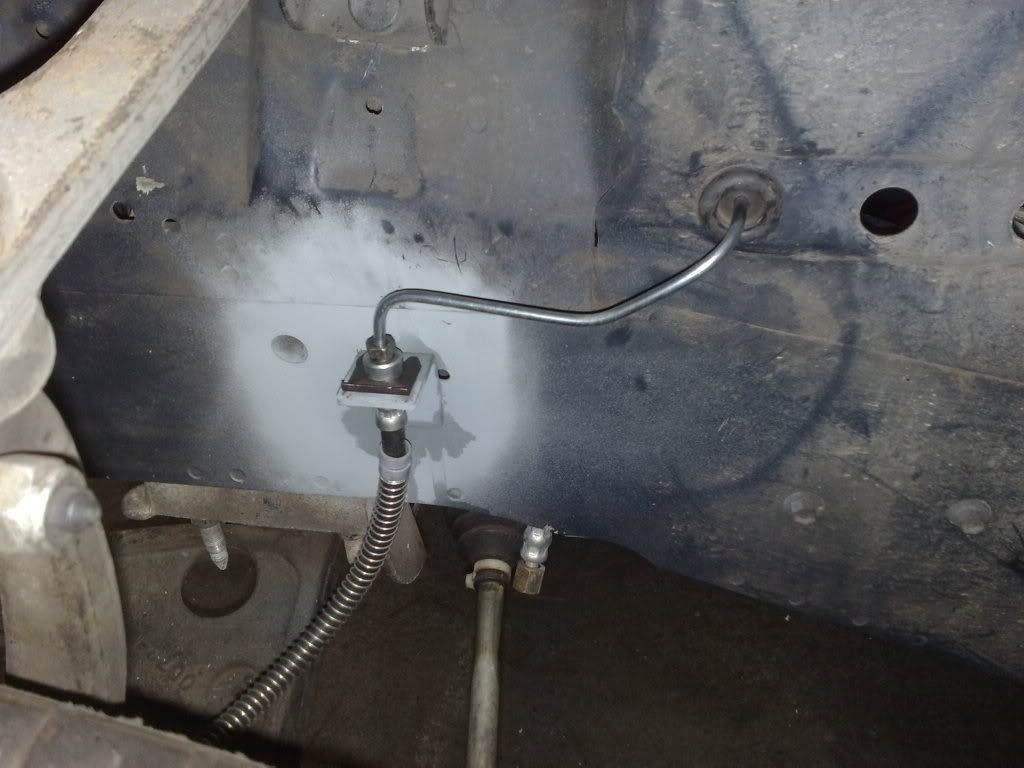 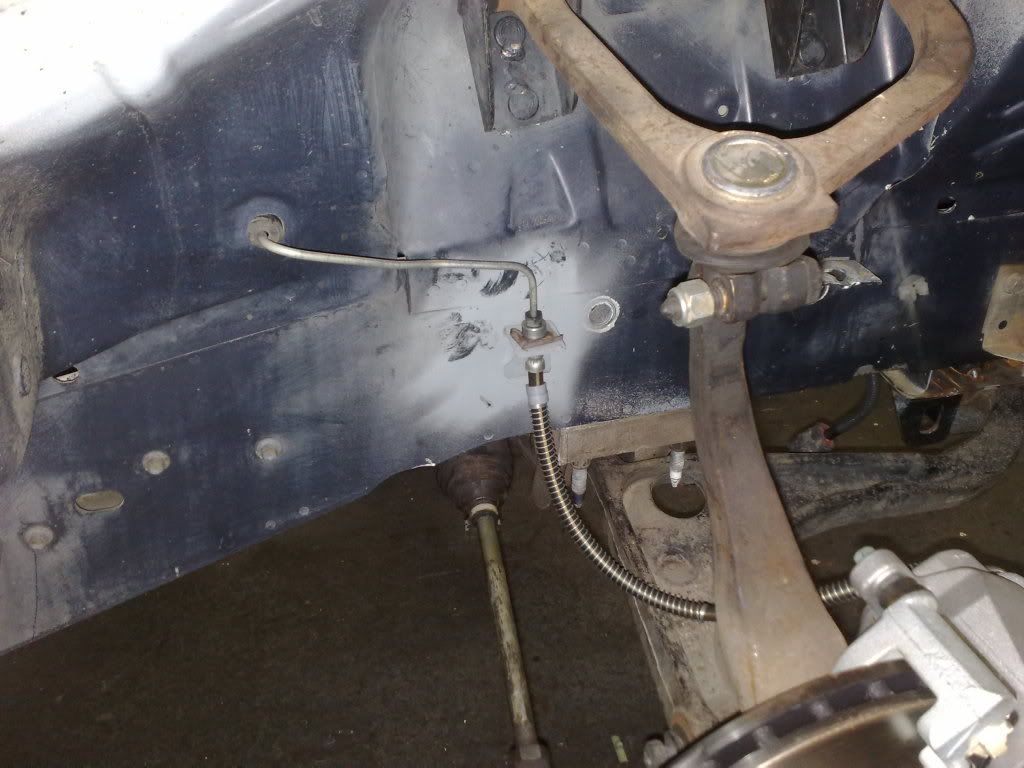 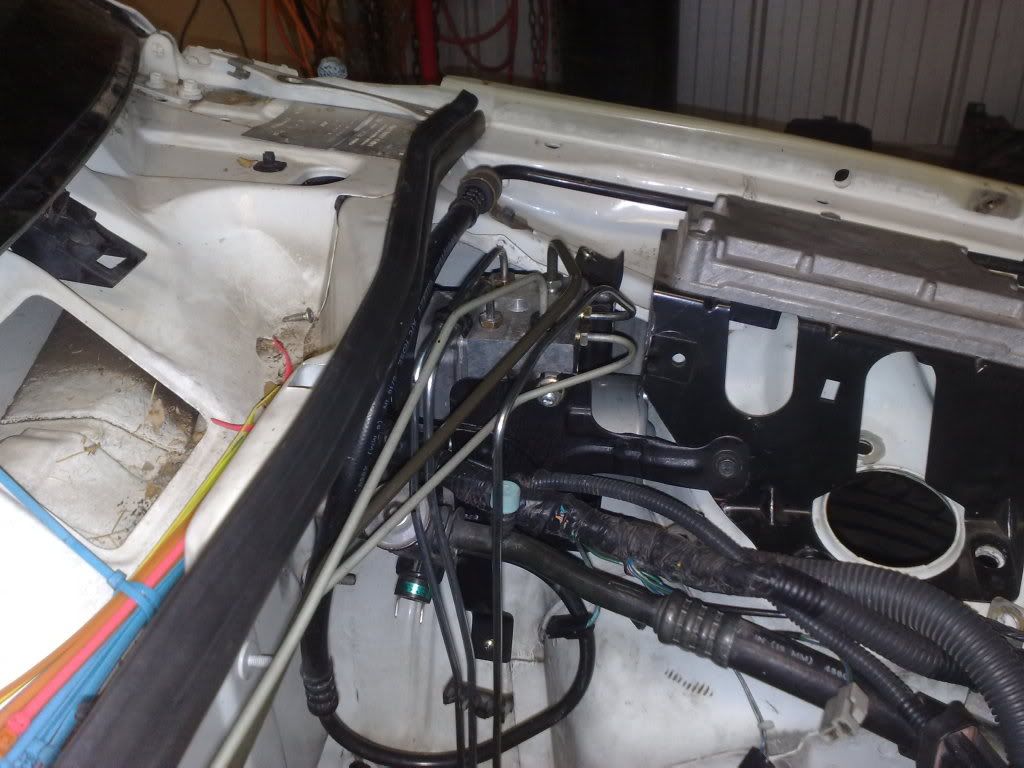 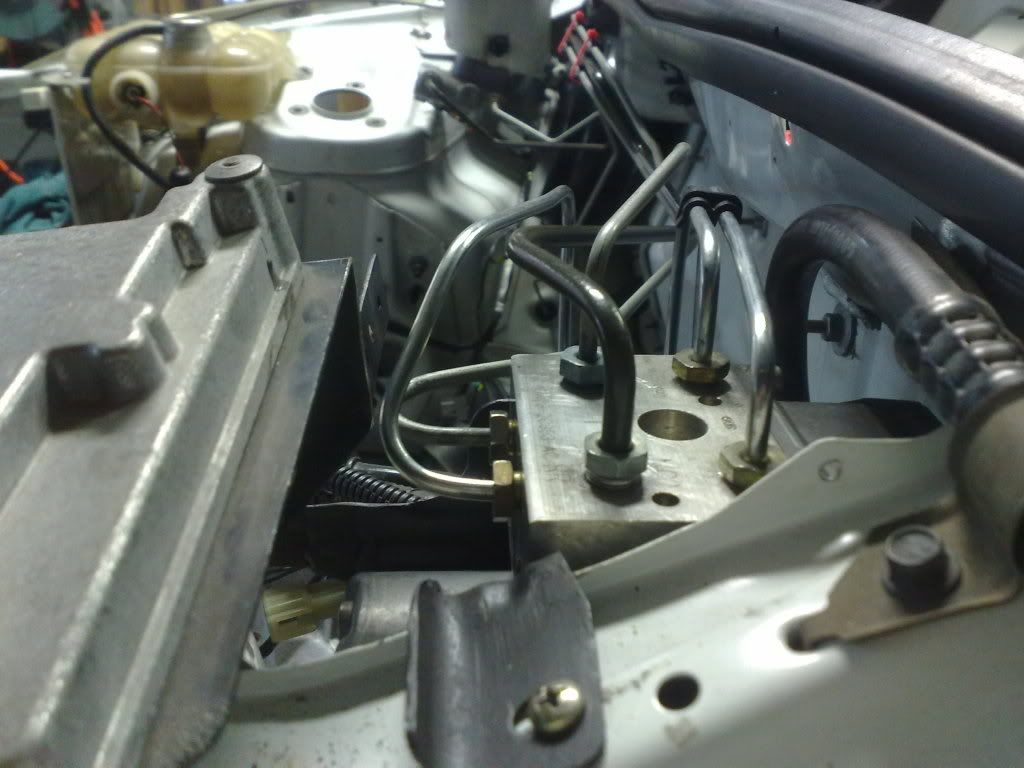 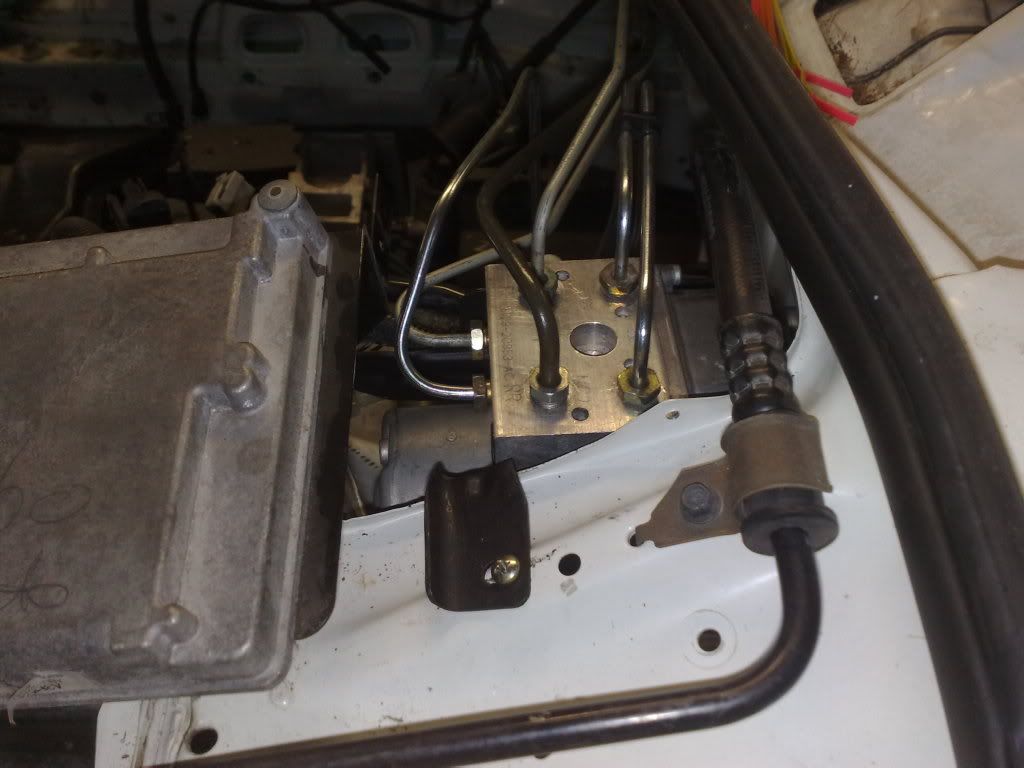 Spent the day trying to find a 30deg double flare tool for doing the join in the rear brake lines, just so happens that of all the tool shops and even the two brake places didn't have one :banghead: So $36 dollars later for a sacrificial pipe flarer and 2 hours spent grinding the right angle onto it i have done the two joins in the engine bay 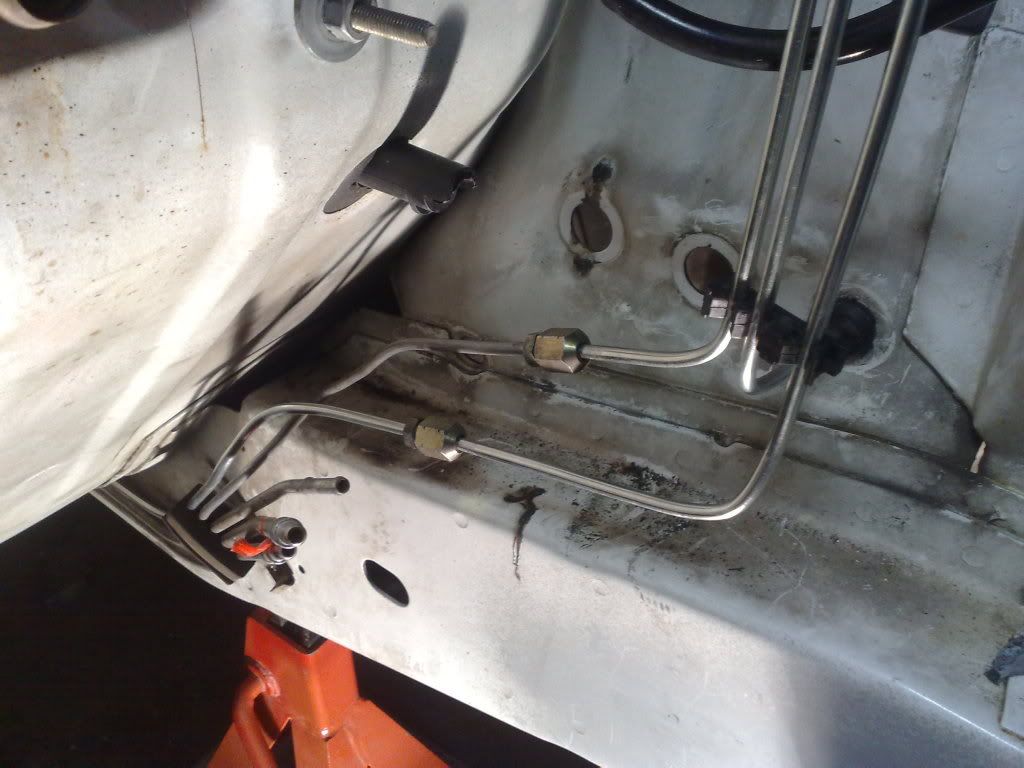 Why is it the little jobs that you think will take an hour tops somehow remove your will to live and bury your face in the concrete. WTF So dam frustrating :banghead: How Scott removes a radiator support 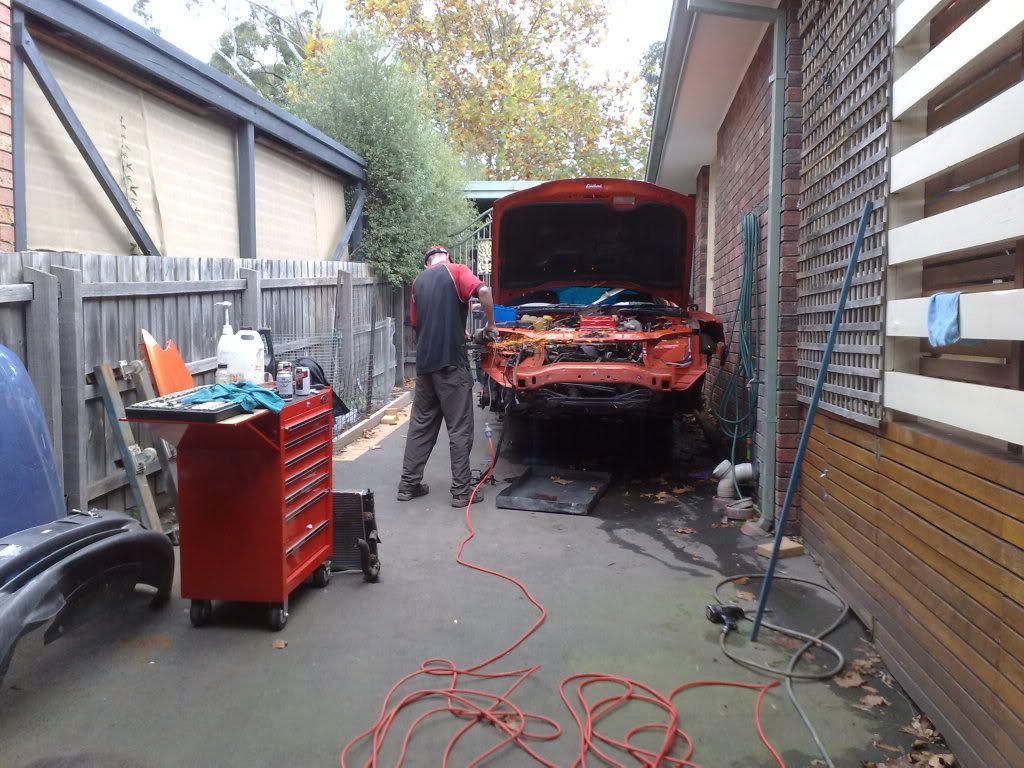 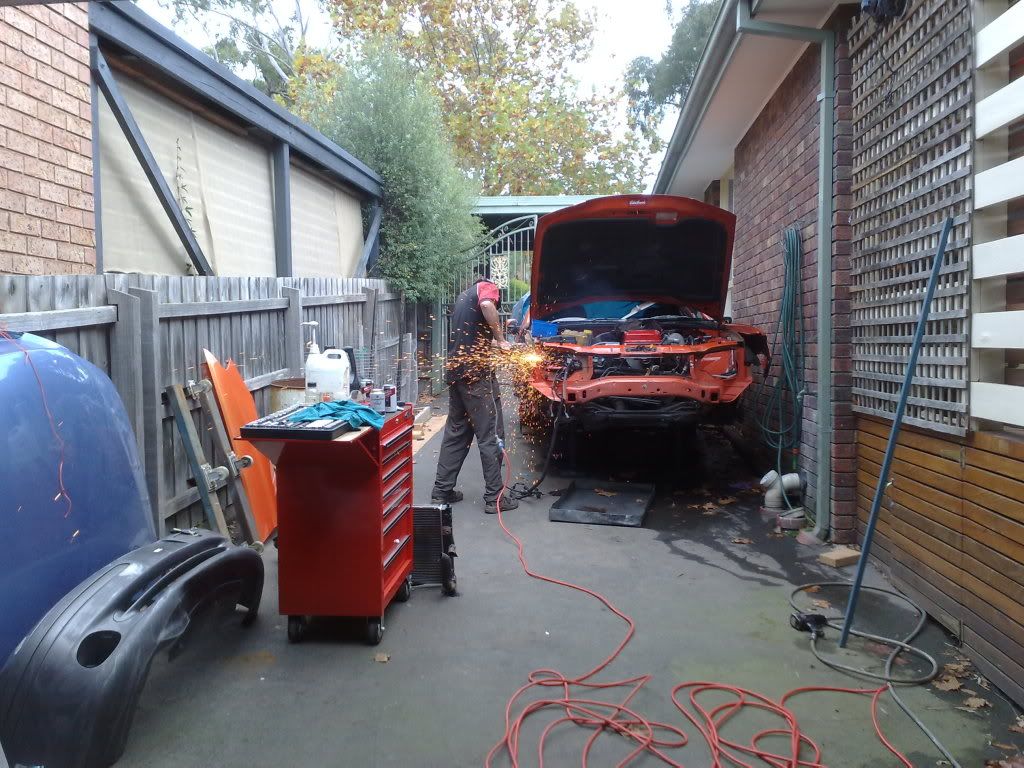 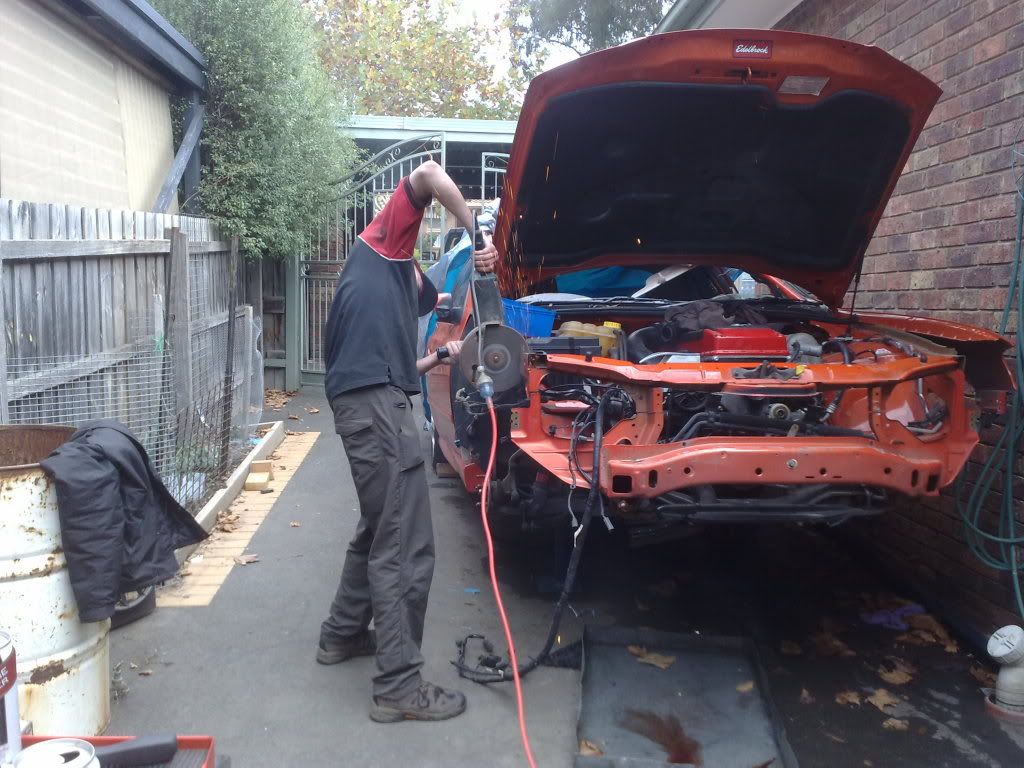 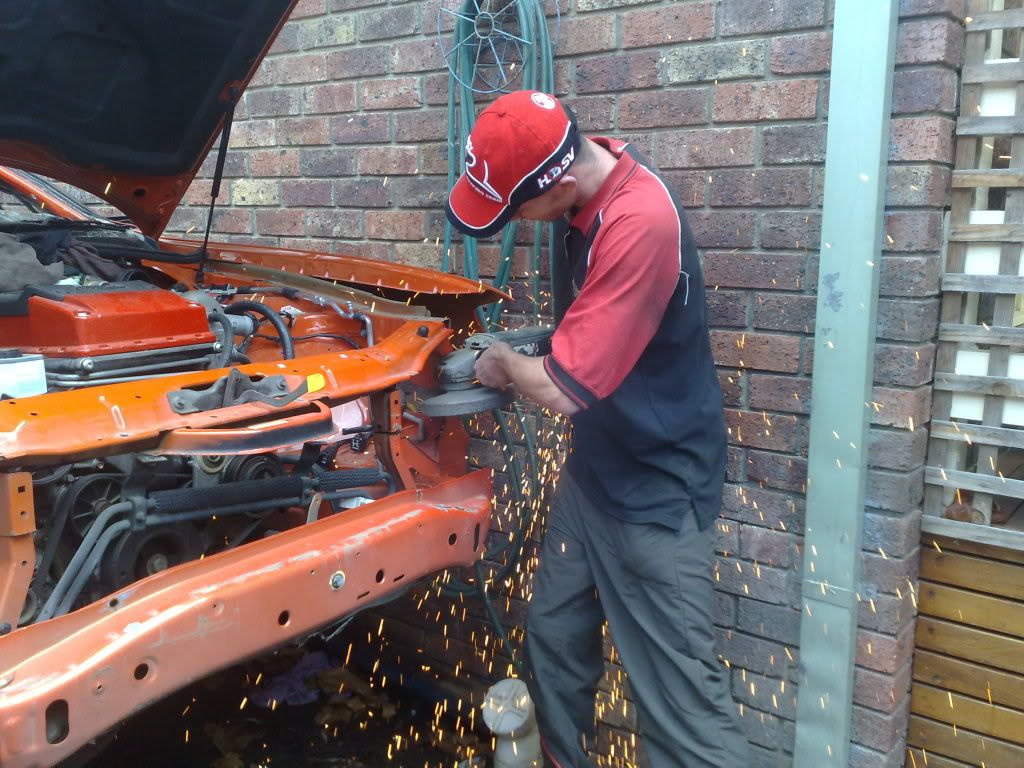 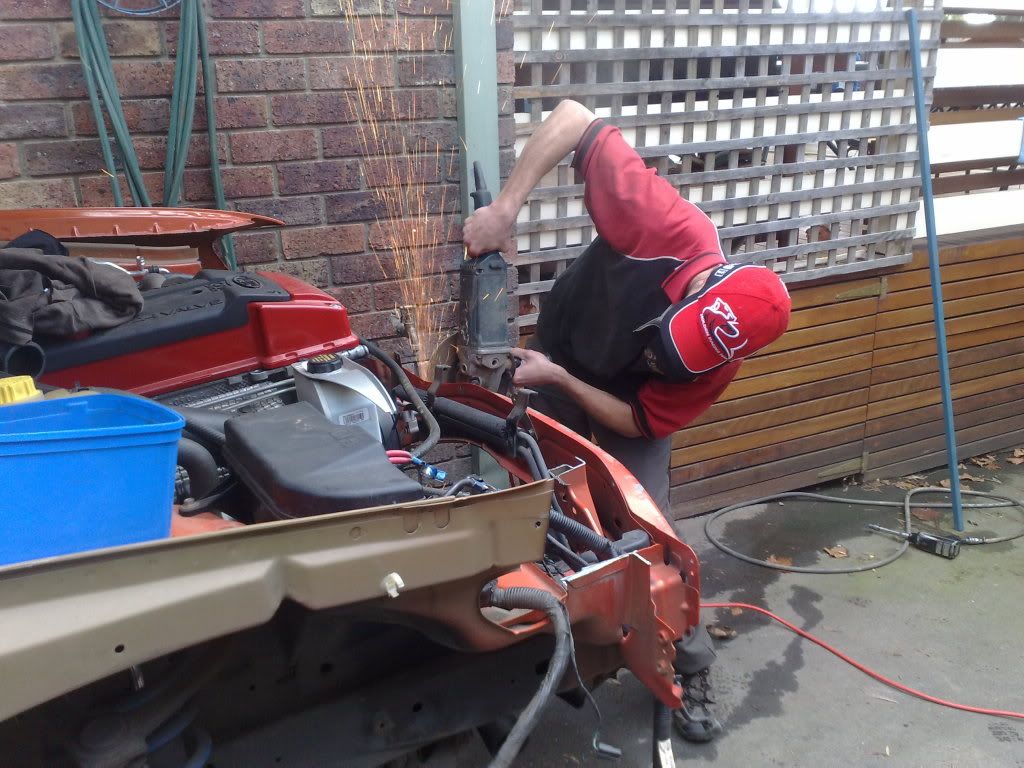 For sale  NOT for sale 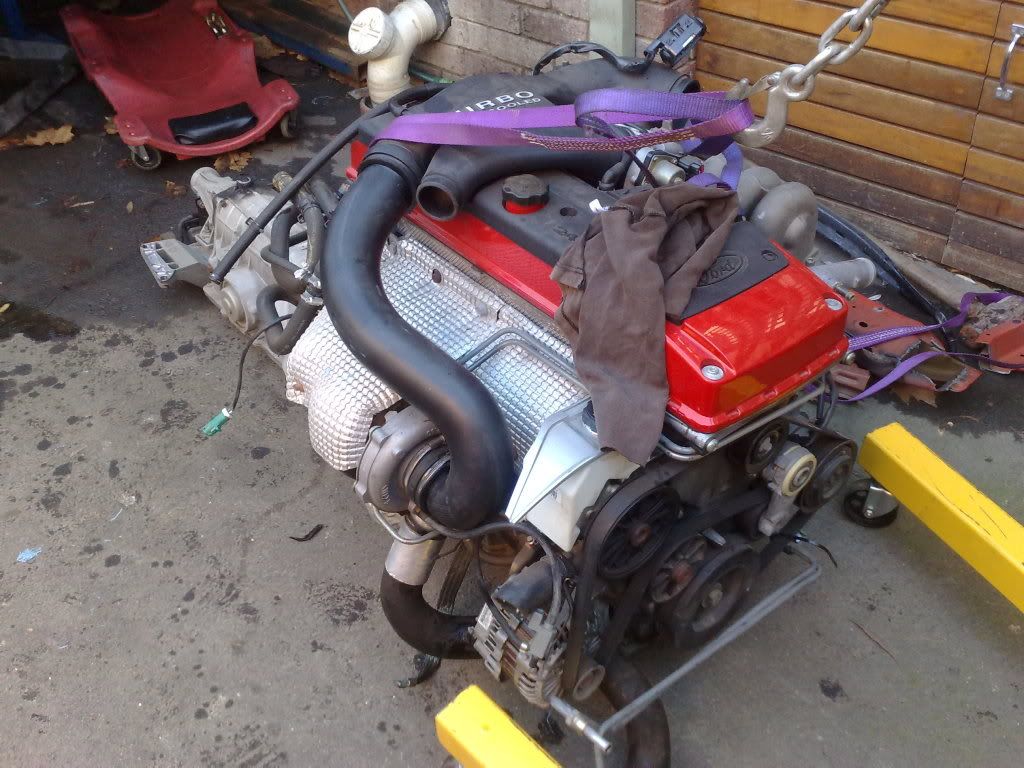 One empty BA engine bay  Left the two kids staring at each other tonight 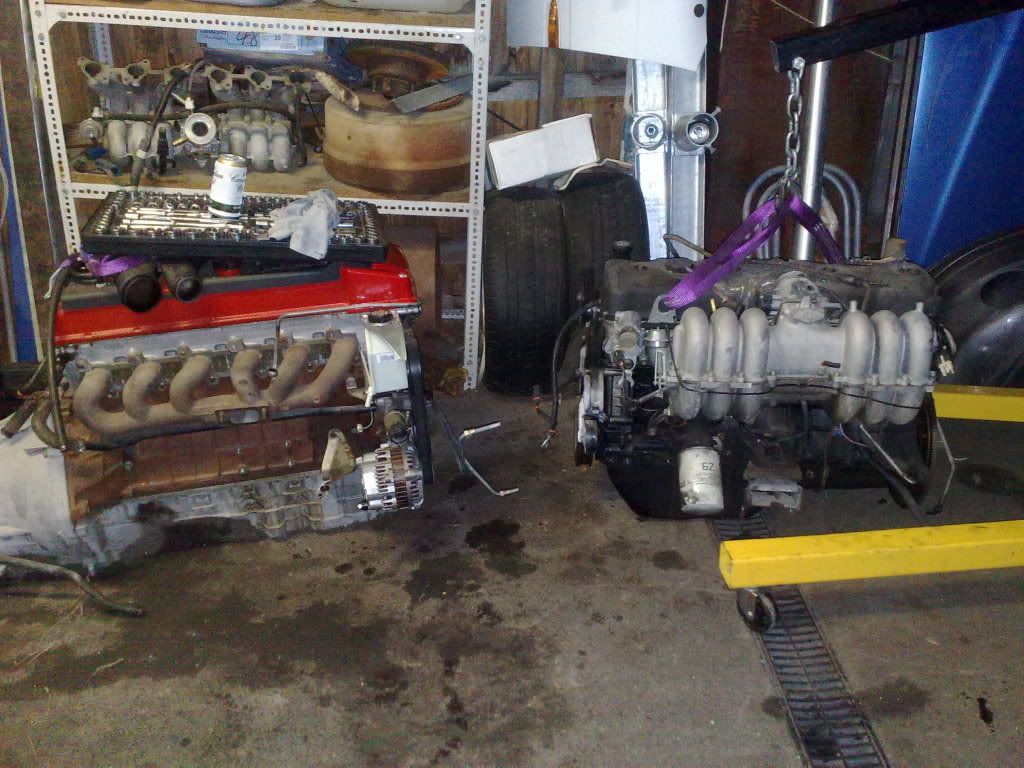 Tonight i had a go at fitting the El heater pipes to the BA motor, The LH pipe clears everything ok but will need the brackets relocated so it's position correctly. 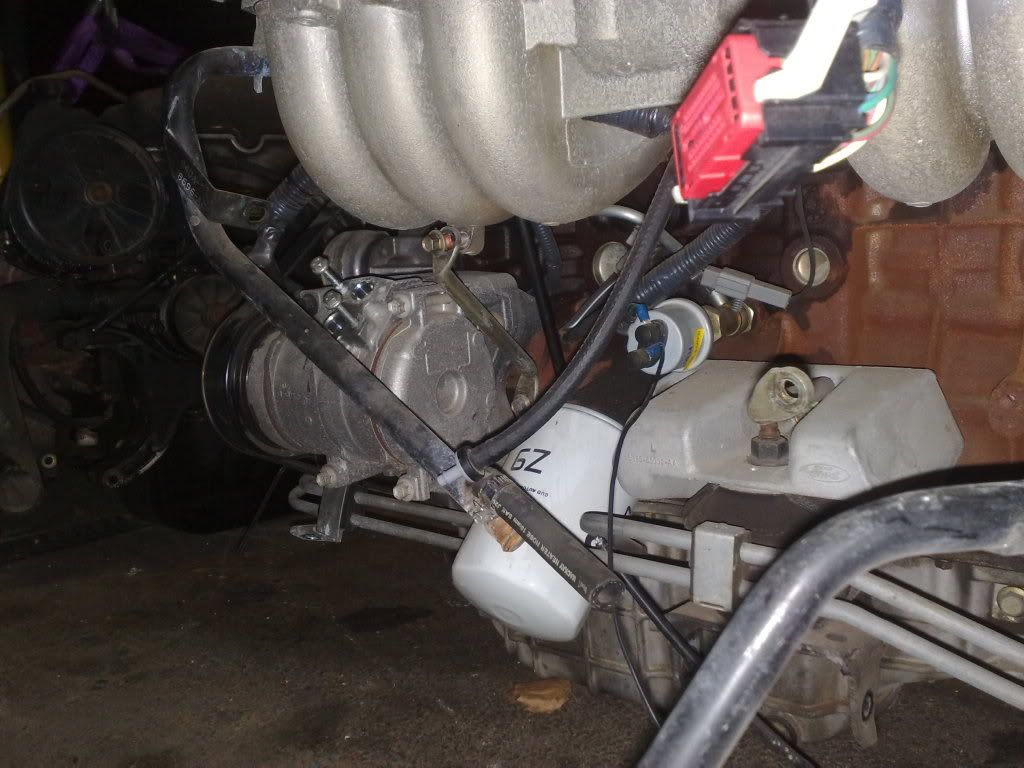 The RH pipe is going to be trouble some, the BA one dips down. 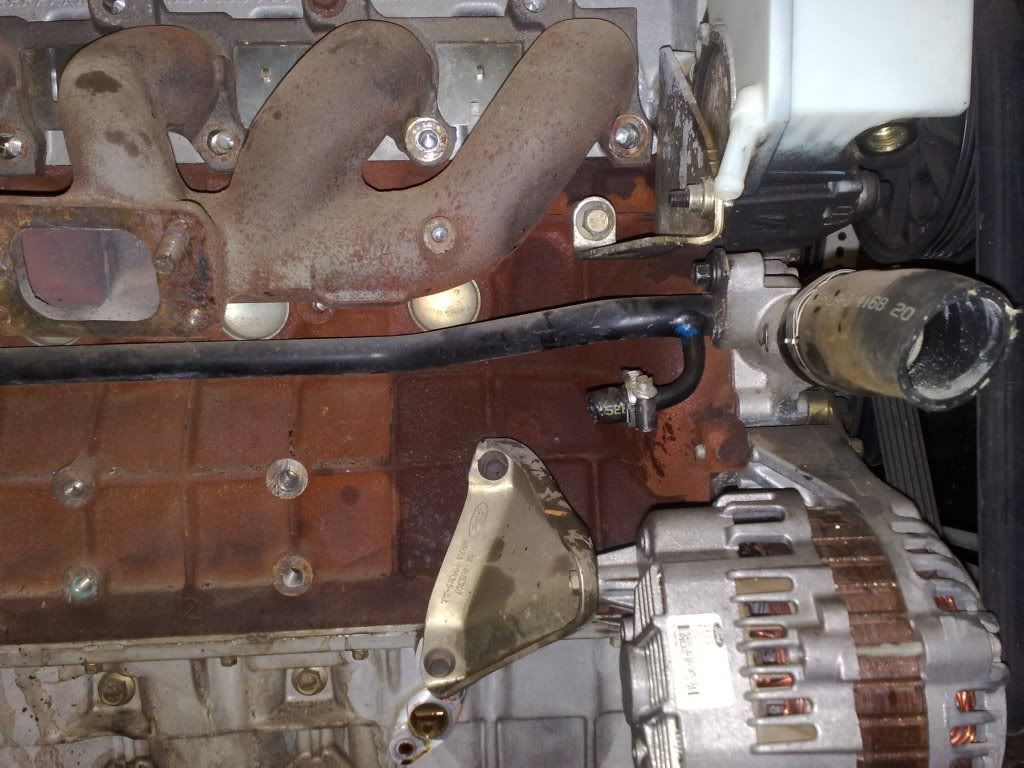 The El one goes up and hits the turbo manifold 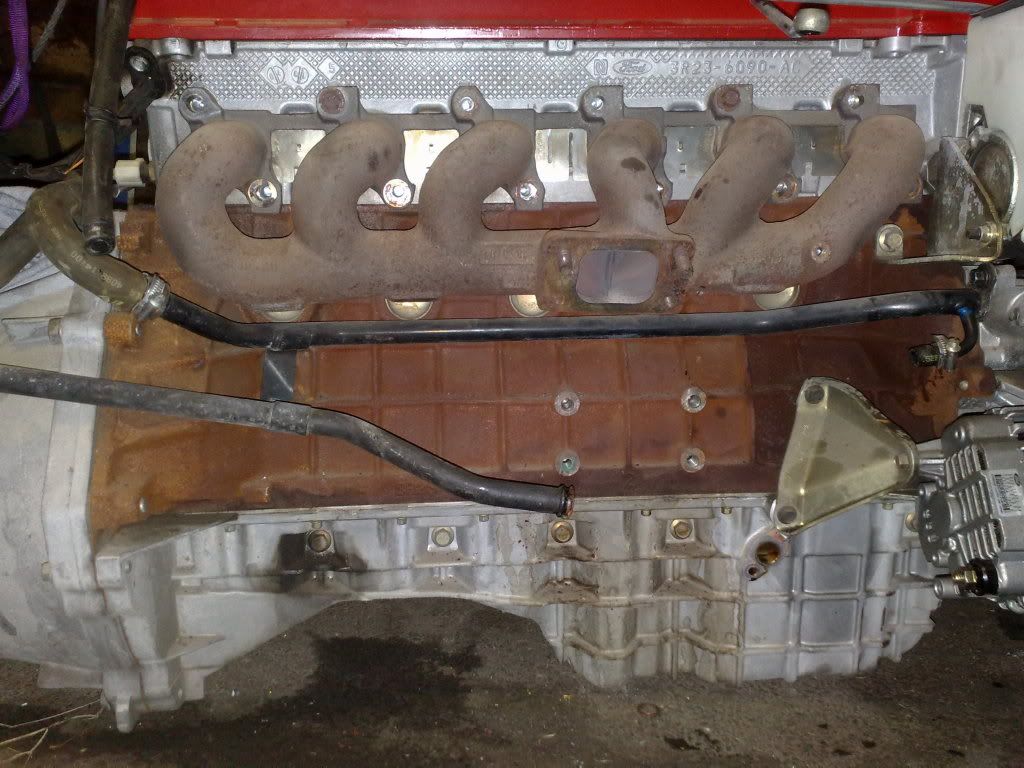 But the bend around the back of the head is ok and the El brackets line up with the BA intake mainfold, So i'm going to try turning using the heater hose bend to join the two pipes together, probably weld the pipes together evenually, not really keen on having rubber hose that close to the exhaust manifold. (but it is heat shielded, CBF factor depending) 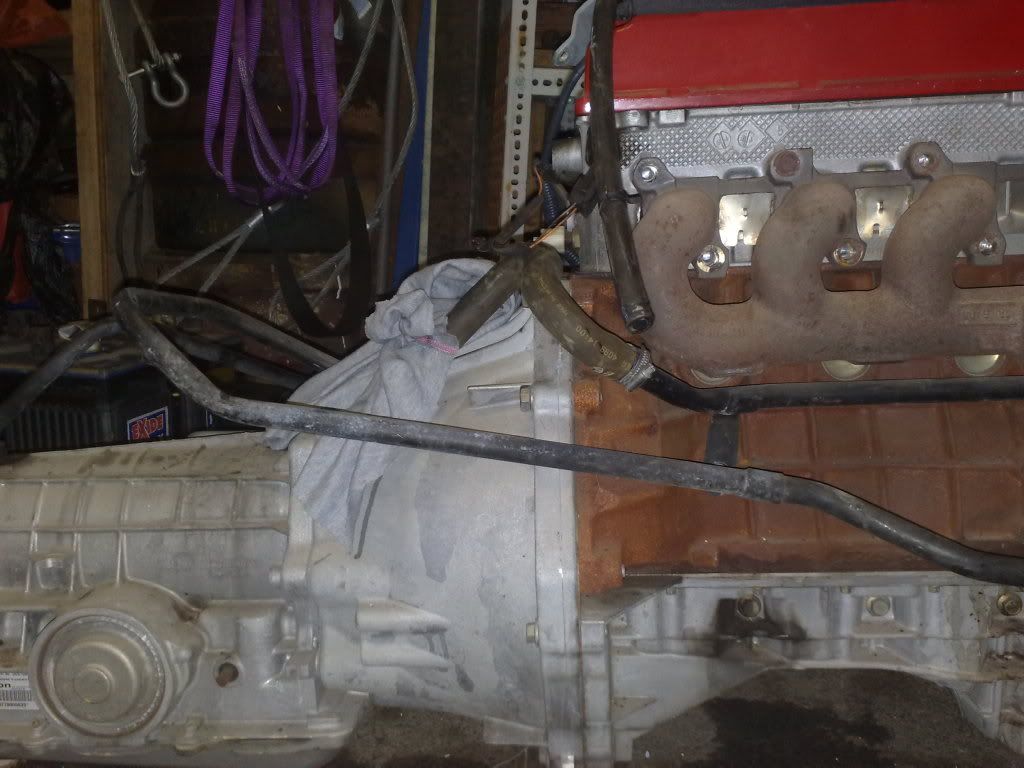 Rant What a c%^t it is to get the turbo and RHS engine mount off, do they really need that bracket between the engine mount and the turbo manifold. Hell truck turbo's are held on by just the manifold and did someone pinch the turbo flange gasket or is that ford bean counters again? And why are all the exhaust manifold bolt loose, why am i missing a turbo nut and stud, WTF end rant So today after work i was curious to see how i was going to run the water pipe for the heater around the back of the head, Using the BA pipe, a short length of heater hose off the EL and a cut down EL heater pipe i was able to run it to the other side. Wasn't too worried about the heater hose near the exhaust because of the heat shielding around the exhaust manifold covers everything. 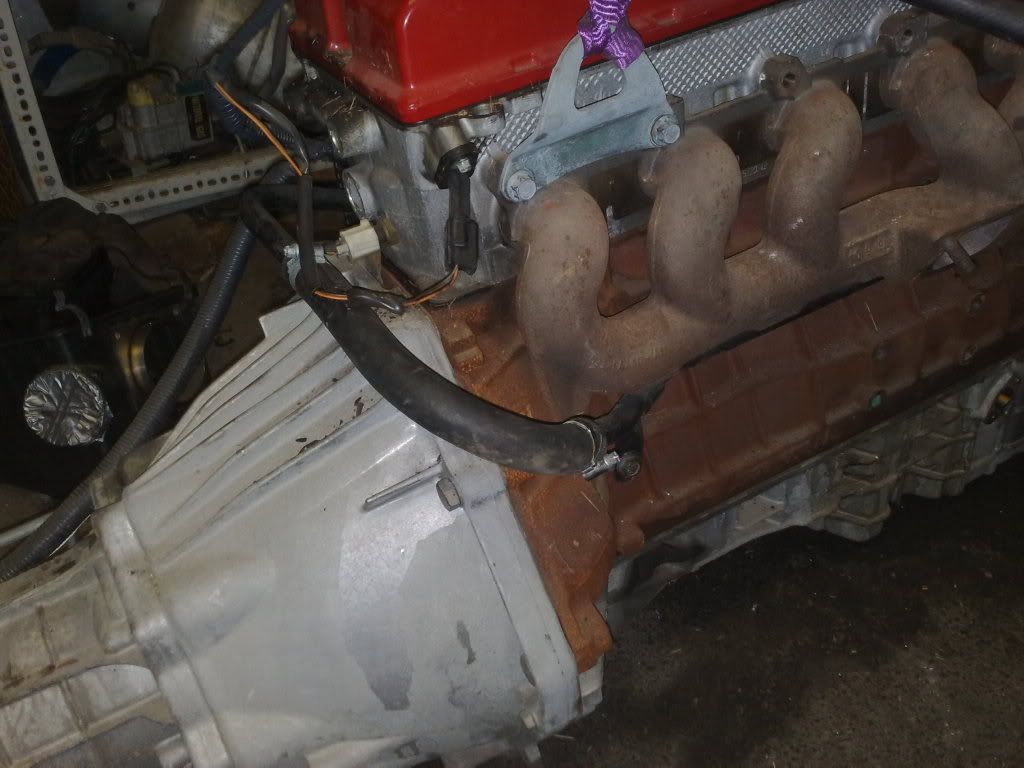  I'm going to bronze the turbo fitting off the BA heater pipe onto the EL heater pipe and that will solve the LH side pipe problem 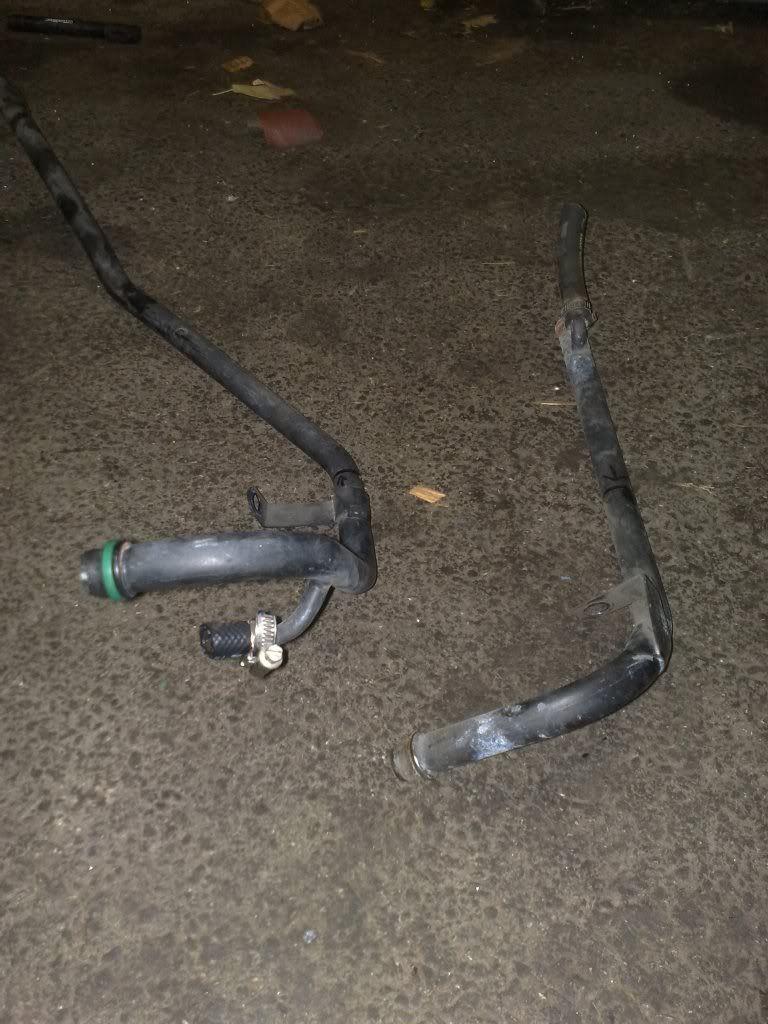 Was so happy that i came up with such simple fixes for the heater pipes i pushed on and did a test fit of the engine in the car Props to the old man for his help 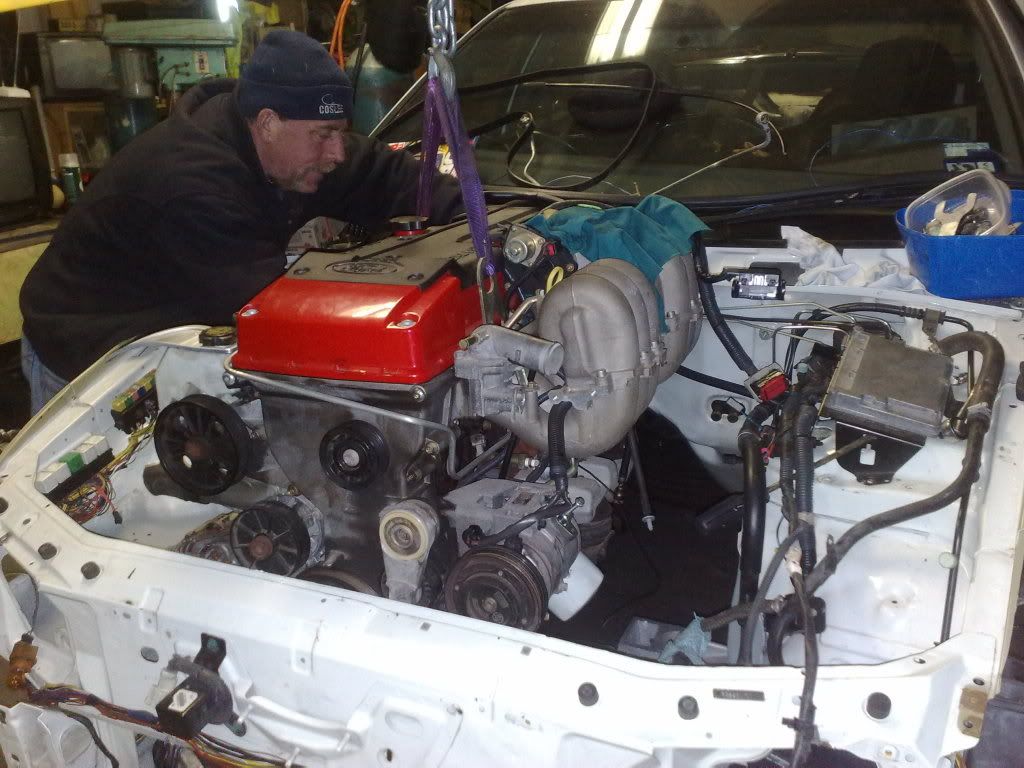 Clearance around the engine 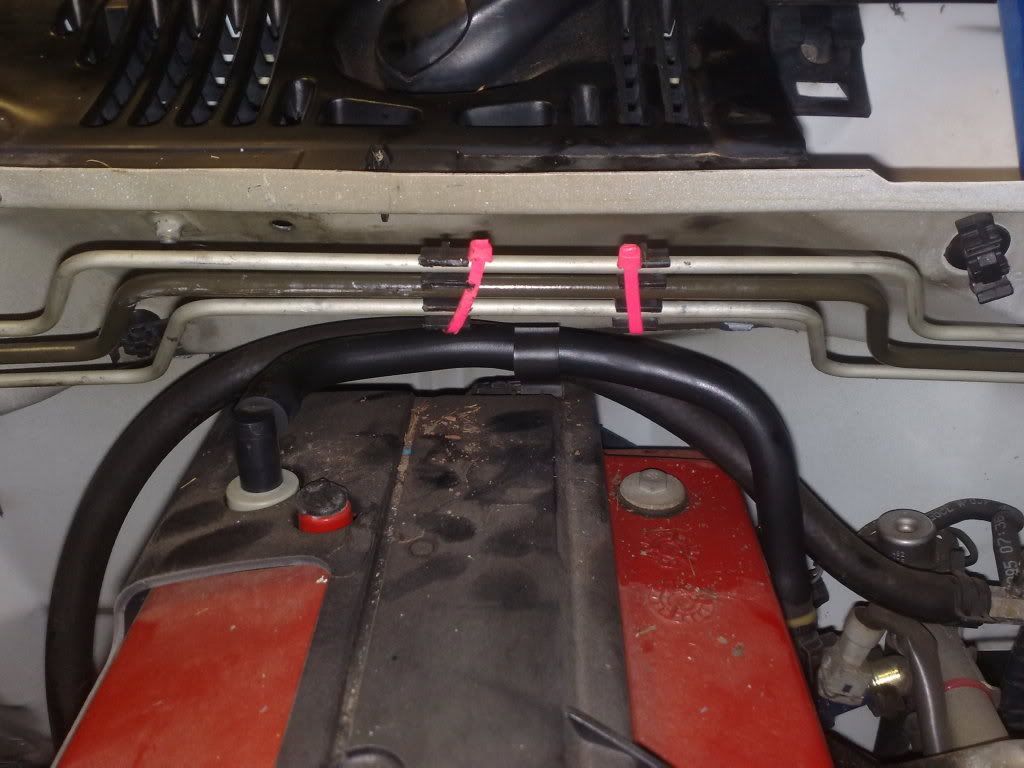 Can fit my hand around the back 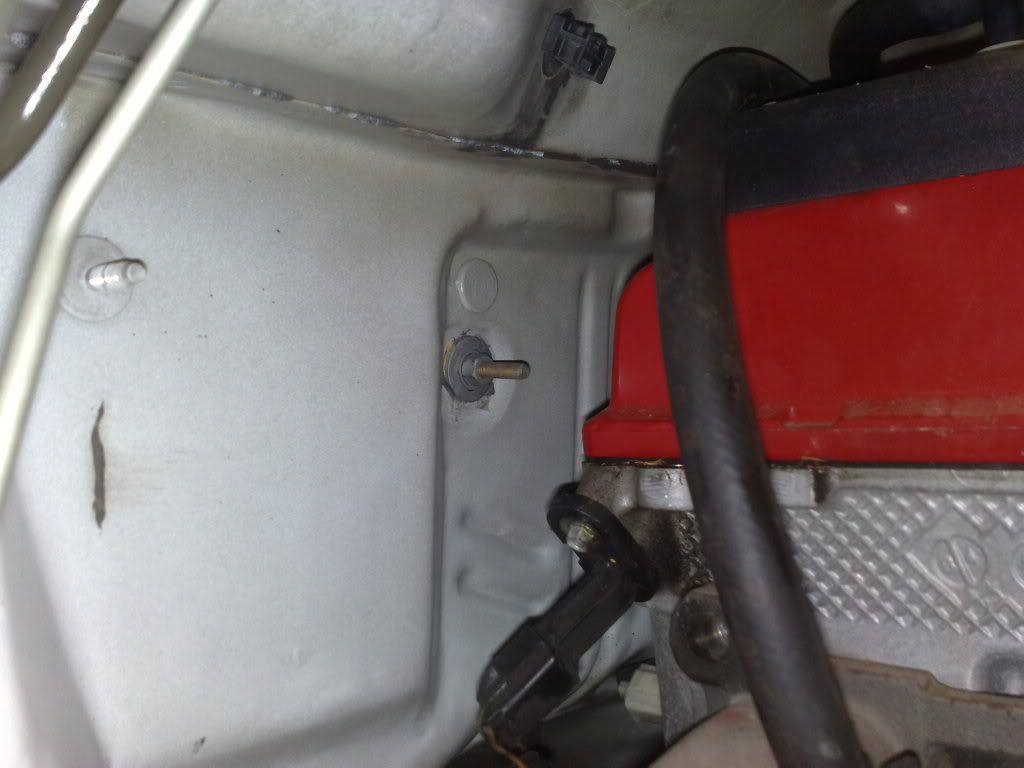 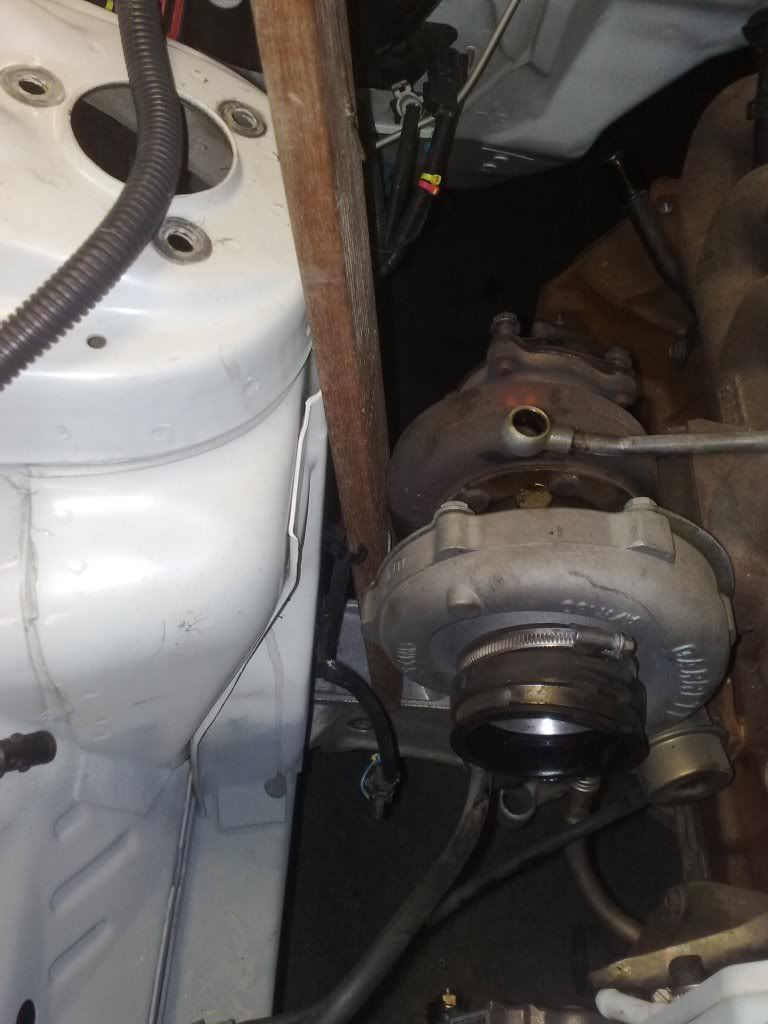 Most of the wiring will be removed from this area so don't mind the mess 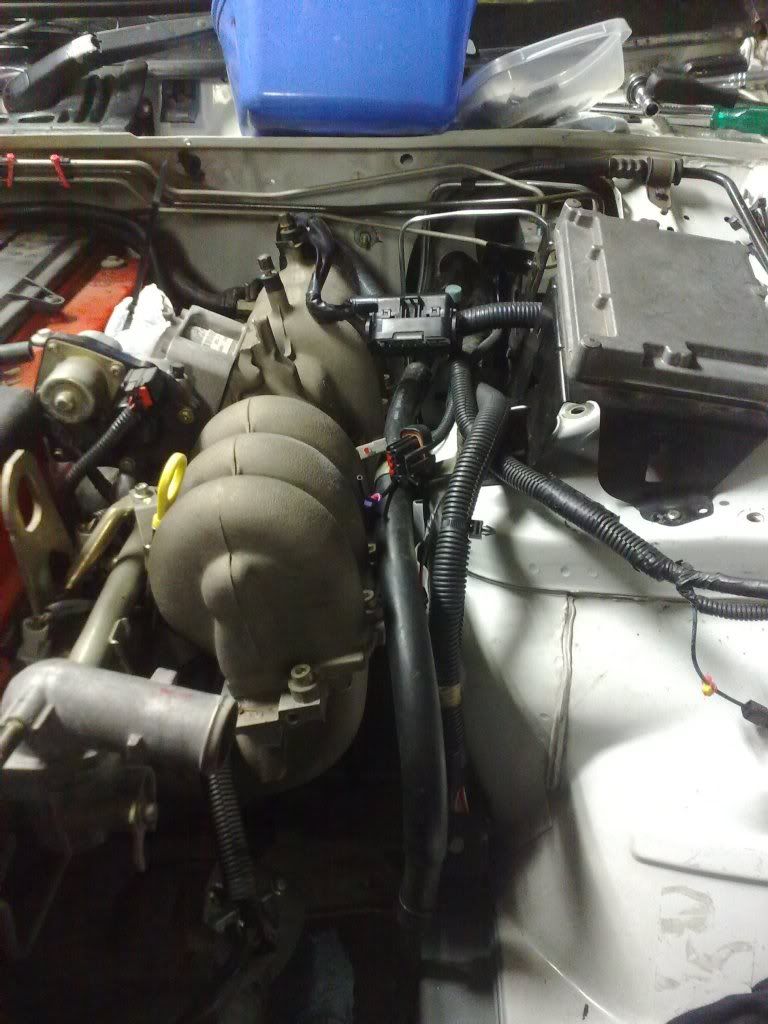 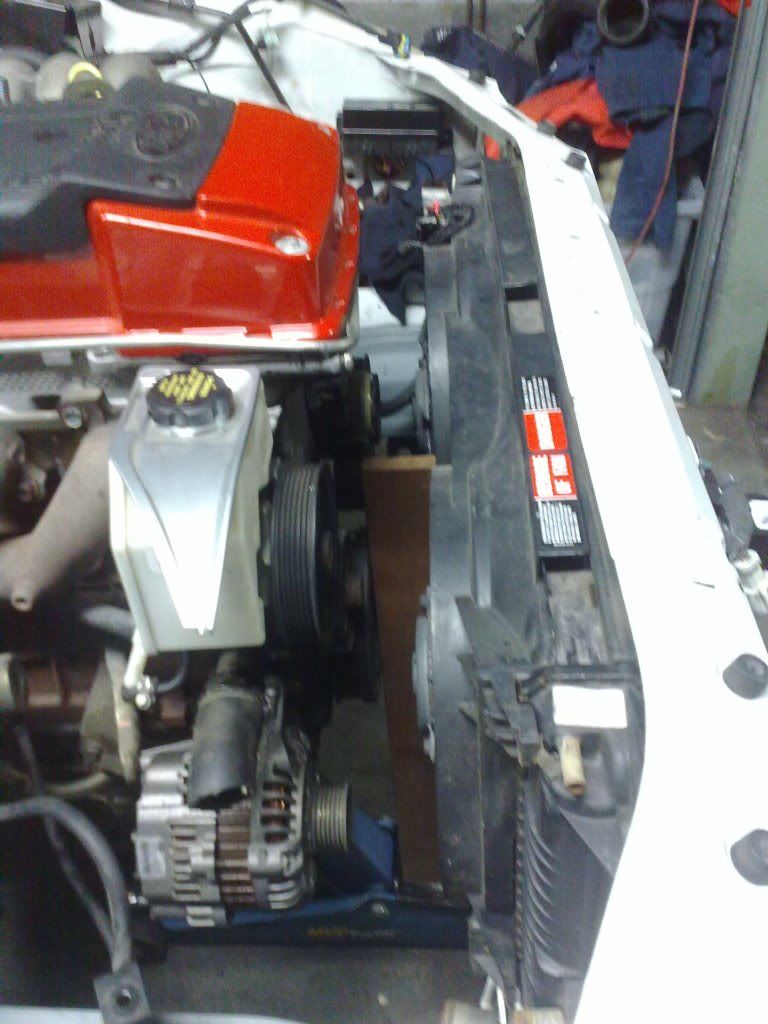 Now little issue with space near the heater pipes but a tight bend should clear everything, guess fitting the crossmember 8mm back has made space a premium at the back 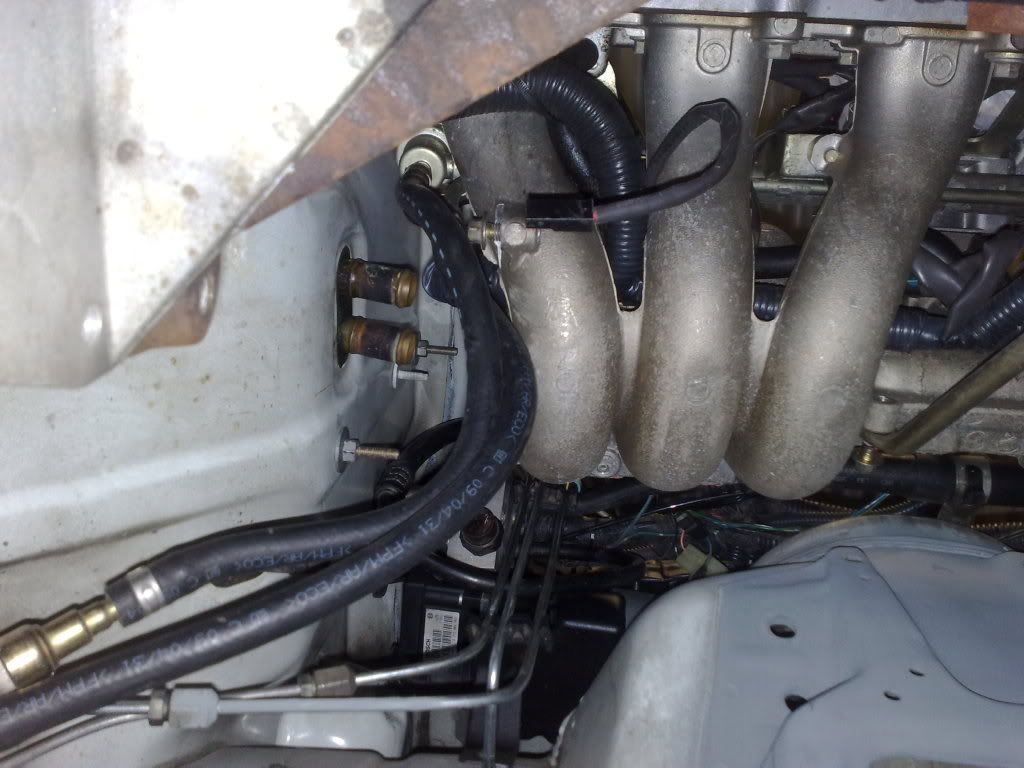 I've been having a good look around the engine and a couple of things i have made the decision to change. One is the brake lines i made, i'm going to have to run them on the otherside of the AC pipe because they are alittle too close to the intake manifold than i would like (when the engine torques up this gap i think will be reduced to nothing Today i stripped the BA of it's cross member bolts and finally mounted the two cross members for the final time Also started working on separating the engine wiring from the vehicle wiring and shorting the ABS wiring, i need to cut out about 1.5m of the ABS wiring because the unit is no longer under the left guard. Fun times ahead Cheers, Anthony
_________________ I enjoy the symphony of mechanical harmony, |
|||
| Top | |
|||
| bbqburner |
|
|||
|
Well today since i had a bad case of the CBF's, i did the only thing that felt reasonable. I pulled a sicky
After painting the rear floor brace i fitted up the IRS again but for the final time i think, can't think of any reason to pull it out anymore, as fun as it is having it balancing on a jack while trying to line up all the bolt holes 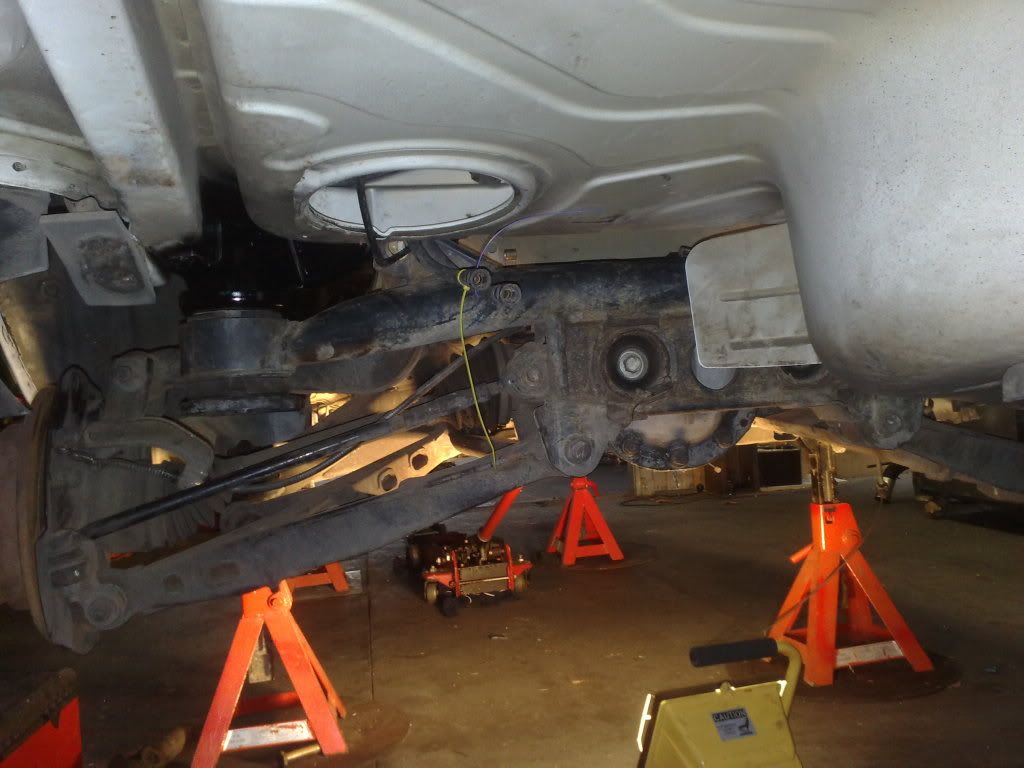 Then i threw in a auto i had lying round the place to align the engine and give me a measurement of where i need to place the t56 output shaft when i build my rear crossmember. 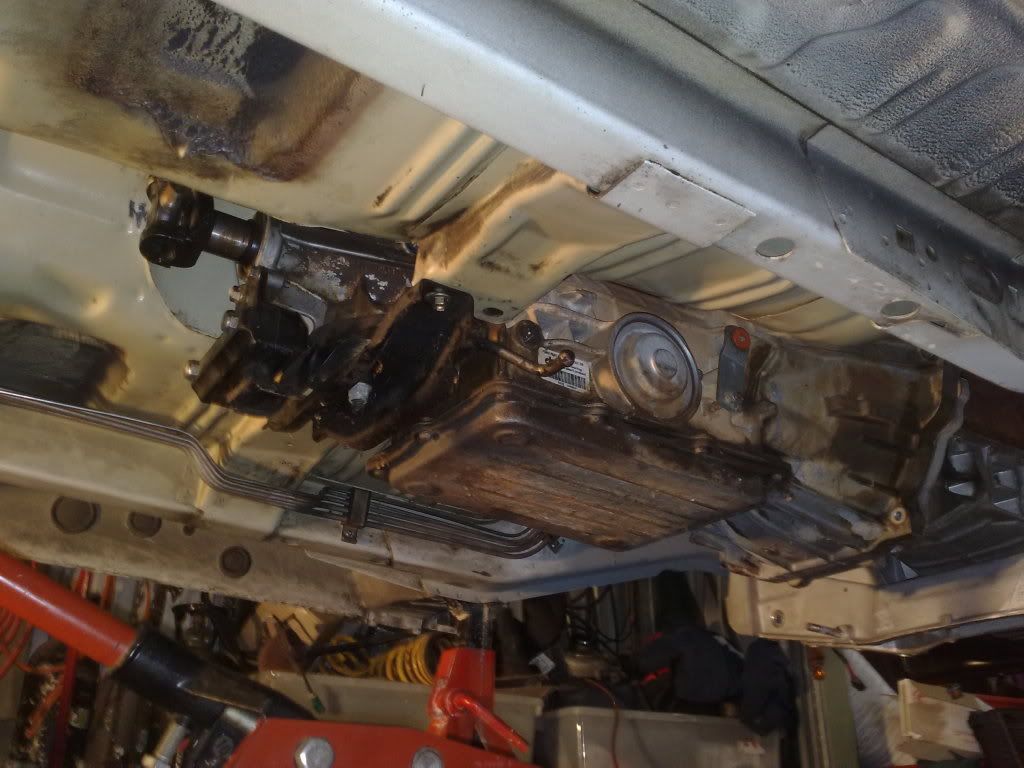 Fitted a bonnet on it and shut it............yer it hits. So i cut out the usual section and now have some space over the engine. Which makes me curious how much space i would have had, had i not space the k-frame 6mm down. 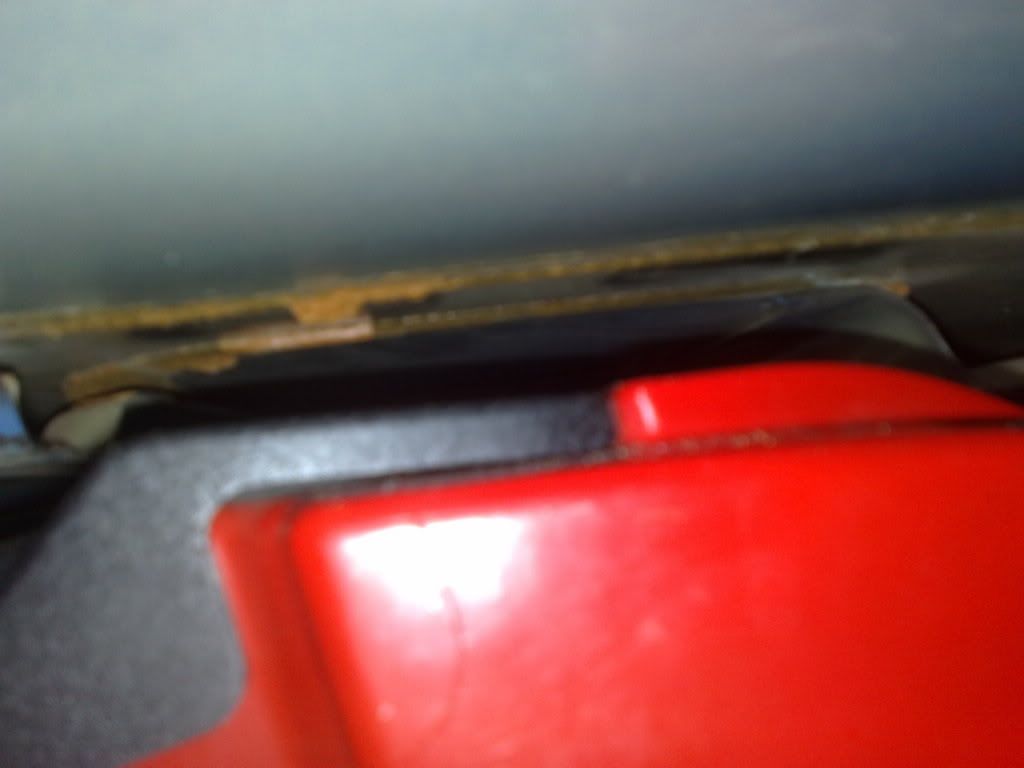 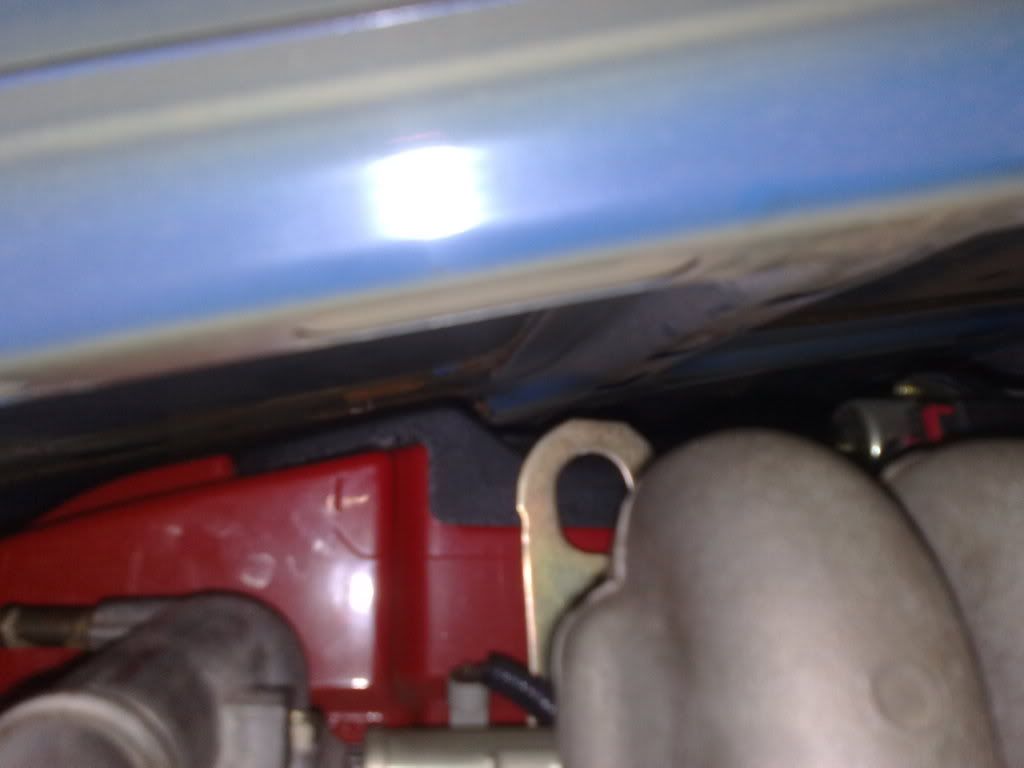 Now one thing is the ECU, It looks like ford already started to indent the bonnet but just not enough. Think I'll notch out the bonnet support a little more, or i could make a slightly shorter ECU mounting bracket. :scratch: 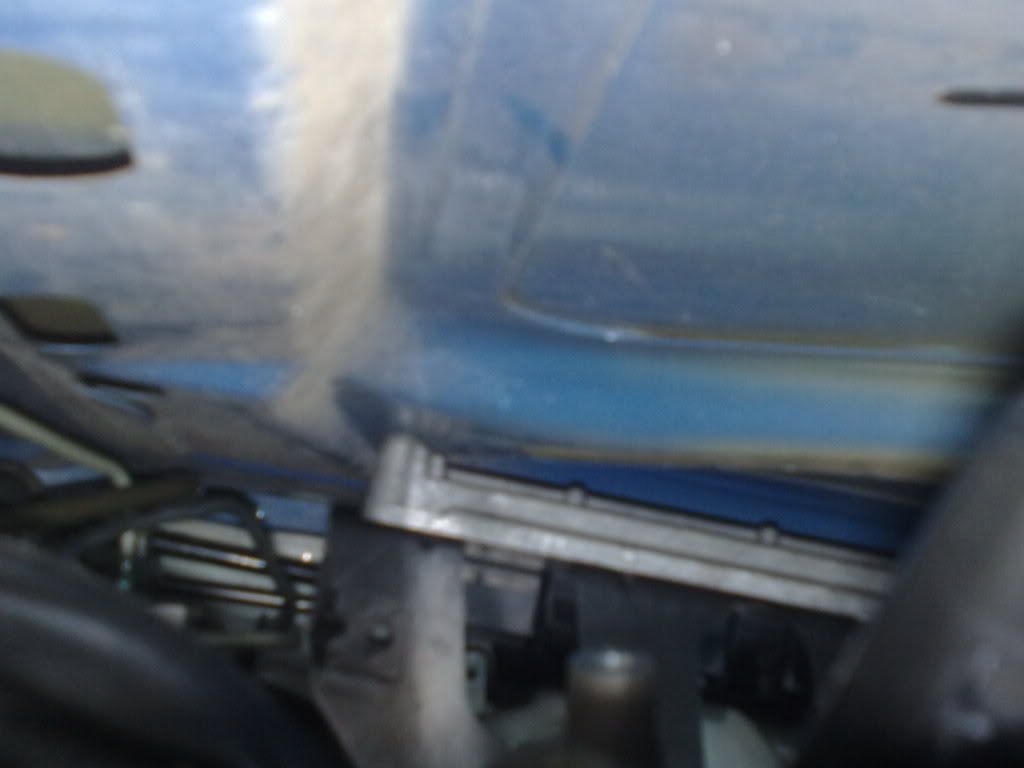 Otherwise the BA brake booster and master fits perfectly, the brake lines and the ABS unit have plenty of clearance too 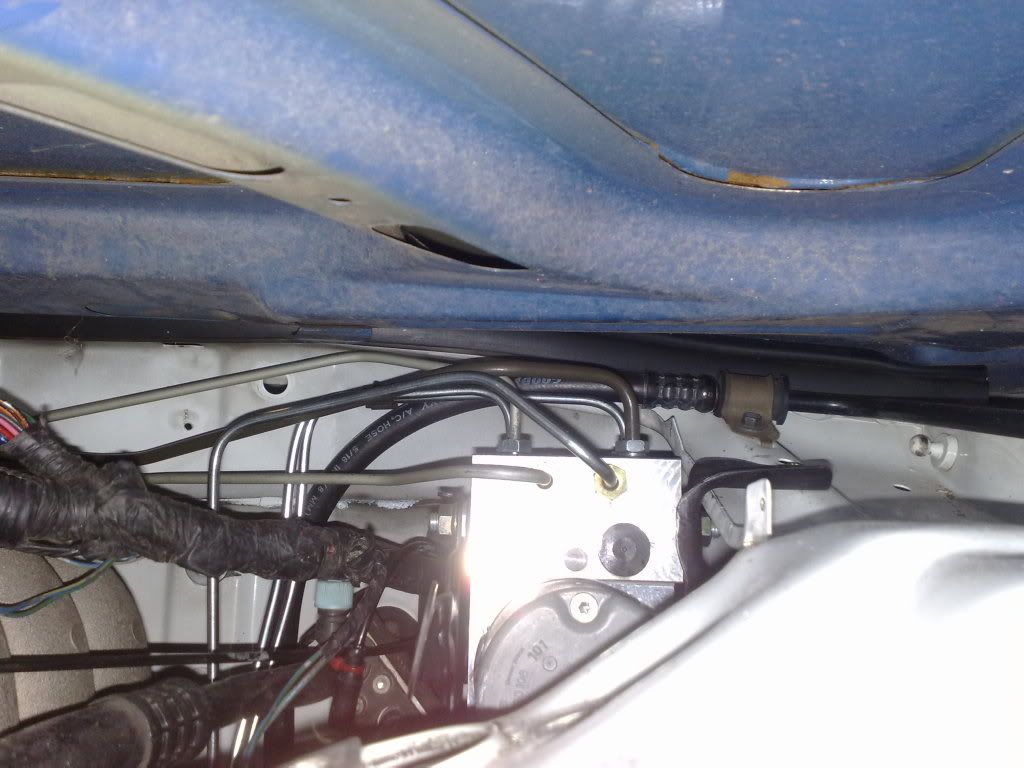 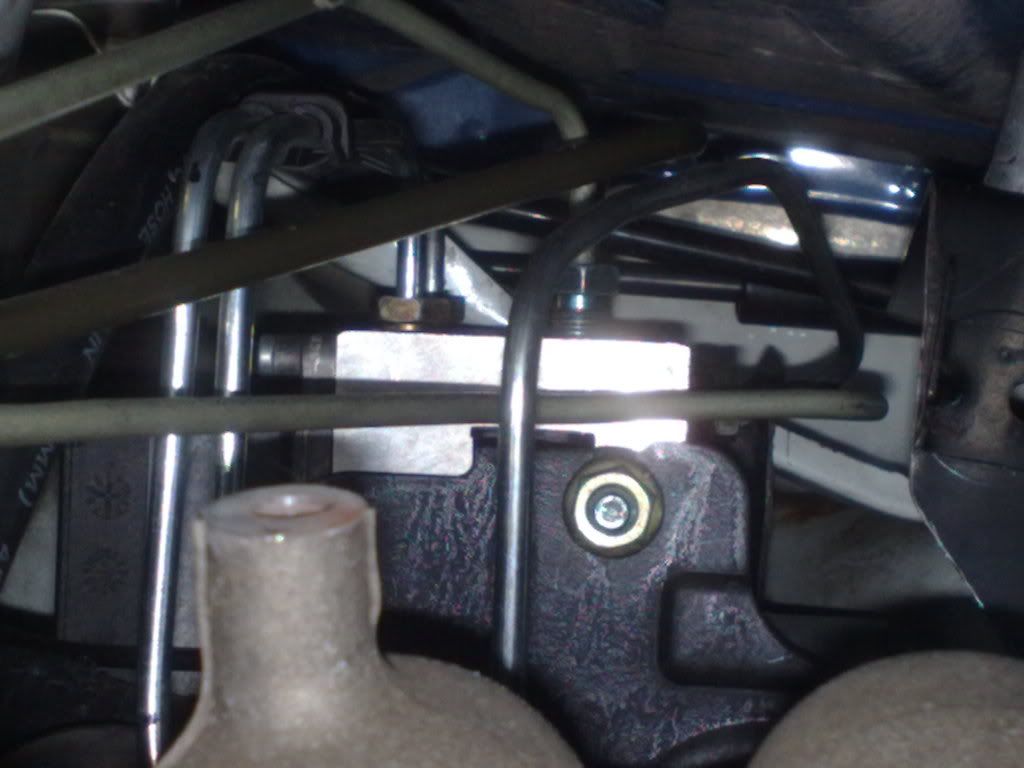 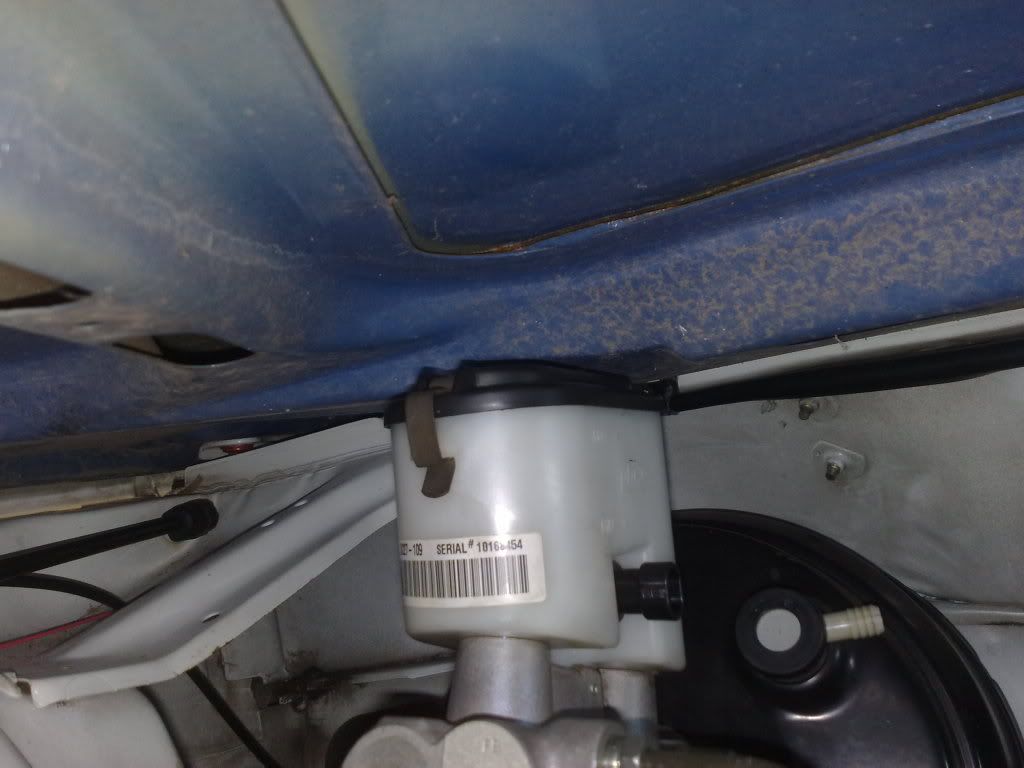 Cheers, Anthony BROCKYB8, i trimmed 5mm off the BA PCM bracket yesterday to fit it under the bonnet. Look plenty of space, blue tack proves it  Everything is going to be a tight squeeze around the top and I'll probably be trimming out another bonnet cross-member to fit the cooler pipping in. Or I can spend the $1662 for a FG Turbo intake plenum, it would make the pipping shorter and easier to run. Need to visit Archie and see if he'll allow a manifold change without me having to go through a emissions test. Here's a pic of the FG turbo intake manifold, has a centralized throttle body that points up, much simpler cooler pipping routing 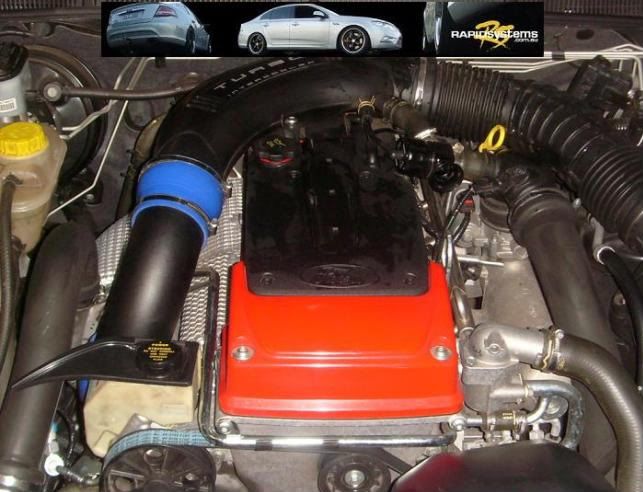 Cheers, Anthony
_________________ I enjoy the symphony of mechanical harmony, |
|||
| Top | |
|||
| tony.martin11 |
|
||
|
Far out anthony! Someone isnt wasting their time... I actually like your work and cant wait to see pics and videos of it all running
_________________ BANNED USER |
||
| Top | |
||
| bbqburner |
|
|||
|
Well to day i got to spend sometime chatting with Owen about a few of the issue i was having and the fixes he has created to get around them, really helpful and having a conversion in progress it was good to look at all the bits that go into it. I'll be heading back there next Friday, Owen has offered to take me for a spin in his EB :yahoo:
Spent the last few hours of the day pulling the auto out after getting my output shaft height and fitting the T56 up. For those that don't know a T56 is a heavy F%*ken gearbox to put in by yourself, i think i prefer putting in the AU IRS It's just resting against the car, had to give my crampy hand a break after balancing the T56 and using my feet to pump the jack 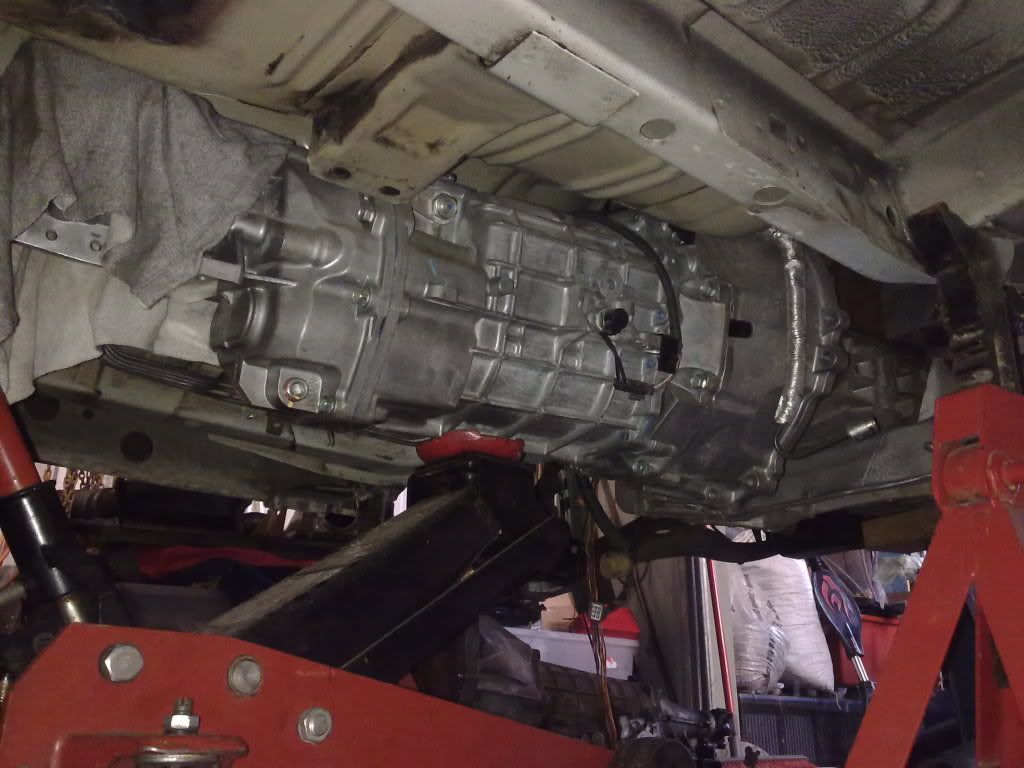 The difference in length and the gap that needs to be made up with a custom gearbox mount 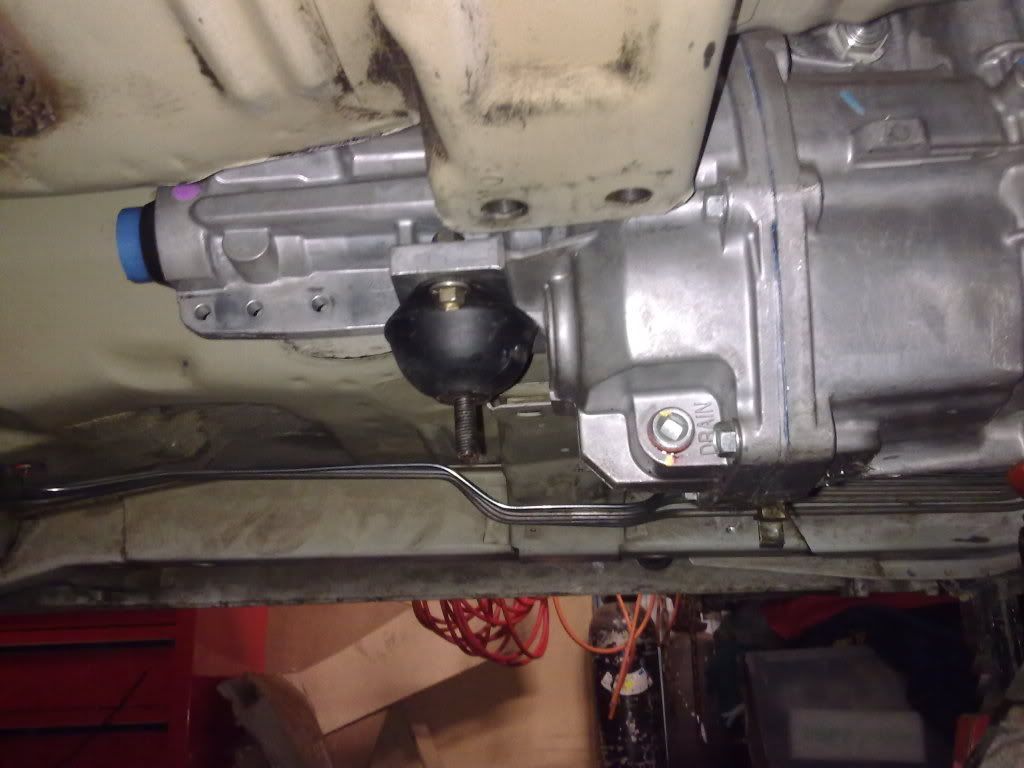 Said gearbox mount progress 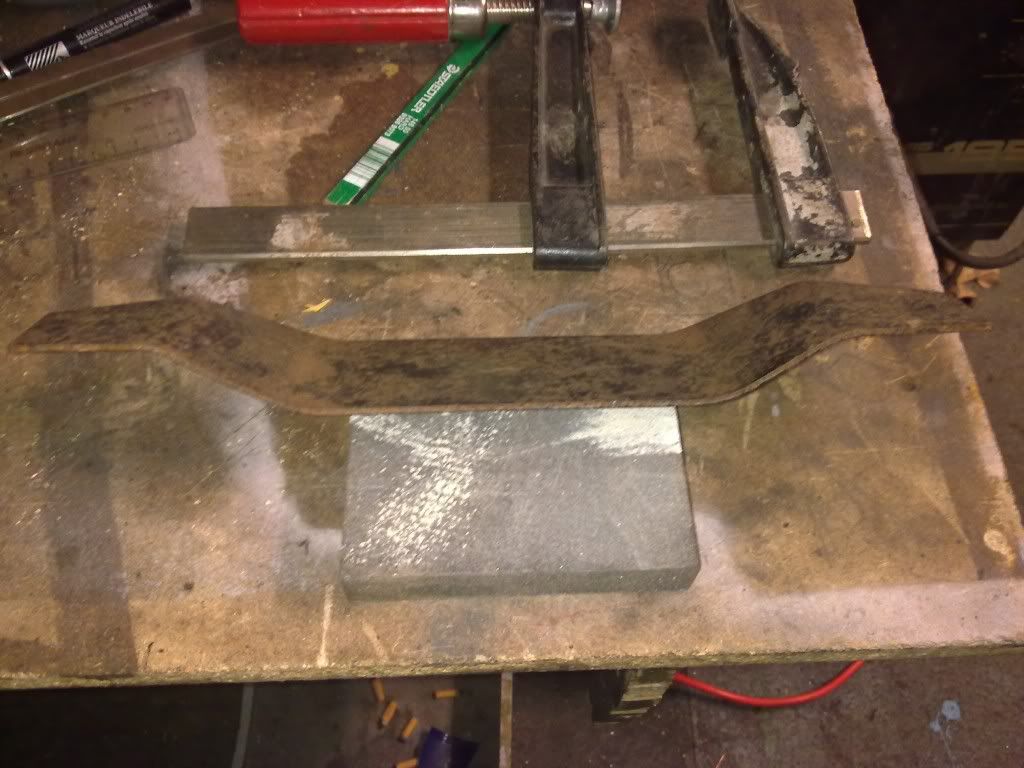 And the usual, this is how far back the hole needs to go 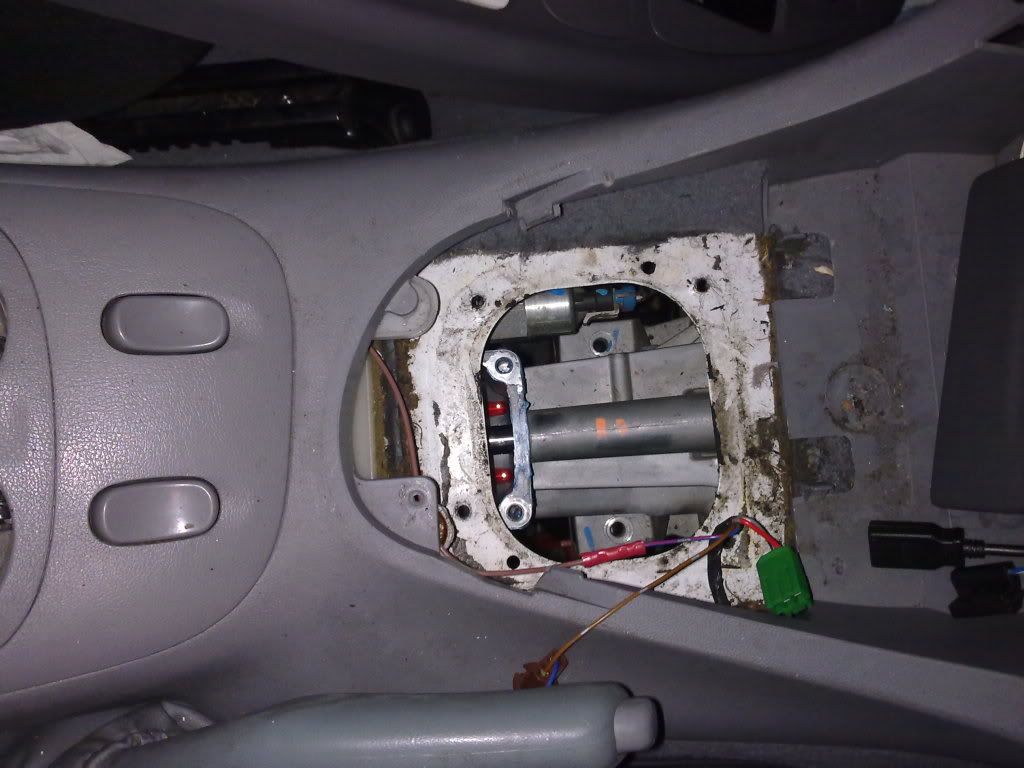 Cheers, Anthony Bit of progress on the gearbox crossmember. Still needs more work. 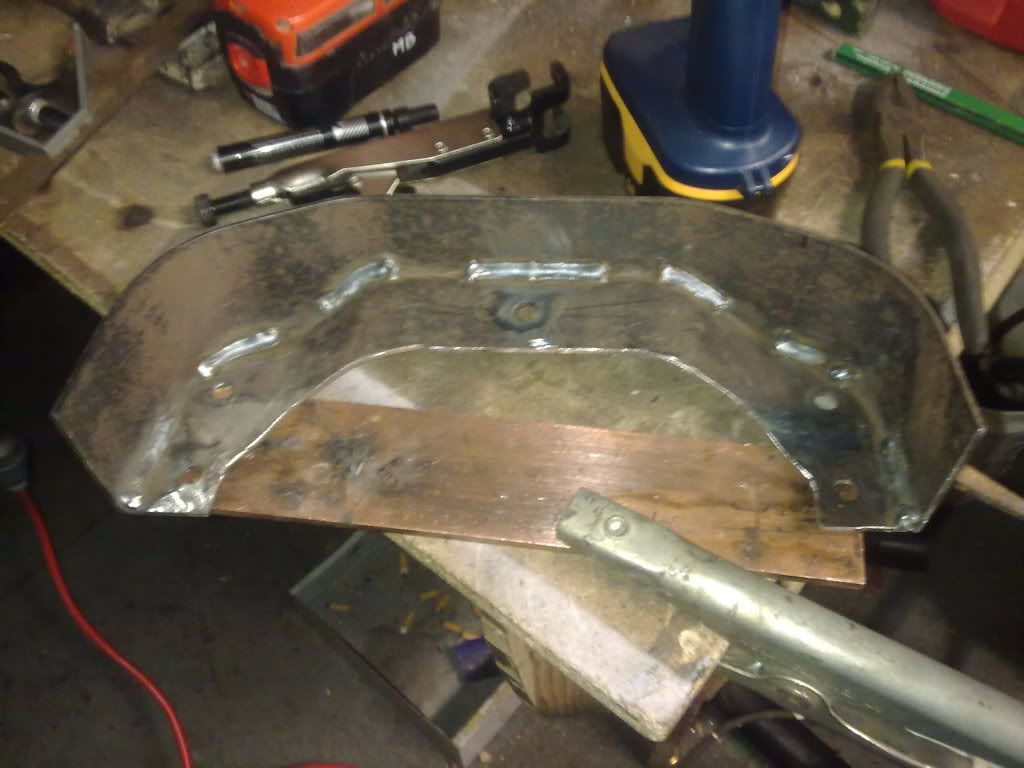 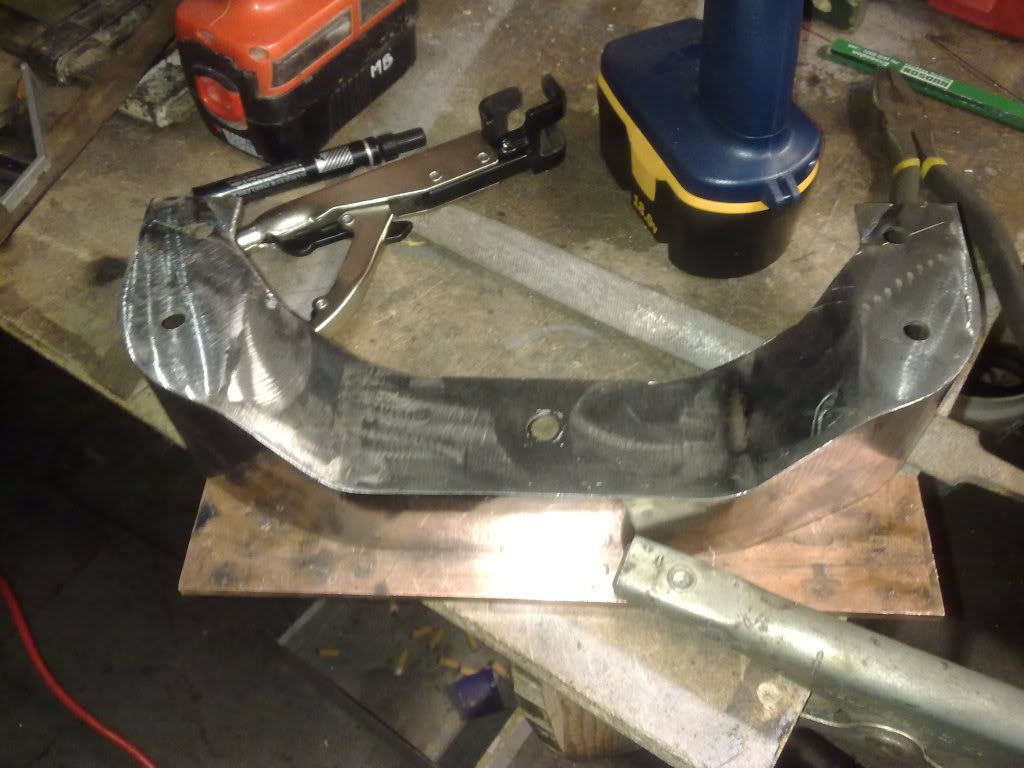 Left it like this tonight, didn't budge when i sat the gearbox weight on the crossmember. 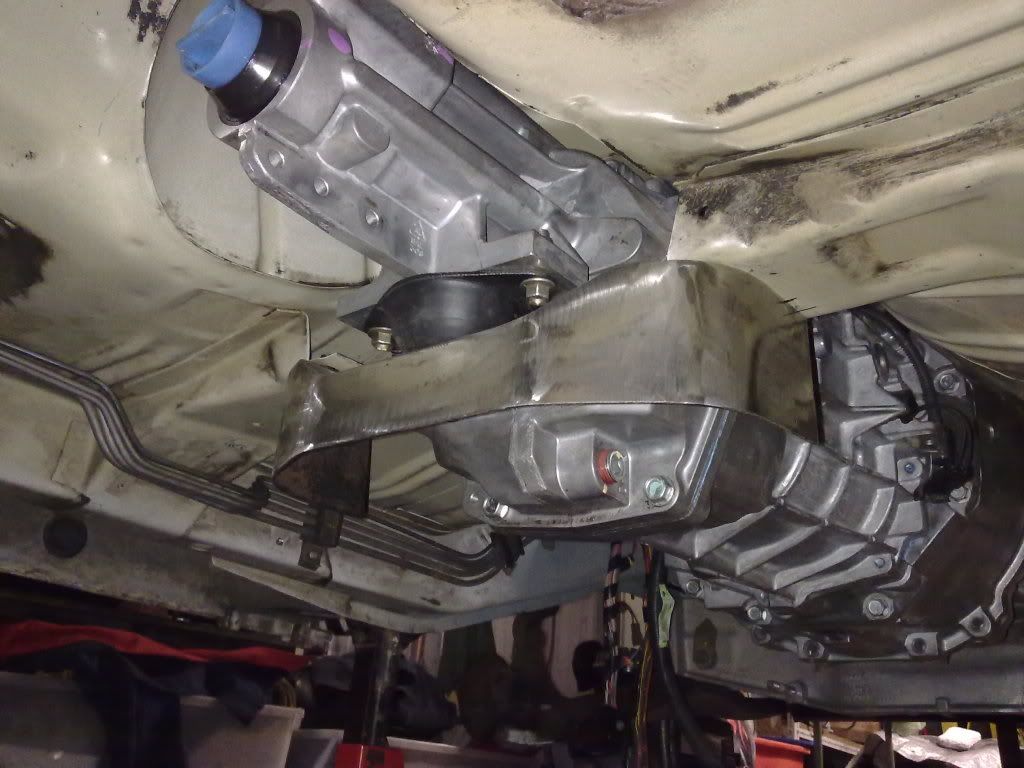 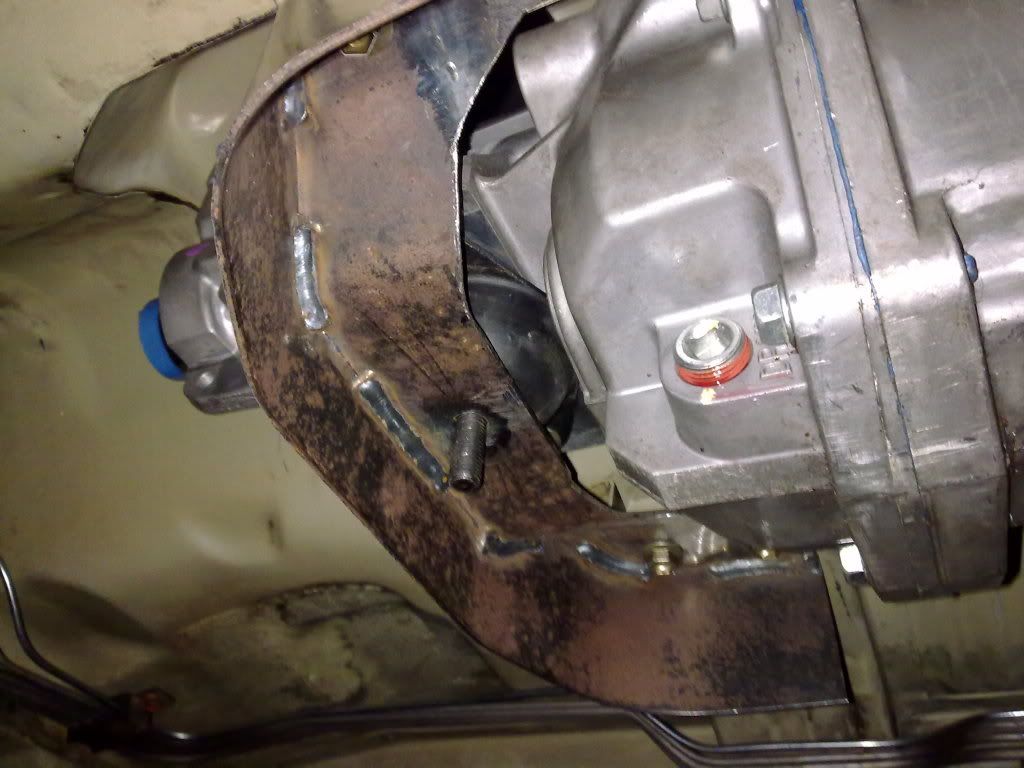 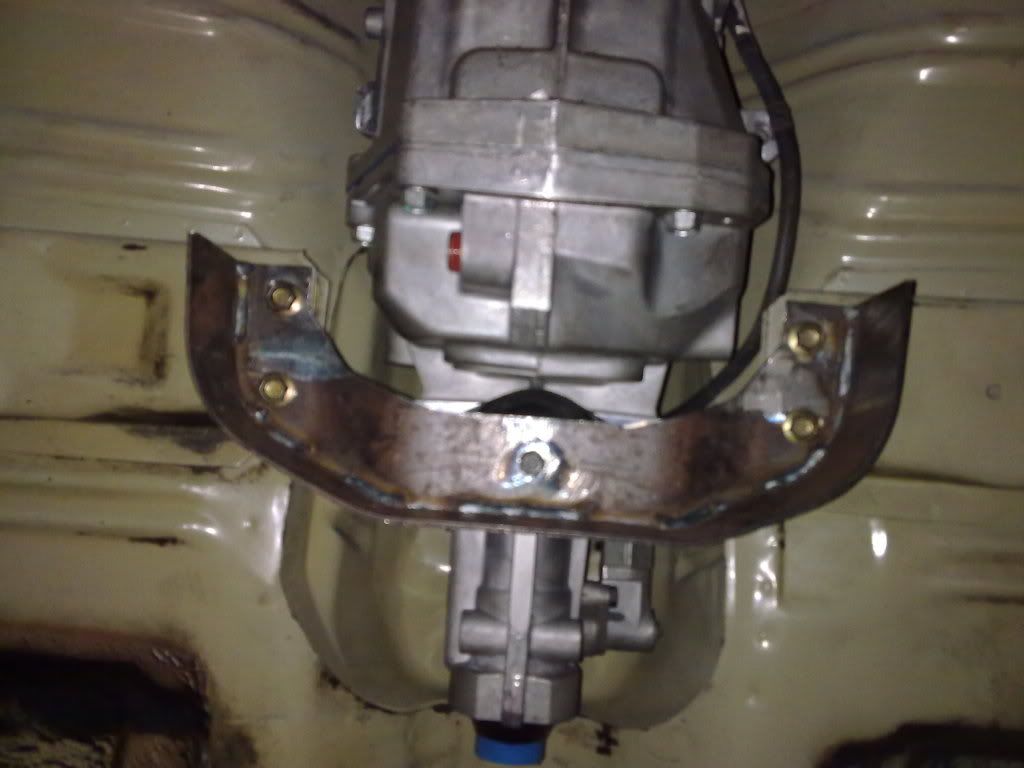 Cheers, Anthony Last night i started a job i have been trying to avoid, working out what wiring goes were 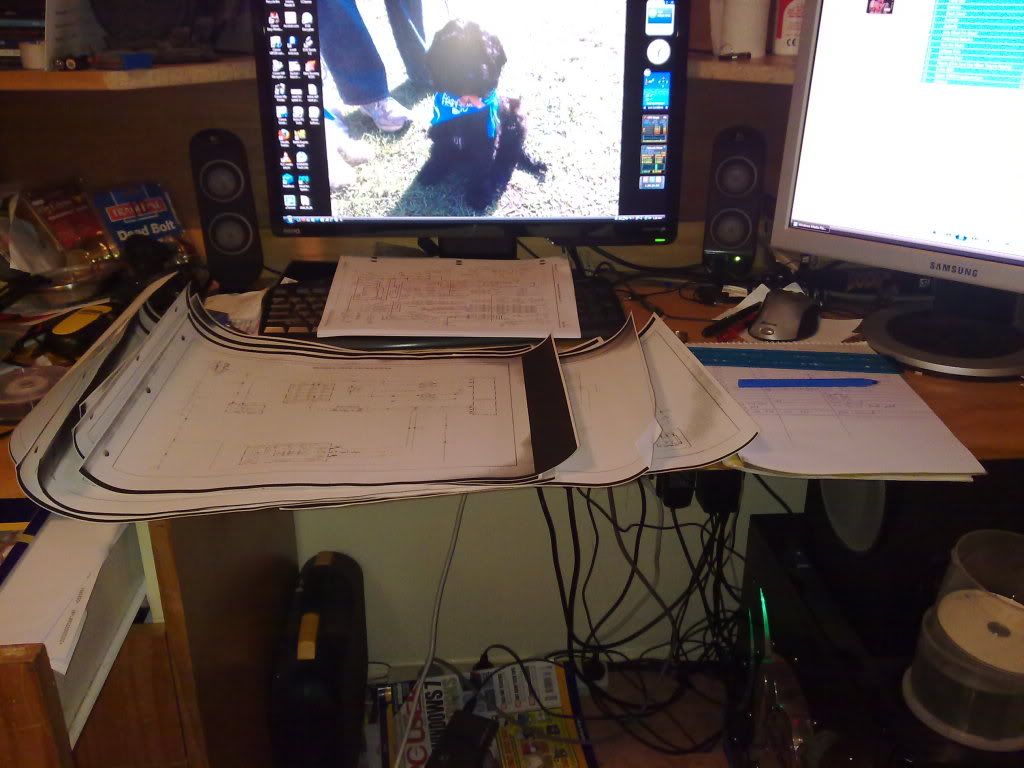 Today i finished my gearbox crossmember. I bent the flat steel into a u shape and use the vice to press it into shape against the crossmember, tacking each section as i went. 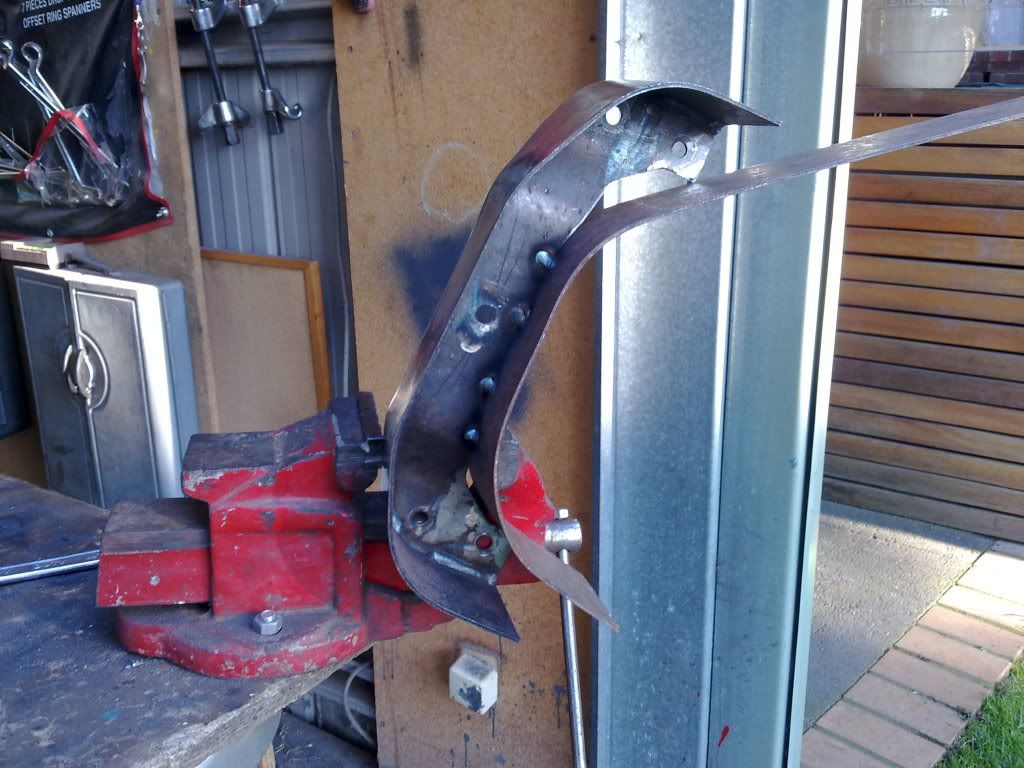 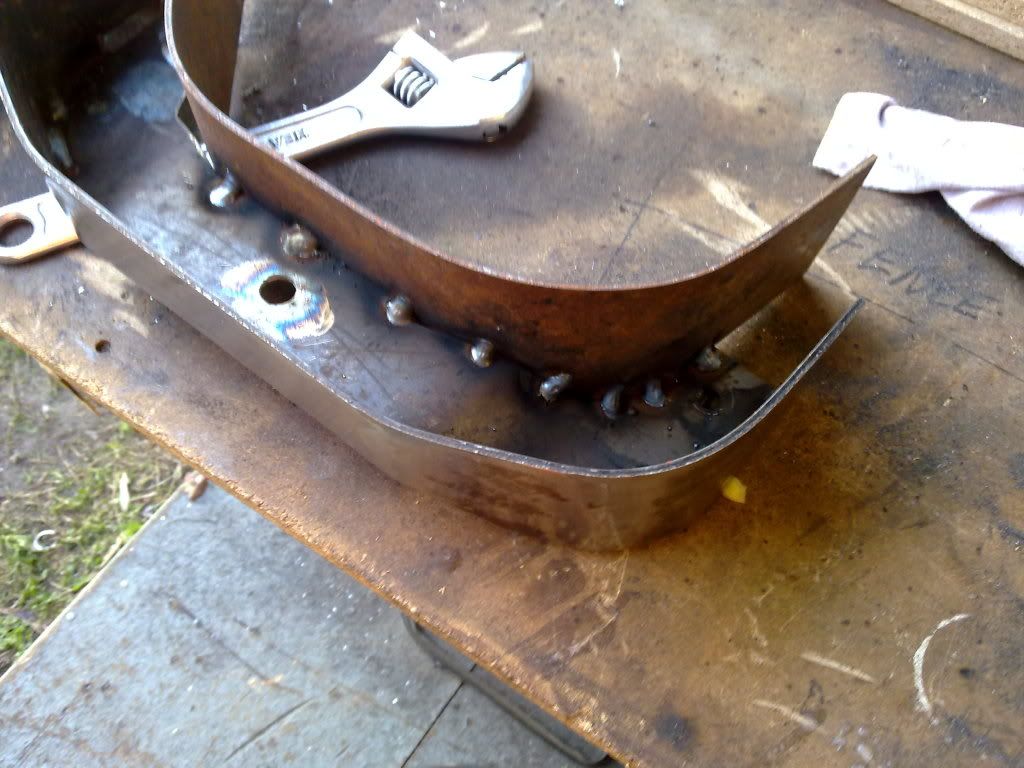 Takes abit of effort to press the steel into shape, had a vice malfunction 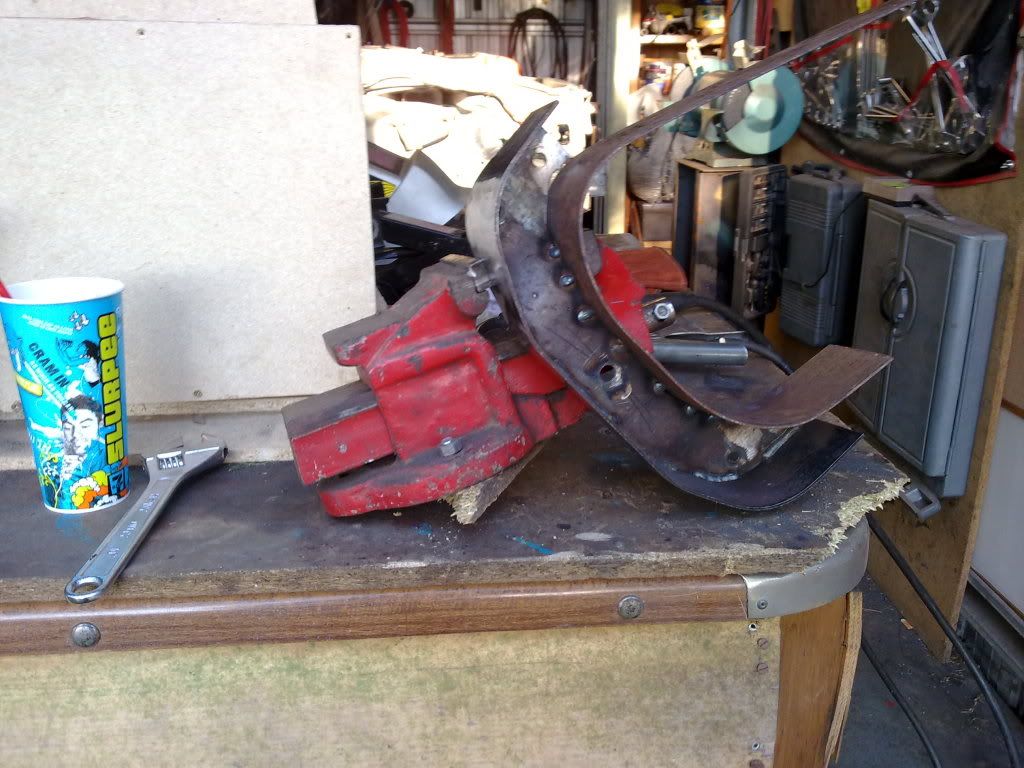 So after remounting the vice i finished the tack welding 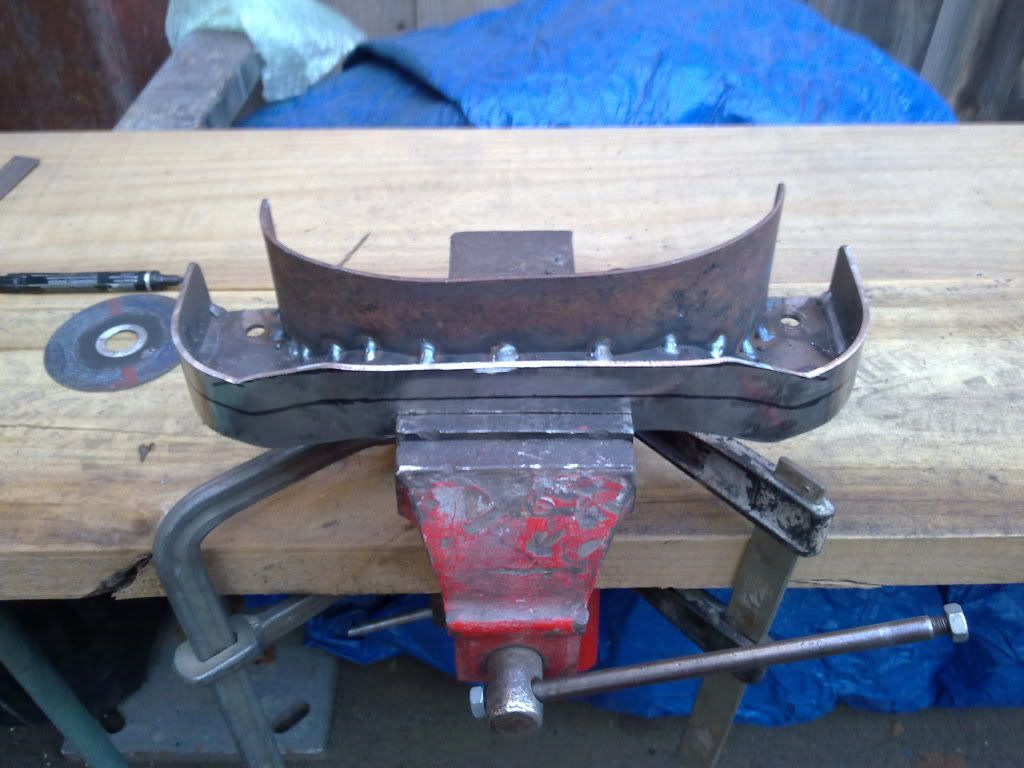 Then competed the stitch welding of the crossmember 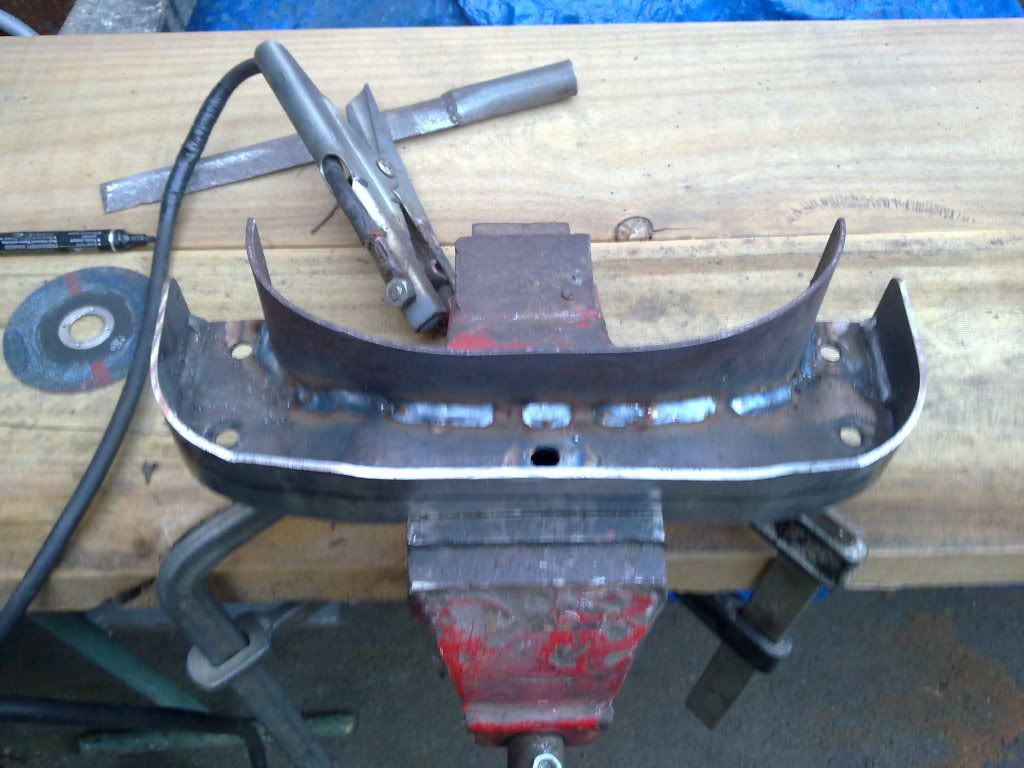 I then cut a small grove in the top and then welded the grove back up, this was then grounded flat. 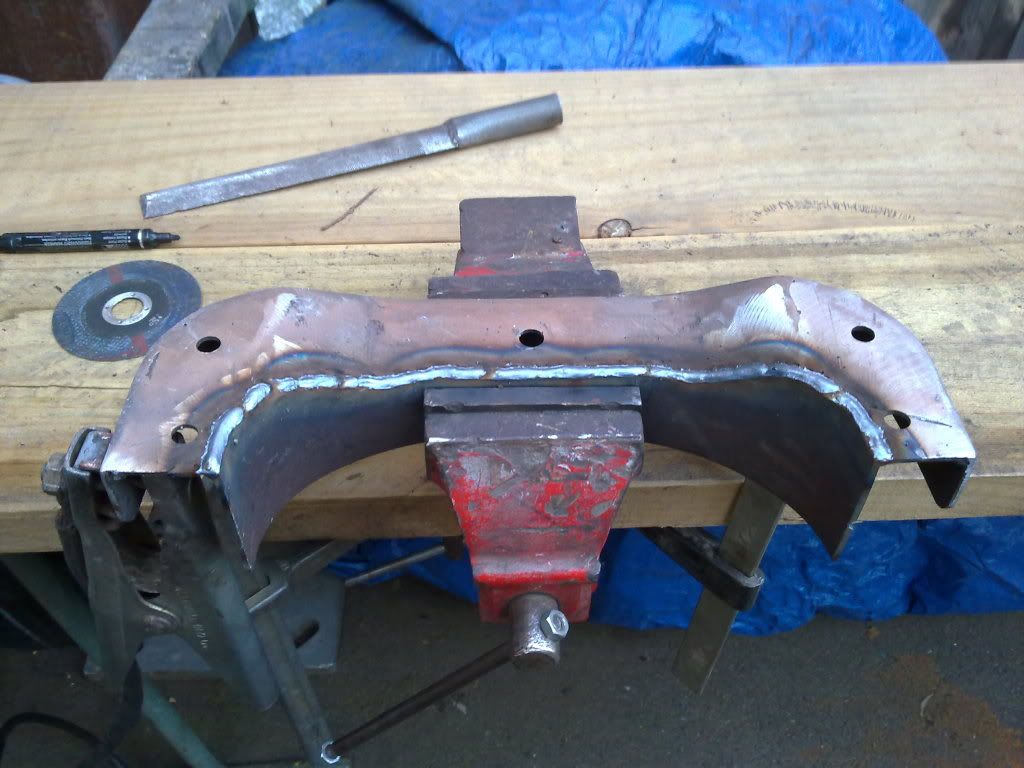 I then measured the height of the original crossmember and trimmed mine up to suit (turned out the sides are 40mm height) 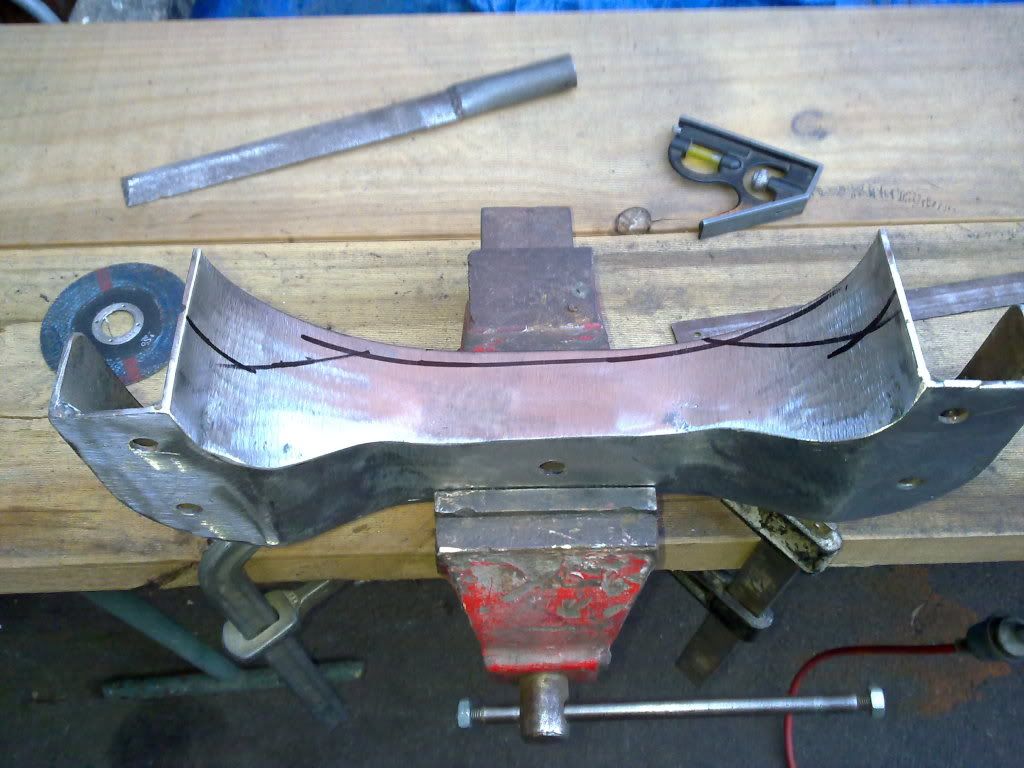 After cleaning it up i ended up with this. Really happy with how it turned out  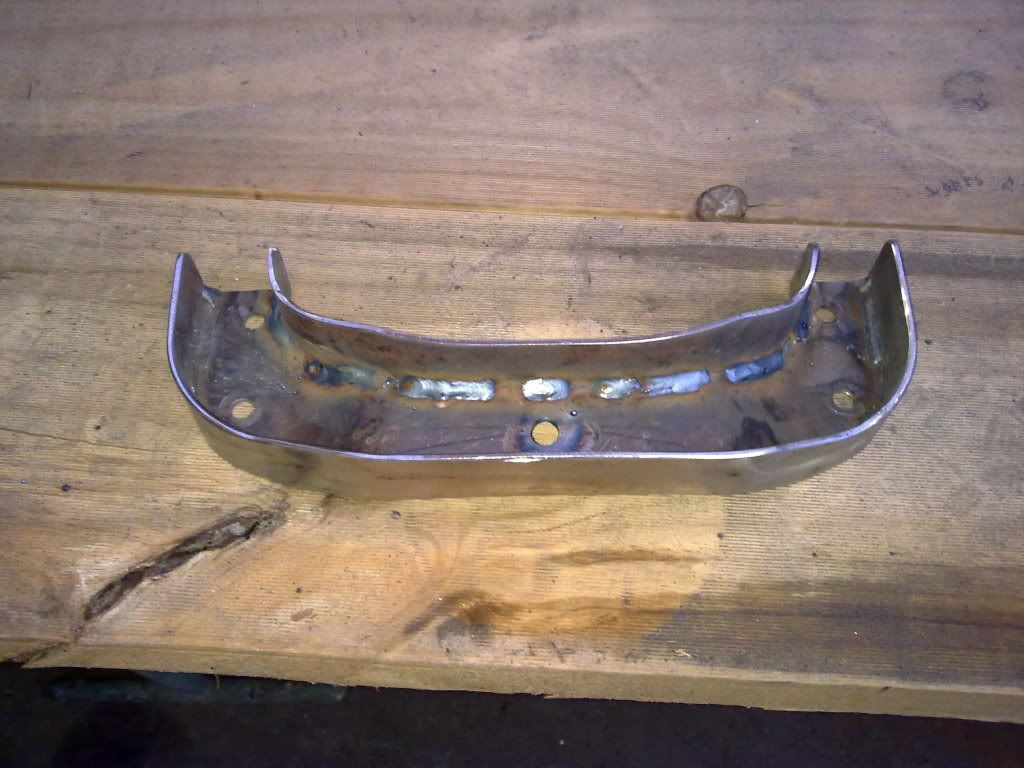 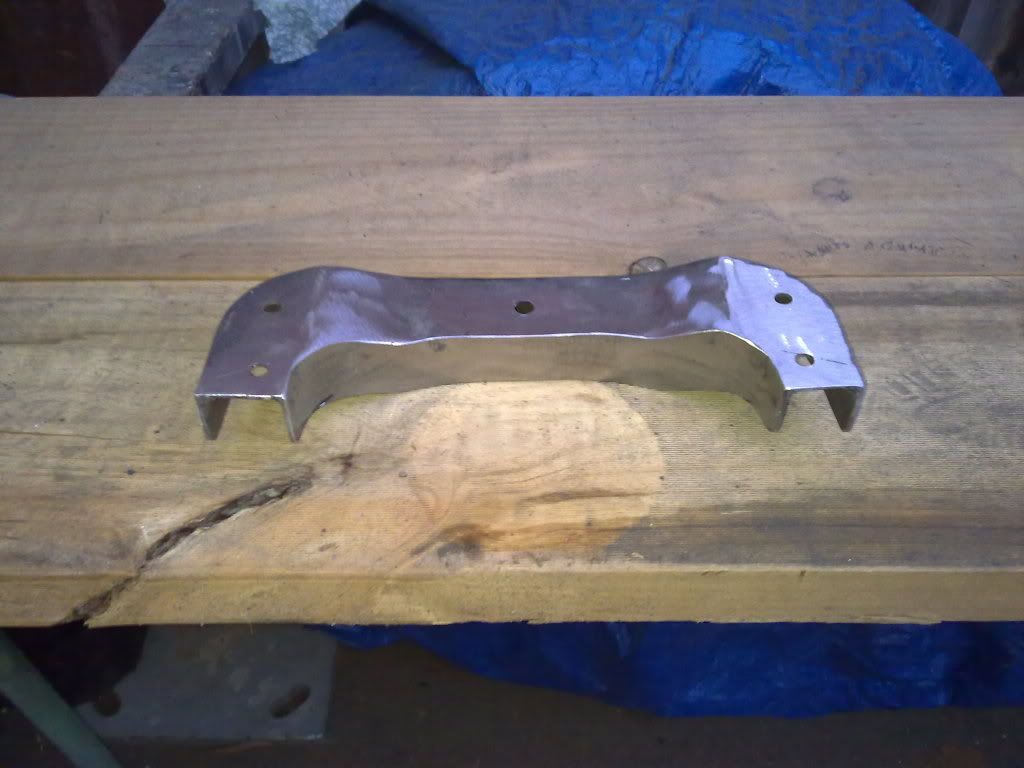 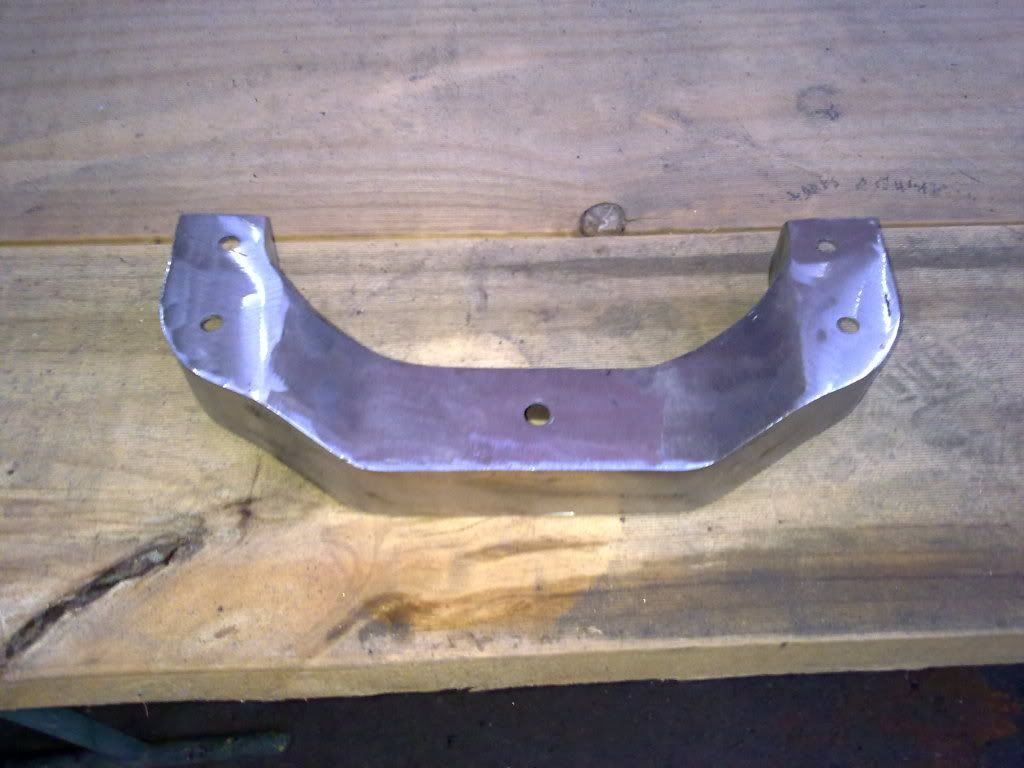 And holding the Gearbox up  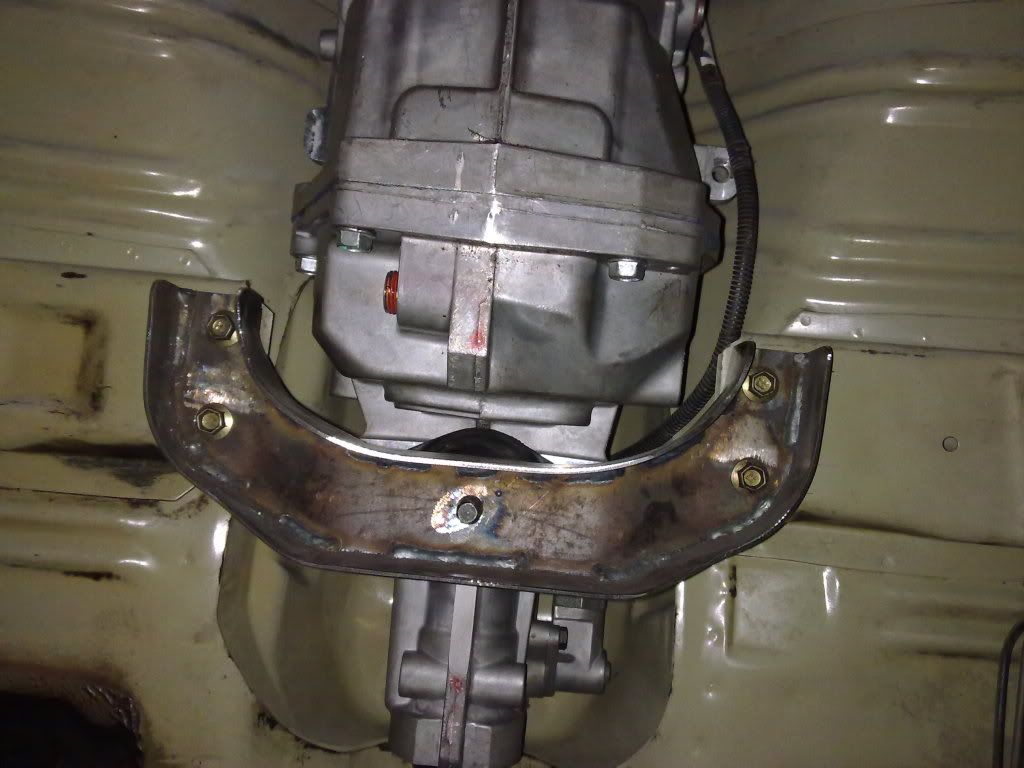 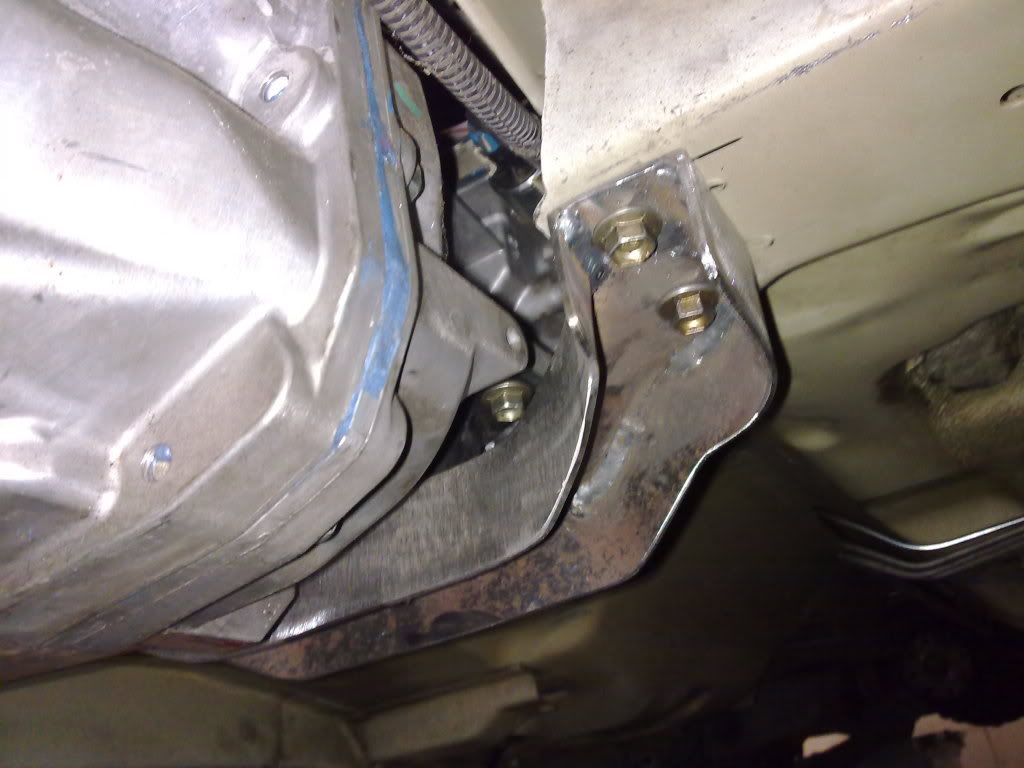 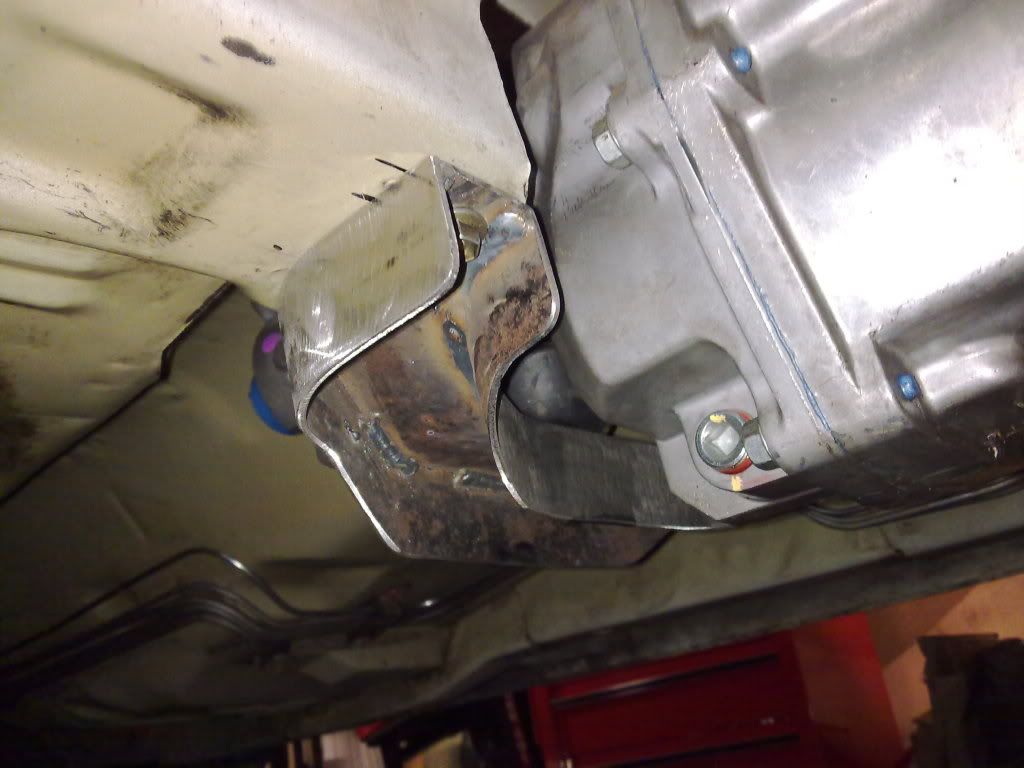 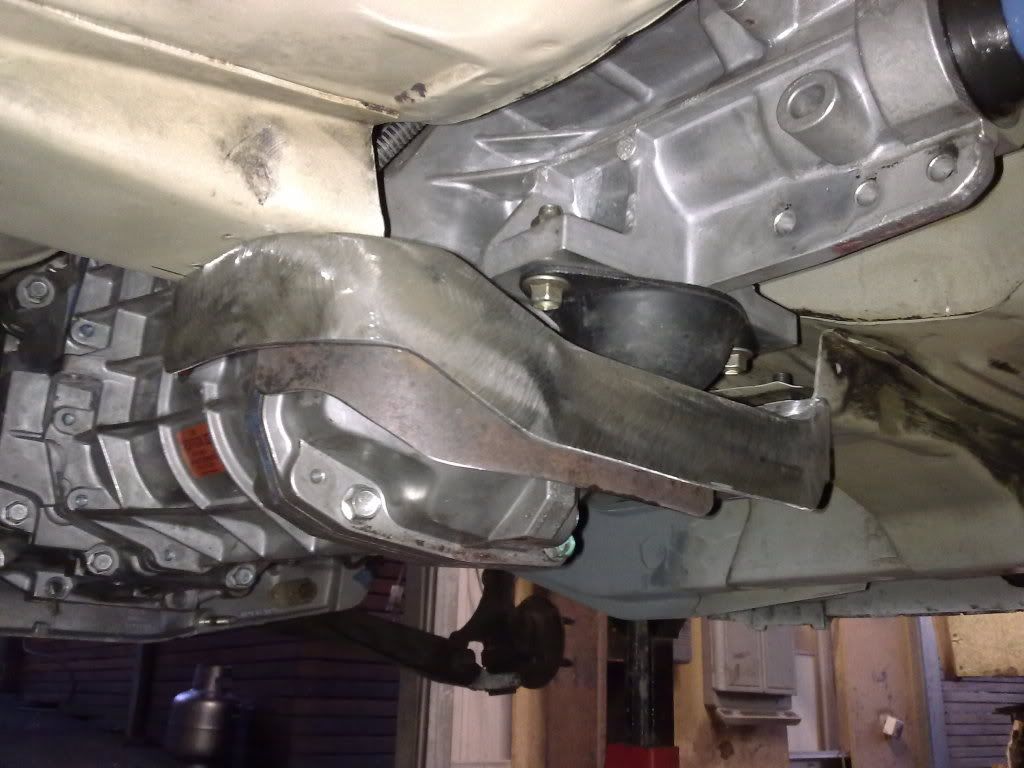 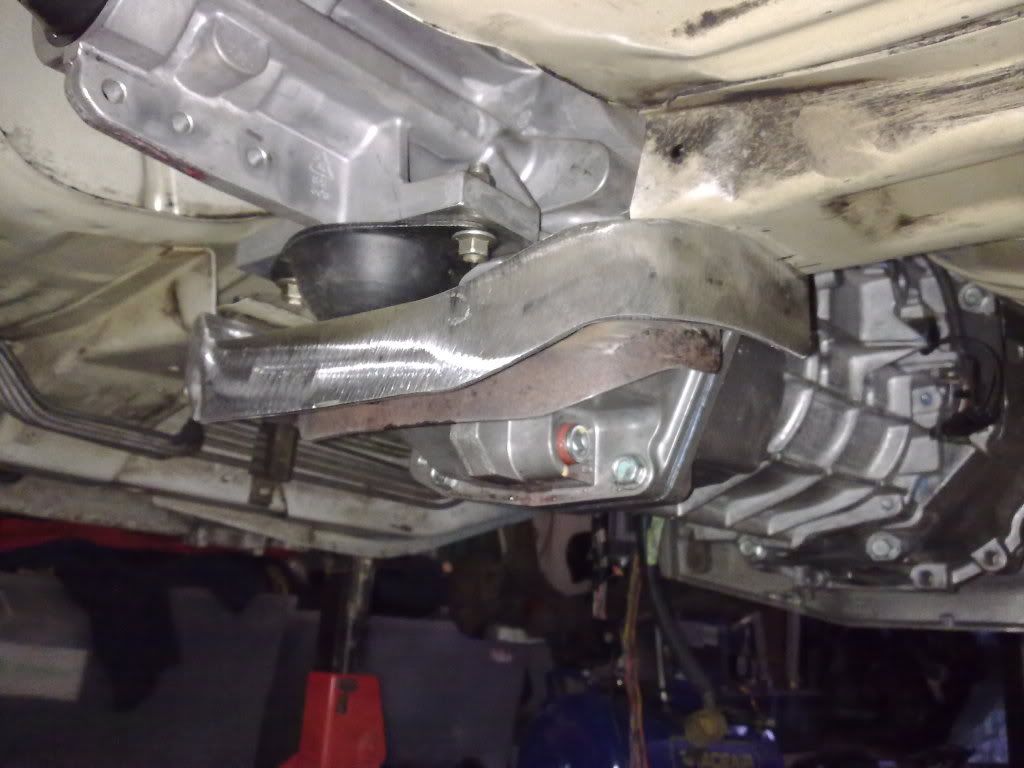 I need to measure the distance between the gearbox and the diff and give that to my tailshaft guy. Then I'll be removing the gearbox and engine from the car so i can finish the heater pipes on the engine, change the engine mounts for new items, etc. Cheers, Anthony Had a thought today about what i'm going to do to for an exhaust, figured since i have a complete BA turbo exhaust I would see what bolts up and what doesn't. I used the BA turbo dump and the BA cat, fits really well except for one spot which i think will require only a small mod, but thats nothing in the grand scheme of things 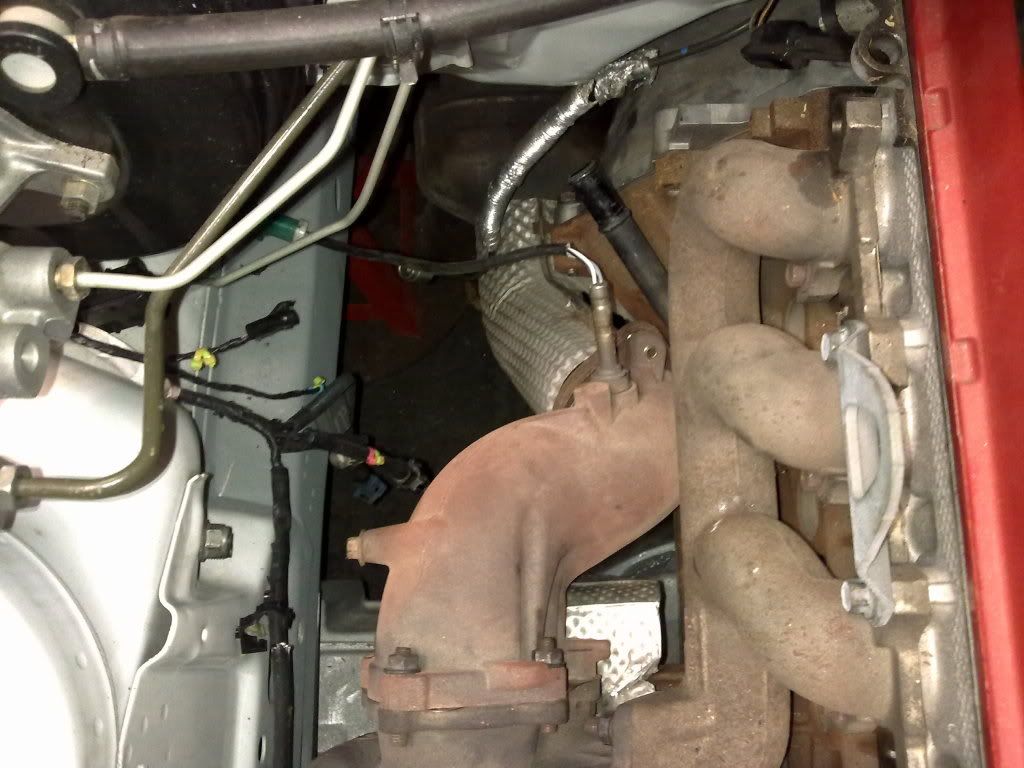 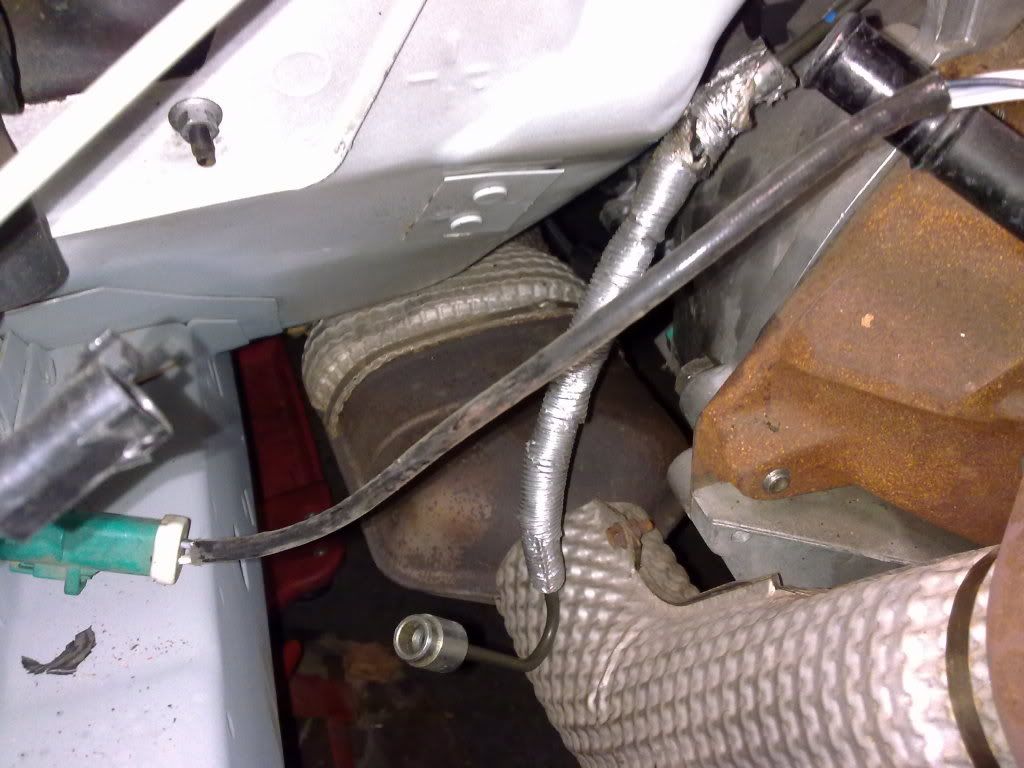 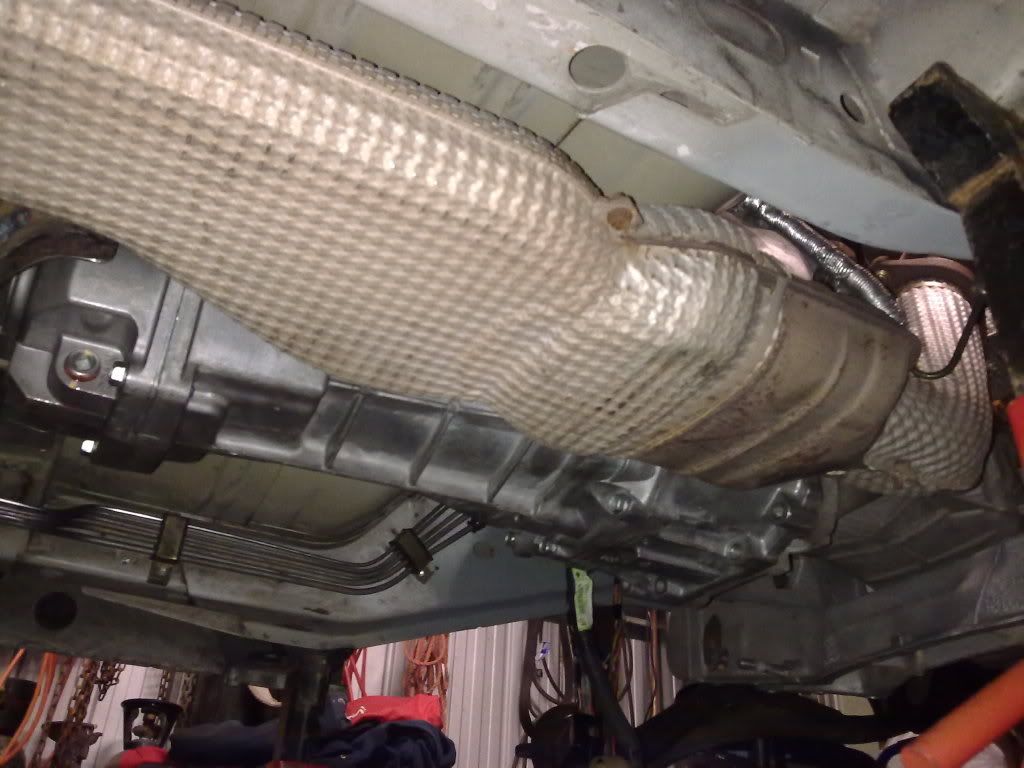 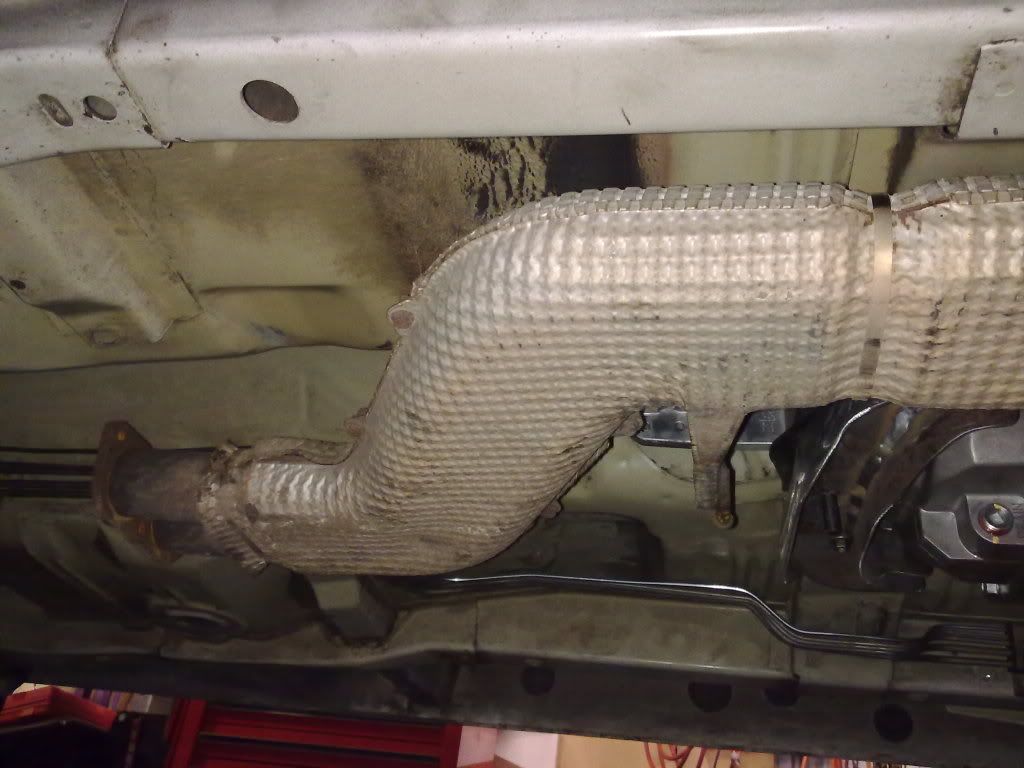 It's alittle tight across the top but the engine torques away from the floor so i'm wondering if i can just roll the pipe around alittle on the turbo dump pipe or do i go the effort and make the floor brace flat all the way along? 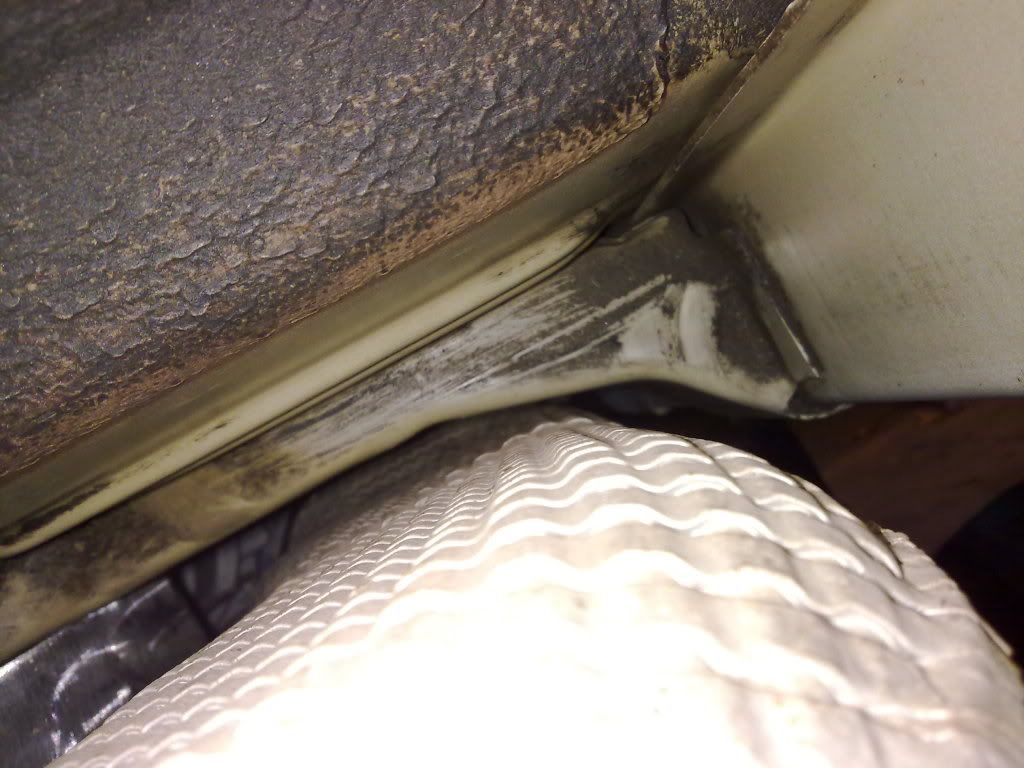 It's almost central 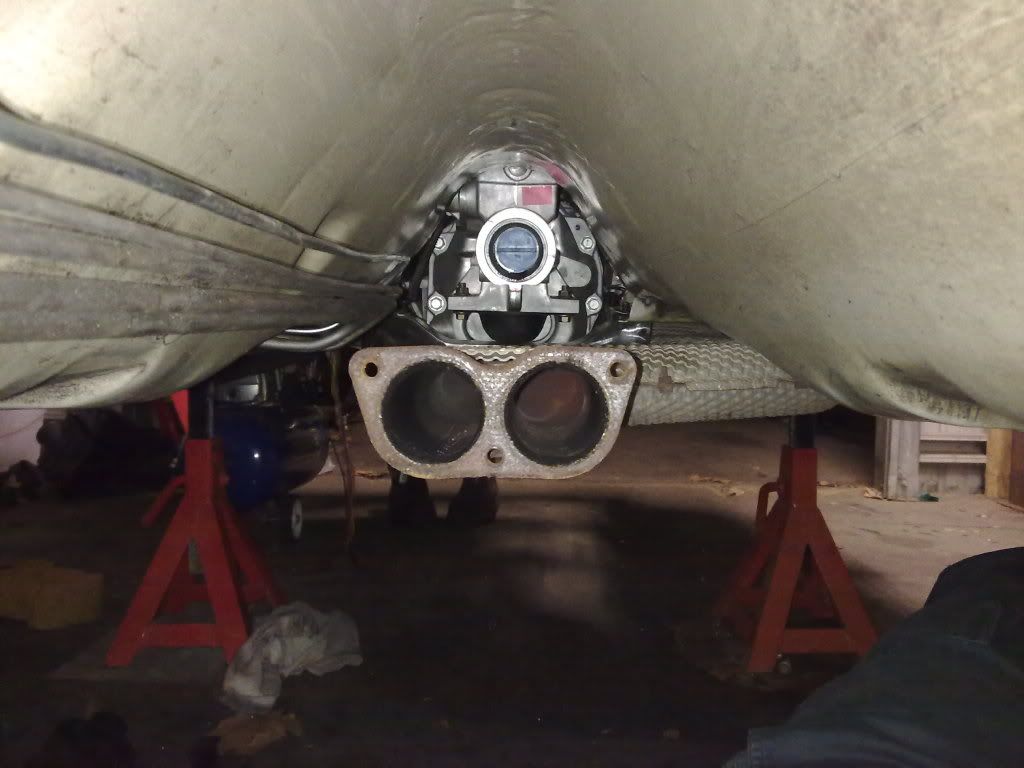 I'll still be making the rear section out of 2.5" pipe, twins all the way to the rear which if i do a custom dump pipe later can still be reused. Whatch ya think? Cheers, Anthony So tonight i did a dummy fit of everything that i think will work. I'll need to make a bracket to hold the EL header tank which i can mount the boost solenoid to aswell. 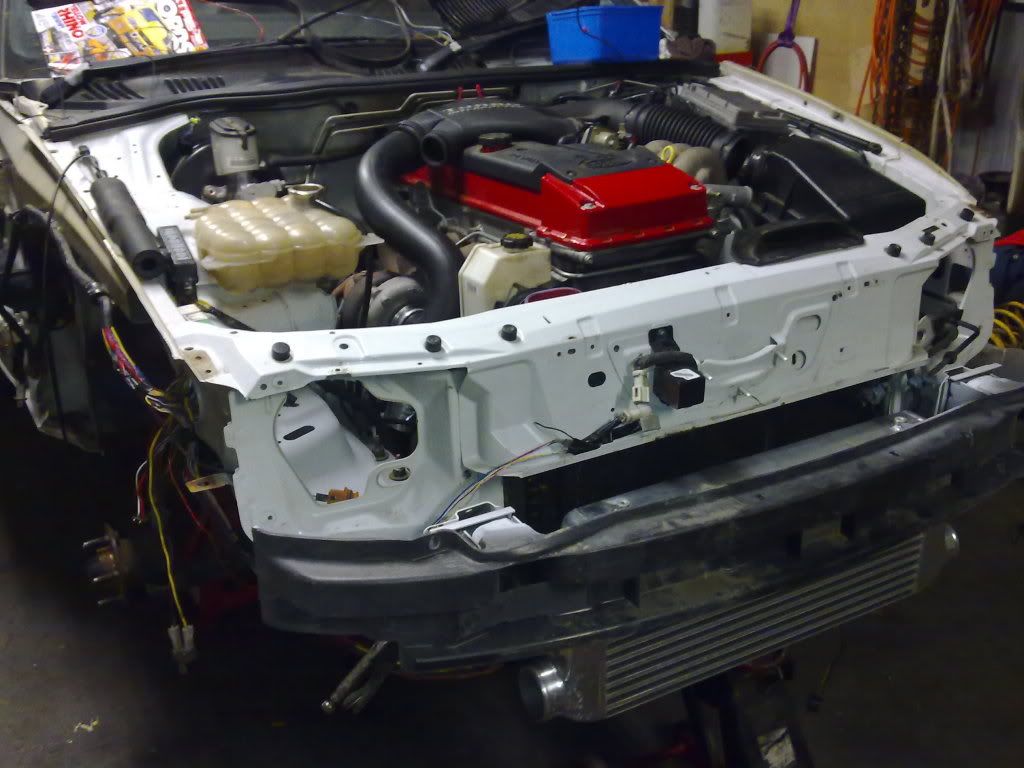 I'm going to use the EL air-box because the BA item sits to high but i'll need to make an adapter to use the BA rubber flex 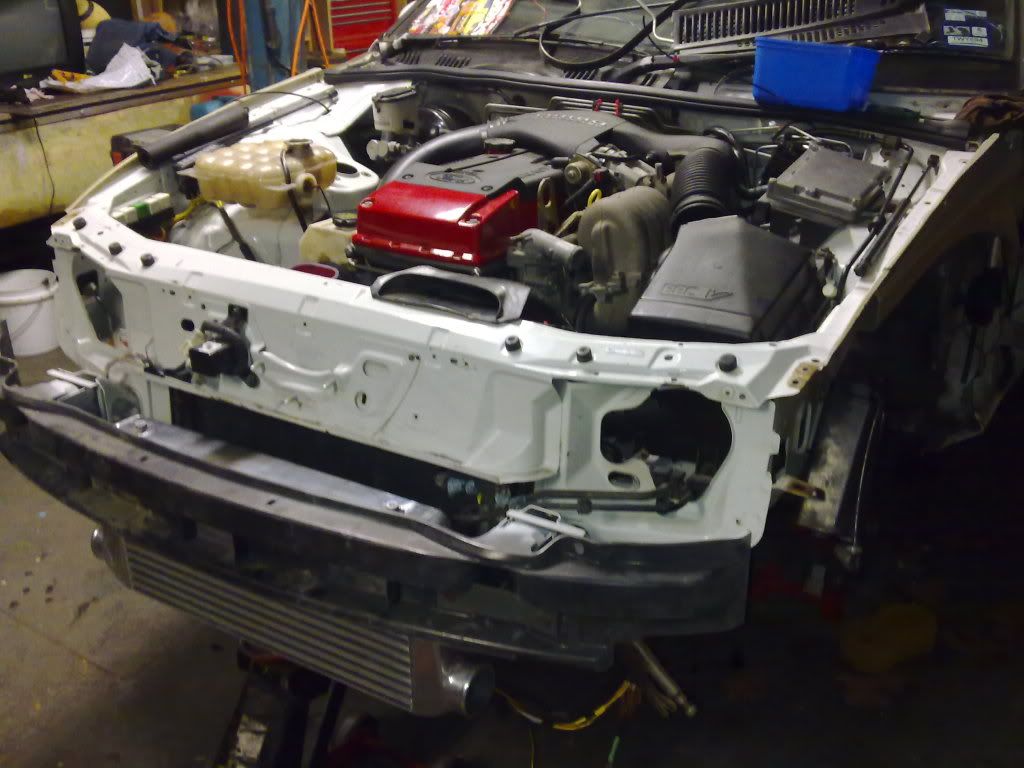 Inter-cooler fits nicely even with all the standard EL A/C gear in place, just sits alot further forward then what i had original hoped. It's about level with the bottom of the rad support which leaves about a third covered by the bumper reinforcement. I'm hoping the bumper clears mostly, i don't want to have to cut big sections out of it. 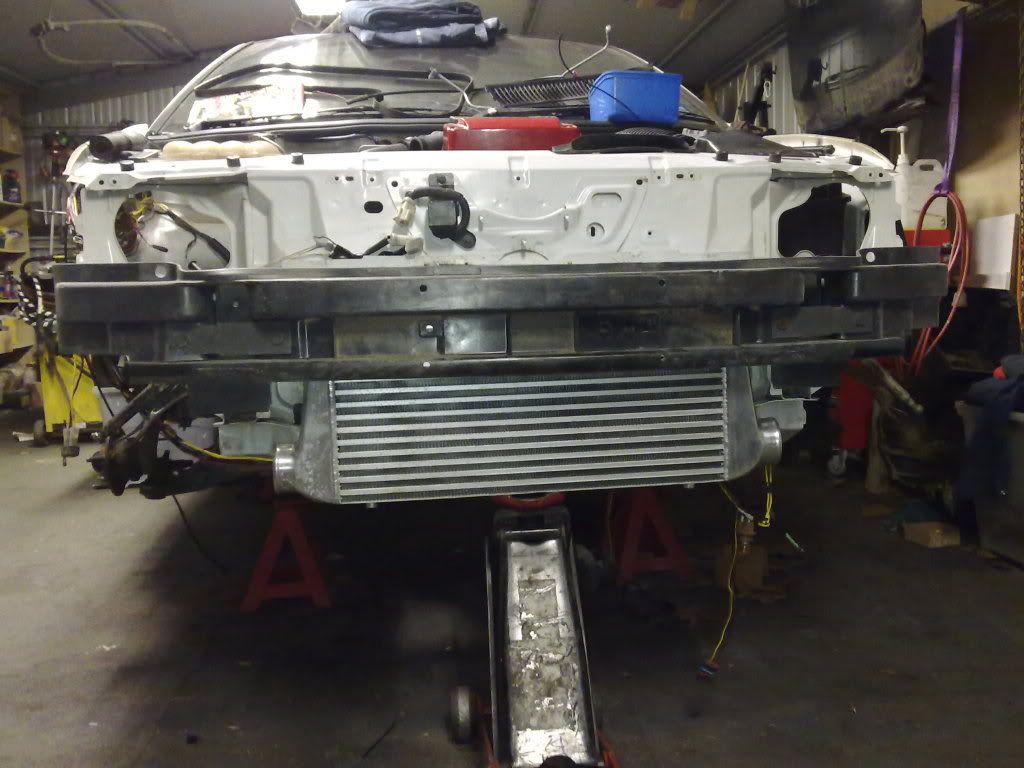 Trying to decide the best spot to make holes for cooler piping I was thinking of enlarging the headlight holes into the start of the inner guard, gives me space behind the headlight to clear decent size piping later on. If i enlarge the headlight hole only i run into a extra bracket the EL's have above the chassis rail which doesn't actually bolt to anything :scratch: think the engineer will notice if i remove it? 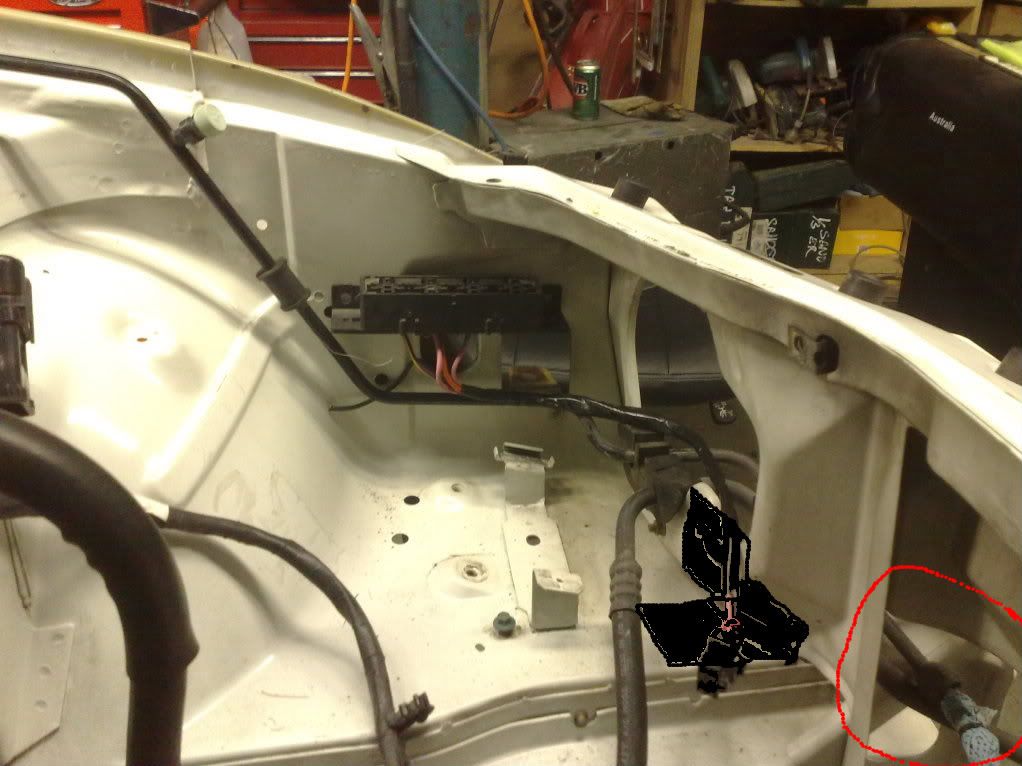 Cheers, Anthony
_________________ I enjoy the symphony of mechanical harmony, |
|||
| Top | |
|||
| bbqburner |
|
|||
|
With fitting the BA brake booster i was going to need a 20mm spacer to clear the firewall. When i was dismantling the BA i noticed the pedal box in the BA had what i needed
 And after trimming, just the right thickness too 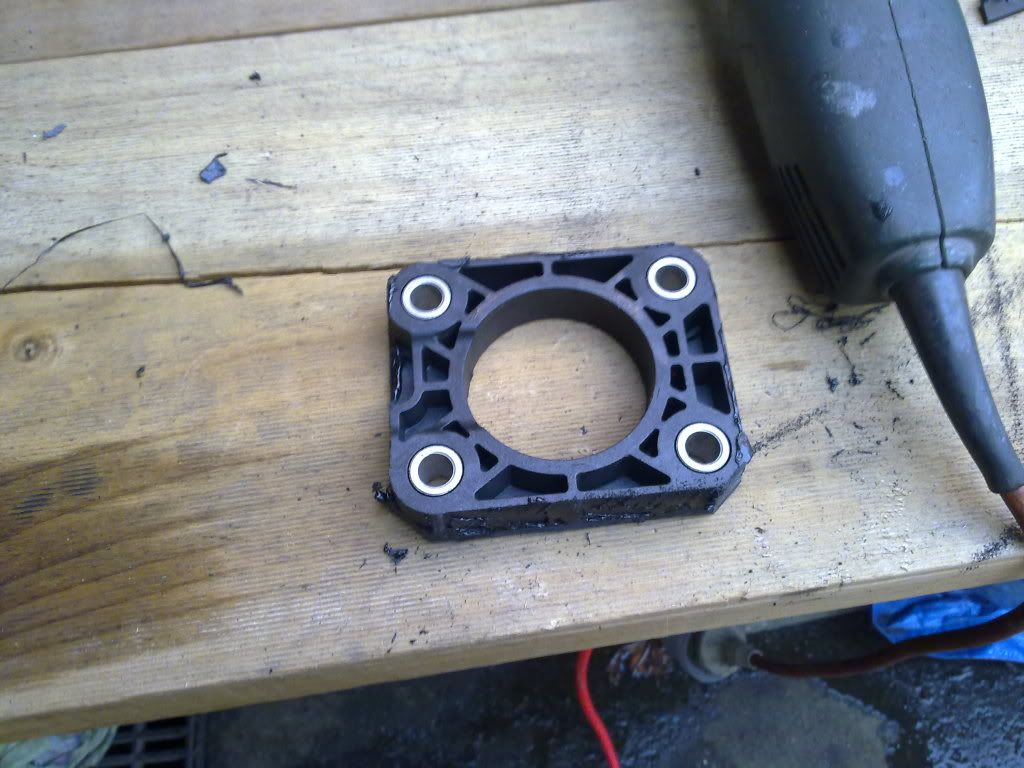 Also a short list I wrote up at work during the quiet moments this week, of what I think i have left to complete on the EL. My car Weld bracket to rear cross member for exhaust hanger. Remove AU seats. Remove dash, center console and floor carpet. Move gearstick cut out to required location. Measure tailshaft length (1350mm). Order tailshaft. Remove engine and gearbox. Acid tank gearbox crossmember and paint. Cut access for cooler piping under headlight cutout in radiator support. Finish rubber groments on fuel lines. Fit heater pipes to engine. Change engine mounts. Fit El A/C pump. Pin A/C line and brake lines together to prevent rubbing. Rebuild turbo and refit to motor with new turbo studs. Torque front crossmember bolts to spec. Refit engine and gearbox. Replace all front end nylocks and torque bolts to spec. Fit front and rear shockers and springs. Change front hubs and fit front brakes. Remove IRS. Redirect fuel lines around top control arm, stick protector pads on top of IRS cradle. Paint any bare areas left unpainted in the rear. Finish rear brake pipes. Refit IRS and torque bolts to spec. Change diff oil. Weld in cradle pins and floor sections. Fit rear brakes with new pads and brake lines. Fit BA fuel sender to EL fuel tank. Fit EL fuel tank to car. Remove unnecessary wiring from RHS around brake booster. Remove unnecessary wiring from LHS around BA ECU. Extend LHS headlight wiring. Mount front end wiring to radiator support. Run BA turbo harness. Reconnect ABS wiring. Add throttle pedal wiring. Modify EL cruise buttons to BA wiring layout. Fit hydraulic clutch pedal to EL pedal box. Mount clutch fluid reservoir. Run cruise control wiring. Wire in BA ecu wiring. Sort out A/C control wiring. Splice BA cluster plugs into EL dash harness. Run canbus wiring. Reconnect battery cable. Layout boot wiring. Get and fit boot carpets. Run cabling for rear power windows. (have a fairmont body harness may just use that instead) Wire in alarm. Refit interior. Fit BA seats. Modify center console. Mount window switches. Make sunroof motor cover with overhead lights. Build cooler piping. Build exhaust. Refit body panels. Cheers, Anthony Does anyone know what the dimensions are for the Ford t56 output yoke? Fitted the booster spacer and fits like a charm, booster doesn't hit anything 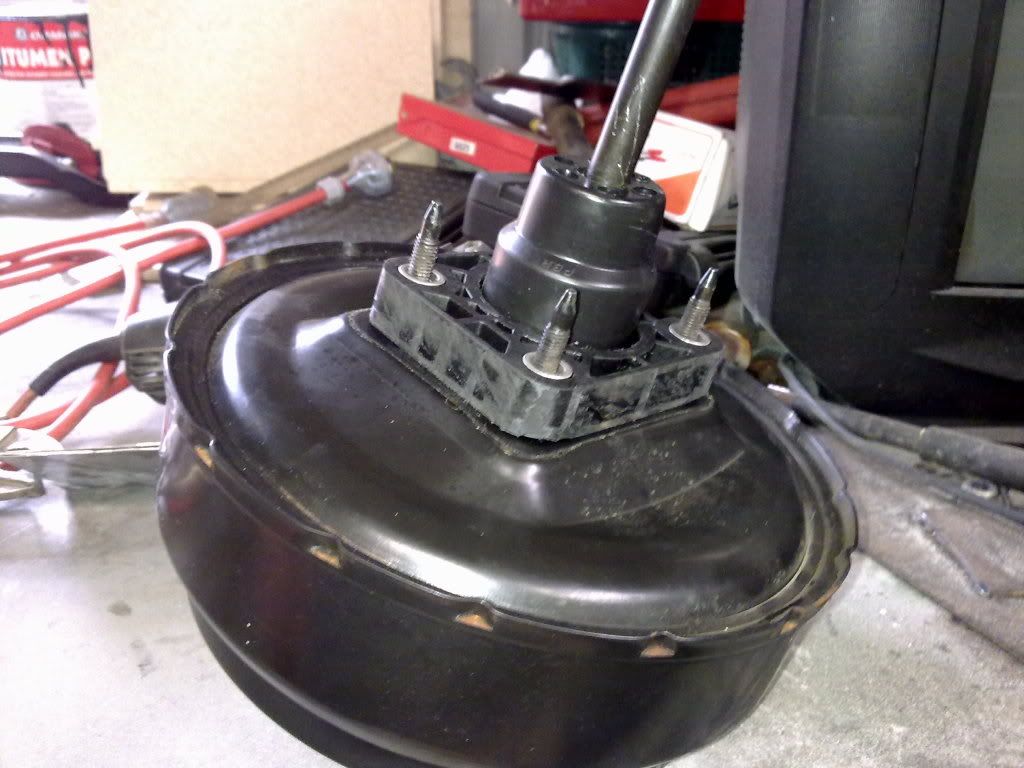 What are peoples thoughts on expansion tanks? BA or EL? I'm more inclined to use the EL one because it has the low level sensor in it and i don't see anywhere for the BA bottle to have one. I'm also going to have koni yellows and having to move the header tank every time i want to adjust the shocker would be a PITA. But I'll have to make brackets to support the EL bottle were as the BA one just bolts on. (Not sure on bonnet clearance with the BA bottle) 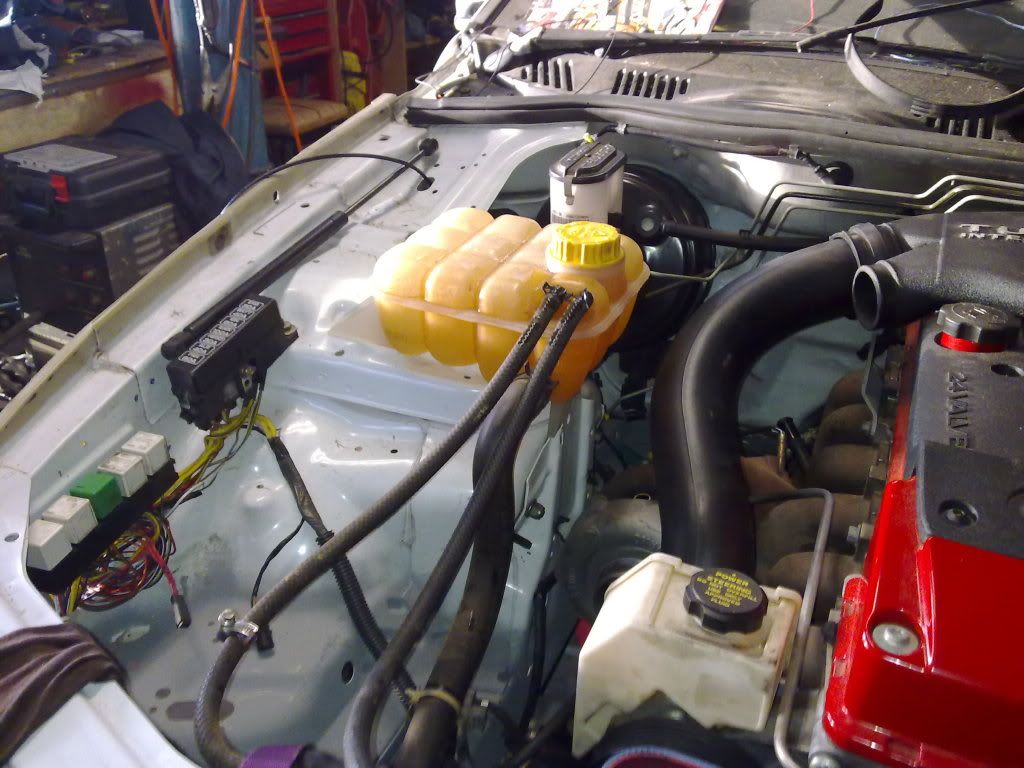 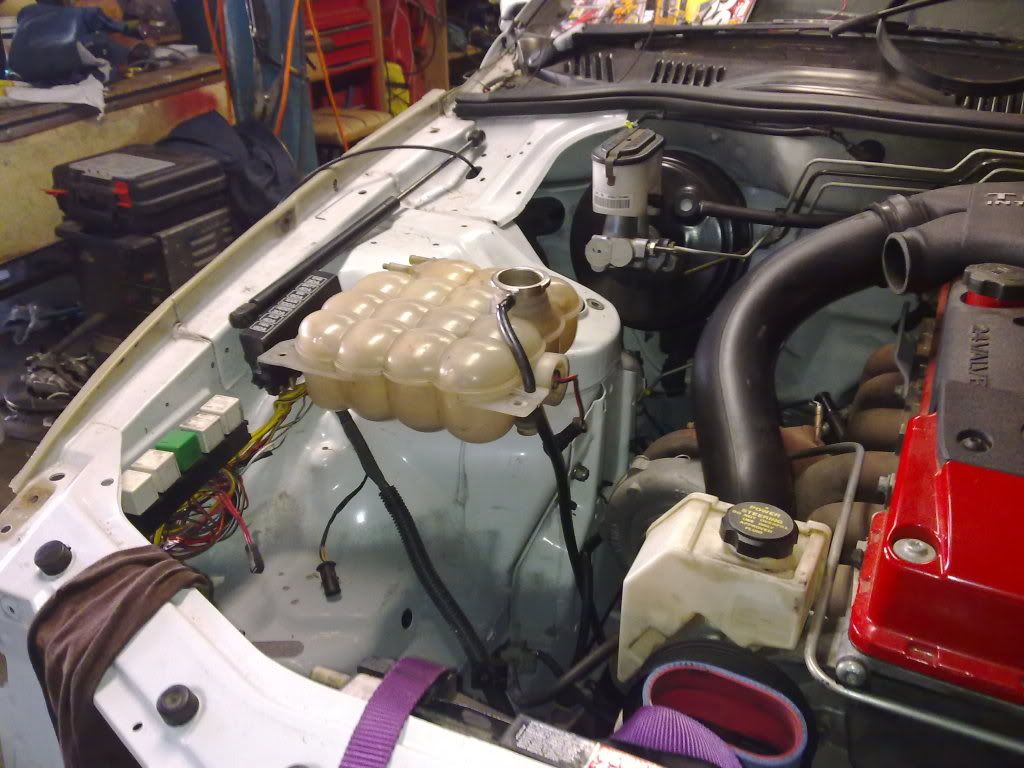 Cheers, Anthony Tonight i finished welding in the IRS pins Left side  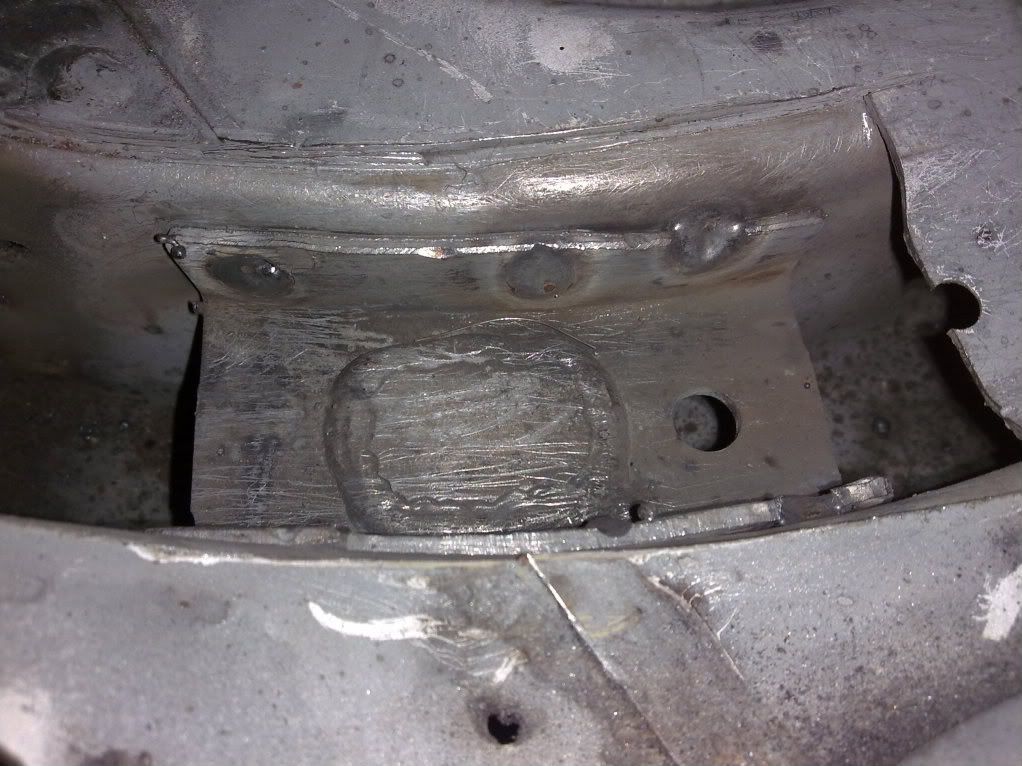 Right side 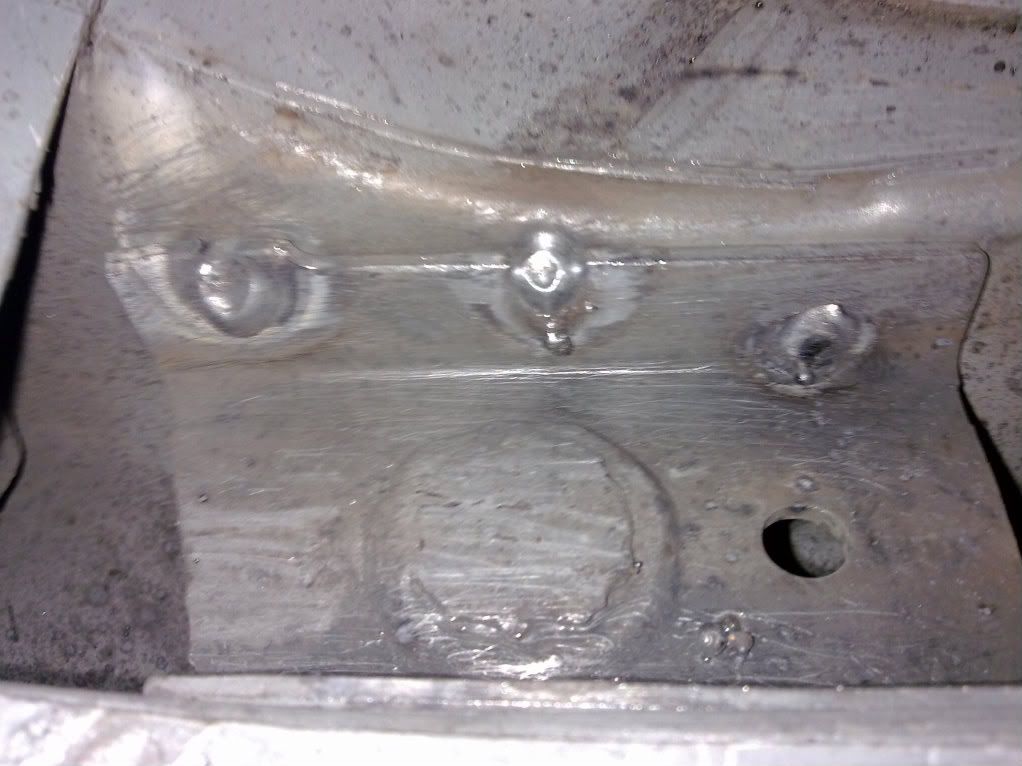 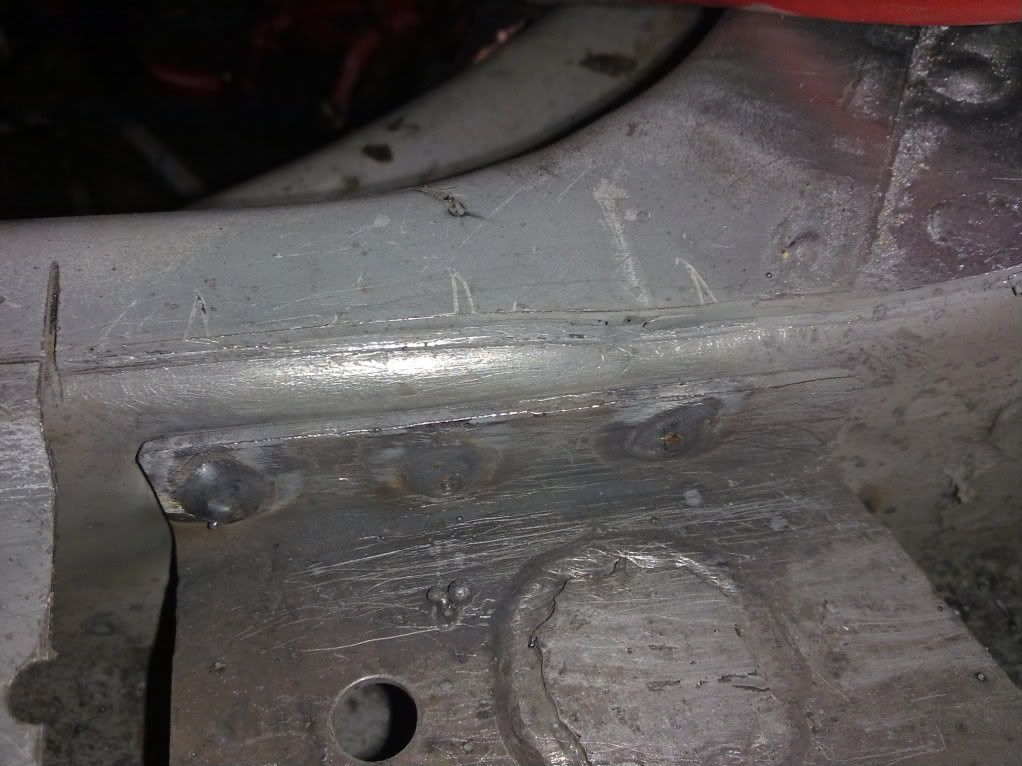 And with the floor welded back in 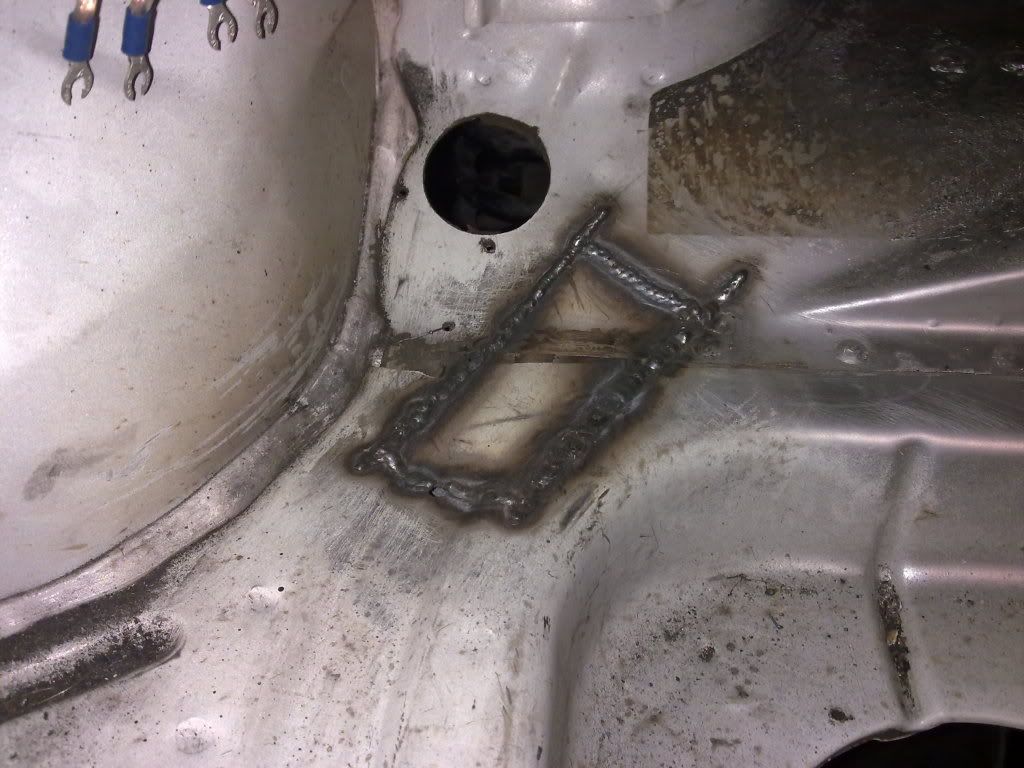 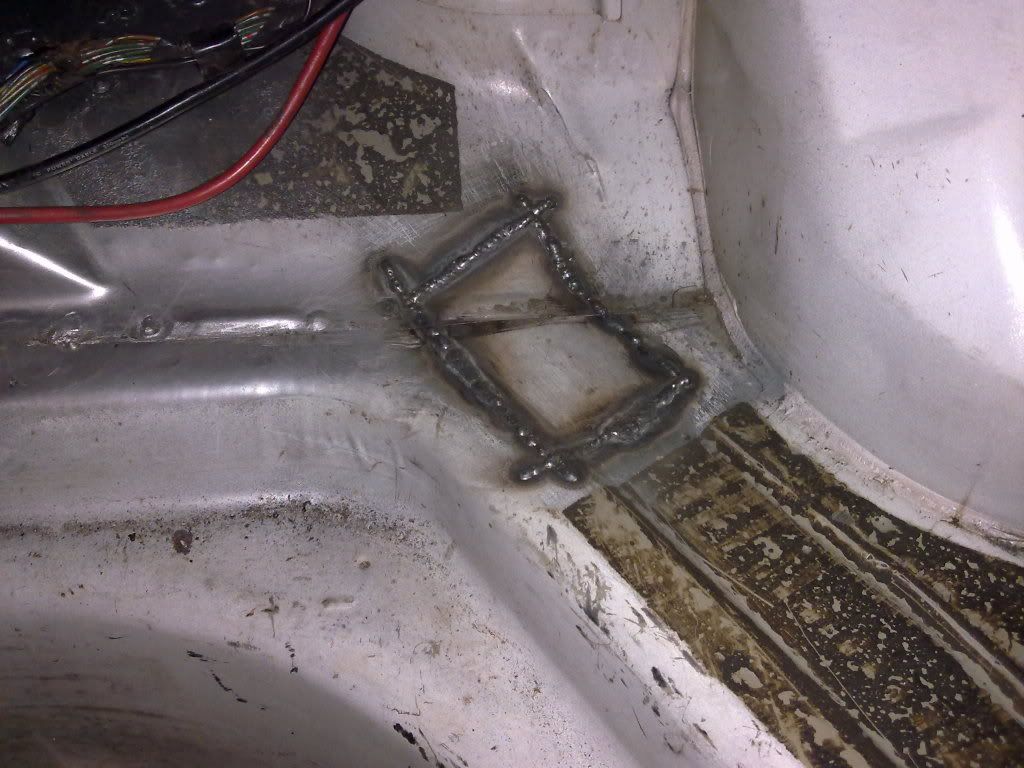 Did alittle with the wiring tonight aswell, i'll have the inner guard plastics in, will that be enough to keep the water out of the relays or should i seal them up? 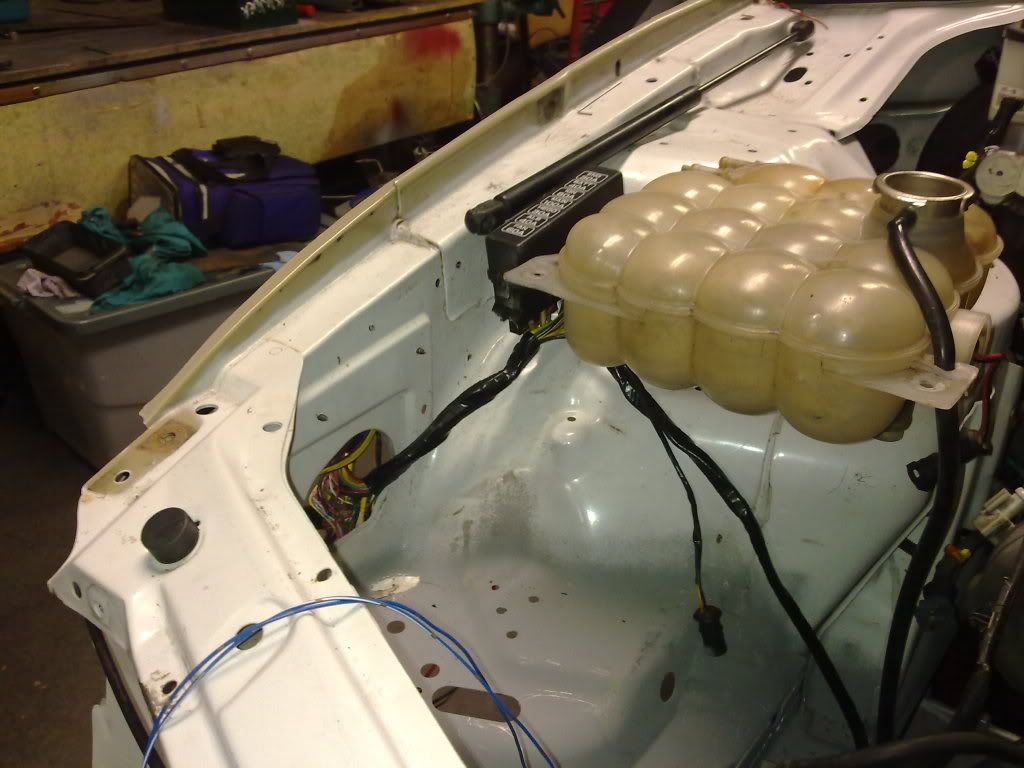 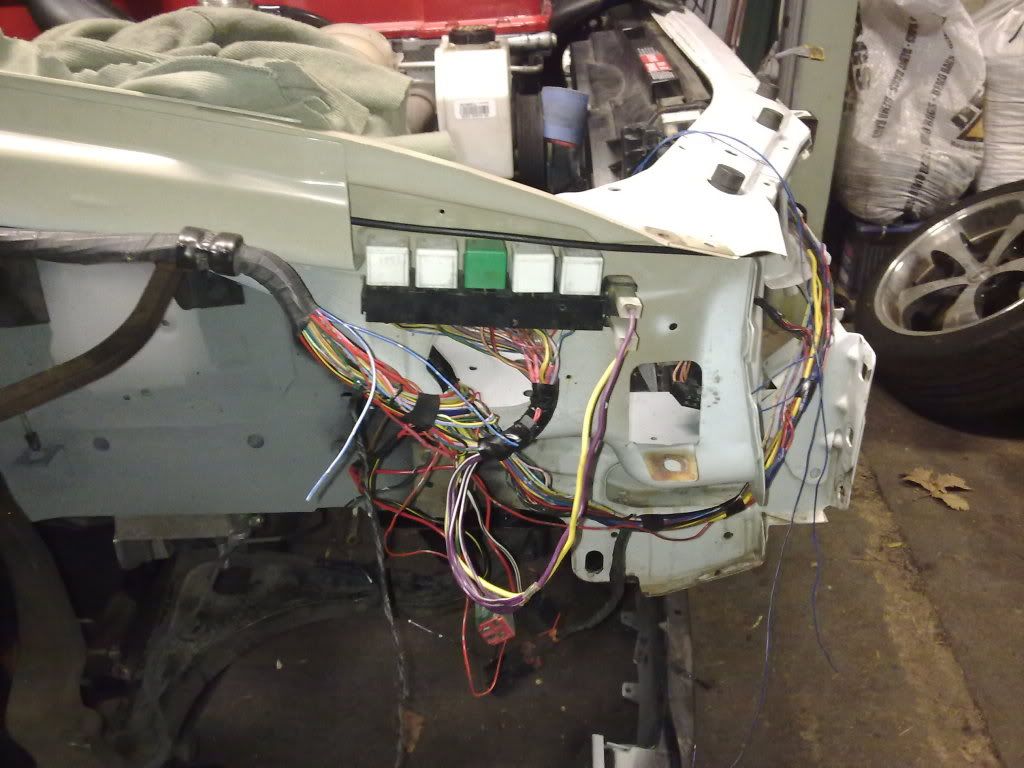 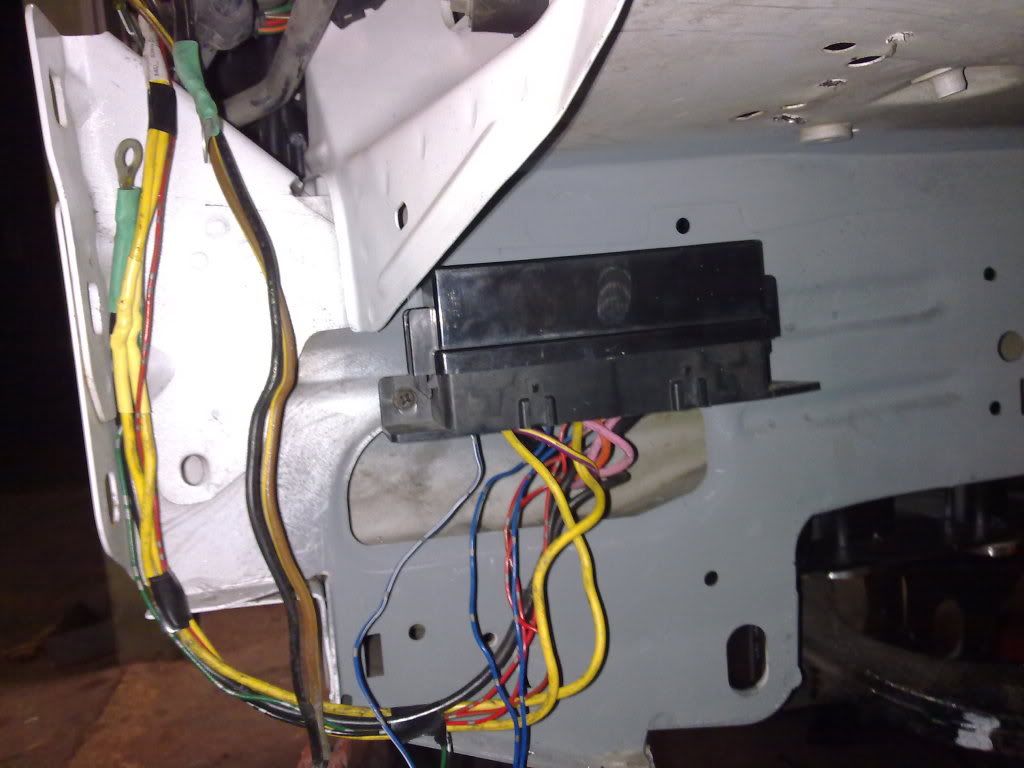 Cheers, Anthony Anyway i ask out of curiosity at bursons how much IRS rear brake lines were, $46each was the reply. FU FRAUD!!!!!!!!!!!!!!!!!!!!!!!!!!!!!!! He then really floored me when he said he had them on the shelf So 20mins later, relieved of packaging 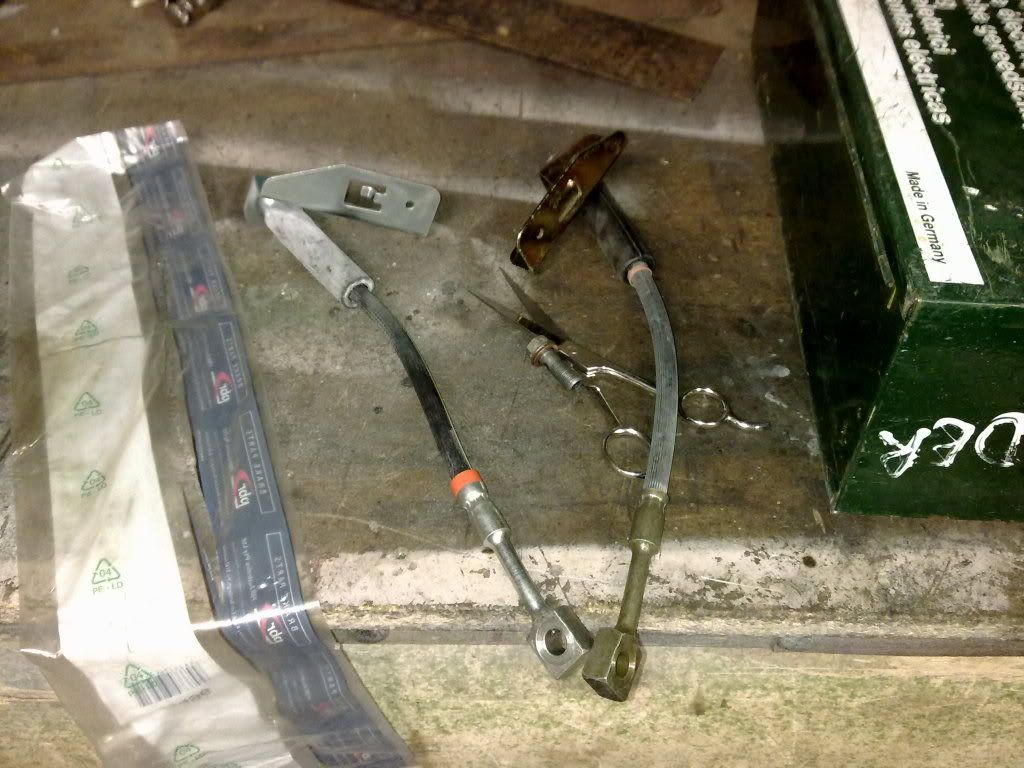 Now you have probably guess that if i don't like how something looks i fix it. FORD WTF is this s**t? Like ok it clears everything, but look at the bends in the line, do you want it to burst? 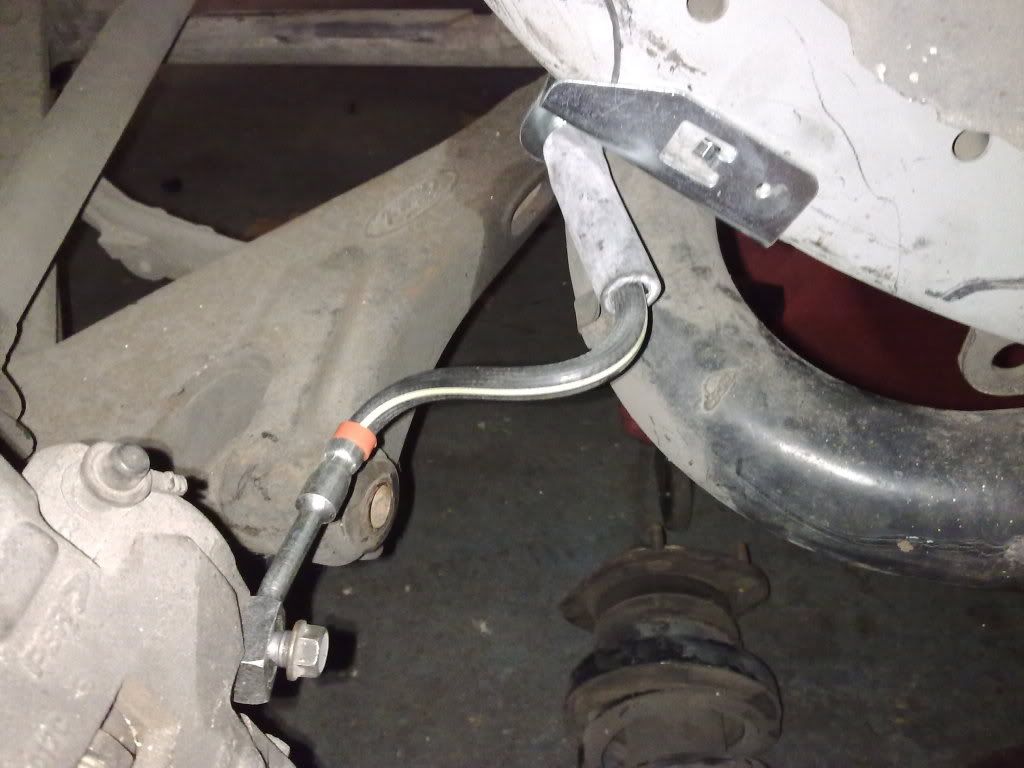 And this stupidly tight bend right at the caliper, do they know this joint moves ALOT? 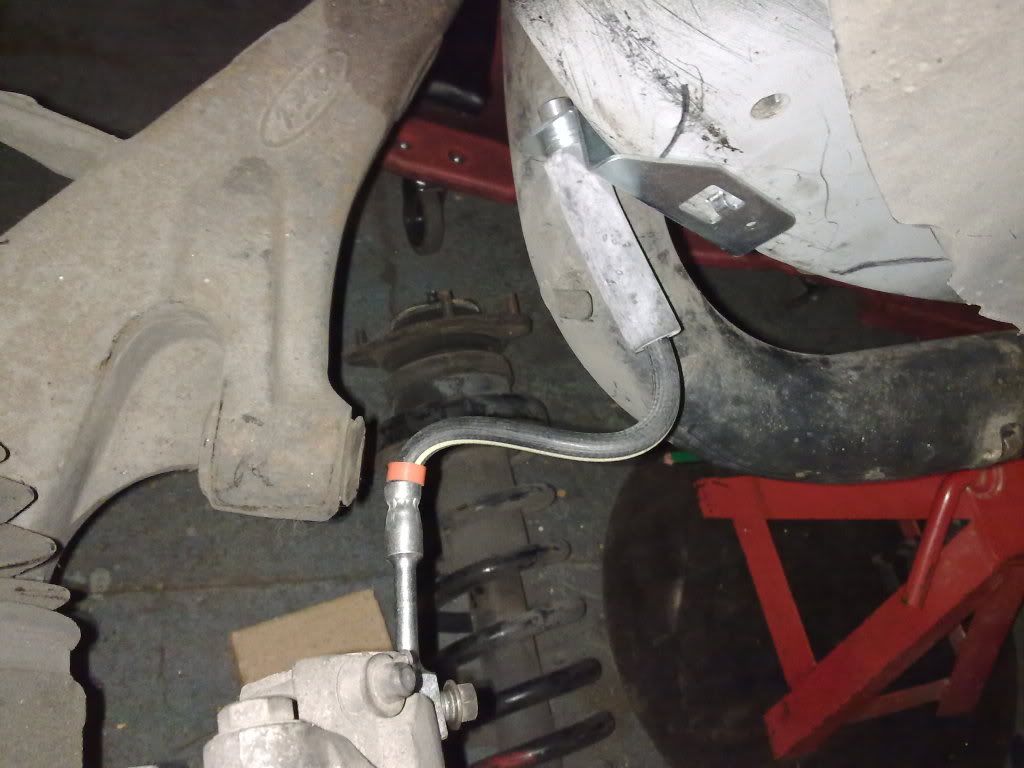 So i bent the end alittle to relieve the tight bend at the caliper 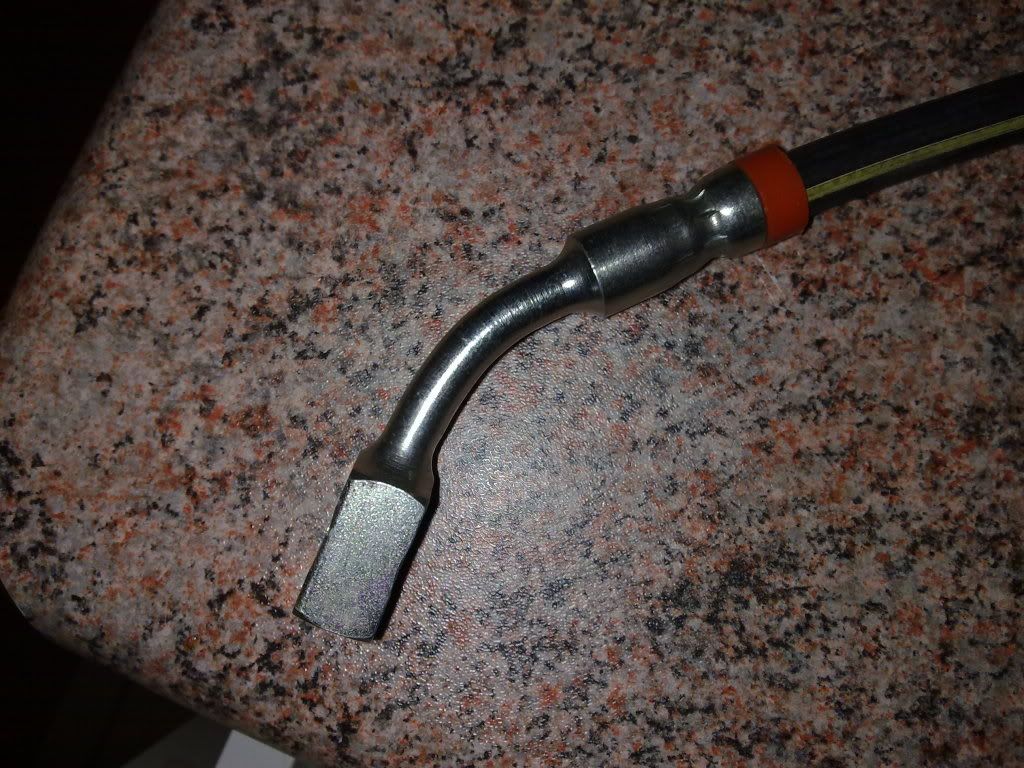 Now they make this lovely bracket to bolt to the chassis rail yet they stuffed it up, the hose sits on this angle why didn't they just bend the bracket alittle more? 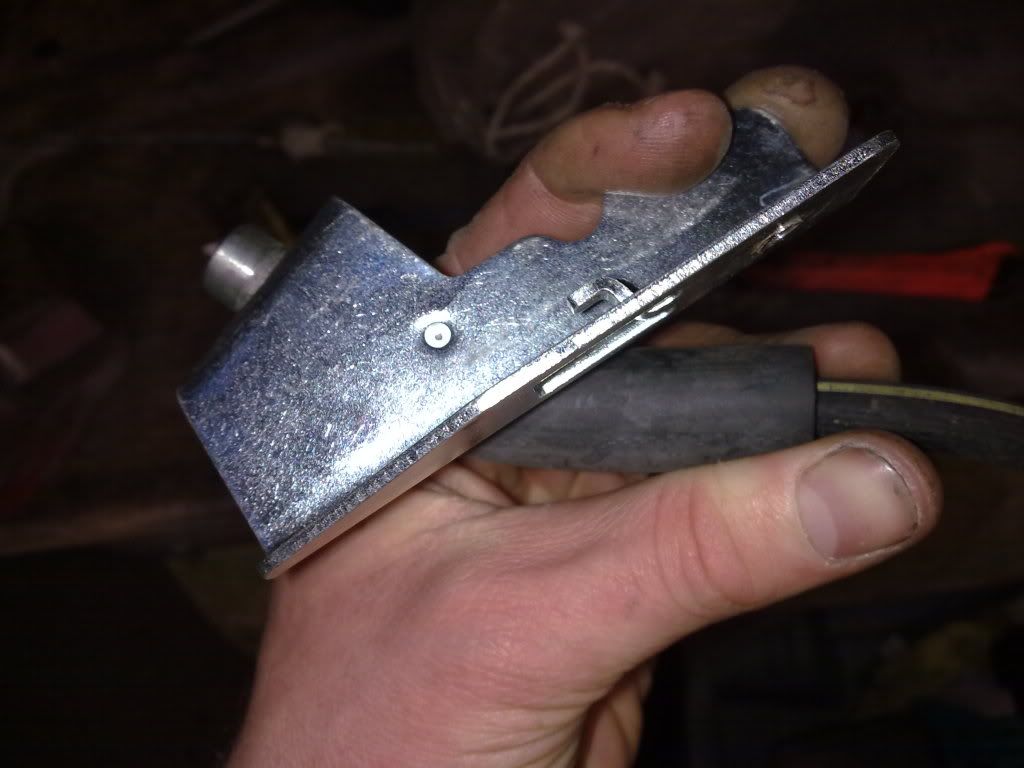 You can see on the bracket where i think they sould have made the bend, i'll cut and reweld this tomorrow at work if I get a chance. 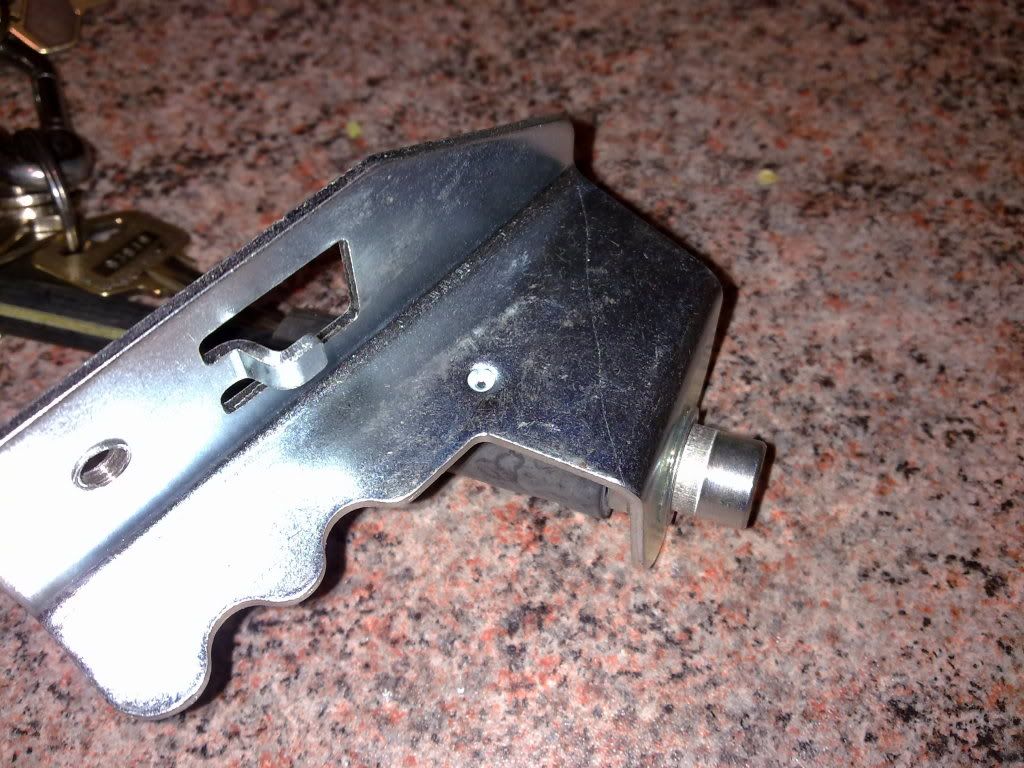 Cheers, Anthony So tonight's effort has resulted in the brake lines ford should have made I cut the bracket down my scribed line and opened it up, then welded in a wedge. 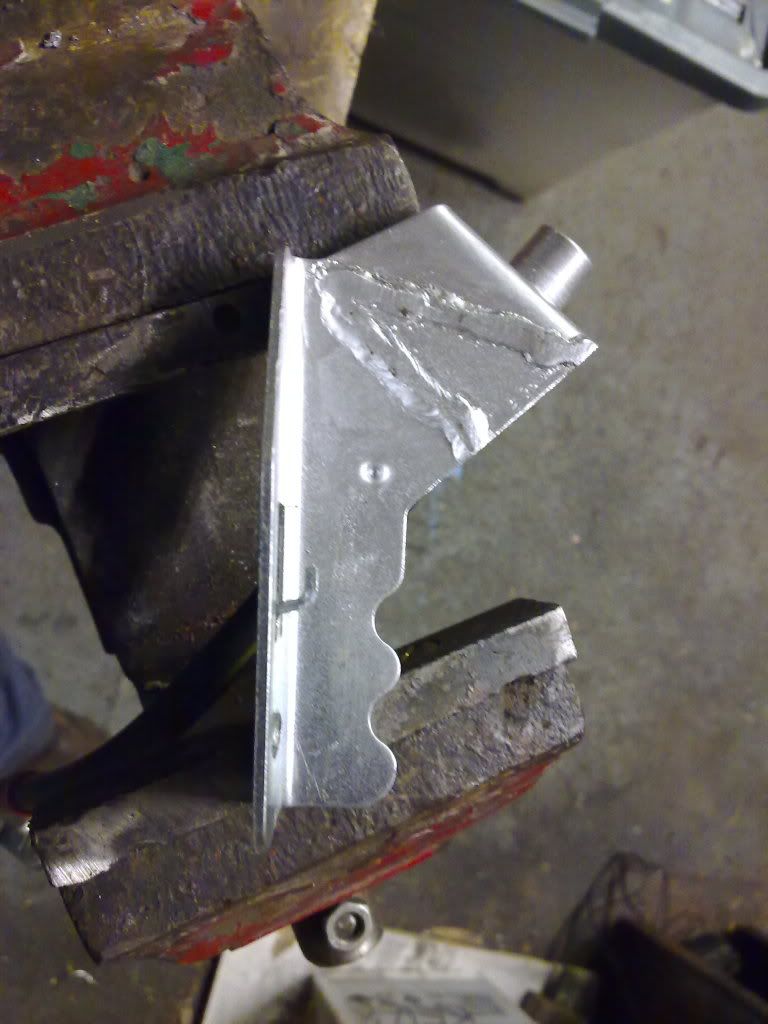 Fitted to the car, much happier with how everything sits. 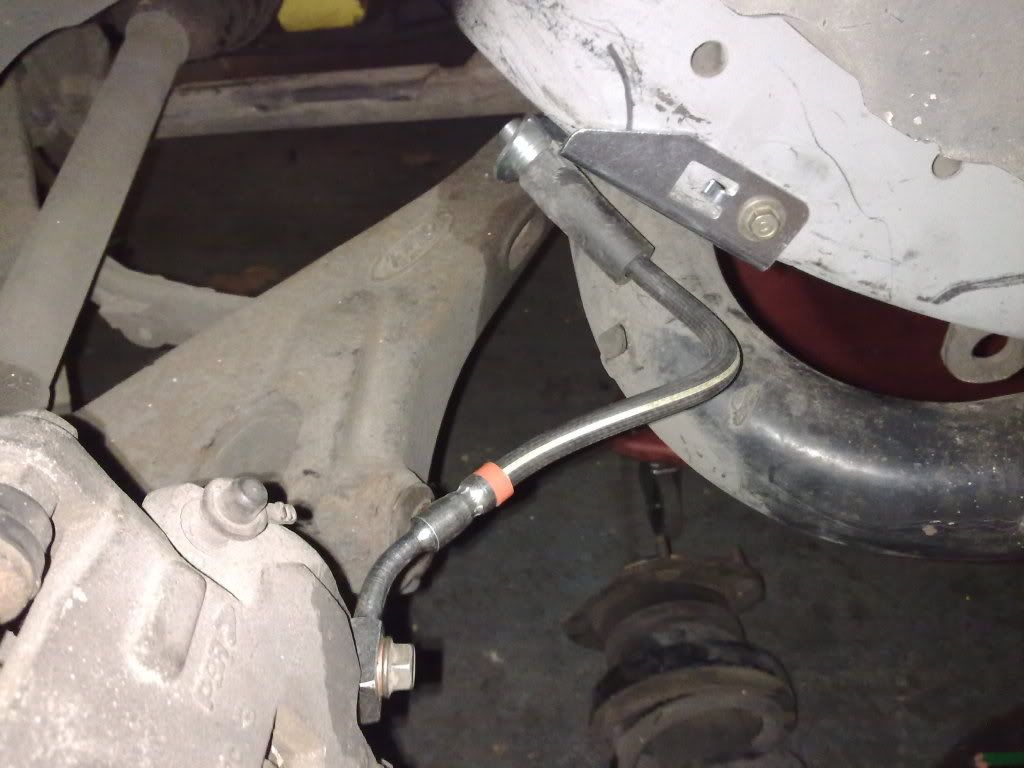 Compaired to Cheers Anthony
_________________ I enjoy the symphony of mechanical harmony, |
|||
| Top | |
|||
| bbqburner |
|
|||
|
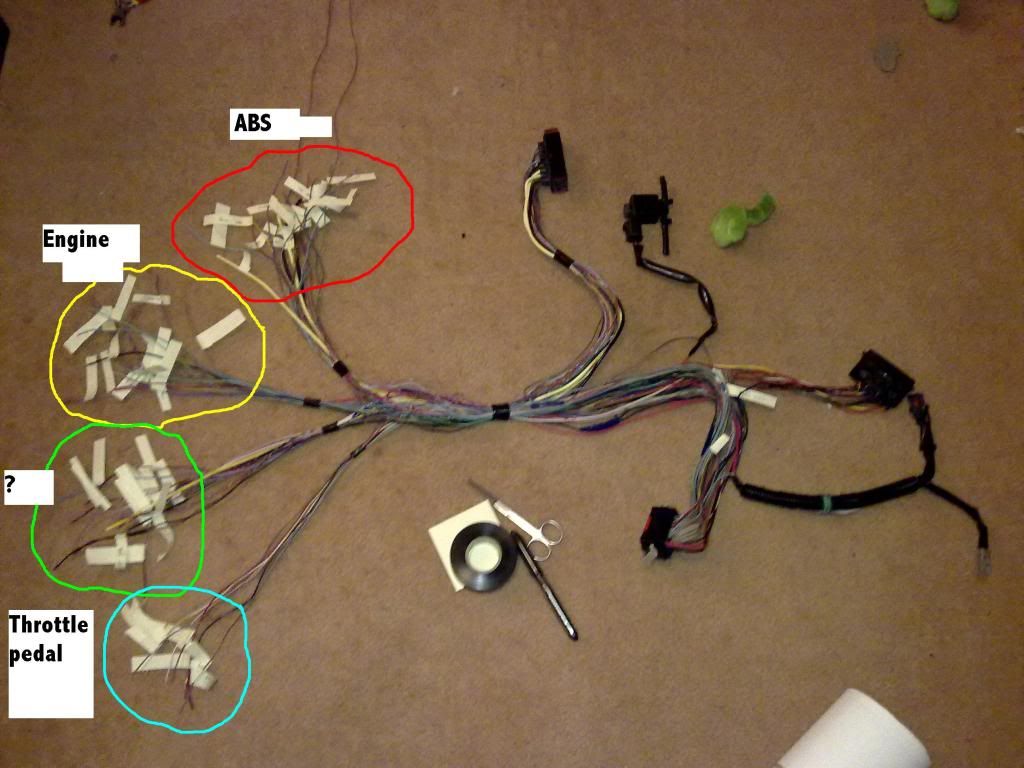
Went through the BA harness and figured out what wiring i need
 Got my transmission yoke, uses standard ford 1310 uni's 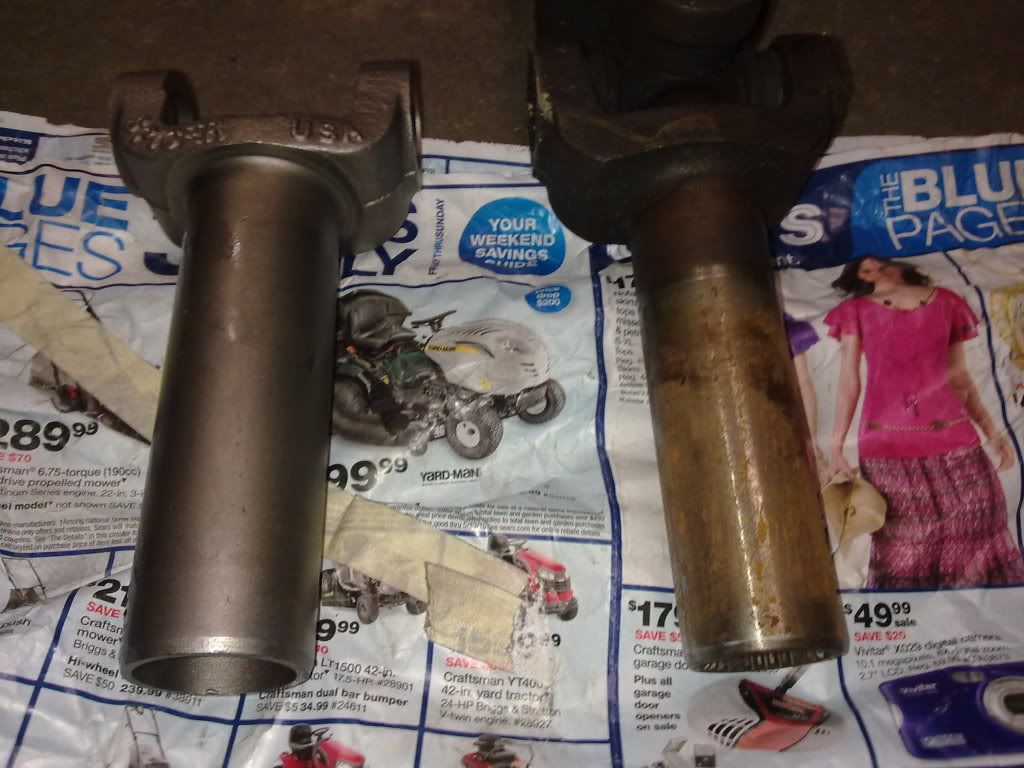 With the T56 yoke bottomed out in the gearbox, and the EL tailshaft uni's lined up there's about 50 - 60mm difference, which a AU tailshaft being 80 - 100mm shorter is perfect. 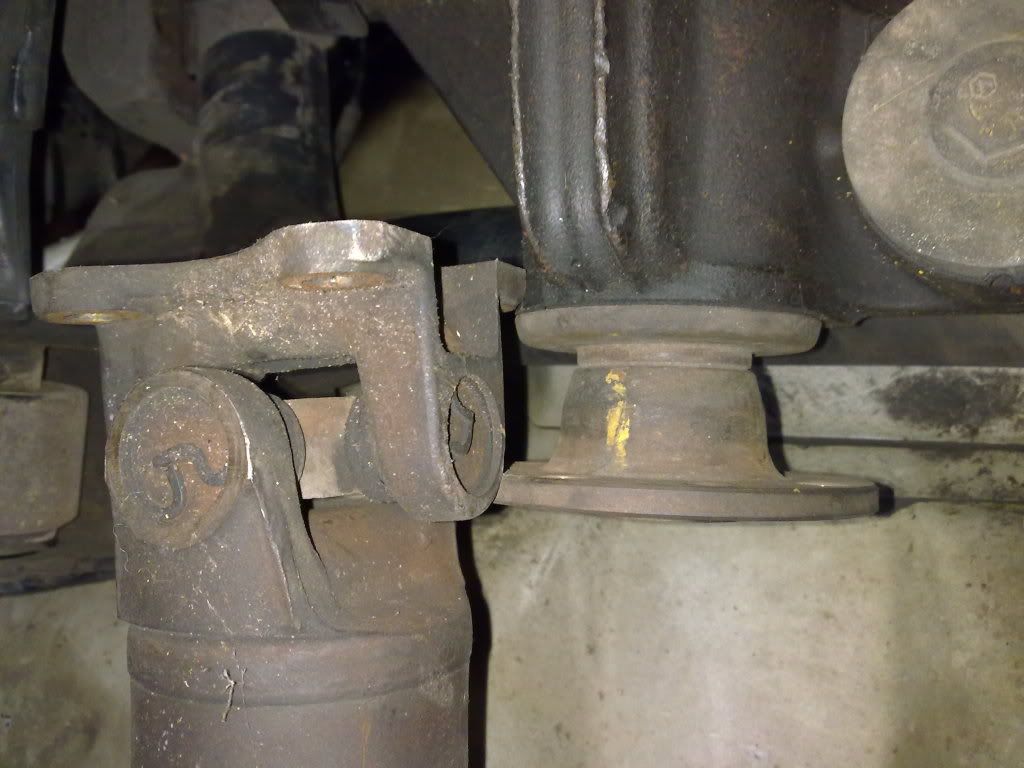 I've been think how i was going to fit the BA piping that i got for $50. I marked out the headlight were i figured i needed to cut. 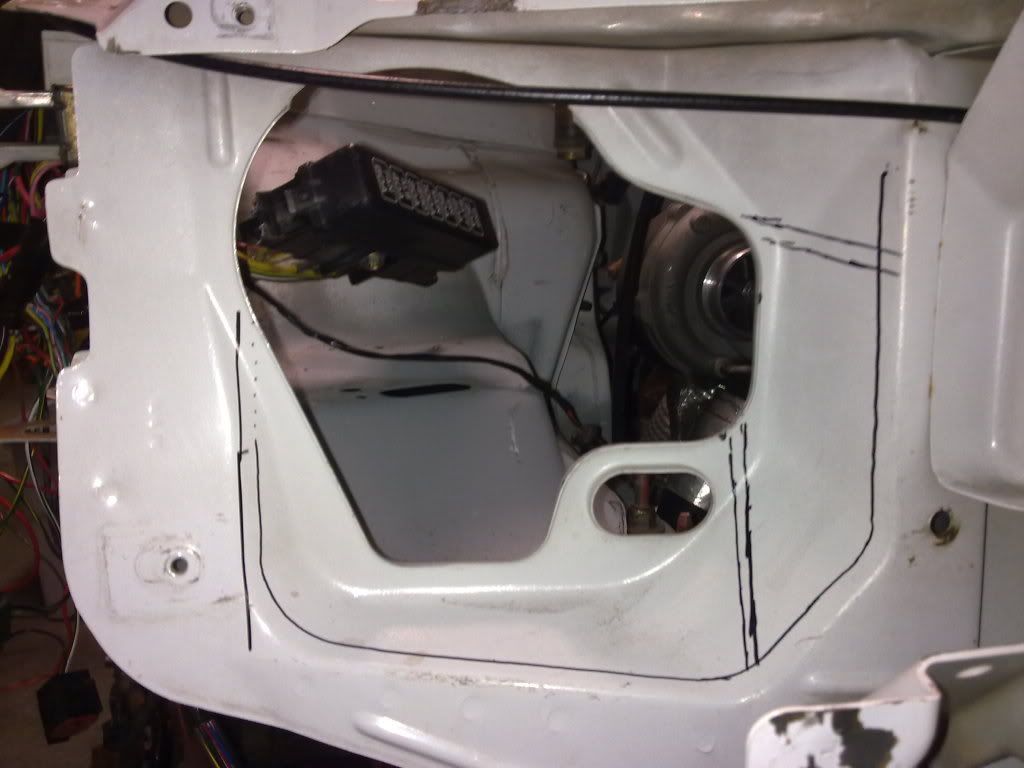 After cutting out the hole and rounding the edges again so the strength is retained in the radiator support.  And fit up, Haven't needed to touched the headlight. Why did they just build them like this to begin with?  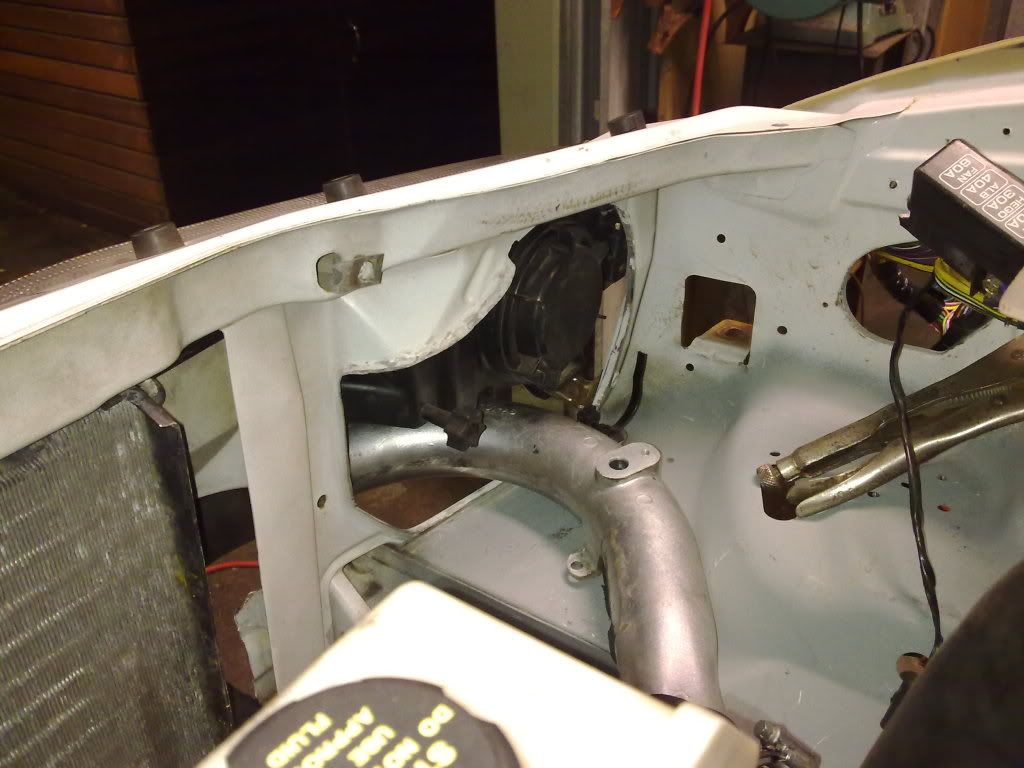 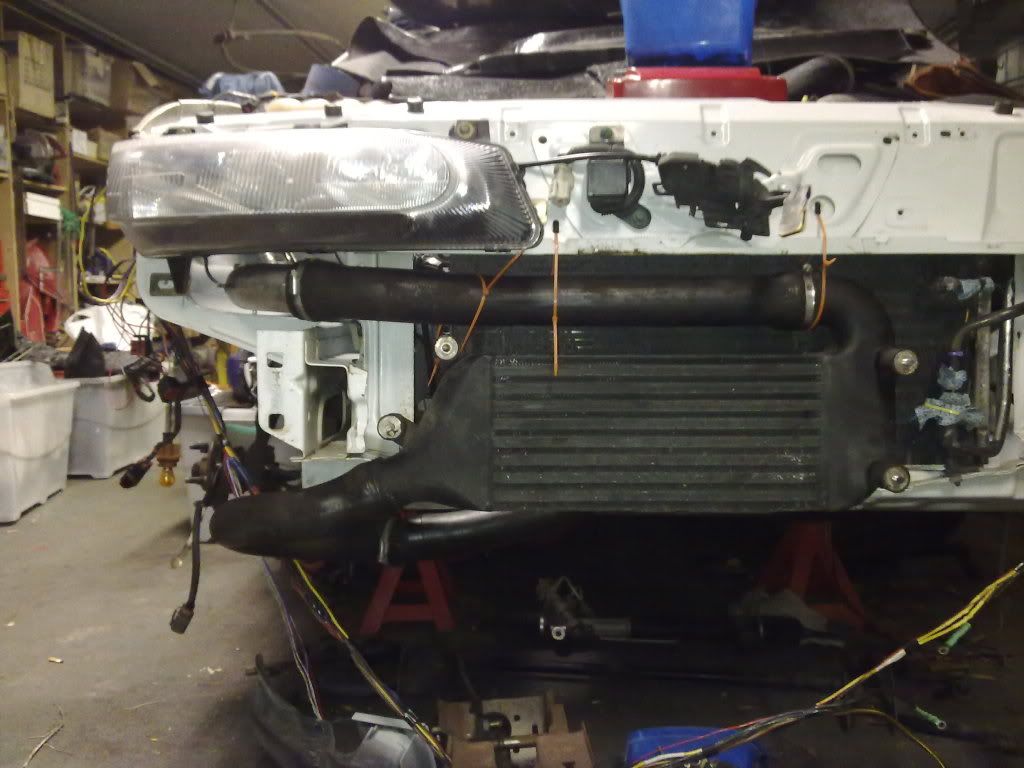 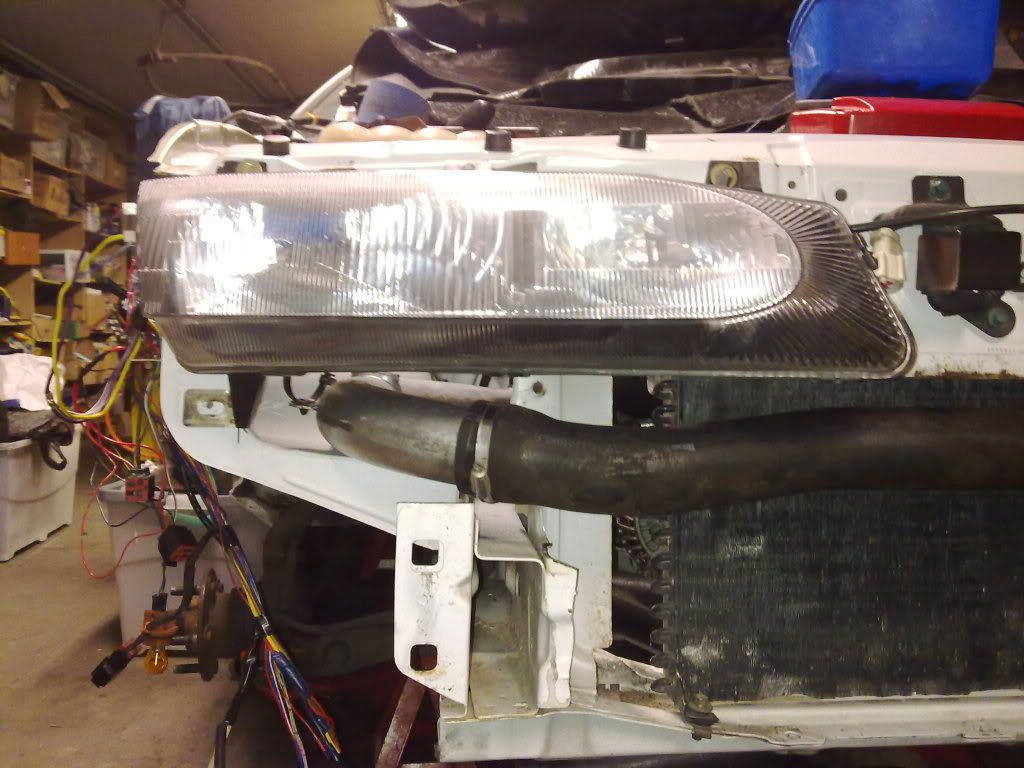 There's still another piece i need to cut out for the pipe back to the throttle body but this has to be the easiest intercooler piping fit up ever. Cheers, Anthony
_________________ I enjoy the symphony of mechanical harmony, |
|||
| Top | |
|||
| BEAR80 |
|
|||
Age: 45 Posts: 683 Joined: 4th Mar 2010 Ride: BF Fairmont Ghia & TS Magna Location: central coast |
{USERNAME} wrote: {USERNAME} wrote: this looks like it going to turn into one hell of a car. i like those mags of the orange falcon, what condition are they in?, what size are they?, and can you put up pictures of each one cheers bear depending on how much you want for them and how much postage is i may be extremely interested, and i would want them shipped without tires as it will be cheaper thats if you would take the tires off cheers, bear |
|||
| Top | |
|||
| Who is online |
|---|
Users browsing this forum: No registered users and 0 guests |

