|
| BenJ |
|
||
|
Hello Again,
Now one of the stated negatives of a BBM conversion or EL Engine install is that you can't get the Cruise Control to work. Following my EL engine install I got around this by cutting and shutting two cables together. I used the EL cable attached to the throttle body, and the EB cable from the actuator servo, cut them both in half and joined them together. This photo should give you an idea of what I mean. 
And a close up of the bodginess - Hey, it worked!!!! 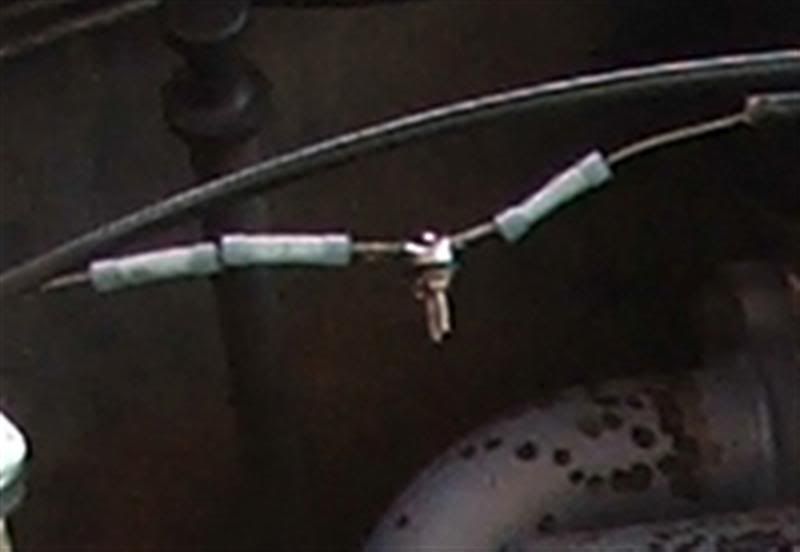
With the above mod (EL Dash and Console) in mind, I realised that the EB Cruise Control Module would no longer fit under the centre console. For those that don't know, the EB Cruise Control is a complicated mess of wires, vacuum hoses and components. There are three separate devices. The Cruise module is under the console, the vacuum pump is located in the engine bay behind the washer bottle on the left hand side and connects via vacuum hose to the actuator servo on the right hand side. There are vacuum hoses under the dash connected to the brake (and clutch) pedal as well as wires. There are many things to check if it decides not to work. All in all, a real pain. Seeing as I had the EL Engine and ECU I thought that I could use the EL Cruise Control. Ford got their act together and in the EF/EL the Cruise Control system is one device, and it is all electronic. A side benefit for me is that my bodgy cable join would be gone. I studied the schematics for both systems and identified that essentially both systems are stand alone. All they need is the relevant inputs and when connected to a throttle body it should work. The main difference is that the EL in addition to the Brake Light switch, uses the Brake Pressure Switch, to cancel cruise. This is attached to the Brake Master Cylinder, and is not able to be fitted to the EB Master Cylinder. It is also not feasible to update the EB to an EF/EL Master Cylinder as the brake lines are routed differently. It is however a simple matter of connecting 12V+ Ign to the Brake Pressure Switch wire to bypass it. So, I got to work. I acquired the EL Cruise module and Cable as well as the Plug and a length of loom. I then made up a loom using wiring stripped from my spare parts car. I used a plug on the end that is located behind the Instrument Cluster to allow easy access to the wiring loom and to be easy to unplug for when the dash conversion happens. After modifying my custom cruise switches with different resistors, I unplugged the EB Cruise module, and after connecting the necessary wires, went for a test drive. It works, and very well to. I have driven up to the Central Coast and back from Sydney and it performed like it should. I am not sure if you need to have the EF/EL instrument cluster in, but I will say that the VSS (Vehicle Speed Sensor) wire out is connected to the Cruise Module. If you were to try this with the EB Cluster, you would have to test if the normal VSS in wire will work. A couple of pics. 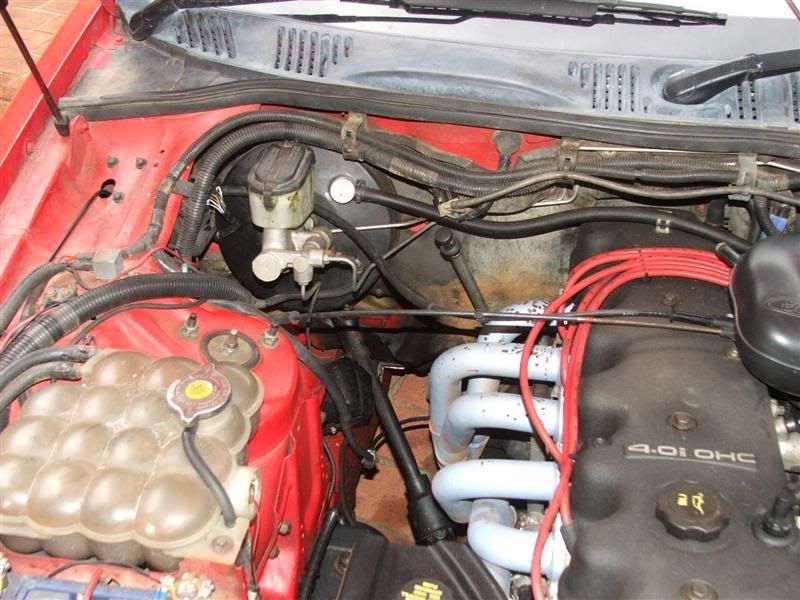
Well I hope you found this interesting. BenJ
_________________ BenJ's EB T5 DOHC Ghia Wagon - Current Ride |
||
| Top | |
||
| BenJ |
|
||
|
Gidday
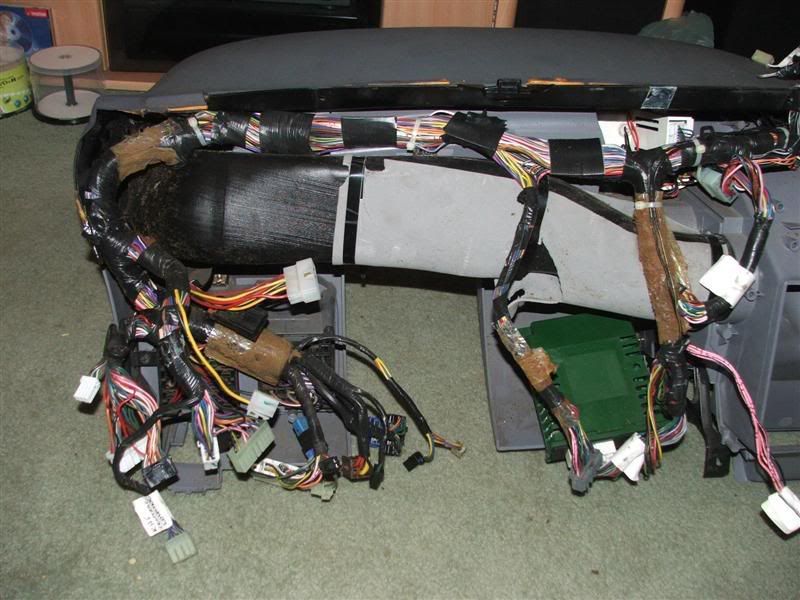
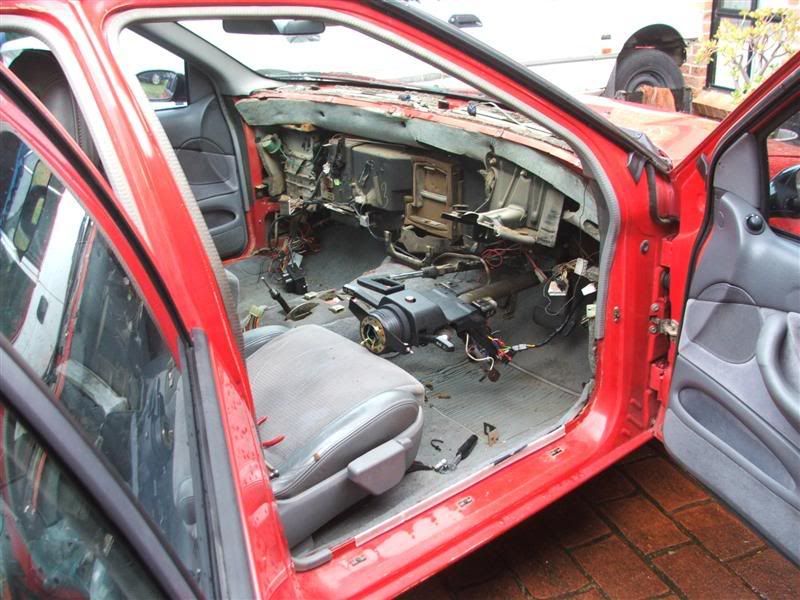
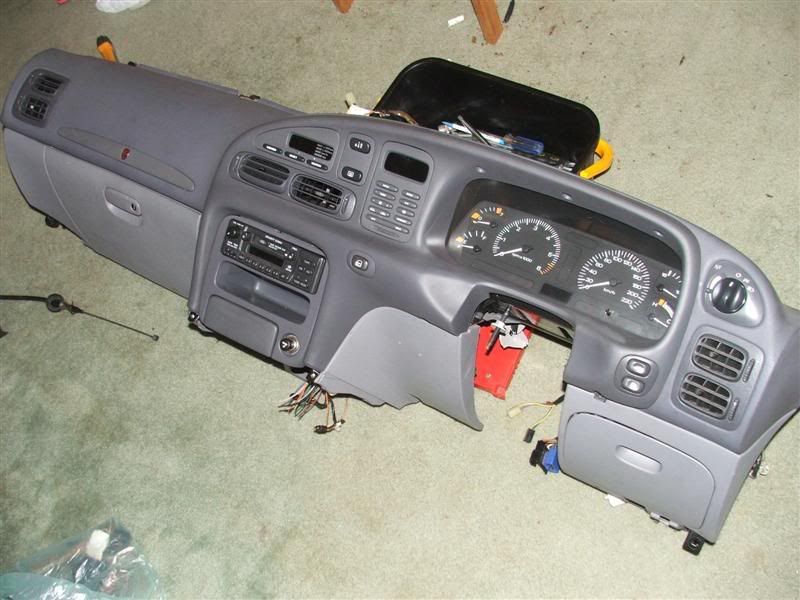
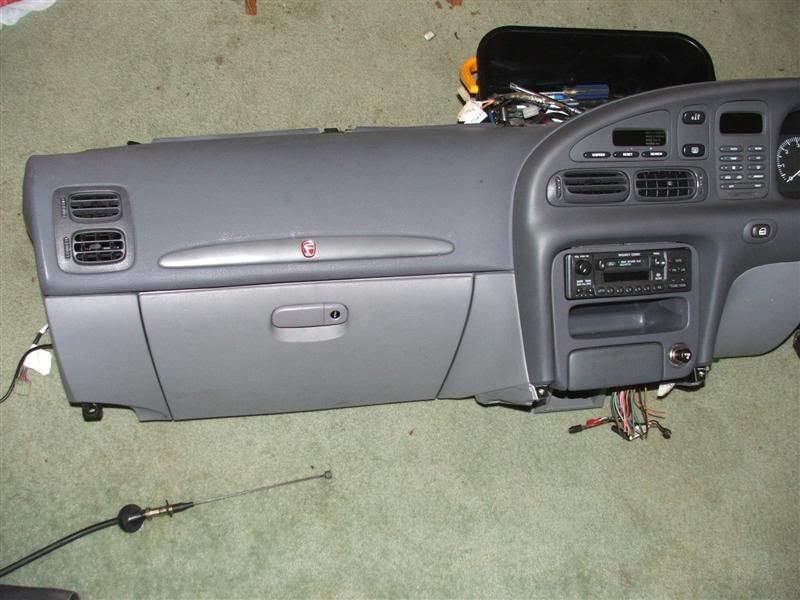
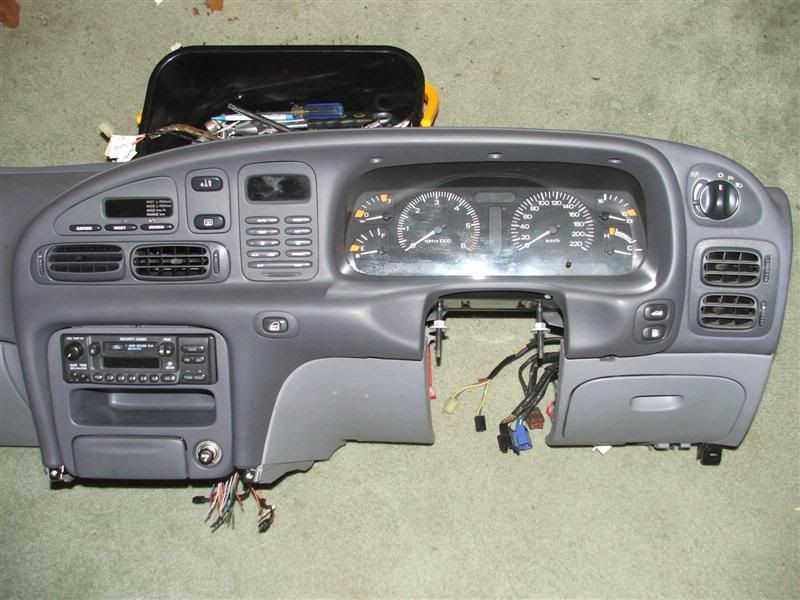
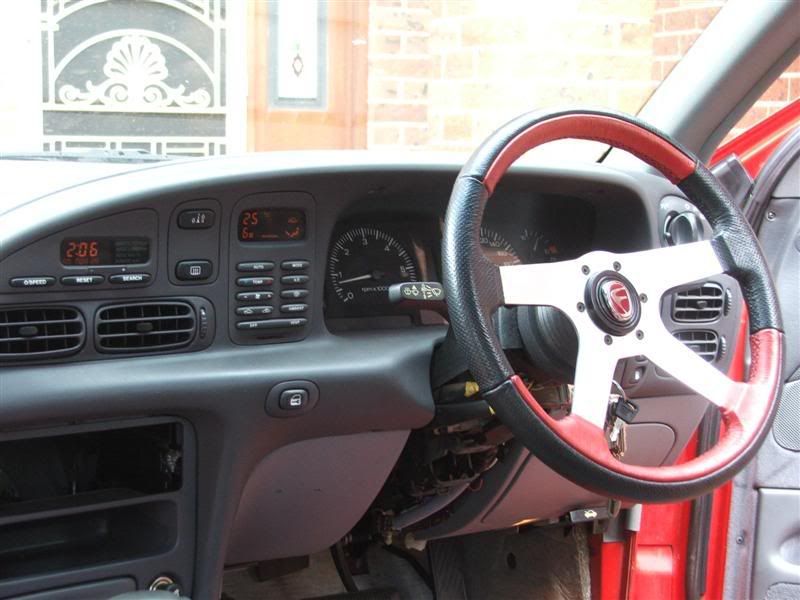
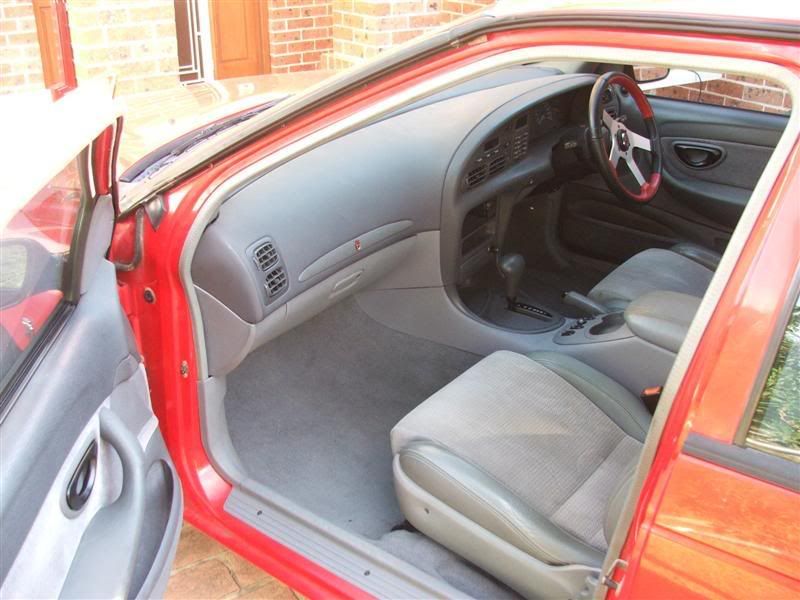
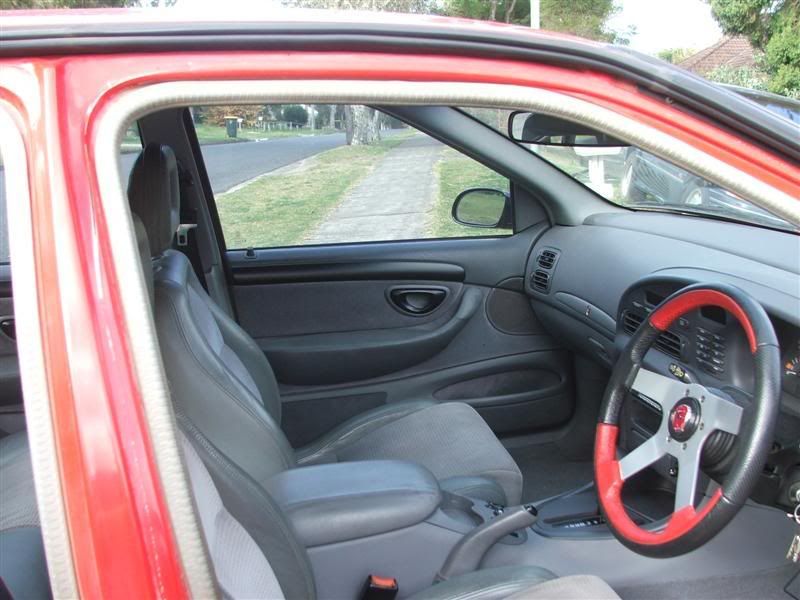
So, have been busy over the last few days. Got off my backside and got stuck into preparing the EL Dash to go in the EB. Before I go any further, I would like to thank PaulMac for giving me the Dash, Console and associated parts for my recent birthday, and snap0964 for answering technical questions re some of the more fiddly wiring changes. Cheers Guys. My conversion will be a little different to others I have read about. All the other conversions have used the entire EL Wiring loom for the Dash, Engine Bay and Body. I intend to use the EB Loom and either cut and shut or make adapters to work with the EL Dash components. The Loom I am using is from my spare parts car, which is an EBII Fairmont with Smartlock. This means I will also get the Fairmont Goodies like the diming interior lights, the variable rheostat for the dash lights and the Auto Climate Control loom. As my car is pre Smartlock, I will use the Smartlock Module only for the Remote Central Locking and associated functions, and bypass the imobiliser components. Here are some shots of the EB loom in the EL Dash. The fuse panels screwed straight in to the factory holes, and the rest of the loom fell into place nicely as well. You can see that I labelled the loom when I pulled it out of the EB Fairmont over 3 years ago. Very helpful now I can tell you. I had to cut and shut some plugs and run a couple of extra wires for lighting etc, but not to bad really. 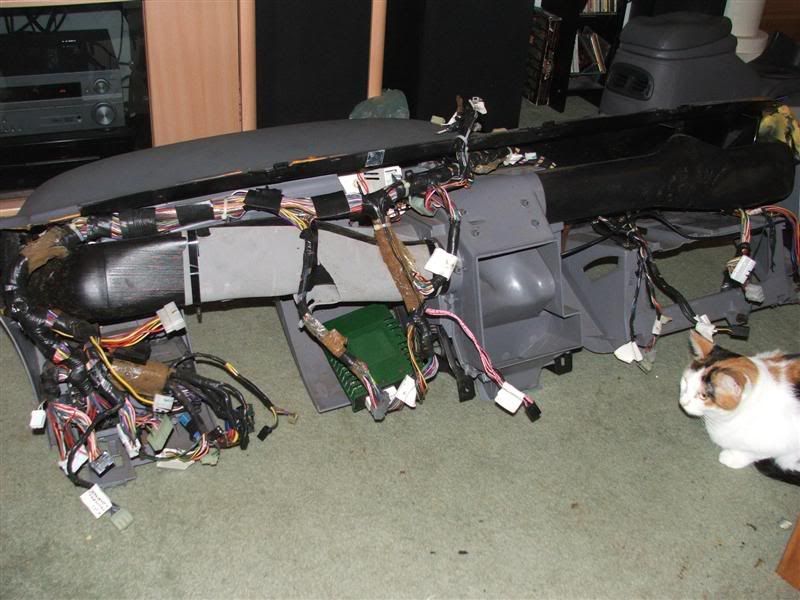
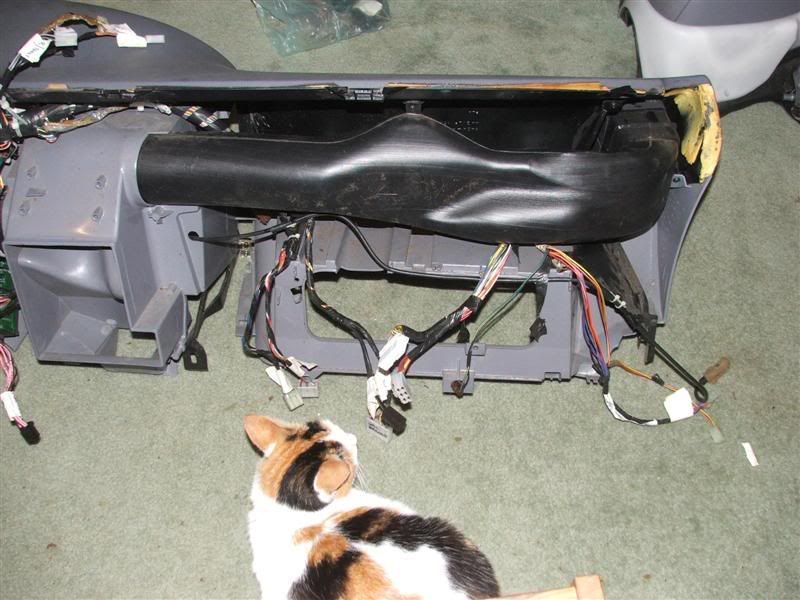
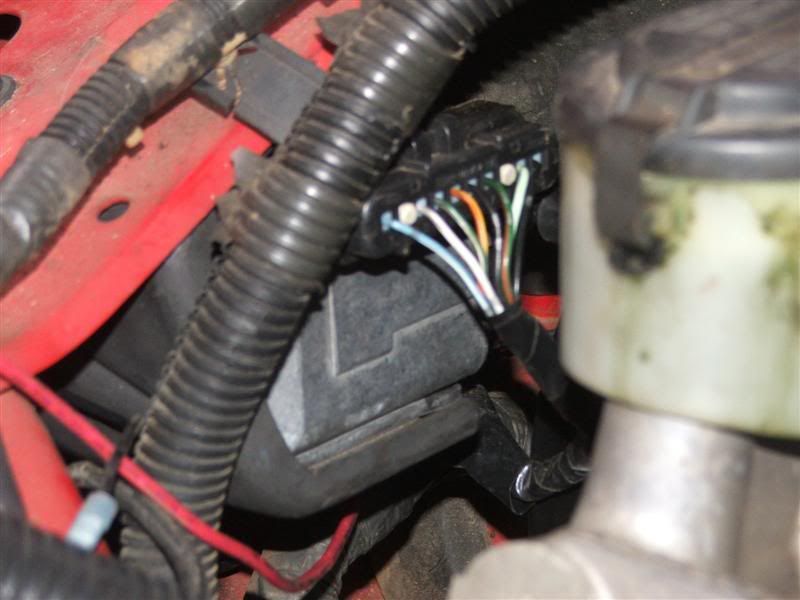
See my assistant there keeping an eye on things. I managed to get the parts together to upgrade to Auto Climate Control at the same time. Interestingly many of the EB components work with the EL Climate Control Module, however there are some important changes as well. There are several functions that in the EB are controlled by the Climate Control Module, but in the EL are controlled by the ECU. This means I have to run a couple of extra wires to the ECU. I won't go in to detail here, but if any one is interested in doing a similar conversion, PM me and I will do what I can to help. I did have to make an adapter loom to interface between the EB Climate Control Plugs and the EL Climate Control Module. I managed to find matching plugs from other parts of the cars so I didn't have to cut and shut this part. The Adapter. 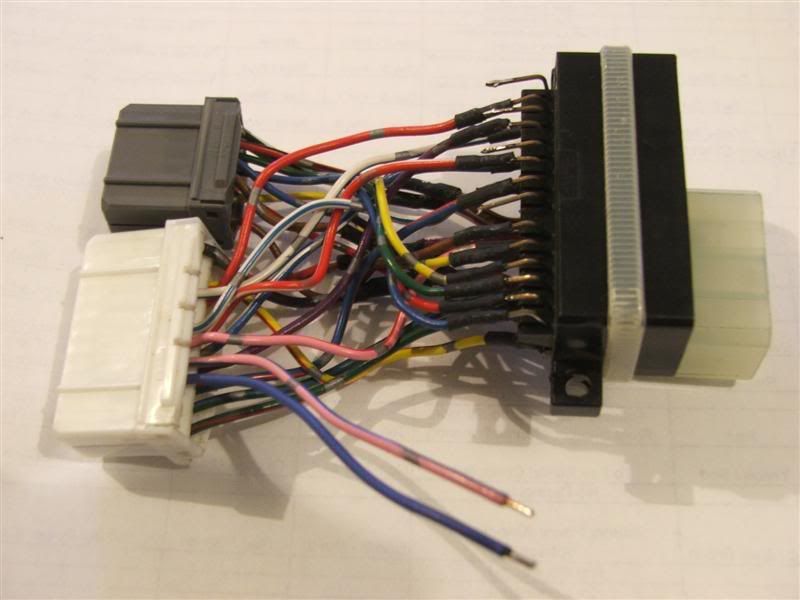
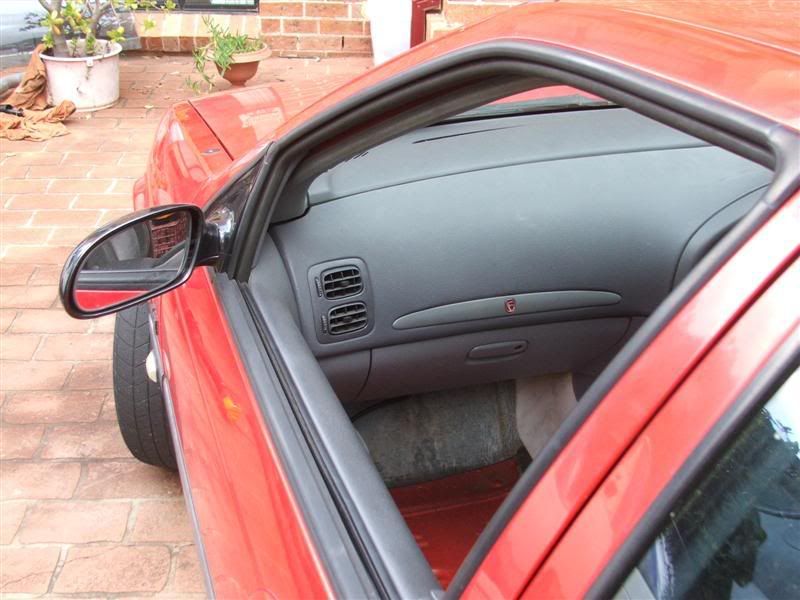
The following are some shots of the EB with no dash (but lots of red dust) and of the front of the EL dash. 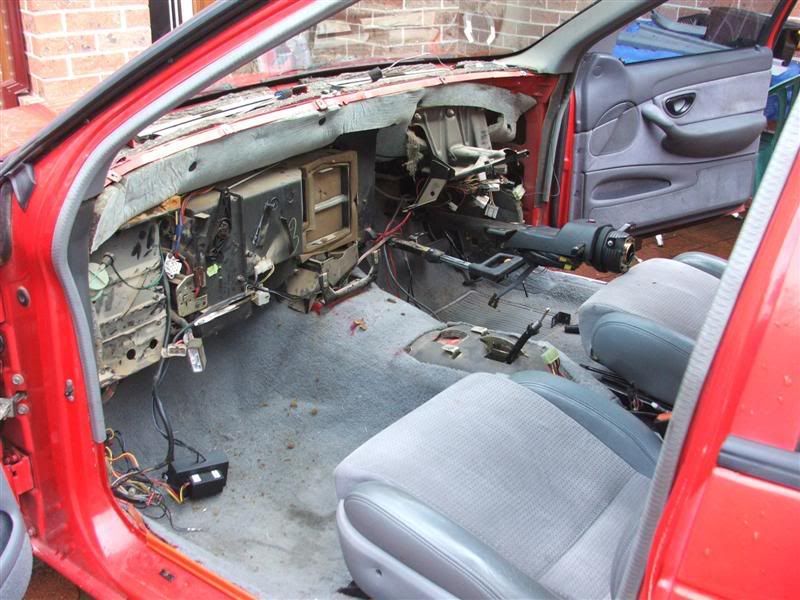
The plan is to put the EL dash in and see if the car starts first, then test the other components. Once it is drivable, I will then install the console and carpet and then worry about the handbrake. Wish me luck. Regards Ben
_________________ BenJ's EB T5 DOHC Ghia Wagon - Current Ride |
||
| Top | |
||
| BenJ |
|
||
|
Wooo Hooo
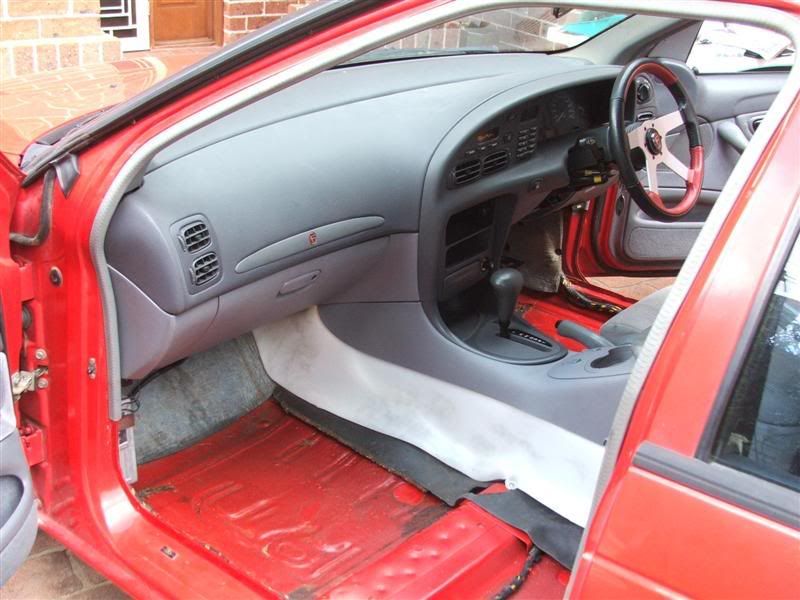
Got the dash in this afternoon and plugged it all together. The main thing was to see if it starts, and it does. Very Happy!!!!! Tomorrow will be sorting all the other little things in the dash and then fitting the console and handbrake etc. There are also bits and piece like my hands free phone kit, and the thermo fans manual override switch etc. Till Tomorrow. BenJ
_________________ BenJ's EB T5 DOHC Ghia Wagon - Current Ride |
||
| Top | |
||
| BenJ |
|
||
|
Hi - me again.
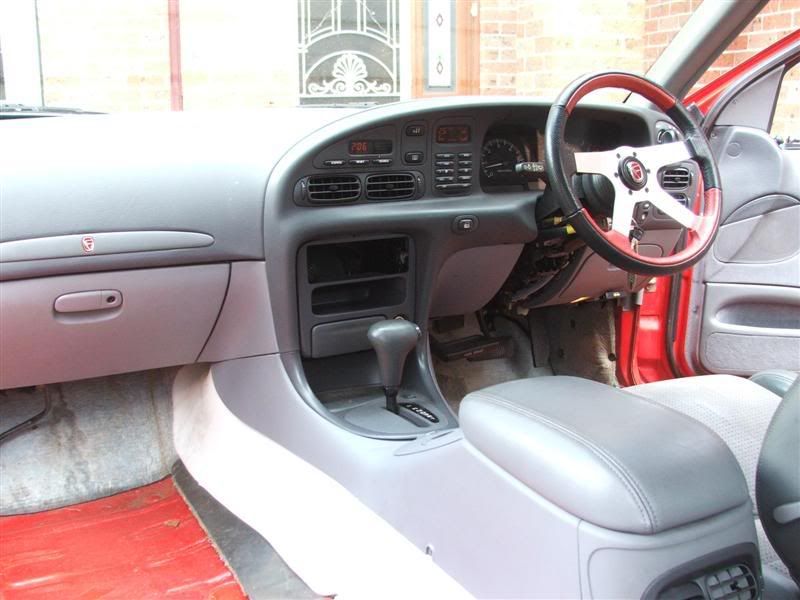
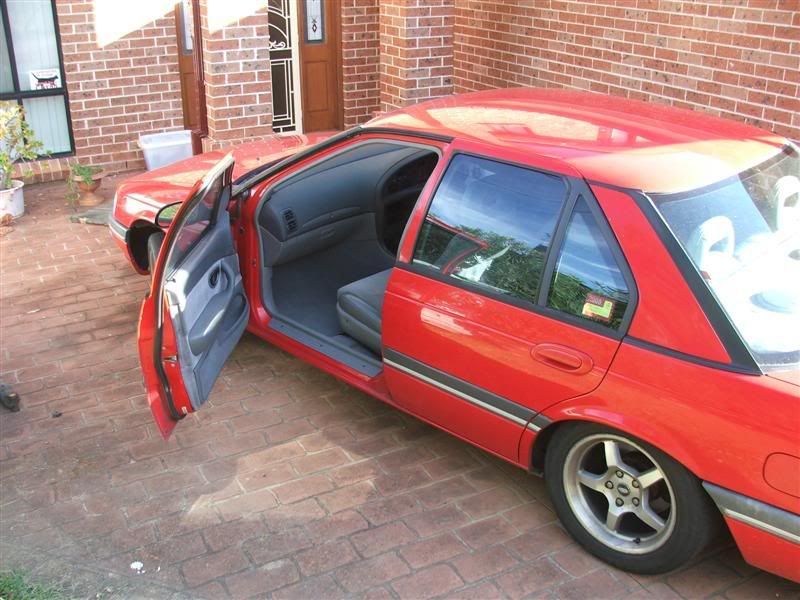
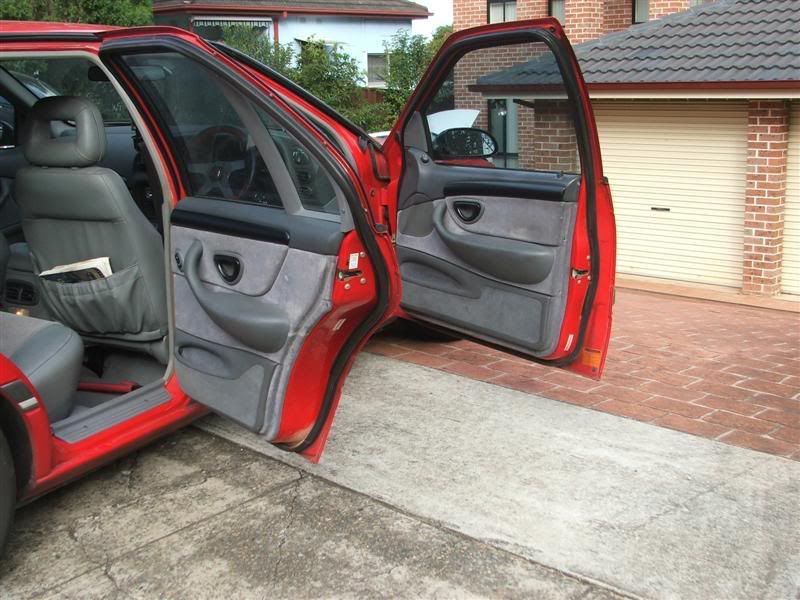
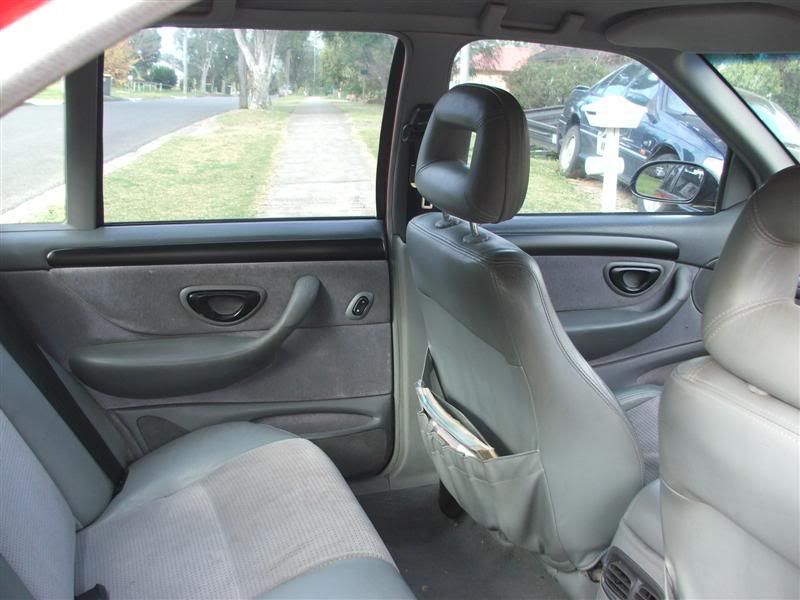
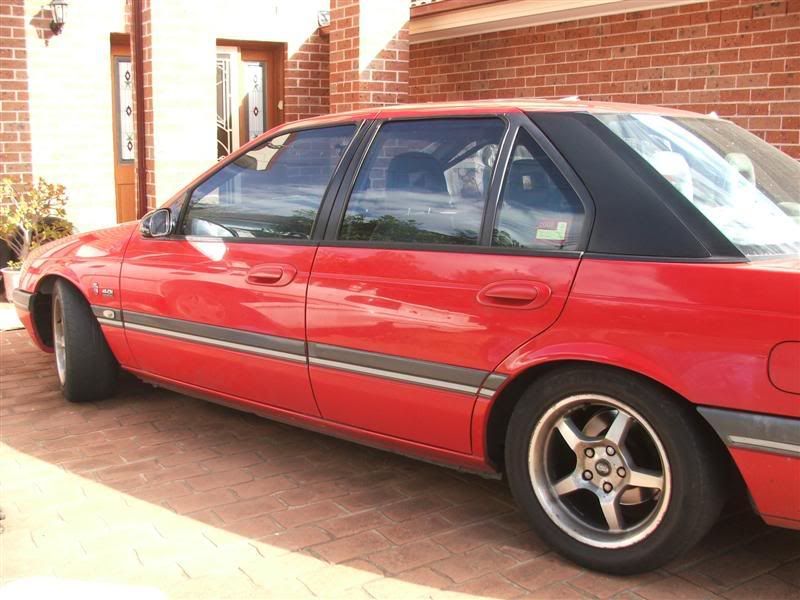
As I have had the pleasure of a spare set of wheels (ED Futura, T5, 3.27 LSD - fun) - Cheers PaulMac, I have been able to spend more time sorting things as I go. When I left off from my previous post, I had to solder on a replacement Radio plug which had been cut off in the distant past, run a couple of extra wires that went to the ECU, and finish installing the cluster and my cluster loom. This took up a bit of time as it is quite fiddly work. I also had to work out what to do with my heater box. I considered swapping it out, but could not find a way to get the heater hoses off the pipes. They are located behind the BBM and are quite impossible to get at. I think I will have to take off the BBM, and I really didn't want to go there at this time. So I modded the GLi heater box to take the EL climate control parts, a fun story I may relay another time. On both my cars the vent flap that controls fresh air is broken. I went to Pick N Payless, and every car had the same problem so will live with it for now. The other mod I was believed I had to make was to the EB Pedal Box. Now, if you are using the EB Pedal Box and a EF/EL dash and the EF/EL steering column, you will need to cut out the two steering column support bolts. Be aware that they EF/EL bolts are spaced wider than the EB so measure carefully. I cut mine out using the EB bolt locations as a guide and found that the EL bolts wouldn't line up with the pedal box, and therefore would not line up with the EB steering column. My solution was to remove the EL bolts from the Dash and improvise (large flat washers) the remounting of the EB bolts to there original location. This worked well for me. So if you are using the EB Steering column, don't mod the pedal box. I got the dash in position and then spent a good hour flat on my back in various positions with my head under the dash plugging in the looms to each other. A joyful experience I believe you all should try at least once. Finally it was time to see if it would run and as I reported previously it started and ran. The cluster was doing it's thing and all was wonderful in my world. This morning I got up and removed the seats, carpet and necessary trims. I gave the floor a dust and a wash before installing the console. It all went together relatively painlessly and a couple of things required a little trimming. I installed the drivers seat and went for a test drive boy racer style. Pics. 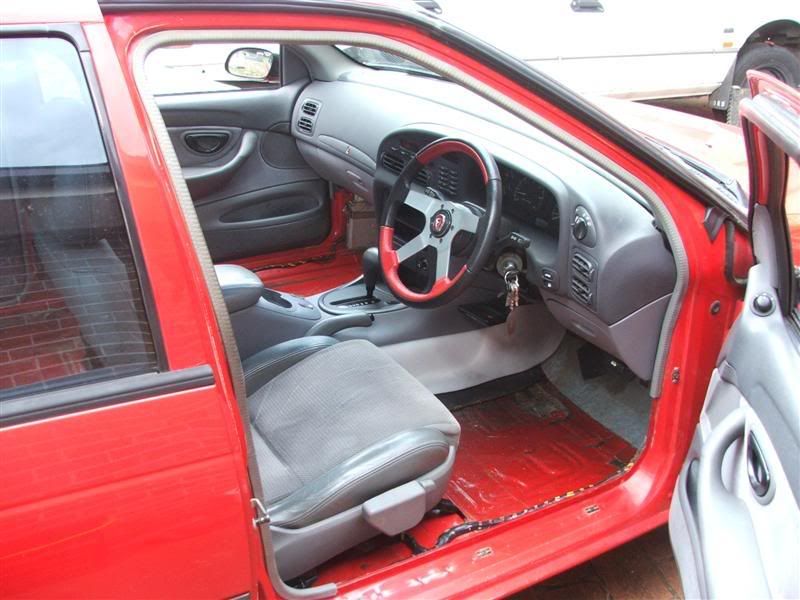
It was dark by the time I got the carpet and all the trims back in place, so here is a quick shot with the flash on. 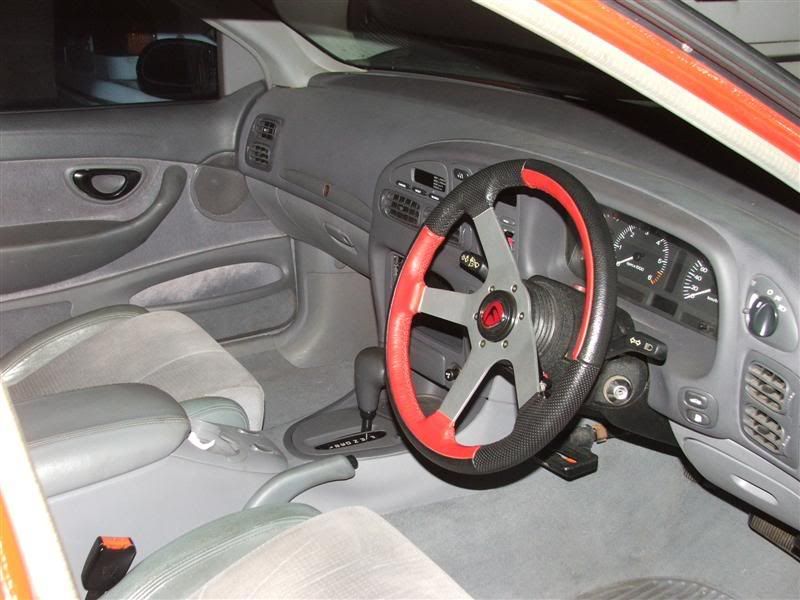
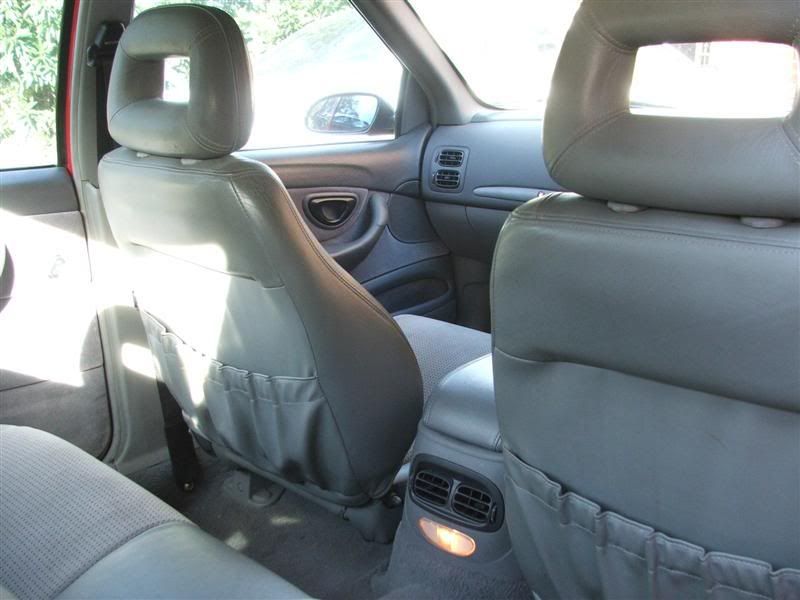
I took the car for a good drive and was pleasantly surprised at the lack of creaks, groans and rattles that I expected from the dash. The EL Trip Computer works as it should and the boot pops, the fuel flap opens and I used the central locking switch to light up the ODO LCD. There are a couple of things remaining to sort out: The EL hand brake is bolted down but not connected. The EB hand brake will be removed soon as the handle keeps wacking my shin. PARK will be my friend for a short while. I am yet to put the CD Player in. I have to make the EL head unit brackets fit my JVC special. I have found that the heater fan will only work on HIGH, so I think I will swap in a spare fan controller I have handy. I also have to figure out how to get the car into learning mode to accept a new keypad. I think the issue is that my ignition barrel is not a smartlock one. I will investigate further. Thanks to all for their comments. I have had a lot of fun and learnt a lot doing this mod, and I am very happy with the results. Until next time. BenJ
_________________ BenJ's EB T5 DOHC Ghia Wagon - Current Ride |
||
| Top | |
||
| BenJ |
|
||
|
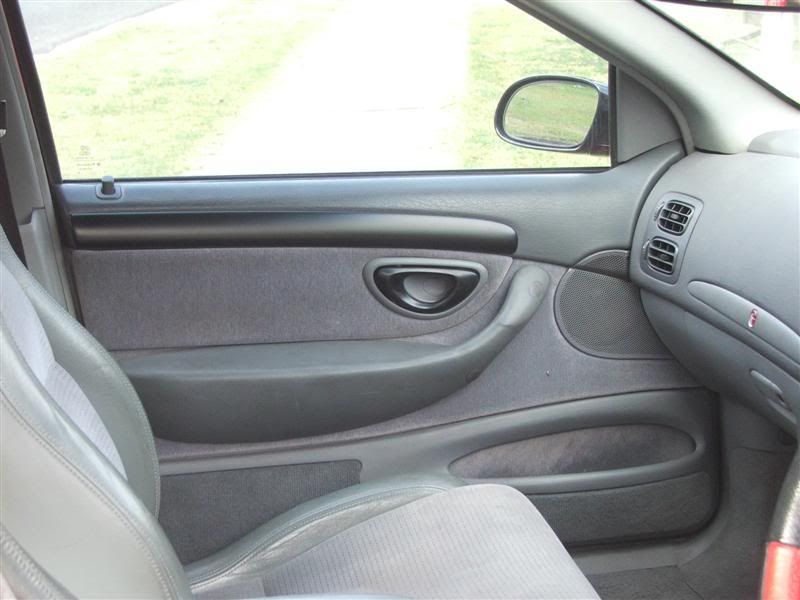
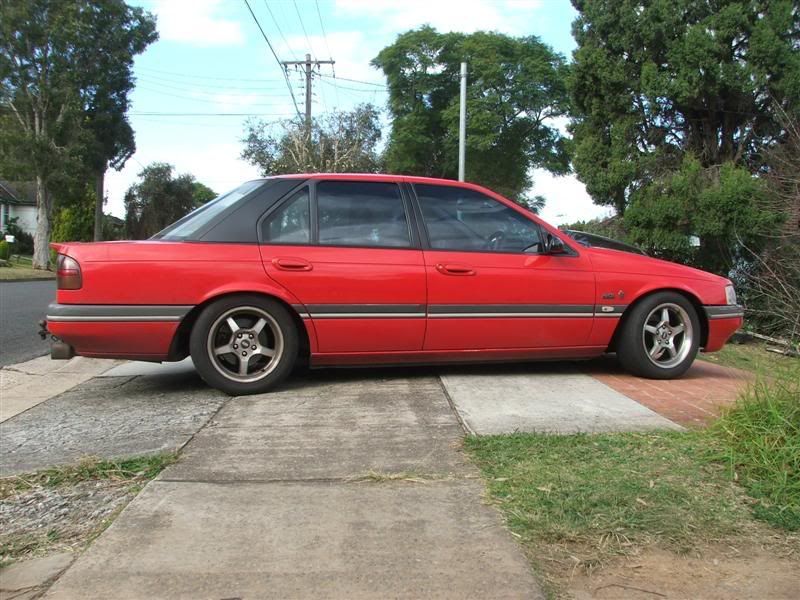
OK, here are some pics of it all together in the daylight.
Oh, and the EB handbrake is now history!! 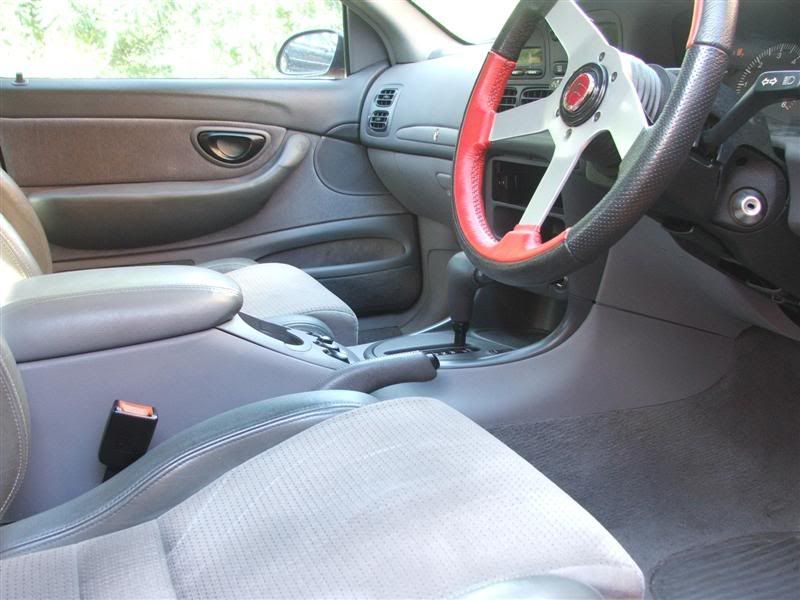
I spent most of the day today, messing around with the hand brake setup. I have followed Barnacus' lead, cheers mate, but have made my own variation. It is all bolted in and connected up. However I have to work on the cable position and some fine tuning/adjustment. At the moment it isn't actually holding the car. When it is doing it's thing I will post up some pics. I have a couple of errors showing up on the Climate Control and have a fair idea why. Something to do with bodgy wiring I suspect LOL. I will sort it out over the next few days. Cheers BenJ
_________________ BenJ's EB T5 DOHC Ghia Wagon - Current Ride |
||
| Top | |
||
| BenJ |
|
||
|
Hello once again.
I finally have an update for this thread. The diff has been dropped off at a diff specialist. They looked at it for free and even took the hat off and checked the teeth for wear etc. They said the LSD needs shimming etc, which I expected, and bearings. So for $480 they will put in new carrier, pinion and axel bearings, and service/shim the LSD centre, setting it all back up again. Should be better than new. I will be picking it up next Wednesday afternoon and Paulmac hopes to come down on the Friday and help me put it in. While we are at it I hope to be able to do something about the pinion angle with a bit of parts swapping. Will post how it all goes. Cheers BenJ
_________________ BenJ's EB T5 DOHC Ghia Wagon - Current Ride |
||
| Top | |
||
| BenJ |
|
||
|
Gidday, It's me - just in case you were wondering LOL
Ok, I spent some more time this week trying to sort out the EL floor mounted handbrake, and getting it to work with the EB handbrake cables. I followed Barnacus' lead and using his method as a guide came up with this. 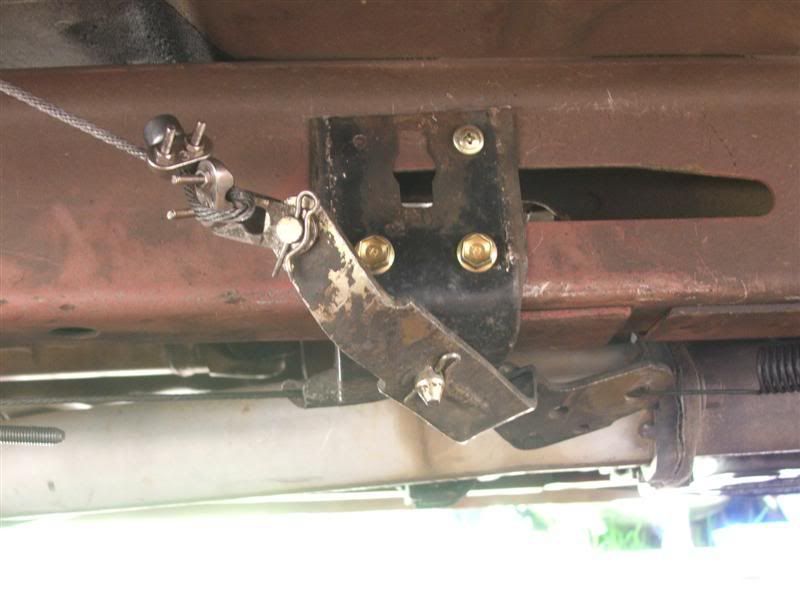
You can see here that the handbrake cable from the handle comes through the floor from the rear of the car towards the front, and pulls backwards on the lever to pull the EB handbrake cables in the correct manner. I made my lever from a spare original EB handbrake component. In the following pictures you can see the one I made compared to the factory one. 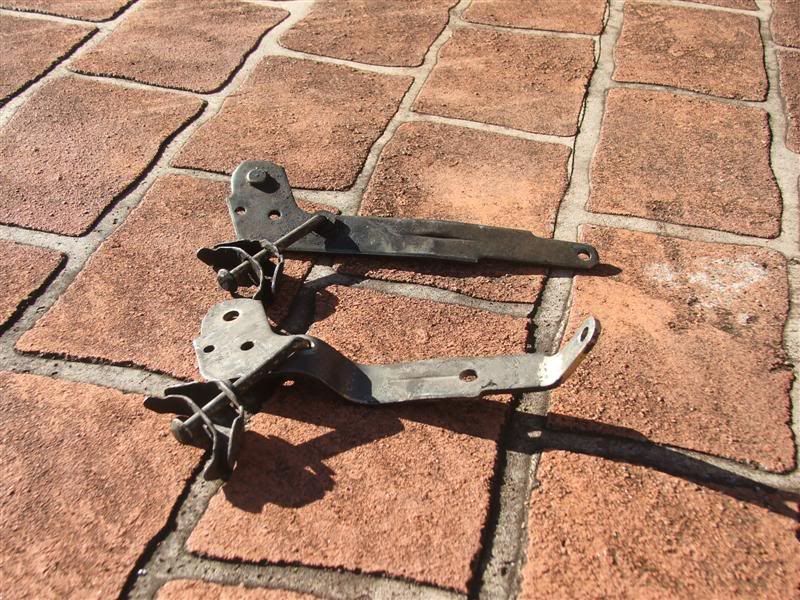
The factory item is the flat one. This arrangement still needs some fine tuning. I need to either mount the lever bracket more to the front, or find some way to give me more adjustment. The handbrake will hold the car in Drive or Reverse, but only when the handle is really yanked on. As this is the case, I think I am on the right track, and will play with it some more when the mood takes me. During the week I have also attended to a couple of other things. I sorted out the issue with the Climate Control. The fan was only coming on FULL. In the end it was indeed some of my bodgy wiring. A wire had come loose on the adapter I made. A few minutes work with the soldering iron had it all fixed up. Now the fan works on all speeds. All that is left to do now is get it regassed. (I hope) As noted above, when I put the dash in I noticed it was lighter in colour than the Vent Cowl cover and the EF door trim tops. I found out that there are three colours. One in the EF and two greys in the ELs. The simple fix was (thanks again Paulmac) to get the appropriate parts from the car the dash came out of. I then swapped them over. I also was able to swap a trip computer with black buttons for one with grey buttons. So overall the whole thing looks much more cohesive. While the door trims were off, I also installed the Fairmont door lock which in the EB has a light in it. This also then meant I had to change the boot and ignition locks so they all operated from the one key. After the car is washed I will get some finished photos. Cheers BenJ
_________________ BenJ's EB T5 DOHC Ghia Wagon - Current Ride |
||
| Top | |
||
| BenJ |
|
||
|
Well, it is finally done.
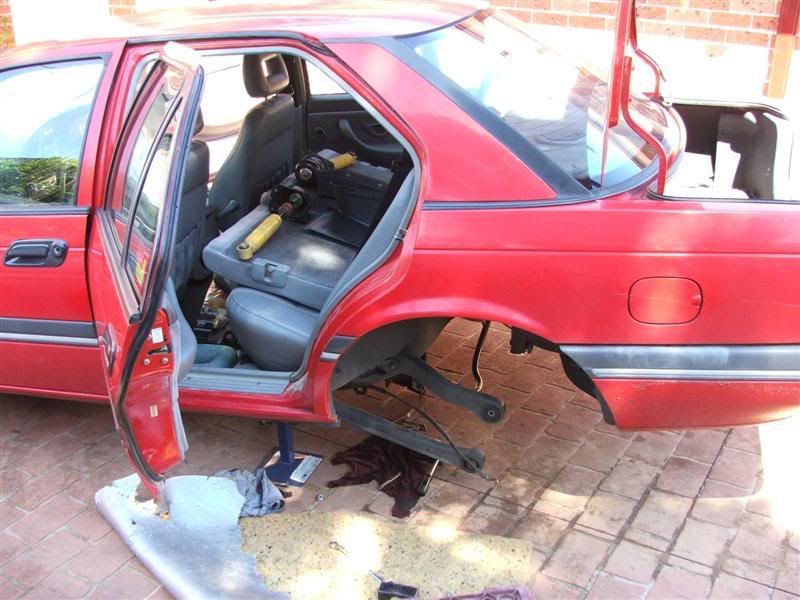
Yes, after all the crap, pain and heartache, I can finally smile. I picked up the Diff yesterday, Wednesday afternoon. Paulmac kindly volunteered to help me put it in on Friday morning, but I couldn't sit around all day on my butt with nothing to do, so I put it in today LOL. Some progress shots. Look no Diff!!!! 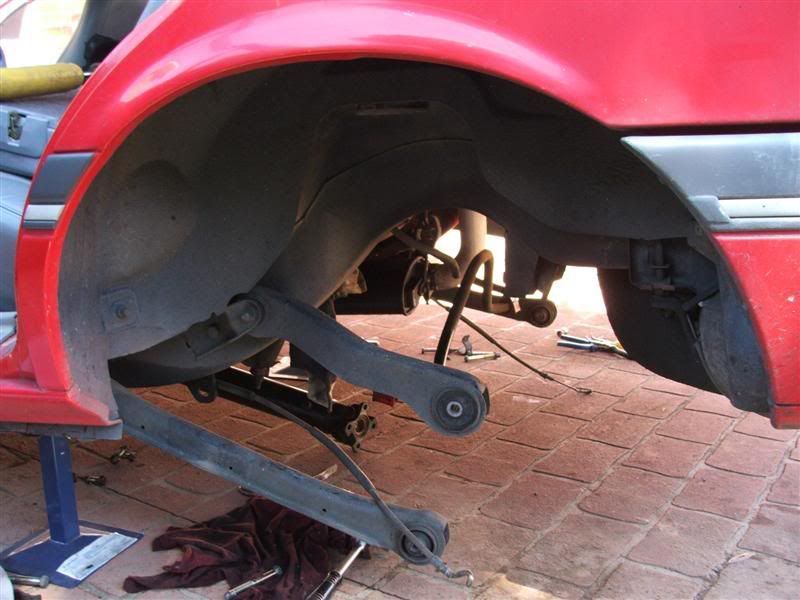
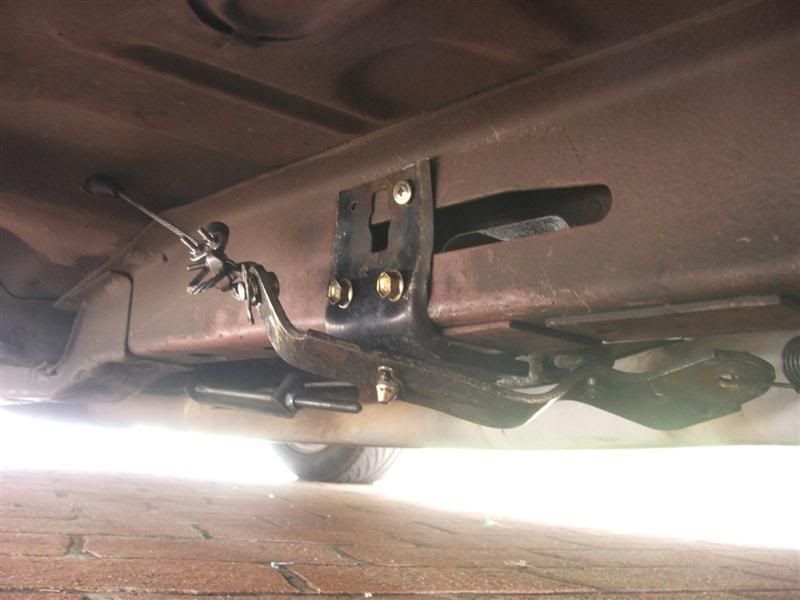
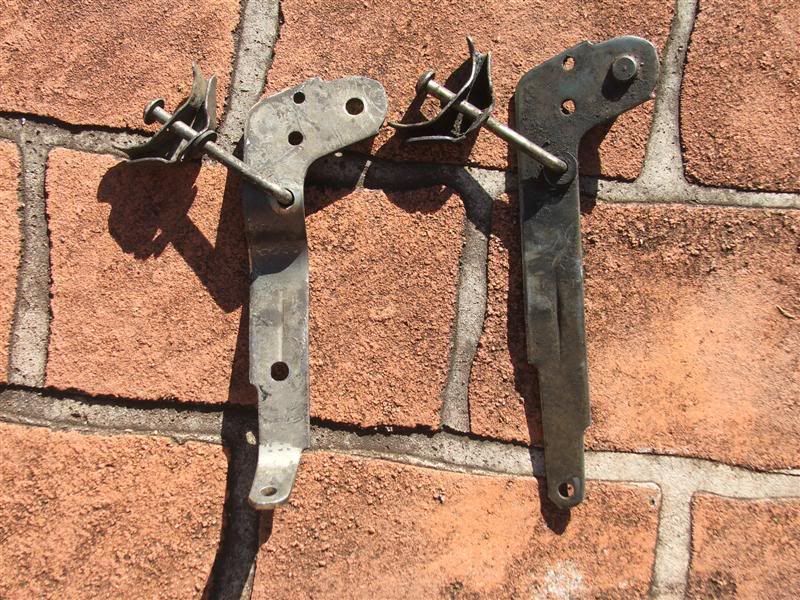
As part of the install I decided to use EL Upper Trailing arms. These are 20mm shorter (320mm) than the EB arms (340mm). The idea was to alter the pinion angle and get rid of some Pinion Grumble I was getting while carrying passengers in the rear. The following shots were taken with the weight of the car on the differential. I will let the pictures speak for themselves. EB Upper arms - angle not too bad 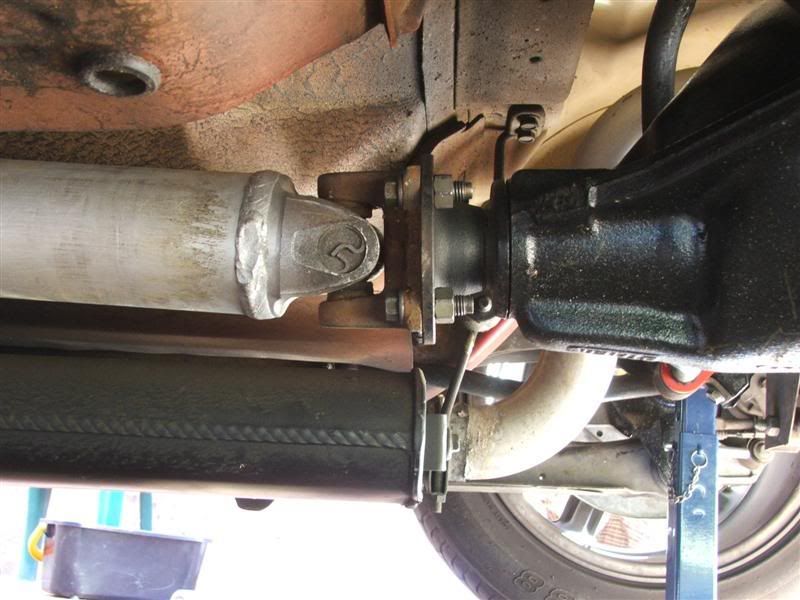
EL Upper Arms - this is not good at all 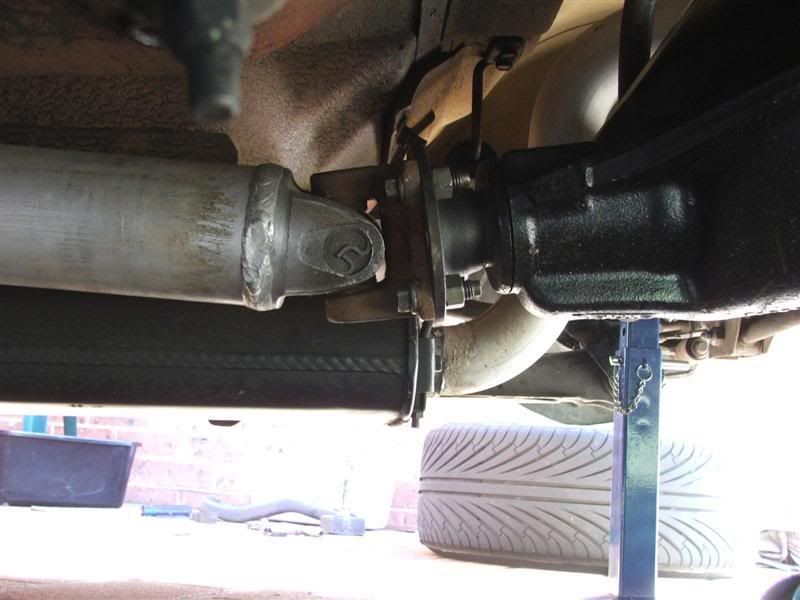
What this has shown is that with Super Low Springs, using an EB/ED/EF housing with a single upper trailing arm mounting hole, the EL arms increase the pinion angle sharply. If however you have an EL housing with the dual mounting holes, there should be no issues using the EL upper arms. It is my opinion that if I was to redrill my upper brackets slightly below and forward of the existing mounting hole, then I would see an improvement in the pinion angle. I may do this in the future. Needless to say, I put the EB upper arms back in. One of the more painful parts of the conversion was changing the speedo gear. What a royal Pain In The a**. I have not had much opportunity do drive it, but in the short trips I did do this afternoon, the car felt snappier and I could feel the LSD working. At this early stage, I am very happy so far. I will report how it goes over the next few days. Cheers BenJ
_________________ BenJ's EB T5 DOHC Ghia Wagon - Current Ride |
||
| Top | |
||
| BenJ |
|
||
|
Hi All
I was at Pick N Payless today doing some research into the Rotor Swap thing. For some reason the EF/EL Rotors are 1mm thicker new than the EB/ED ones. So to satisfy myself I played with some parts and fitted EF Calipers and Rotors to an ED. And of course it all bolted up fine. This means I can now buy some EF/EL Slotted Front Rotors to go with the EF/EL Slotted Rear Rotors I have coming in the mail. BUT, the cool part of this is that while checking all this out, I noted that there was an EL XR6 there, minus the engine etc, but it had a red swaybar on it. I thought thats odd, and on close inspection in proved to be an aftermarket Pedders Swaybar. So I wandered up to the front desk and asked how much is an EA-EL swaybar? $20 he said. So I quickly acquired the swaybar and Nolathane bushes from the car, handed over my $20 and fitted it as soon as I got home. 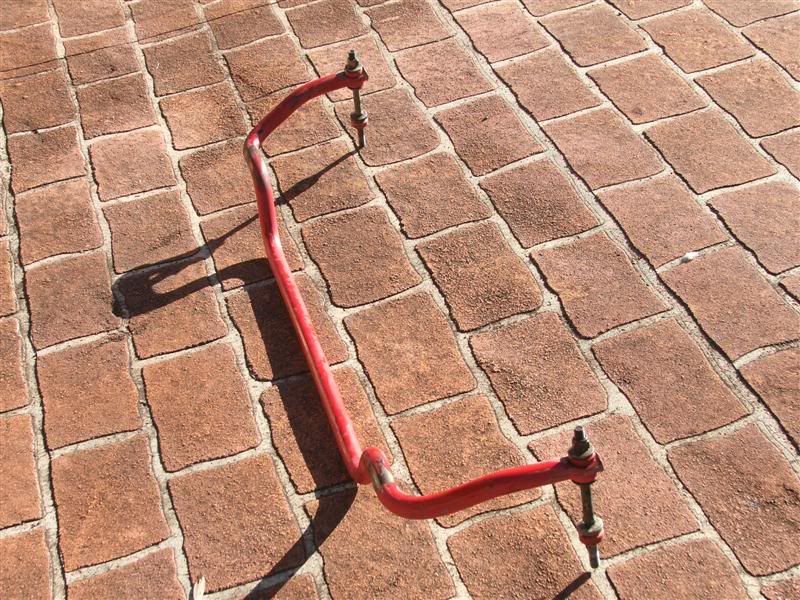
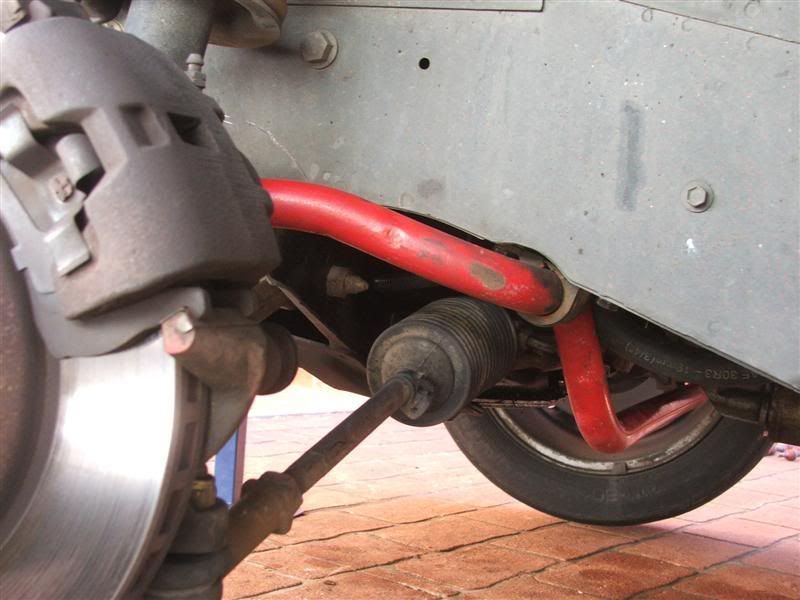
Am I happy? Bloody Oath I am. Made a huge difference to the turn in and the car sits flatter as well. A bit of Background: The EB sits on King Superlows Front and Rear. The front has Boge Struts and there are Ultima Short Heavy Duty shocks in the rear. In addition I have inserted 10mm spacers in the rear to raise it slightly so it sits level and reduces some of the pinion angle rumble. The front has Nolathane Radius Rod and Swaybar Bushes fitted. Brakes are stock EB Front and Rear. Future Plans: Convert the Rear Brakes to EF/EL with Slotted Rotors. Install EF/EL Front Rotors. Brake Pad Choice still open. Replace the Front Struts with Ultima Short Heavy Duty struts. Replace the Steering Rack with a Speed Sensitive Rack or Standard Rack. Possibly an EF/EL KFrame and Suspension conversion. Regards BenJ
_________________ BenJ's EB T5 DOHC Ghia Wagon - Current Ride |
||
| Top | |
||
| BenJ |
|
||
|
Well have been a busy lad again.
This is my last week of holidays, and I go back to work again next week. Sad state of affairs really. LOL I had already painted the interior door handles in Satin Black, and I really liked the way they came up. I had been looking around for some stuffed EF/EL woodgrain door trims, and finally a set fell into my lap. So I started late last week sanding them back and painting them. I took my time, but the passenger front disagreed with the plastic primer and crazed. I tried a couple of times to sand it back and re prep it but it was no good. In the end I just sprayed some black on it, let it dry then gave it a light sand and hit it with a couple of coats of spray putty. Problem solved. Any way yesterday I finished spraying them and let them dry overnight. I fitted them in place this morning using some clear silicone. Enough talk, some pics. 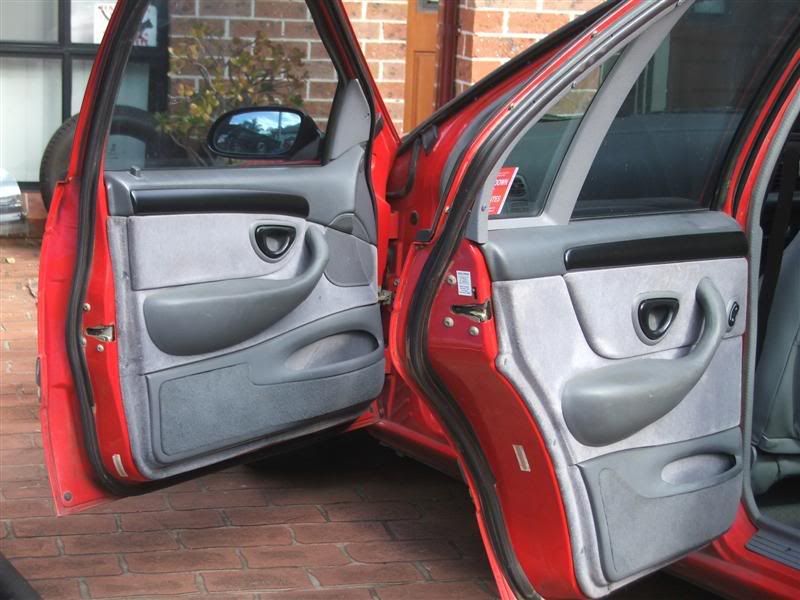
I think I will also paint the Fairmont dash spear to match. Will have to get a spare one first. Cheers BenJ
_________________ BenJ's EB T5 DOHC Ghia Wagon - Current Ride |
||
| Top | |
||
| BenJ |
|
||
|
I always wanted to paint the B Pillars Black. So, finally did it today.
Masking up takes sooooooo long. 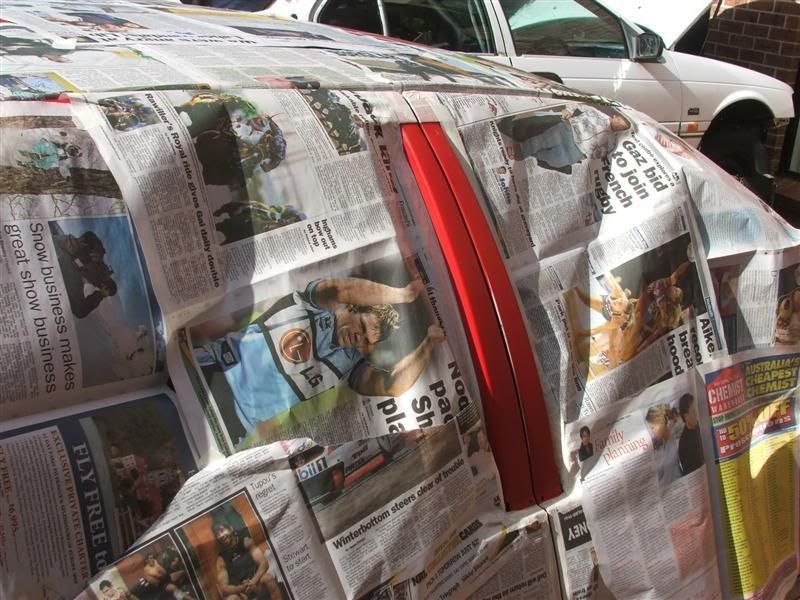
First coat of Satin Black 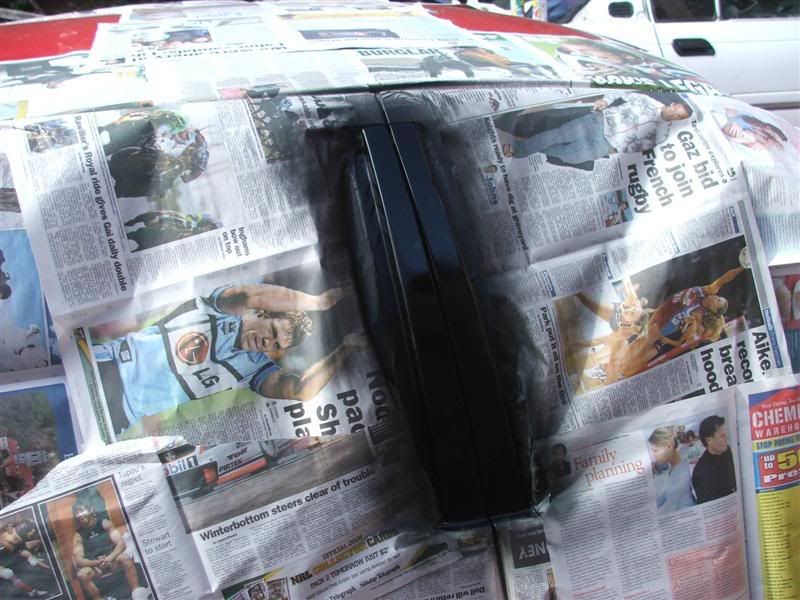
And while I had the paint out, I grabbed my spare set of C Pillar Trims and gave them some Satin Black goodness as well. 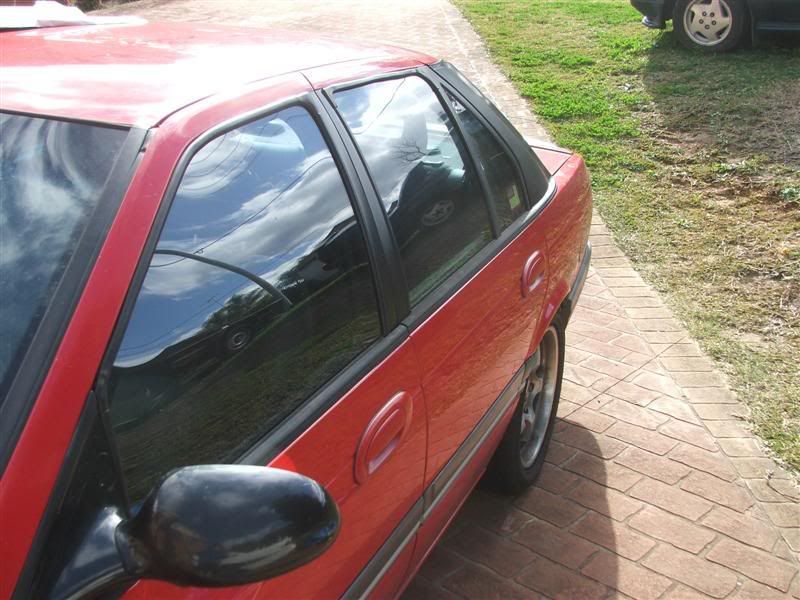
Not sure yet if I will keep the C Pillar Trims. I still have the red ones if I want to swap them back. Cheers BenJ PS, yes will get some shots of how to do the fuel flap.
_________________ BenJ's EB T5 DOHC Ghia Wagon - Current Ride |
||
| Top | |
||
| frankieh |
|
|||
|
Its certainly an interesting look isn't it...
I'll have to think about that one abit more, its hard to say whether I like the C pillars like that. |
|||
| Top | |
|||
| TerroristGHIA |
|
|||
|
One of the best threads yet for the Garage. It is for this reason we now have the Garage. Well done Ben. Very Nice work
Brett
_________________ The Terrorist ED Retired due to RUST. |
|||
| Top | |
|||
| PIMP_LTD |
|
||
|
This is a great car, i have got most of the inspiration to tidy up mine from this thread.
Well done on a great EB mate. Andrew.
_________________ Commodore australia's favorite car??? What a load of s**t |
||
| Top | |
||
| huggiebear |
|
|||
|
well done young fella... looking forward to see what you come up with next...
|
|||
| Top | |
|||
| Who is online |
|---|
Users browsing this forum: No registered users and 19 guests |


