|
| TimmyA |
|
|||
|
{USERNAME} wrote: Oh yes Tim they sound exactly the same. I only hang around for the same reasons as you. I love how they keep threatening the merger between the 3 of us and then they forget about it overnight. At least you know who your working for. We are the company with no name as it was sold as part of the sell off everyone is up in arms about! Isn't that a nightmare? I still don't follow whether our retail sector is actually sold off... {USERNAME} wrote: Hey Tim! The car is looking fantastic. Brings back memories of my old Red EB. Pleased to hear that the trip went well without any real mechanical dramas. Hopefully we can meet up at some point in the future. Cheers BenJ Many thanks Ben I'm rather impressed with it all too... I may be coming to Sydney eventually... It'd be nice to get there one day and go on a cruise with you guys... They way things are at the moment it may be sooner than later but we'll wait see what pans out for the moment... Cheers, Tim
_________________ {DESCRIPTION} |
|||
| Top | |
|||
| Ballast |
|
|||
|
Is that a Holden bag in your boot??
Shame shame shame
_________________ Remember kids, the more pages of crap in your build thread, the bigger your e-penis is |
|||
| Top | |
|||
| TimmyA |
|
|||
|
It certainly is... Mine is a Ford bag though on the back seat... Thats my brothers bag as they were too young to decide when we got them so I got the Ford one and they got Holden ones... We all own ED Falcons though...
Fear not my man... We are Blue Oval fans... Also dad reckons (despite only ever owning Holdens and working for Ford) if he had to update he'd own an FG over a VE... At the time though he said he was not going to own an AU so hence the VT... Cheers, Tim
_________________ {DESCRIPTION} |
|||
| Top | |
|||
| TimmyA |
|
|||
|
While I'm in a "updating my garage" sort of mood I'll add up my dual battery system...
This is basically the finished product... So its a custom made bank of 3 unspillable sealed lead acid batteries which I picked up used for free... Each is obviously 12V and rated at 13Ah... I found a container they sit very nice which was $6 from the reject shop... They are link with 8AWG cable (~6.5mm squared) terminated into 6mm lugs (bit of a squeeze) soldered on and each is about 3 inches long just to bridge all the positives and all the negatives (So 2 red ones and 2 black ones)... Each link (being 8AWG) is rated at 50amps... So then to avoid voltage drop (as its a killer with ELV high current systems) I have some scrap 35mm sqaured double insulated cable joined to the middle battery (crimped 35mm lugs) (the links then only run the one battery to the centre, therefore no link carries two battery's worth of current)... The black runs straight out into a 175Amp Anderson plug ($17 each plug) again soldered... The red runs via a 100amp circuit breaker "just in case" again the 35mm cables are terminated with crimped 35mm lugs with a 6mm hole... Out of the breaker into the Anderson plug... So thats the pack in itself... Rated at 39Ah with the 3 in parallel... I'm hoping it will jump start flat cars too... While on hols I found a proper jump start pack rated at 22Ah (1200 amps however they works that out? Sits on the passenger side behind the toolbox (unused space anyway)... Its well anchored with 2 short pieces of airline track (3x 6mm stainless bolts on each piece, one with 3 nyloc nuts, one with a 6mm piece of plate drilled and tapped) and the proper single stud rings (rated at 1500Lb each)... One normal ring at the back for the hook... One ring removed and replaced with a ratchet tie buckle... This is Airline Track (or L track as it is also called)  So the end product after much thinking and trial and error is this: 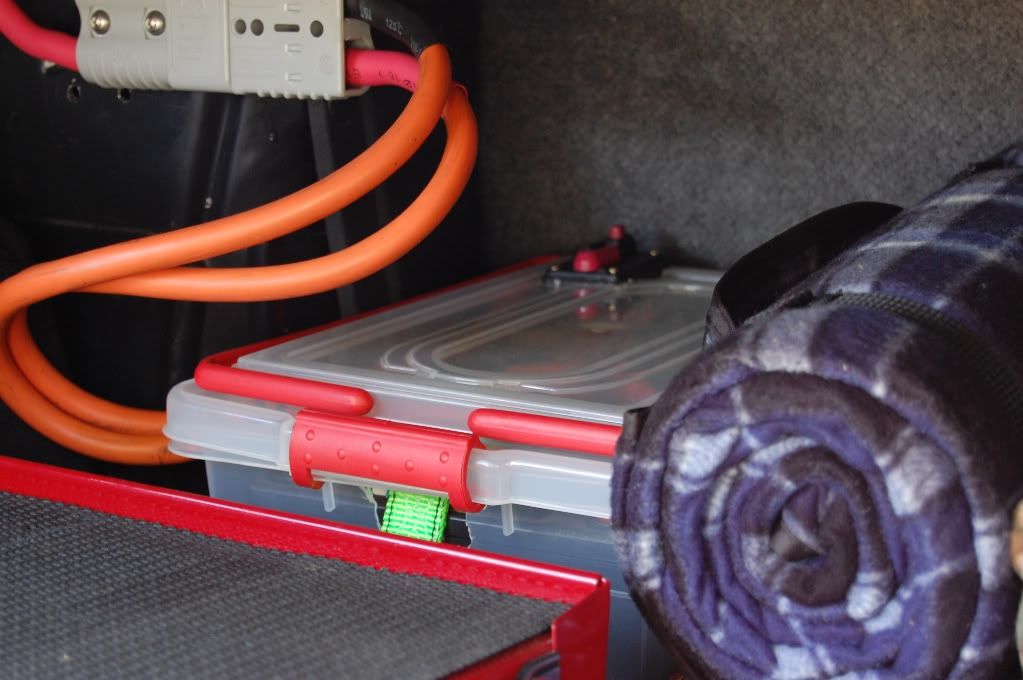 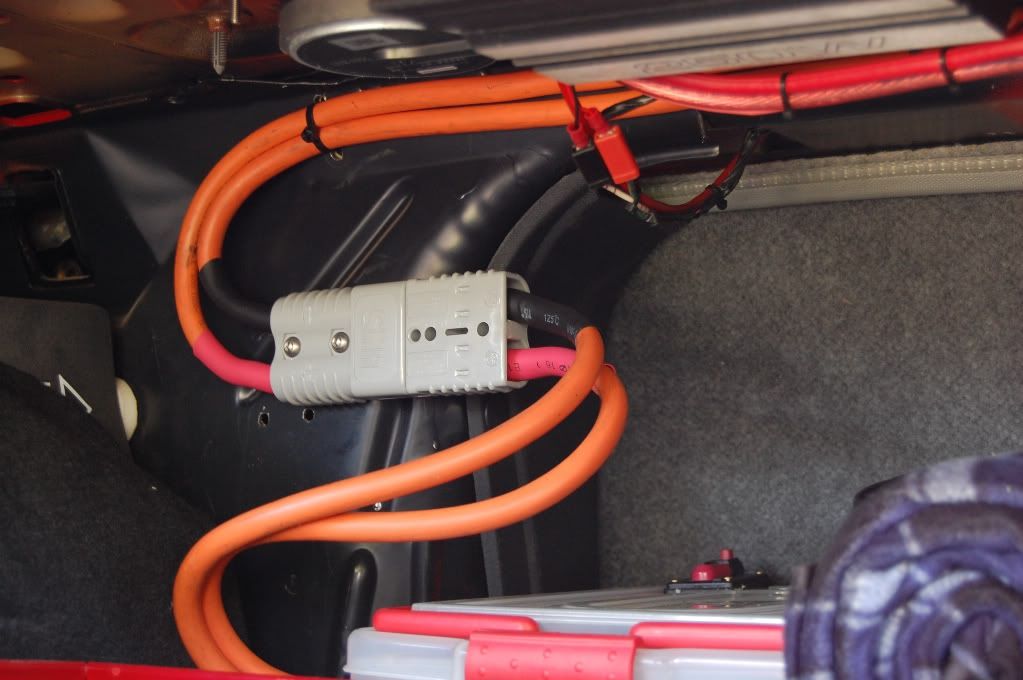 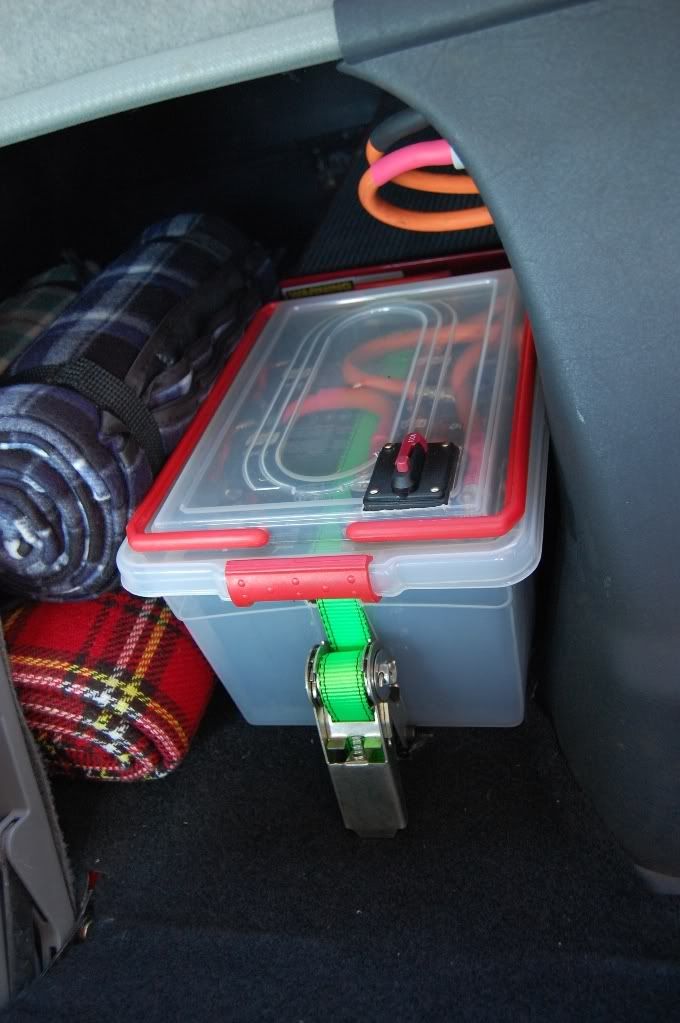 From the pack (which is easily removable thanks to the genderless Anderson plugs) it runs into another run of 35mm cables (soldered connections) up over the top of the boot (held there with drilled holes into the channel and cable ties) round to where the factory amp would mount... 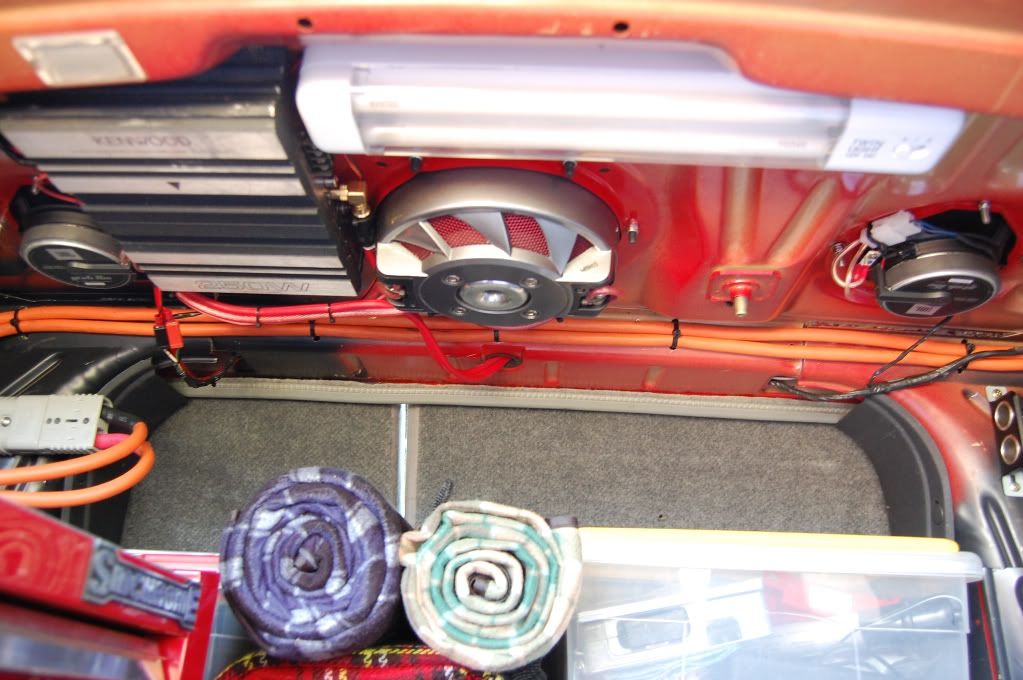  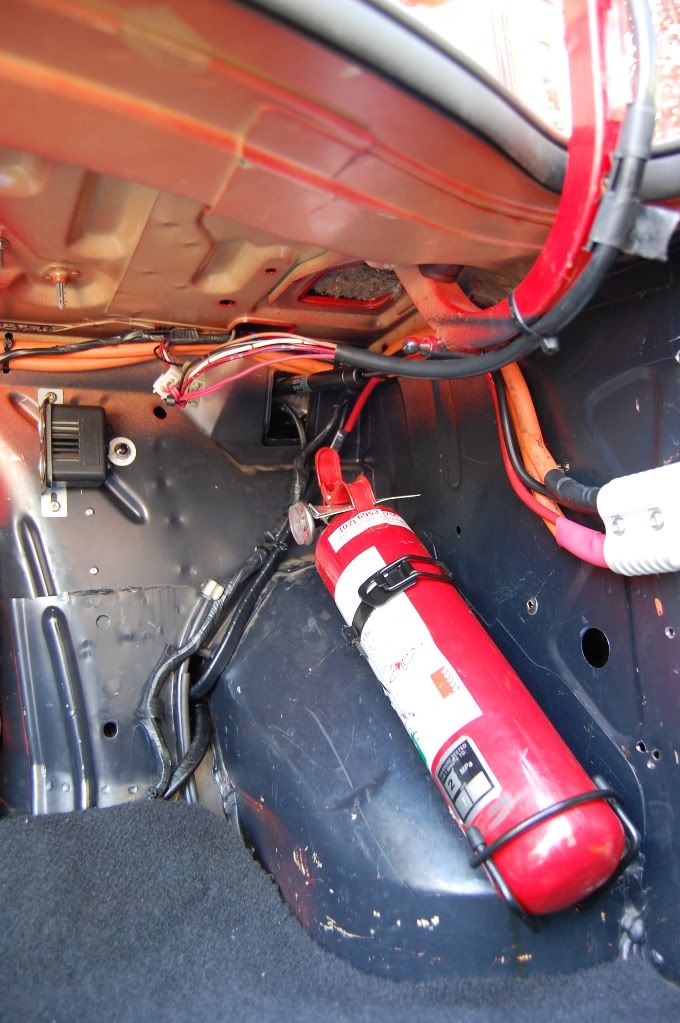 In this Anderson plug I also had the room to solder two 8 gauge cables (1 positive & 1 negative) into the terminals... These run back with the 35mm cables and drop down into the right rear shock absorber cavity where the magic is... 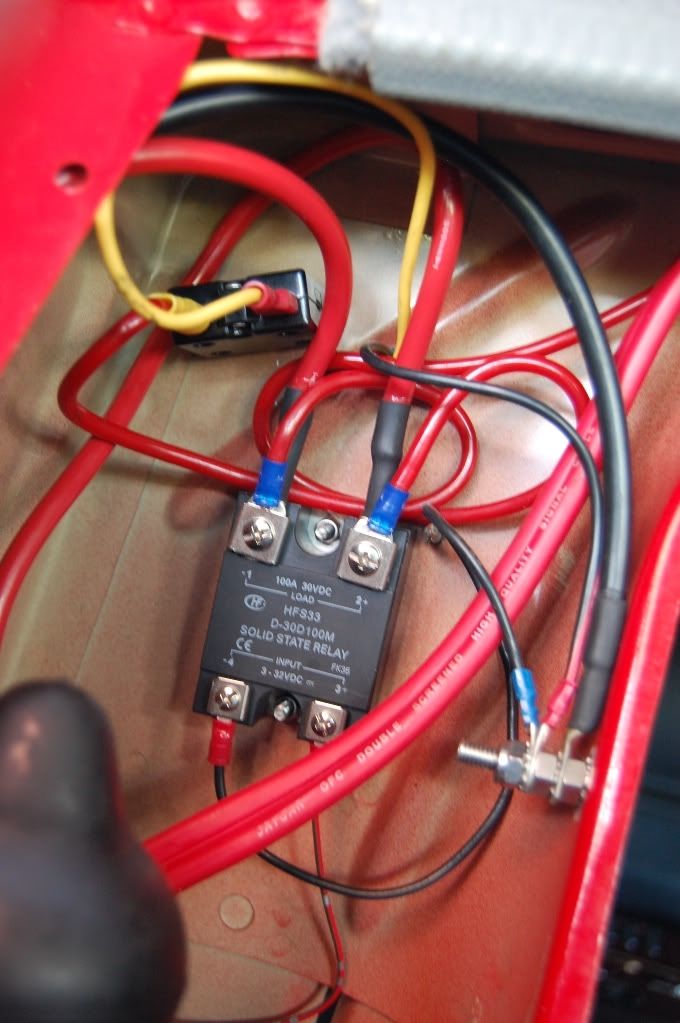 Now it looks like a nightmare... Reason being its easier to leave 4 inches of cable (esp there where its not seen) in case it needs to be changed in the future... Better to have too much than not enough... Ok so the cables running into here are:
1x Figure 8 double screened which you see running past for the sub 1x Tiny Trigger wire for relay, picked up off old cruise wiring (only on when key is "on" not accy)
So you have it wired as per the following:
The earth bolt is 6mm stainless. Paint has been removed from both side of the panel and fitted with e-star washers on both side to ensure it bites into the steel... A nut holds it in, then the bigger the current the closer the wires to the panel (less bolt to travel through)... So first is the 8AWG from the Anderson plug (e-star washer+nut from good connectivity). Then the cigarette plug earth, and then the relay switch earth topped off with a nyloc nut so it can't rattle loose... This means that when running the relays closes and the main battery + alternator links to the anderson plug in the boot and hence the second battery pack... It then charges... Which switched off the cigarette plugs are joined to the second battery (where I have my WAECO plugged into when I use it) and it can run the second battery flat without effecting the car... The amp stays on the first battery side basically just to balance the number of terminals on the relay out (either would work, when car is off remote wire turns amp off anyway)... The Anderson plug in the boot will have two functions... 1 will be to run the winch controller for my tipper trailer (I use a winch to tip the trailer) and second I'll have plug in jumper leads which use the pack... Main reason behind it was I worried about the modules in the car... When the winch cuts in on the trailer it dropped the battery voltage and I worried about the electronics... This way you pull up... Turn the car off, relay opens and then you operate the winch and it runs off the battery pack... Being a shorter run and 35mm cables there is less resistance and should work equally as well as when I used the tiny 8AWG wire from the battery... I'll have to get pics of the trailer too at some stage... That's my theory anyway... Yet to try the jumper leads (halfway through making) and the tipper trailer on the pack yet... Fingers crossed though... When on hols it ran the WAECO great though Only issue so far... Is that I chose a solid state relay... Its silent in operation when inside the car... Its rated at 100amps with the heatsink (just for the record) and about 30 without it (I'm somewhere in between with the steel panel for heat conduction)... When switched off these allow backwards current flow (become a diode) and the pack can go flat by loads in the car (lights left on)... So I am going to get a big diode and stick the other way in series with the 8AWG wire from the battery so it does completely isolate... This way if the car ever goes flat I can jump start myself with the jumper leads and second battery... Anyway thats it to date... I'll get pics of the leads and tipper trailer gear at some stage... Its a cheap alternative to using a hydraulic ram system and works just as good... Now with the battery pack and genderless Andersons my whole system can be removed and put in someone elses car so they can use the tipper trailer and returned to my car for charging... Cheers, Tim
_________________ {DESCRIPTION} |
|||
| Top | |
|||
| TimmyA |
|
|||
|
Not a worry mate...
I saw your thread about the fridge for the van and thought you may find this useful... Tried to cover it in as much detail as possible... For your application you'd get away with 8AWG wire down through a 50A Anderson plug beside your trailer plug and into the van's battery (the second battery) Only reason I used such big wire was simply to avoid voltage drop when my winch may burst at 100 odd amps... Just to try and keep the voltage up as much as possible... For a current draw or 10 or even 20 amps you wouldn't need to consider this factor... If you ever get stuck just sing on out... One of dad's mate tows a caravan with his territory and we decked it out the same way... Gel cell in van with a dual battery system (his is actually a triple as he one of the jump start packs plugged in too always on charge)... Thanks mate, Tim
_________________ {DESCRIPTION} |
|||
| Top | |
|||
| TimmyA |
|
|||
|
Yeah he runs all std gear... The top bush in the shockers flogged out and they are nolathane now... And yeah polyairs in the rear coils... They cost him a small fortune...
Solar is always a possibility... The run two wires from a panel into a regulator and out into the battery... How you join the two systems I'm not sure... But could always find out... I'm off to work now but I'll catch up with you later on... Cheers, Tim
_________________ {DESCRIPTION} |
|||
| Top | |
|||
| Matt_jew |
|
||
|
The solar on my truck is setup from the panel to the regulator then from the regulator , through a 40A relay to the second battery.
The relay is normally closed , so when the truck is off the solar takes over charging. When the truck is started the relay opens (trigger wire off ignition) and the voltage senstive relay kicks in when the main battery is charged and brings the secondary battery in to parallel to charge off the alternator. Instead of a diode Tim I would recommend a constant duty solenoid between the main battery and the second battery. I have found you can get voltage drop using diodes. The argument between solenoid and diode second battery isolators started just after Noah built his first tug boat and we will most likely still be discussing it when we all cash in on life.
_________________ {USERNAME} wrote: More people paid for a ride in a VT commodore then an AU Falcon so the VT is superior.
Based on that fact my Mum is the best around! |
||
| Top | |
||
| TimmyA |
|
|||
|
Doing the movie at the cinema...
Normal work on Monday though...
_________________ {DESCRIPTION} |
|||
| Top | |
|||
| TimmyA |
|
|||
|
Gulliver's Travels... Can't say I watched any of it... Didn't look overly exciting from the very hot and humid projection room...
Yeah matey for sure... We'll get some docs up and make something... Basically with this arrangement anything is possible... Its just deciding what you want to run of which battery and how you want them to connect to charge... With some simply relay logic the possibilities are endless... Cheers, Tim
_________________ {DESCRIPTION} |
|||
| Top | |
|||
| TimmyA |
|
|||
|
{USERNAME} wrote: Instead of a diode Tim I would recommend a constant duty solenoid between the main battery and the second battery. I have found you can get voltage drop using diodes. The argument between solenoid and diode second battery isolators started just after Noah built his first tug boat and we will most likely still be discussing it when we all cash in on life. It is a schottky so the voltage drop is rated to be .62V at 80 amps... The circuit is fused at 60amps... Two diodes will be in parallel (2x 80 amp diodes) to keep the junction temps cool... So it should be less than .62 (though I will measure it when I order one and put it in)... Only reason for the diode is the solid state relays behaviour... Only reason for the solid state relay is I didn't want the big CLUNK coming from behind the seats every time you start the car... Plus a solid state relay is smaller too... {DESCRIPTION} The relays "contacts" are a mosfet transistor... So basically when the gate is not powered the thing is a diode (connected in reverse so that power can't flow through it) when the gate is powered the thing conducts through... So the issue I have because it becomes a diode the boot pack is able to leak back in the cars items... So it a light is left on the car battery and the pack will flatten... If I add a diode in series with the relay this wont happen... The car battery will go flat is a light is left on and the pack wont... So if the car wont start I can jump start it with the pack... Thats the theory at this stage Cheers, Tim
_________________ {DESCRIPTION} |
|||
| Top | |
|||
| TimmyA |
|
|||
|
I don't think it'll be long before you find it on the TV somehow...
Yeah that'll be good... Dual or even triple battery systems are the way to go... And I'll be keen to see how you go about making as much use of the little space that's available... You look around bought caravans and they have little storage spots everywhere and this folds out and that folds away and there is some thought gone into them... Other thing I recommend is a big inverter in it somewhere (switch mode would be fine) so that the second battery in the van can run it so on the side of the road you have flick a change over switch inside as to go from 240 from the socket on the outside to 240 fed from the inverter... And maybe even a power supply (battery charger) fed from the 240V socket outside so when its set to that it charges the battery in the van (because you will still have 12V accessories in it like some lights and that I guess (Dad's mate's has this feature)...? Like I said the possibilities are endless... Because you have it to its skin you need to work out what you want from it and wire it accordingly and mount the inverter and charger somewhere... This way you get the most functionality out of it... Cheers, Tim
_________________ {DESCRIPTION} |
|||
| Top | |
|||
| TimmyA |
|
|||
|
{DESCRIPTION}
Albeit dear... You'd choose the sized inverter with respect to what it may run... So if you want to run a kettle you may need a real big one (a 12V kettle would be ideal if they make such a thing?) Sandwhich toasters for the smaller ones are usually in the 700 to 800W range... Its run a small LCD I'd think... But again if you didn't want 240V on the side of the road then its an expense not required... {DESCRIPTION} And this is the type of thing in Dad's mates van so that the 12V gear charges and runs when plugged into 240V... This would be ideal... When you go lighting do it all in LED's or LED's strips... No heat, better light, last longer than halogens and withstand vibration from the road better... Set the whole lot up as 12V... Put some cigarette sockets in the van for 12V items (phone chargers and the like)... Then use that PSU or even the bigger 18A unit to run/charge the battery. Be aware special chemical make up batteries require special chargers... This would be fine for a sealed lead acid... But unsure what a gel cell requires)... I think even a calcium based SLA needs a special charger... In this case... You have the PSU to run the internals stuff and have the change over switch so it disconnect the battery... Without a batter you may get power fluctuations (battery keeps the power smooth)... That's just to throw some ideas into the mix... haha Cheers...
_________________ {DESCRIPTION} |
|||
| Top | |
|||
| TimmyA |
|
|||
|
Nothing much to do with the car...
But I bought myself a gift recently... Genuine Ford Manual... Attachment: DSC_1484.JPG Attachment: DSC_1485.JPG Attachment: DSC_1486.JPG Other than the leather cover its in pretty good nic for a used workshop manual... Reason I splurged out to get it is that this one is WM28C as opposed to the others being sold which are WM28D... This is the completed EA to ED book including auto & manual transmissions and rear drive (note the contents page)... Which the WM28D does not cover... They are included separately as WM28S... The WM28S book was $88 off the net plus post... The one I bought (WM28C) was $99 plus post... So for $11 more I got the complete book... So rather thrilled to have all the specs on the driveline stuff too... I already have the WM28D in digital but again for only $11 is seemed well worth it... Cheers, Tim You do not have the required permissions to view the files attached to this post.
_________________ {DESCRIPTION} |
|||
| Top | |
|||
| TimmyA |
|
|||
|
G'day boys and girls...
As we had a day here that wasn't in the mid 40's for a change... I thought I'd get motivated after work and do a bit of landscaping in my back yard... Prime opportunity to test out the tipper trailer I designed and fabricated from a "tilt" trailer... I got 1 cubic meter of loam... IIRC most cubic meter substances weigh around the 750kg mark... So with this weight the U bolts hit on the hinges so the 20mm spare sticking out the U bolt may be removed in the near future... Pulled up and and removed the gate and lifted to the tilt position it had when I bought it... Then engaged the winch and watch it unload itself... Thanks gravity... Easier on my back... So this runs off the batteries in the boot detailed previously... Turn the car off and the winch flattens them... Start the car from the main battery... The relay makes and then the alt charges the battery pack back up again... Here is the video in case others inspire to make something similar... For the price of a few hundred dollars for the winch... Some scrap steel I found... Fair bit of time and labour... And miscellaneous other bolts and nuts I bought it works out fairly cheap compared to thousands for hydraulic tippers... Plus I can use it drag things around the yard and up onto the trailer... {DESCRIPTION} As always open to criticism and thoughts all the same... Cheers, Tim
_________________ {DESCRIPTION} |
|||
| Top | |
|||
| ro88bo |
|
||
|
Great Work Mate.
|
||
| Top | |
||
| Who is online |
|---|
Users browsing this forum: No registered users and 43 guests |